Cisco ATA 191 Administration Manual
Analog telephone adapter
Hide thumbs
Also See for ATA 191:
- Administration manual (142 pages) ,
- User manual (40 pages) ,
- Quick start manual (13 pages)
Table of Contents
Advertisement
Quick Links
Advertisement
Table of Contents

Related Manuals for Cisco ATA 191


Summary of Contents for Cisco ATA 191
- Page 1 Cisco ATA 191 Analog Telephone Adapter Administration Guide for Cisco Unified Communications Manager First Published: 2017-11-22 Americas Headquarters Cisco Systems, Inc. 170 West Tasman Drive San Jose, CA 95134-1706 http://www.cisco.com Tel: 408 526-4000 800 553-NETS (6387) Fax: 408 527-0883...
- Page 2 Cisco and the Cisco logo are trademarks or registered trademarks of Cisco and/or its affiliates in the U.S. and other countries. To view a list of Cisco trademarks, go to this URL: www.cisco.com/go/trademarks . Third-party trademarks mentioned are the property of their respective owners. The use of the word partner does not imply a partnership relationship between Cisco and any other company.
-
Page 3: Table Of Contents
Installation and Configuration Overview Prepare to Install the ATA 191 on Your Network C H A P T E R 2 Interactions with Other Cisco Unified IP Communications Products Cisco ATA 191 Analog Telephone Adapter Administration Guide for Cisco Unified Communications Manager... - Page 4 C H A P T E R 5 Fax Services Fax Mode Fax Modem Standards Fax Modem Speeds Troubleshoot and Maintenance C H A P T E R 6 Configure Syslog Reports Cisco ATA 191 Analog Telephone Adapter Administration Guide for Cisco Unified Communications Manager...
- Page 5 ATA 191 Specifications C H A P T E R 7 Physical Specifications Electrical Specifications Environmental Specifications Physical Interfaces Ringing Characteristics Software Specifications SIP Compliance Reference Information Cisco ATA 191 Analog Telephone Adapter Administration Guide for Cisco Unified Communications Manager...
- Page 6 ATA 191 Country-Specific Tones and Cadences C H A P T E R 9 ATA 191 Country-Specific Tones and Cadences Mechanism Link a Tone File with a Device Tone Configuration Cisco ATA 191 Analog Telephone Adapter Administration Guide for Cisco Unified Communications Manager...
-
Page 7: Cisco Ata 191 Analog Telephone Adapter Overview
The ATA 191 analog telephone adapter is a telephony-device-to-Ethernet adapter that allows regular analog phones to operate on IP-based telephony networks. The ATA 191 supports two voice ports, each with an independent phone number. The ATA 191 also has an RJ-45 10/100BASE-T data port. -
Page 8: Session Initiation Protocol
• User agent client (UAC)—A client application that initiates the SIP request. • User agent server (UAS)—A server application that contacts the user when a SIP request is received and returns a response on behalf of the user. Cisco ATA 191 Analog Telephone Adapter Administration Guide for Cisco Unified Communications Manager... -
Page 9: Sip Clients
LAN side and the switched-circuit network side. • Phones—Can act as either a UAS or UAC. The ATA 191 can initiate SIP requests and respond to requests. -
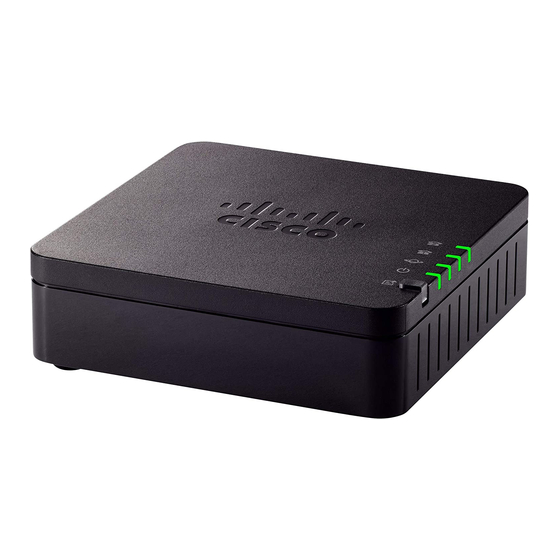
Page 10: Cisco Ata 191 Hardware
Cisco ATA 191 Hardware The ATA 191 is a compact, easy to install device. The following figures show the top and rear panels of the ATA 191. The unit provides these connectors: •... -
Page 11: Ata 191 Top Panel
Cisco ATA 191 Analog Telephone Adapter Overview Cisco ATA 191 Hardware ATA 191 Top Panel Figure 3: ATA 191 Top Panel Cisco ATA 191 Analog Telephone Adapter Administration Guide for Cisco Unified Communications Manager... -
Page 12: Problem Report Tool Button
Problem Report Tool Button The ATA top panel includes the Problem Report Tool (PRT) button. When the button is pressed, a log file is prepared and uploaded to either an HTTP server or to Cisco Unified Communications Manager depending on your configuration. -
Page 13: Ata 191 Back Panel
Use the power adapter that was provided to connect to a power source. Software Features The ATA 191 supports these protocols, services, and methods: • Secure Real-Time Transport Protocol, on page 8 • Fax Passthrough, on page 8 Cisco ATA 191 Analog Telephone Adapter Administration Guide for Cisco Unified Communications Manager... -
Page 14: Secure Real-Time Transport Protocol
INVITE message indicate that T.38 fax relay is present. After the initial SIP INVITE message, the call is established to switch from voice mode to T.38 mode. Cisco Unified Communications Administration allows you to configure a SIP profile that supports T.38 fax communication. -
Page 15: Other Supported Protocols
• Low-bit-rate codec selection • User authentication • Configurable tones (ringback tone, reorder tone, dialing tone, outside dialing tone, busy tone, call waiting tone) • Dial plan and PLAR Cisco ATA 191 Analog Telephone Adapter Administration Guide for Cisco Unified Communications Manager... -
Page 16: Supported Call Services
• Hookflash detection timing configuration • Type of Service (ToS) configuration for audio and signaling Ethernet packets • Debugging and diagnostic tools Modem Standards The ATA supports these modem standards: Cisco ATA 191 Analog Telephone Adapter Administration Guide for Cisco Unified Communications Manager... -
Page 17: Fax Services
Related Topics Configure Fax Services , on page 37 Supported Methods The ATA 191 supports these methods: • REGISTER • REFER • INVITE • BYE • CANCEL Cisco ATA 191 Analog Telephone Adapter Administration Guide for Cisco Unified Communications Manager... -
Page 18: Supported Ata Call Features
1 Plan the network and the ATA configuration. 2 Install the Ethernet connection. 3 Install and configure the other network devices. 4 Install the ATA but do not power it up yet. Cisco ATA 191 Analog Telephone Adapter Administration Guide for Cisco Unified Communications Manager... -
Page 19: Cisco Ata 191 Analog Telephone Adapter Administration Guide For Cisco Unified Communications Manager
5 Power up the ATA. Related Topics Prepare to Install the ATA 191 on Your Network , on page 15 Install the ATA 191 , on page 21 Cisco ATA 191 Analog Telephone Adapter Administration Guide for Cisco Unified Communications Manager... -
Page 20: Cisco Ata 191 Analog Telephone Adapter Administration Guide For Cisco Unified Communications Manager
Cisco ATA 191 Analog Telephone Adapter Overview Software Features Cisco ATA 191 Analog Telephone Adapter Administration Guide for Cisco Unified Communications Manager... -
Page 21: Prepare To Install The Ata 191 On Your Network
To function in the IP telephony network, the ATA 191 must be connected to a networking device, such as a Cisco Catalyst switch. You must also register the ATA 191 with a Cisco Unified Communications Manager system before you can send and receive calls. -
Page 22: Power Guidelines
Unified Communications Manager. When you make a change in Cisco Unified Communications Manager that requires the ATA 191 line to be reset, the phone configuration file is automatically updated. If a system reset or restart is required, both lines must reset or restart at the same time. -
Page 23: Ata 191 Startup Process
ATA 191 Startup Process If the device security mode in the configuration file is set to Authenticated and the CTL file on the ATA 191 has a valid certificate for Cisco Unified Communications Manager, the phone establishes a TLS connection to Cisco Unified Communications Manager. -
Page 24: Chapter
(encrypted or authenticated), and the Cisco Unified Communications Manager is set to Mixed (security) mode, the device makes a TLS connection. Otherwise, it makes a nonsecure TCP/UDP connection. Cisco ATA 191 Analog Telephone Adapter Administration Guide for Cisco Unified Communications Manager... -
Page 25: Start Up Process With Standby Image
Start up Process with Standby Image Start up Process with Standby Image The ATA 191 has two images or partitions in permanent storage. The second image allows the device to recover if the initial image is corrupted. Press the PRT button when the power is on, and you switch to the standby partition. Startup is similar to the normal process, except that the LED for Phone 2 flashes amber indicating that the second partition is being used. -
Page 26: Addition With Cisco Unified Communications Manager Administration
After you have collected MAC addresses, in Cisco Unified Communications Manager Administration, choose Device > Phone and click Add New to begin. The ATA 191 has two FXS ports, and each port has its own MAC address. The first ATA 191 port uses Note the MAC address and the second ATA 191 port uses the shifted MAC address (example, AABBCCDDEEFF to BBCCDDEEFF01). -
Page 27: Install The Ata 191
ATA 191 Installation Information You connect the ATA 191 hardware and configure the ATA 191 by loading the QED and firmware files. Install the QED file first, then install the firmware file. For more information about loading the QED and firmware files, see the "Installation Notes"... -
Page 28: Safety Recommendations
(TNV) circuits. LAN ports contain SELV circuits, and WAN ports contain TNV circuits. Some LAN and WAN ports both use RJ-45 connectors. Use caution when connecting cables. For translated warnings, see the Regulatory Compliance and Safety Information for the Cisco ATA 191 document. -
Page 29: Attach A Phone To The Ata 191
3 The LED for Phone 1 flashes while the Phone1 port boots, followed by the LED for Phone 2. After the Phone1 and Phone2 ports register with Cisco Unified CM successfully, the corresponding LEDs are lit with solid green. If a phone port fails to register, the LED rapidly flashes in green three times, then repeats. -
Page 30: Configure Startup Network Settings
For more information about the security features, see the Security Guide for Cisco Unified Communications Manager. You can start the installation of a Locally Significant Certificate (LSC) on the device profile from Cisco Unified Communications Manager. Use the Device > Phone > Phone Configuration menu option. You can also use this menu option to update or remove an LSC. -
Page 31: Configure The Ata 191
• System Configuration Guide for Cisco Unified Communications Manager, “Configure Analog Telephone Adapters” chapter • Feature Configuration Guide for Cisco Unified Communications Manager, “Audible Message Waiting Indicator” chapter Cisco ATA 191 Analog Telephone Adapter Administration Guide for Cisco Unified Communications Manager... -
Page 32: Cisco Ata 191 Analog Telephone Adapter Administration Guide For Cisco Unified Communications Manager
Displays • System Configuration Guide incoming call information on the phone screen. for Cisco Unified Communications Manager, “Configure Analog Telephone Adapters” chapter Cisco ATA 191 Analog Telephone Adapter Administration Guide for Cisco Unified Communications Manager... -
Page 33: Cisco Ata 191 Analog Telephone Adapter Administration Guide For Cisco Unified Communications Manager
(without remaining on the line). • System Configuration Guide for Cisco Unified Communications Manager, “Configure Analog Telephone Adapters” chapter • Feature Configuration Guide for Cisco Unified Communications Manager, “Call Transfer” chapter Cisco ATA 191 Analog Telephone Adapter Administration Guide for Cisco Unified Communications Manager... -
Page 34: Cisco Ata 191 Analog Telephone Adapter Administration Guide For Cisco Unified Communications Manager
No support for resuming a call from a for Cisco Unified shared line party. Communications Manager, “Configure Analog Telephone Adapters” chapter • Feature Configuration Guide for Cisco Unified Communications Manager, “Secure Tone” chapter Cisco ATA 191 Analog Telephone Adapter Administration Guide for Cisco Unified Communications Manager... -
Page 35: Cisco Ata 191 Analog Telephone Adapter Administration Guide For Cisco Unified Communications Manager
• System Configuration Guide for Cisco Unified Communications Manager, “Configure Analog Telephone Adapters” chapter • Feature Configuration Guide for Cisco Unified Communications Manager, “Music On Hold” chapter Cisco ATA 191 Analog Telephone Adapter Administration Guide for Cisco Unified Communications Manager... -
Page 36: Cisco Ata 191 Analog Telephone Adapter Administration Guide For Cisco Unified Communications Manager
Time Zone Updates the device with time zone changes. For more information, refer to: Update • System Guide for Cisco Unified Communications Manager, “Configure Analog Telephone Adapters” chapter Cisco ATA 191 Analog Telephone Adapter Administration Guide for Cisco Unified Communications Manager... -
Page 37: Product-Specific Configuration Parameters
Adapters” chapter Product-Specific Configuration Parameters Cisco Unified Communications Manager Administration allows you to set some product-specific configuration parameters for the ATA 191. The following table lists the configuration windows and their paths to configure the parameters. Table 6: Configuration Information... -
Page 38: Cisco Ata 191 Analog Telephone Adapter Administration Guide For Cisco Unified Communications Manager
Log Server or IPv6 Log Server parameters. If disabled, log data is not copied to the log server location. Default: Disabled Cisco ATA 191 Analog Telephone Adapter Administration Guide for Cisco Unified Communications Manager... -
Page 39: Cisco Ata 191 Analog Telephone Adapter Administration Guide For Cisco Unified Communications Manager
(target), and the users currently on the call receive a tone (if configured). Barge supports conference bridges. Echo Cancellation Enable or Disable the use of echo canceler. Cisco ATA 191 Analog Telephone Adapter Administration Guide for Cisco Unified Communications Manager... -
Page 40: Cisco Ata 191 Analog Telephone Adapter Administration Guide For Cisco Unified Communications Manager
The default is Caller Or Callee. IVR Password ATA 191 IVR password. The default is 24726. Input Audio Level Gain value of Network-to-Phone Output Audio Level Gain value of Phone-to-Network Cisco ATA 191 Analog Telephone Adapter Administration Guide for Cisco Unified Communications Manager... -
Page 41: Cisco Ata 191 Analog Telephone Adapter Administration Guide For Cisco Unified Communications Manager
Waveform for the ringing signal. Choices are Sinusoid or Trapezoid. Default setting: Trapezoid. Ring Frequency(15-50Hz) Frequency of the ringing signal. Valid values are 15-50 (Hz). Default setting: 20. Cisco ATA 191 Analog Telephone Adapter Administration Guide for Cisco Unified Communications Manager... -
Page 42: Add Users To Cisco Unified Communications Manager
Delay after far end hangs up before reorder tone is played. RTP Packet Time (10-160ms) Packet size in milliseconds for RTP. You can access the ATA 191 web page and perform limited configuration. In Admin mode, most information and settings are available. Add Users to Cisco Unified Communications Manager Adding users to Cisco Unified Communications Manager allows you to display and maintain information about users. -
Page 43: Configure Fax Services
Voice Over IP (VoIP) network as though the fax were a voice call. With T.38 fax relay mode, the ATA 191 supports the transmission of faxes, in real time, between two standard fax terminals communicating over SIP networks. T.38 fax relay mode provides a more reliable and error-free method of sending faxes over an IP network. -
Page 44: Fax Modem Standards
• 24 kb/s • 21.6 kb/s • 19.2 kb/s • 16.8 kb/s • 14.4 kb/s • 12 kb/s • 9.6 kb/s • 7.2 kb/s • 4.8 kb/s Cisco ATA 191 Analog Telephone Adapter Administration Guide for Cisco Unified Communications Manager... -
Page 45: Cisco Ata 191 Analog Telephone Adapter Administration Guide For Cisco Unified Communications Manager
Configure Fax Services Fax Modem Speeds • 2.4 kb/s Note The speeds that are only used in V.34 do not apply for fax using T.38 relay. Cisco ATA 191 Analog Telephone Adapter Administration Guide for Cisco Unified Communications Manager... -
Page 46: Cisco Ata 191 Analog Telephone Adapter Administration Guide For Cisco Unified Communications Manager
Configure Fax Services Fax Modem Speeds Cisco ATA 191 Analog Telephone Adapter Administration Guide for Cisco Unified Communications Manager... -
Page 47: Troubleshoot And Maintenance
Clean the ATA 191, page 54 Configure Syslog Reports Debug information can be configured from the administration section of the Cisco Unified Communications Manager. Refer to the Product-Specific Configuration Parameters for information about configuring debug parameters. Note the following when configuring debug parameters from the Cisco Unified Communications Manager: •... -
Page 48: Cisco Ata 191 Analog Telephone Adapter Administration Guide For Cisco Unified Communications Manager
Only high severity messages are logged unless its debug flag is turned on. If you are experiencing phone problems that you cannot resolve, Cisco TAC can assist you. You will need to turn on debugging for the phone, reproduce the problem, turn debugging off, and send the logs to TAC for analysis. -
Page 49: Practice
Turn on debug flag for security-related logs. Related Topics Product-Specific Configuration Parameters, on page 31 Practice This section provides practice exercises for getting your voice syslog information. Cisco ATA 191 Analog Telephone Adapter Administration Guide for Cisco Unified Communications Manager... -
Page 50: Turn On Debug Flag For Media Or Sip
Step 10 Click Apply Config. Resolve Startup Problems After installing an ATA 191 into your network and adding it to Cisco Unified Communications Manager, the phone starts up. If the phone does not start up properly, see the following sections for troubleshooting information: •... -
Page 51: Check Network Connectivity
Ensure that the network is currently running. Verify TFTP Server Settings You can determine the IP address of the TFTP server used by the ATA 191 by entering http://x.x.x.x where x.x.x.x is the IP address of the ATA 191. Procedure Step 1 If you have assigned a static IP address to the phone, manually enter a setting for the TFTP Server 1 option. -
Page 52: Verify Dns Settings
DNS server. Verify this setting by entering http://x.x.x.x where x.x.x.x is the IP address of the ATA 191. Step 2 Verify that there is an A entry in the DNS server for the TFTP server and for the Cisco Unified Communications Manager system. Step 3 Ensure that DNS is configured to do reverse look-ups. -
Page 53: Create A New Configuration File
Attach a Phone to the ATA 191, on page 23 Search for the ATA in Cisco Unified Communications Manager An ATA can register with a Cisco Unified Communications Manager server only if it has been added to the server or if autoregistration is enabled. -
Page 54: Ata 191 Unable To Obtain Ip Address
Step 3 Choose Phone > Find What to Do Next If the phone is already in the Cisco Unified Communications Manager database, its configuration file may be damaged. Related Topics Attach a Phone to the ATA 191, on page 23... -
Page 55: Verify The Physical Connection
Verify that the DHCP server has been set up properly. Step 3 Verify the DHCP lease duration. Cisco recommends that you set it to 8 days. The ATA sends the DHCP request message to update the IP Address at half of the lease time. If no response is received from the server, the ATA starts the DHCP Discover process to get the new IP address. -
Page 56: Check Static Ip Address Settings
Assign the TFTP server. Use the same TFTP server used for other functioning ATA units. Step 3 On the Cisco Unified Communications Manager server, verify that the local host files have the correct Cisco Unified Communications Manager server name mapped to the correct IP address. -
Page 57: Troubleshoot Ata 191 Security
Determine the MAC Address of the ATA, on page 20 Troubleshoot ATA 191 Security The following table provides troubleshooting information for the security features on the ATA 191. For information relating to solutions for any of these issues, and for more troubleshooting information about security, see the Security Guide for Cisco Unified Communications Manager. -
Page 58: Problem Report Tool
3 Both phones are registered to the same Cisco Unified Communications Manager. Problem Report Tool To issue a problem report, press the PRT button on the ATA. Cisco ATA 191 Analog Telephone Adapter Administration Guide for Cisco Unified Communications Manager... -
Page 59: Configure A Customer Support Upload Url
• username (the username configured in CUCM, the device owner) • prt_file (example: “probrep-20141021-162840.tar.gz”) A sample script is shown below. This script is provided for reference only. Cisco does not provide support for the upload script installed on a customer's server. -
Page 60: Generate A Problem Report
Problem Report Tool, on page 52 Generate a Problem Report You can generate a problem report for the ATA 191 using the Problem Report Tool. When you generate a problem report, a log file is generated and sent to the system administrator. -
Page 61: Ata 191 Specifications
Administration Guide (online) Regulatory Compliance and Safety Information guide (online) Dimensions 3.98 x 3.98 x 1.10 in. (101 x 101 x 28mm) (W x H x D) Cisco ATA 191 Analog Telephone Adapter Administration Guide for Cisco Unified Communications Manager... -
Page 62: Electrical Specifications
Operating temperature 32 to 113°F (0 to 45°C) Nonoperating temperature –13 to 158°F (–25 to 70°C) Operating humidity 10% to 90% noncondensing Storage humidity 10% to 90% noncondensing Cisco ATA 191 Analog Telephone Adapter Administration Guide for Cisco Unified Communications Manager... -
Page 63: Physical Interfaces
The ATA 191 provides multiple impedance, such as 600 ohm for American SKU, 900 ohm for European SKU, 220 ohm (820 ohm || 120nF) for Australian SKU, and so on. Cisco ATA 191 Analog Telephone Adapter Administration Guide for Cisco Unified Communications Manager... -
Page 64: Software Specifications
• Basic boot configuration (RFC 1350 TFTP Profiling) • Dial plan configuration • Cisco Discovery Protocol Quality of Service • Class-of-service (CoS) bit-tagging (802.1P) • Type-of-service (ToS) bit-tagging Cisco ATA 191 Analog Telephone Adapter Administration Guide for Cisco Unified Communications Manager... -
Page 65: Sip Compliance Reference Information
Voice-over-IP (VoIP) protocols SIP (RFC 3261) SIP Compliance Reference Information Information on how the ATA 191 complies with the IETF definition of SIP as described in RFC 2543 is found at the following URL: http://www.ietf.org/rfc/rfc2543.txt Cisco ATA 191 Analog Telephone Adapter Administration Guide for Cisco Unified Communications Manager... -
Page 66: Cisco Ata 191 Analog Telephone Adapter Administration Guide For Cisco Unified Communications Manager
ATA 191 Specifications SIP Compliance Reference Information Cisco ATA 191 Analog Telephone Adapter Administration Guide for Cisco Unified Communications Manager... -
Page 67: Voice Menu Codes
Press **** from the phone keypad. The IVR prompts for a password. The ATA 191 allows you to enter only numerical values for the password. The default password is 24726. Step 3 Enter the IVR password by pressing the number keypad, followed by #. -
Page 68: Ivr Tips
• Press 1 to save the IP address or press the * (star) key to cancel your entry and return to the main menu. IVR Configuration Menu Options The following table describes the various options in the IVR Configuration Menu. Cisco ATA 191 Analog Telephone Adapter Administration Guide for Cisco Unified Communications Manager... - Page 69 (IPv6) Check the IPv6 Internet addressing method (IPv6) Set the IPv6 Internet Addressing DHCP: 0; Static IP: 1. Method Check IPv6 Auto Configuration. 0: Disabled 1: Enabled. Cisco ATA 191 Analog Telephone Adapter Administration Guide for Cisco Unified Communications Manager...
- Page 70 (IPv6) Configure the gateway IP Available in IPv6 static IP mode only. address (IPv6) Check the primary DNS Server setting (IPv6) Set the primary DNS Server 73738 Factory Reset Cisco ATA 191 Analog Telephone Adapter Administration Guide for Cisco Unified Communications Manager...
-
Page 71: Chapter 9 Ata 191 Country-Specific Tones And Cadences
Australia. During provisioning, the device knows the network locale setting and tries to download [locale name]/g3-tones.xml from the Cisco Unified CM TFTP server. For example, if the network locale is set to Australia, the path is Australia/g3-tones.xml. -
Page 72: Tone Configuration
Tone Configuration Tone Configuration • Only the ATA 191 Line1 network locale setting is applied. The line2 network locale always applies the line1 option, even if the configured value of line2 network locale differs from the line1 value. • Only these tones can be configured: ◦...
Need help?
Do you have a question about the ATA 191 and is the answer not in the manual?
Questions and answers