Cisco ATA 191 Manual
Hide thumbs
Also See for ATA 191:
- Administration manual (142 pages) ,
- User manual (40 pages) ,
- Quick start manual (13 pages)
Advertisement
Quick Links
Your ATA
•
•
•
•
•
•
Your New ATA
Your analog telephone adapter (ATA) allows you to connect an analog device, such as an analog phone or
fax machine, to your network. The connected device can then function like the IP phones in your network.
Your new analog telephone adapter (ATA) has two interfaces:
• Two RJ11 ports for analog devices
• A RJ45 port for Ethernet
Light-emitting diodes (LEDs) on the ATA provide status.
Install your ATA with the components that are included in the box.
You'll perform these tasks:
• Install your ATA with the components in the box.
Devices Associated with Your ATA
Use your ATA to connect these types of devices to your network:
• Analog phones
Your New ATA, on page 1
Devices Associated with Your ATA, on page 1
Cisco ATA 191 and ATA 192 Hardware, on page 2
Install Your New ATA, on page 6
Phone Adapter Configuration Utility, on page 7
Supported ATA Call Features, on page 8
• Analog phones have no softkeys.
• The information that analog phones display depends on the model you have.
• You use the phone's flash button for hold, resume, transfer, and conference.
Your ATA
1
Advertisement

Related Manuals for Cisco ATA 191


Summary of Contents for Cisco ATA 191
- Page 1 Your New ATA, on page 1 • Devices Associated with Your ATA, on page 1 • Cisco ATA 191 and ATA 192 Hardware, on page 2 • Install Your New ATA, on page 6 • Phone Adapter Configuration Utility, on page 7 •...
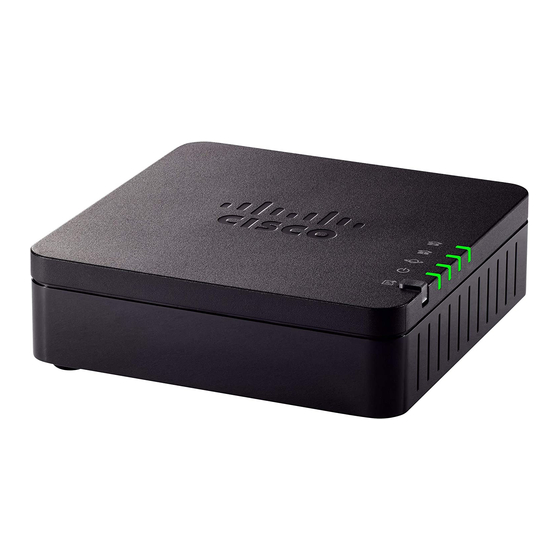
- Page 2 PSTN line. Cisco ATA 191 and ATA 192 Hardware The ATA 191 and ATA 192 are compact, easy to install devices. The unit provides these connectors: • 5V DC power connector.
- Page 3 Your ATA ATA 191 and ATA 192 Top Panel Figure 1: ATA 191 and ATA 192 Top Panel Table 1: ATA 191 and ATA 192 Top Panel Items Item Description Power LED Steady green: System booted up successfully and is ready for use.
-
Page 4: Problem Report Tool Button
• Configure the customer support upload URL to best suit your needs, and apply it to the ATA. ATA 191 and ATA 192 Back Panel The following figures shows the different ports and buttons found on the back of your ATA. - Page 5 Your ATA ATA 191 and ATA 192 Back Panel Figure 2: ATA 191 Back Panel Figure 3: ATA 192 Back Panel Table 2: ATA 191 and ATA 192 Back Panel Items Item Description RESET To restart the ATA, use a paper clip or similar object to press this button briefly.
-
Page 6: Install Your New Ata
Your ATA Install Your New ATA Install Your New ATA Your ATA comes with everything to power it up, connect it to the network, and set it up on your desk. Before you begin Before you begin the installation, make sure you have the following equipment: •... - Page 7 Your ATA Phone Adapter Configuration Utility If connecting a fax machine, connect it directly to the ATA. Do not connect an extension to a fax machine, and do not use a splitter. Step 3 (Optional) If you have a second analog device, connect the phone cable to the PHONE 2 port on the ATA and to your second analog device.
-
Page 8: Supported Ata Call Features
Your ATA Supported ATA Call Features Feature Description Speed dial. You assign phone numbers to a line so that you can quickly call that person. For more information, see Speed Dial Settings Set Up Phone Features with Phone Adapter Configuration Utility Supplementary services. - Page 9 Your ATA Supported ATA Call Features • Voicemail—This feature has no visual indicator, but a message waiting tone when you go off-hook indicates that you have voice messages. Some analog phones with a large LCD screen may display a voicemail icon. •...
- Page 10 Your ATA Supported ATA Call Features Your ATA...
Need help?
Do you have a question about the ATA 191 and is the answer not in the manual?
Questions and answers