Premier Mounts CTM-MS3 Installation Manual
Hide thumbs
Also See for CTM-MS3:
- Specifications (2 pages) ,
- Installation manual (16 pages) ,
- Installation manual (19 pages)
Table of Contents
Advertisement
Quick Links
Download this manual
See also:
Installation Manual
Advertisement
Table of Contents

Related Manuals for Premier Mounts CTM-MS3


Summary of Contents for Premier Mounts CTM-MS3
- Page 1 CTM-MS3 Installation Guide Installationsanleitung, Guía de Instalacíon, Guida de Installazione, Guide d’Installation, Installatie gids www.mounts.com | North America 800.368.9700 | International +1-714-632-7100 1321 S. State College Blvd., Fullerton, CA 92831 USA...
- Page 2 LES SUPPORTS PREMIER MOUNTS NE GARANTISSENT PAS CONTRE LES DOMMAGES CAUSÉS PAR L’USAGE DU PRODUIT DE MONTAGE PREMIER MOUNTS À D’AUTRES FINS QUE CELLES POUR LESQUELLES IL A ÉTÉ CONÇU OU DES DOMMAGES CAUSÉS PAR DES ACCESSOIRES OU DES MODIFICATIONS NON AUTORISÉS, ET NOUS NE POUVONS PAS ÊTRE TENUS RESPONSABLES DES DOMMAGES, PLAINTES, RÉCLAMATIONS, POURSUITES, ACTIONS OU CAUSES D’ACTION DE N’IMPORTE QUELLE...
-
Page 3: Included Components
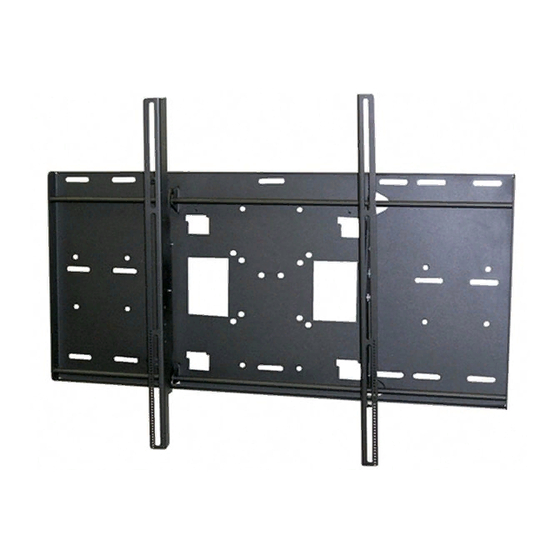
Minimum of 2 x 4 wood stud to be used Minimum de 2 x 4 bois goujon pour être utilisé Directional Mounting Arrow The Directional Mounting Arrow stamped into the CTM-MS3 wall plate indicates which edge is the top. Visual Centering Diamond The Visual Centering Diamond will guide you in determining the screen placement on the wall. - Page 4 CTM-MS3 Installation Guide Installationsanleitung, Guía de Instalacíon, Guida de Installazione, Guide d’Installation, Installatie gids Two people are recommended for this step; one person to level the wall plate and another person to mark the wall stud location. Il est recommandé deux personnes pour cette étape : une personne pour niveler la sablière et une autre personne pour...
- Page 5 CTM-MS3 Installation Guide Installationsanleitung, Guía de Instalacíon, Guida de Installazione, Guide d’Installation, Installatie gids Place the wall plate against the wall and align it with the pilot hole. Insert one (1) 5/16˝ x 3˝ lag bolt and one (1) 5/16˝ washer into the upper right pilot hole.
- Page 6 CTM-MS3 Installation Guide Installationsanleitung, Guía de Instalacíon, Guida de Installazione, Guide d’Installation, Installatie gids Drill a “pilot hole” in the center of each of the marks with a power drill and a 1/4″ drill bit. Two people are recommended for this step; one person to level the wall plate and another person to drill the pilot holes.
-
Page 7: Concrete Wall Installation
CTM-MS3 Installation Guide Installationsanleitung, Guía de Instalacíon, Guida de Installazione, Guide d’Installation, Installatie gids CONCRETE WALL INSTALLATION Two people are recommended for this step: one person to level the wall plate and another person to mark the mounting locations. Il est recommandé deux personnes pour cette étape : une personne pour niveler la sablière et une autre personne pour... - Page 8 CTM-MS3 Installation Guide Installationsanleitung, Guía de Instalacíon, Guida de Installazione, Guide d’Installation, Installatie gids Insert a Finned Anchors into each hole. Lightly tap each Finned Anchors into place with a hammer. Insert the lag bolts and washers into the Finned Anchors.Tighten all lag bolts using a socket wrench and 1/2″...
-
Page 9: Selecting The Mounting Hardware
Universal Spacer Installation Premier Mounts’ Universal Spacers allow you to attach the mounting bracket to flat-panels which have recessed or uneven mount points. Each Universal Spacer adds 1/4” to the distance between the mounting bracket and your flat- panel. -
Page 10: Universal Washer Installation
Installationsanleitung, Guía de Instalacíon, Guida de Installazione, Guide d’Installation, Installatie gids Universal Washer Installation Premier Mounts’ Universal Washers are designed to accommodate the various M4, M5, M6 and M8 hole sizes required by flat-panels. Do not place excessive pressure on the back of the flat-panel, as this may damage your flat-panel. - Page 11 CTM-MS3. Les boutons de molettes de sécurité maintiennent le panneau plat d'être accidentellement délogé du CTM-MS3. Fully extend the flat panel away from the wall. Install and tighten a safety knurl knob at the top of one of the mounting brackets.
- Page 12 The locking safety screws keep the flat panel from being accidently dislodged from the CTM-MS3. Les boutons de molettes de sécurité maintiennent le panneau plat d'être accidentellement délogé du CTM-MS3. Thread an M6 x 30mm locking safety screw at the bottom of one of the mounting brackets.
- Page 13 This warranty gives you specific legal rights, and you may also have other rights which vary from state to state. Premier Mounts intends to make this manual accurate and complete. However, Premier Mounts makes no claim that the information contained herein covers all details, conditions or variations, nor does it provide for every possible contingency in connection with the installation or use of this product.
Need help?
Do you have a question about the CTM-MS3 and is the answer not in the manual?
Questions and answers