Polycom VVX D60 User Manual
Hide thumbs
Also See for VVX D60:
- User manual (40 pages) ,
- Quick start manual (2 pages) ,
- Quick reference manual (3 pages)
Table of Contents
Advertisement
Quick Links
Advertisement
Table of Contents

Subscribe to Our Youtube Channel
Related Manuals for Polycom VVX D60


Summary of Contents for Polycom VVX D60
- Page 1 Polycom VVX D60 User’s manual cVVX...
-
Page 2: Important Safety Instructions
Radiation Exposure Statement The antenna used for VVX D60 Wireless Base Station must be installed to provide a separation distance of at least 20 centimeters from all persons and must not be co-located or operating in conjunction with any other antenna or transmitter. -
Page 3: Set Up The Telephone
Disposal Warning When this crossed-out wheeled bin symbol is attached to a product, it means the product is covered by the European Directive 2002/96/EC. All electrical and electronic products/battery should be disposed of separately from the municipal waste stream via designated collection facilities appointed by the government or the local authorities. -
Page 4: Connect The Base Station
Connect the Base Station Plug the power cable into the base station, and then plug the other end of the power adapter into the mains power wall outlet. Plug a line cord into the LAN socket of the base station, and then plug the other end into a LAN port. -
Page 5: Install And Charge The Handset Battery
Install and Charge the Handset Battery Slide open the battery compartment cover. Insert the battery into the battery compartment, with the label THIS WAY UP facing upward and inverted. - Page 6 Slide the battery compartment cover towards the center of the handset until it clicks into place. Place the handset in the base station or charger to charge.
-
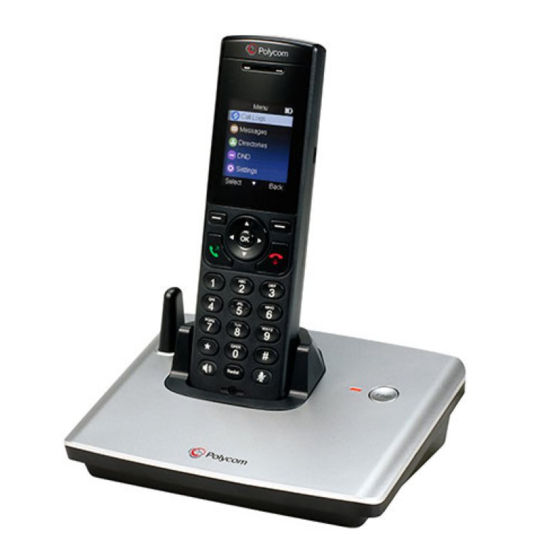
Page 7: Get To Know Your Phone
GET TO KNOW YOUR PHONE Overview of the Handset 1. SOFTKEYS Press to select a menu item displayed above the key. 2. NAVIGATION KEYS Press to increase the ringer volume in idle mode. Press to scroll up in a menu. Press to decrease the ringer volume in idle mode. - Page 8 Press to enter the main menu. Press to select a highlighted item, or save an entry or setting while in a menu. Press to make or answer a call. Press to hang up during a call. Press to return to idle mode. Press and hold to power on or off the handset.
-
Page 9: In Use Light
1. FIND (PAIR) Press to locate the registered handset(s). Press and hold to start the handset registration if the handset is not registered or deregistered. 2. IN USE LIGHT On when the telephone is in use. 3. CHARGING CRADLE... -
Page 10: Main Menu Structure
Main Menu Structure Navigating in the menu: When the handset is switched on and in idle mode: Press MENU in idle mode to enter the main menu. Press until the handset displays the desired feature menu. Press OK or SELECT to enter that menu. To return to the previous menu, press BACK. -
Page 11: Text And Digit Entry Table
Text and Digit Entry Table The following table shows you where each letter and punctuation character can be found. This will be helpful when storing a name in the Contact Directory renaming the handset name in settings Writing tips: You can move the cursor position by pressing Press DELETE to delete the last character. -
Page 12: Use Your Phone
USE YOUR PHONE Pre-dialing 4.1.1 Pre-dial a Call Using the Current Line Enter the number with the dialing keys. Press to dial. -OR- Press OPTIONS, and then press OK to dial. 4.1.2 Pre-dial a Call Using Another Line Enter the number with the dialing keys. Press OPTIONS, and then press to scroll to Use Other Line. - Page 13 4.3.1 Answer an Incoming Call Press Press Options during an incoming, and then to scroll to Answer. Press Select to answer. 4.3.2 Forward an Incoming Call To forward an incoming call to a designated number: Press Options during an incoming call. Press to scroll to Forward, and then press Select.
- Page 14 Press to scroll to New Call, and then press Select. Press to choose Dial, and then press Select. Use the dialing keys to enter a number to which you want to forward the call, and then press Call. The call will be forwarded when the far end answers the call.
- Page 15 If you want to hold the call before intercom, press Select to select Hold, and then press Options again. Press to scroll to Intercom, and then press Select. If the called handset has multiple lines configured, press to choose a line, and then press Call. Press on the called handset to answer the intercom call.
- Page 16 Press to scroll to Transfer, and then press Select. Press to scroll to Dial, and then press Select. Use the dialing keys to enter a number to which you want to transfer, and then press Transfer, . The call will be transferred when the far end answers the call.
- Page 17 Press to choose Dial, and then press Select. Use the dialing keys to enter a number to which you want to make the call, and then press Call. The call will be connected when the far end answers the call. 4.4.8 Conference Call To create a conference call with another registered handset:...
- Page 18 Use the dialing keys to enter a number with which you want to establish the conference, and then press Invite. The conference call will be connected when the invited party answers the call. To split the conference call back to normal call: During a conference call, press Options.
- Page 19 automatically. For further operations after the new call is established, see section 4.4.9 for multiple calls handling. 4.4.11 Call Park You can park the current the call and retrieve it on some other devices by entering the dedicated call park code. To park a call: During the call, press Options.
- Page 20 DIRECTORIES This phone contains two types of directories - Contact Directory and Corporate Directory. In the Contact Directory, you can call, view, edit, delete or save any contact. In the Corporate Directory, you can call the members of the list and copy the contact to Contact Directory, but will not be able to edit or delete any of the...
- Page 21 contacts in this list. Contact Directory 5.1.1 Store a Number Entry to the Contact Directory Press MENU in idle mode to enter the main menu. Press to scroll to Directories, and then press OK. Press to scroll to Add New Contact, and then press Select to proceed to contact information.
- Page 22 Press Select to call the selected entry. 5.1.4 Edit a Contact Directory Entry Press MENU in idle mode to enter the main menu. Press to scroll to Directories, and then press OK. Press to scroll to Contact Directory, and then press Select. Use the dialing keys to enter the first name (or the last name, depending on current setting) to search or press to scroll to the directory entry,...
- Page 23 Press Select to confirm. Corporate Directory 5.2.1 View a Corporate Directory Entry Corporate Directory entries appear alphabetically. If there is no entry in the directory, the screen will display “No Records”. Press MENU in idle mode to enter the main menu. Press to scroll to Directories, and then press OK.
- Page 24 5.2.4 Copy a Corporate Directory Entry to Contact Directory Press MENU in idle mode to enter the main menu. Press to scroll to Directories, and then press OK. Press to scroll to Corporate Directory, and then press Select. Use the dialing keys to enter the first name (or the last name, depending on current setting) to search or press to scroll to the directory entry, and then press Options.
- Page 25 entry. 5.3.2 Call a Speed Dial Entry Press MENU in idle mode to enter the main menu. Press to scroll to Directories, and then press OK. Press to scroll to Speed Dial List, and then press Select. Press to scroll to the desired speed dial slot, and then press Options.
-
Page 26: Phone Settings
Press MENU in idle mode to enter the main menu. Press to scroll to Directories, and then press OK. Press to scroll to Speed Dial List, and then press Select. Press to scroll to the desired speed dial slot, and then press Options. - Page 27 Press to scroll to Preferences, and then press Select. Press to scroll to Time & Date, and then press Select. Press to scroll to Clock Time, and then press Select. Press to scroll to 12 Hour or 24 Hour, and then press Select to save the preference.
- Page 28 Press MENU in idle mode to enter the main menu. Press to scroll to Settings, and then press OK. Press to scroll to Preferences, and then press Select. Press to scroll to Language list, and then press Select. Press to scroll to your desired language, and then press Select to save the preference.
- Page 29 Press OK to confirm. Check Handset Information Press MENU in idle mode to enter the main menu. Press to scroll to Settings, and then press OK. Press to scroll to Features, and then press Select. Press to scroll to Handset Information, and then press Select to check the handset information, including product name and software version.
- Page 30 6.9.2 Deregister a Handset If need to replace an old handset with a new handset, you need to deregister the old handset first before you register the new handset to the base station. Press MENU in idle mode to enter the main menu. Press to scroll to Settings, and then press OK.
-
Page 31: Missed Calls
CALL LOGS The Call Logs comprise of the following elements. Missed calls – Record of calls which have been missed by the user. Received calls – Record of calls which have been received by the user. Dialed calls – Records of calls made or dialed by the user. Recent calls –... - Page 32 7.1.2 View Details of a Missed Call Entry Press MENU in idle mode to enter the main menu. Press OK to select Call logs. Press to scroll to Missed Calls, and then press View. Press to scroll to the desired entry, and then press Options. Press to scroll to View Details, and then press Select.
- Page 33 User Forwarded call Rejected call Received – if you receive an incoming call Forwarded – if the Forward feature is pre-configured User Forwarded – If you receive an incoming call and forward it. Rejected – if you reject an incoming call 7.2.1 Call a Received Call Entry Press MENU in idle mode to enter the main menu.
- Page 34 Use the dialing keys to enter or edit the first name, and then press. Use the dialing keys to enter or edit the last name, and then press Use the dialing keys to enter or edit the office number, and then press Use the dialing keys to enter or edit the mobile number, and then press Use the dialing keys to enter or edit the other number, and then press Press Save to confirm.
- Page 35 Press to scroll to Delete, and then press Select. Press OK to confirm delete. 7.3.4 Add a Dialed Call Entry to Contact Directory Press MENU in idle mode to enter the main menu. Press OK to select Call logs. Press to scroll to Dialed Calls, and then press View.
- Page 36 Press OK to select Call logs. Press to scroll to Recent Calls, and then press View. Press to scroll to the desired entry, and then press Options. When Call is highlighted, press Select to call. 7.4.2 View Details of a Recent Call Entry Press MENU in idle mode to enter the main menu.
-
Page 37: Listen To Messages
MESSAGES You can access the message center for voice messages through the handset menu. Listen to Messages Press MENU in idle mode to enter the main menu. Press to scroll to Messages, and then press OK. Press Select to select the message center. Press to choose the line in which you want to listen the messages, and then press Select. - Page 38 Press to scroll to DND, and then press OK. Press to choose the ticked lines, and then press OK for DND mode deactivation. Wait until it is time out, the DND mode the disable. Enable or Disable the DND Mode in Idle Mode Press Lines in idle mode to enter the lines menu.
-
Page 39: Care And Maintenance
CARE AND MAINTENANCE Take care of your telephone Your cordless telephone contains sophisticated electronic parts, so you must treat it with care. Avoid rough treatment. Place the handset down gently. Save the original packing materials to protect your telephone if you ever need to ship it.
Need help?
Do you have a question about the VVX D60 and is the answer not in the manual?
Questions and answers