
Related Manuals for Infinity Furion S201 Profile V1


Summary of Contents for Infinity Furion S201 Profile V1
- Page 1 MANUAL ENGLISH Infinity S201 Profile Ordercode: 41505 Highlite International B.V. – Vestastraat 2 – 6468 EX – Kerkrade – the Netherlands...
-
Page 2: Table Of Contents
One Infinity (Manual) ..............................11 Multiple Infinitys (DMX control) ..........................12 Multiple Infinitys (Wireless DMX Control) ......................13 Connect the Infinity to the Wireless DMX Signal Transmitter ................14 Disconnect the Infinity from the Wireless DMX Signal Transmitter ..............14 Multiple Infinitys (ArtNet Control) ..........................15 Connecting to a Network ............................16... - Page 3 Infinity S201 Profile 6. Information ................................34 6.1. Fixture Information ............................35 6.2. Fan Information ..............................35 6.3. Error Information ...............................35 6.4. Channel Information ............................36 DMX Channels ................................37 23 channels ................................41 Maintenance ..................................45 Replacing the Fuse ..............................45 Gobo Size ..................................45 Replacing a Gobo From the Rotating Gobo Wheel ...................46 Glass Gobo Orientation .............................47...
-
Page 4: Warning
Infinity S201 Profile Warning Unpacking Instructions Immediately upon receiving this product, carefully unpack the carton and check the contents to ensure that all parts are present, and have been received in good condition. Notify the dealer immediately and retain packing material for inspection if any parts appear damaged from shipping or the carton itself shows signs of mishandling. - Page 5 ● If your Infinity device fails to work properly, discontinue the use immediately. Pack the unit securely (preferably in the original packing material), and return it to your Infinity dealer for service.
-
Page 6: Operating Determinations
Always have the inspections carried out by an authorized dealer! Procedure: ● If the Infinity is lowered from the ceiling or high joists, professional trussing systems have to be used. ● Use a clamp to mount the Infinity, with the mounting bracket, to the trussing system. -
Page 7: Connection With The Mains
Infinity S201 Profile The Infinity can be placed on a flat stage floor or mounted to any kind of truss with a mounting bracket and a clamp. Improper installation can cause serious injuries and/or damage of property! Connection with the mains Connect the device to the mains with the power-plug. -
Page 8: Return Procedure
Infinity S201 Profile Return Procedure Returned merchandise must be sent prepaid and in the original packing, call tags will not be issued. Package must be clearly labeled with a Return Authorization Number (RMA number). Products returned without an RMA number will be refused. Highlite will not accept the returned goods or any responsibility. -
Page 9: Description Of The Device
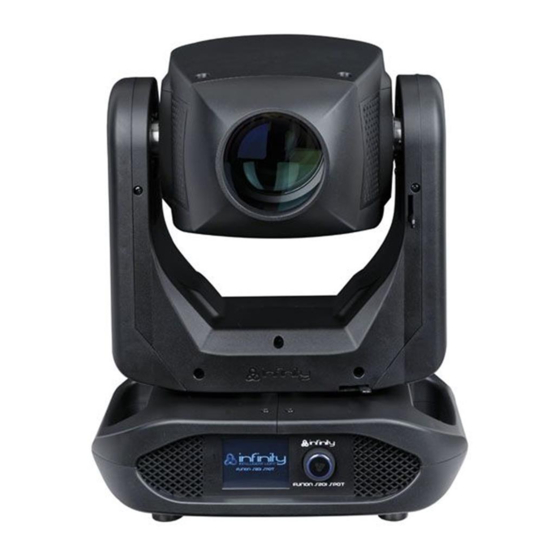
Infinity S201 Profile Description of the device Features The Infinity S201 Profile is a moving-head with high output and great effects. Output ● Lux @ 5m 12°: 11345 ● Lux @ 5m 30°: 2296 ● Beam angle: 12° - 30°... -
Page 10: Certification And Safety
Infinity S201 Profile Certification and Safety ● Certification: CE ● Max. ambient temperature: 40°C Optional accessories: 70454 – Safety cable Saveking 4 mm (Natural) 70456 – Safety cable Saveking 4 mm (Black) FLA43 – DMX Terminator 75101 – Fast Coupler 150 kg (Black) Frontside Fig. -
Page 11: Backside
11) Neutrik PowerCON True1 power connector OUT Installation Remove all packing materials from the Infinity S201 Profile. Check if all foam and plastic padding is removed. Connect all cables. Do not supply power before the whole system is set up and connected properly. -
Page 12: Set Up And Operation
03) Plug the end of the electric mains power cord into a proper electric power supply socket. 04) When the Infinity is not connected with a DMX cable, it functions as a stand-alone device. 05) Please see page 34 for more information about Stand-alone mode. -
Page 13: Multiple Infinitys (Dmx Control)
02) Always use a safety cable (ordercode 70140 / 70141). 03) Use a 5-pin XLR cable to connect the Infinity and other devices. 04) Link the units as shown in fig. 04. Connect the first unit's DMX "out" socket with the second unit's "in"... -
Page 14: Multiple Infinitys (Wireless Dmx Control)
Infinity S201 Profile Multiple Infinitys (Wireless DMX Control) 01) Install multiple Infinitys at the desired positions (maximum Wi-Fi distance: 250 m). 02) In order for the Infinitys to receive a wireless DMX signal properly, activate W-DMX on all Infinitys (see page 26 for more information). -
Page 15: Connect The Infinity To The Wireless Dmx Signal Transmitter
When the wireless DMX communication is normal, the W-DMX indicator on the display is always green. The Infinity cannot receive a wireless DMX signal and a DMX cable signal at the same time. Connect the Infinity to the Wireless DMX Signal Transmitter The Infinity cannot actively match a random wireless signal transmitter. -
Page 16: Multiple Infinitys (Artnet Control)
01) Fasten the effect light to a firm trussing. Leave at least 0,5 meter on all sides for air circulation. 02) Always use a safety cable (ordercode 70140 / 70141). 03) Use a CAT-5/CAT-6 cable to connect the Infinity and other devices. 04) Connect your PC with installed ArtNet software to the first device’s RJ45 "in" socket. -
Page 17: Connecting To A Network
04) Set the IP address of your software/light controller to 2.x.x.x or 10.x.x.x, depending on the ArtNet settings. 05) Set the subnet mask to 255.0.0.0. on both – the Infinity and your software/light controller. Make sure that all the fixtures in the network have a unique IP address. -
Page 18: How To Make A Data Cable
Infinity S201 Profile How to Make a Data Cable A standard ETHERNET cable can be used to replace the data cable required to transmit the data for the S201. Please follow the instructions below in order to create an extra net cable. -
Page 19: Fixture Linking
Infinity S201 Profile Fixture Linking You will need a serial data link to run light shows of one or more fixtures using a DMX-512 controller or to run synchronized shows of two or more fixtures set to a master/slave operating mode. The combined number of channels required by all the fixtures on a serial data link determines the number of fixtures the data link can support. -
Page 20: Control Panel
When using multiple Infinitys, make sure you set the DMX addresses right. Therefore, the DMX address of the first Infinity should be 1(001); the DMX address of the second Infinity should be 1+57=58 (058); the DMX address of the third Infinity should be 58+57=115 (115), etc. -
Page 21: Menu Overview
Infinity S201 Profile Menu Overview Ordercode: 41505... - Page 22 Infinity S201 Profile Ordercode: 41505...
- Page 23 Infinity S201 Profile Ordercode: 41505...
- Page 24 Infinity S201 Profile Ordercode: 41505...
-
Page 25: Start-Up
05) The display will now show the main menu. Please see the next page. No Reset Start-Up It is not required to turn the Infinity on, in order to adjust the device’s settings. It is possible to activate only the display. There are 2 possibilities: ●... -
Page 26: Main Menu Options
Infinity S201 Profile Main Menu Options DMX Addressing Control Mode Settings Menu Manual Control Stand-Alone Information Return one step back Home Down 1. DMX Addressing With this menu you can set the DMX address. 01) In main menu, select and enter the menu. The display will show: 02) Turn the control or type in the desired DMX address. -
Page 27: Control Mode
PERSONALITY: BASIC (17 channels), ADVANCE (23 channels), USER (up to 23 channels) ● USER PERSONALITY: In this mode it is possible to customize your Infinity by changing the order of the 23 DMX channels and/or leaving some channels out. Please, see below for more information. -
Page 28: Settings Menu
Infinity S201 Profile 3. Settings Menu With this menu you can set your desired mode. 01) In main menu, select and enter the menu. The display will show: 02) Use the control or the UP/DOWN buttons to toggle through the 23 submenus. - Page 29 WIRELESS UNLINK: Terminate the connection between the Infinity and the transmitter (YES/NO). ● DMX FAIL: The Infinity’s behavior in case of a DMX error. There are 2 options: OFF (output blackout) and HOLD (the Infinity will use the latest properly working DMX signal which ensures undisrupted performance).
-
Page 30: Network Settings
Infinity S201 Profile 3.1. Network Settings With this menu you can set the network settings. 01) If you have selected NETWORK SETTINGS, the display will show: 02) Use the control or the UP/DOWN buttons to toggle through the 4 submenus. -
Page 31: Lock Code
Infinity S201 Profile 3.2. Lock Code With this menu you can set the safety code. 01) If you have selected LOCK CODE, the display will show: 02) Turn and press the control in order to insert the master code: 6468. -
Page 32: Touch Calibration
Infinity S201 Profile 3.3. Touch Calibration With this menu you can calibrate the touch screen. 01) If you have selected TOUCH CALIBRATION, the display will show: 02) Follow the instructions on the display until the touch screen calibration is complete. -
Page 33: Reset Function
Infinity S201 Profile ● GOBO ROTATE ● GOBO2 ● FOCUS-GOBO ● FOCUS-GOBO2 ● ZOOM ● PRISM ● DIMMER ● MAC4 ● MAC5 ● MAC6 ● RDM ID4 ● RDM ID5 ● RDM ID6 3.5. Reset Function With this menu you can reset the device’s settings. -
Page 34: Manual Control
Infinity S201 Profile 4. Manual Control With this menu you can set Manual mode. 01) In main menu, select and enter the menu. The display will show: 02) Use the control or the UP/DOWN buttons to toggle through the 2 submenus. -
Page 35: Stand-Alone
Infinity S201 Profile 5. Stand-Alone With this menu you can set your desired built-in program. 01) In main menu, select and enter the menu. The display will show: 02) Press the control and then turn it in order to select one of the 9 built-in programs. -
Page 36: Fixture Information
Infinity S201 Profile 6.1. Fixture Information With this menu you can view the currently installed software version, operation mode, DMX address and many other crucial parameters. 01) If you have selected FIXTURE INFORMATION, the display will show: 02) Use the control or the UP/DOWN buttons to toggle through 2 screens, in order to see all pieces of information. -
Page 37: Channel Information
Infinity S201 Profile 6.4. Channel Information With this menu you can view all the channel information. 01) If you have selected CHANNEL INFO, the display will show: 02) Use the control or the UP/DOWN buttons to toggle through 2 screens, in order to see all pieces of information. -
Page 38: Dmx Channels
Infinity S201 Profile DMX Channels Infinity Furion S201 Firmware Version V5.0 Basic Advanced Function Default Highlight Snap 0-255 0-540 Pan 16bit 0-255 16bit adjustable Tilt 0-255 0-270 Tilt 16bit 0-255 16bit adjustable Pan/tilt speed 0-255 Decreasing speed Dimmer 0-255 0-100%... - Page 39 Infinity S201 Profile Infinity Furion S201 Firmware Version V5.0 Basic Advanced Function Default Highlight Snap 0-255 0-540 Rotating Open gobo wheel 1 9-17 Gobo 1 (Asteroids) 18-26 Gobo 2 (Psycho) 27-35 Gobo 3 (Brushed) 36-44 Gobo 4 (Triangles) 45-53 Gobo 5 (Baroque)
- Page 40 Infinity S201 Profile Infinity Furion S201 Firmware Version V5.0 Basic Advanced Function Default Highlight Snap Prism No function Prism effect 1 (3 Facet Circular) 5-255 Prism rotating 0-45 Prism index 46-126 Positive rotating, decreasing speed 127-130 Stop 131-211 Negative rotating, increasing speed...
- Page 41 Infinity S201 Profile Infinity Furion S201 Firmware Version V5.0 Basic Advanced Function Default Highlight Snap Functions No function 6-11 Pan Reverse 12-17 Pan Normal 18-23 Tilt Reverse 24-29 Tilt Normal 30-35 Pan Tilt Swop 36-41 Pan Tilt Normal 42-47 BO PT on...
-
Page 42: Channels
Infinity S201 Profile 23 channels Channel 1 – Horizontal movement (Pan) Push the slider up, in order to move head horizontally (PAN). Gradual head adjustment from one end of the slider to the other (0-255, 128-center). The head can be turned by 540° and stopped at any position you wish. - Page 43 Infinity S201 Profile Channel 10 – Color wheel CH6 and CH8 must be open White 7-13 Color 1 (Magenta) 14-20 Color 2 (CTO) 21-27 Color 3 (Cyan) 28-34 Color 4 (Dark Yellow) 35-41 Color 5 (Blue) 42-48 Color 6 (Light Lavender)
- Page 44 Infinity S201 Profile 78-84 Rotating Gobo 6 shake effect, from slow to fast 85-91 Rotating Gobo 5 shake effect, from slow to fast 92-98 Rotating Gobo 4 shake effect, from slow to fast 99-105 Rotating Gobo 3 shake effect, from slow to fast...
- Page 45 Infinity S201 Profile Channel 23 – Functions Not functional 6-11 Pan reverse 12-17 Pan normal 18-23 Tilt reverse 24-29 Tilt normal 30-35 Pan/Tilt swop 36-41 Pan/Tilt normal 42-47 P/T blackout ON 48-53 P/T blackout OFF 54-59 Color wheel blackout ON...
-
Page 46: Maintenance
04) The electric power supply cables must not show any damages or material fatigue. The Infinity S201 Profile requires almost no maintenance. However, you should keep the unit clean. Otherwise, the fixture’s light output will be significantly reduced. Disconnect the mains power supply, and then wipe the cover with a damp cloth. -
Page 47: Replacing A Gobo From The Rotating Gobo Wheel
Infinity S201 Profile Replacing a Gobo From the Rotating Gobo Wheel Fig. 10 01) Before removing the top part of the housing, make sure that the moving head is in the horizontal position. The lens position should be on the bottom, symmetrically speaking. -
Page 48: Glass Gobo Orientation
Infinity S201 Profile Glass Gobo Orientation Coated glass gobos are inserted with the coating against the rim of the holder (away from the spring). Textured gobos are inserted with the smooth side against the spring. This provides the best results when combining rotating gobos. -
Page 49: Rotating Gobo Wheels And Color Wheels
Infinity S201 Profile Rotating Gobo Wheels and Color Wheels Gobo wheel 1 Gobo wheel 2 Color wheel 1 Color wheel 2 Ordercode: 41505... -
Page 50: Troubleshooting
04) If all of the above appears to be O.K., plug the unit in again. 05) If you are unable to determine the cause of the problem, do not open the Infinity, as this may damage the unit and the warranty will become void. - Page 51 Infinity S201 Profile Problem Probable cause(s) Solution ● Check if power is switched on One or more No power to the fixture and cables are plugged in fixtures do not function at all Primary fuse blown ● Replace fuse Fixtures reset The controller is not connected ●...
-
Page 52: Product Specifications
Infinity S201 Profile Product Specifications Model: Infinity S201 Profile Input voltage: 100-240V AC, 50/60Hz Power consumption: 380W (full output) DMX linking: 30pcs Fuse: F7AL/250V Dimensions: 284 x 380 x 564 mm (LxWxH) Weight: 20,12 kg Operating and Programming: Signal pin OUT:... -
Page 53: Dimensions
Infinity S201 Profile Dimensions Ordercode: 41505... -
Page 54: Moving Head Position / Dmx Values
Infinity S201 Profile Moving head Position / DMX Values Ordercode: 41505... -
Page 55: Notes
Infinity S201 Profile Notes Ordercode: 41505... - Page 56 ©2019 Infinity...
Need help?
Do you have a question about the Furion S201 Profile V1 and is the answer not in the manual?
Questions and answers