Table of Contents
Advertisement
Quick Links
PSM900 -- Wireless Personal Monitor Sys-
tem
IMPORTANT SAFETY INSTRUCTIONS
1. READ these instructions.
2. KEEP these instructions.
3. HEED all warnings.
4. FOLLOW all instructions.
5. DO NOT use this apparatus near water.
6. CLEAN ONLY with dry cloth.
7. DO NOT block any ventilation openings. Allow sufficient distances for adequate ventilation and install in accor-
dance with the manufacturer's instructions.
8. DO NOT install near any heat sources such as open flames, radiators, heat registers, stoves, or other appara-
tus (including amplifiers) that produce heat. Do not place any open flame sources on the product.
9. DO NOT defeat the safety purpose of the polarized or grounding type plug. A polarized plug has two blades
with one wider than the other. A grounding type plug has two blades and a third grounding prong. The wider
blade or the third prong are provided for your safety. If the provided plug does not fit into your outlet, consult an
electrician for replacement of the obsolete outlet.
10. PROTECT the power cord from being walked on or pinched, particularly at plugs, convenience receptacles,
and the point where they exit from the apparatus.
11. ONLY USE attachments/accessories specified by the manufacturer.
12. USE only with a cart, stand, tripod, bracket, or table specified by the manufacturer, or sold with the apparatus.
When a cart is used, use caution when moving the cart/apparatus combination to avoid injury from tip-over.
13. UNPLUG this apparatus during lightning storms or when unused for long periods of time.
14. REFER all servicing to qualified service personnel. Servicing is required when the apparatus has been dam-
aged in any way, such as power supply cord or plug is damaged, liquid has been spilled or objects have fallen
into the apparatus, the apparatus has been exposed to rain or moisture, does not operate normally, or has
been dropped.
15. DO NOT expose the apparatus to dripping and splashing. DO NOT put objects filled with liquids, such as vas-
es, on the apparatus.
16. The MAINS plug or an appliance coupler shall remain readily operable.
17. The airborne noise of the Apparatus does not exceed 70dB (A).
18. Apparatus with CLASS I construction shall be connected to a MAINS socket outlet with a protective earthing
connection.
1/30
Advertisement
Table of Contents

Related Manuals for Shure PSM900


Summary of Contents for Shure PSM900
-
Page 1: Important Safety Instructions
PSM900 -- Wireless Personal Monitor Sys- IMPORTANT SAFETY INSTRUCTIONS 1. READ these instructions. 2. KEEP these instructions. 3. HEED all warnings. 4. FOLLOW all instructions. 5. DO NOT use this apparatus near water. 6. CLEAN ONLY with dry cloth. 7. DO NOT block any ventilation openings. Allow sufficient distances for adequate ventilation and install in accor- dance with the manufacturer’s instructions. -
Page 2: Safety Precautions
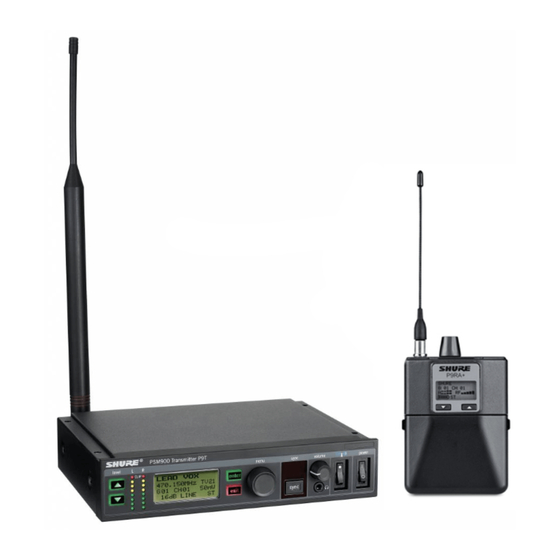
Shure Incorporated 19. To reduce the risk of fire or electric shock, do not expose this apparatus to rain or moisture. 20. Do not attempt to modify this product. Doing so could result in personal injury and/or product failure. 21. Operate this product within its specified operating temperature range. - Page 3 PSM 900 ® The Shure PSM 900 Wireless Personal Monitor System offers an unprecedented combination of superb audio quality, robust RF performance, and category-leading features for the most demanding professional applications. Patented Audio Reference Companding and advanced digital signal processing technology provide excellent stereo separation and audio clarity.
- Page 4 Shure Incorporated • Exceptional transmitter linearity vastly reduces frequency intermodulation and allows up to 20 compatible chan- nels per frequency range. • Automatic RF gain control prevents signal distortion due to RF overload before it can affect performance. Category-Leading Setup and Operation Features •...
-
Page 5: Quick Start Instructions
Shure Incorporated Quickstart Instructions Rack Mount Transmitter 1. Connect to a power outlet using the supplied power adapter. 2. Attach the supplied antennas to the antenna out BNC connectors. 3. Connect the audio source, such as the output of a mixer, to the audio inputs. You can use both input jacks or choose either one for a mono source. - Page 6 Shure Incorporated 6/30...
- Page 7 Shure Incorporated Bodypack Insert batteries and attach antenna. Turn on using the volume knob. The battery light illuminates. Scan and Sync 1. On the bodypack, press the scan button. The display flashes SYNC NOW..2. Align the IR windows on the bodypack and rack unit and press the sync button. The rack unit Level LEDs flash, and it displays SYNC SUCCESS.
- Page 8 Shure Incorporated 8/30...
-
Page 9: Front Panel Controls
Shure Incorporated Rack Unit Transmitter Front Panel Controls ① Input Level Control and Display Use the ▼▲ buttons to adjust the audio so that, for the average input signal level, the top two yellow LEDs flicker and the lower LEDs are solid. The red clip LED indicates the inputs are overdriven. Reduce the level at the audio source or change the input sensitivity of the rack unit from the >... -
Page 10: Rear Panel Connectors
Connect to balanced or unbalanced outputs. Use either connector for mono input. Accepts both 1/4-inch or male XLR connectors. ⑩ Antenna (BNC) Attach supplied antenna. If you are rack mounting, use a front panel or remote mounting kit from Shure. Configuration Menu Note: Configuration menu items may vary with regional model variations. - Page 11 Shure Incorporated 888.888MHz Manual frequency selection RF POWER Select from 10, 50, or 100 mW (varies by region) Audio Settings > AUDIO MODE Selects monitor mode STEREO/MX Transmits both channels MONO Transmits a mono signal to bodypack > AUDIO INPUT Sets nominal input level LINE +4 dBu...
- Page 12 Shure Incorporated MENU ONLY Locks only the configuration menu (menu controls). MENU+SWITCH Locks all controls except for the level buttons (including the RF and power switches).* Locks all controls (including the RF and power switches).* *RF is automatically activated when locked. When you unlock the unit, RF and power turns off if the swithes are off.
-
Page 13: Lcd Screen
For transmitting settings between bodypack and rack unit. ⑤ Battery Compartment Requires 2 AA batteries or Shure rechargeable battery. Open by pressing the latches on both sides and pulling. ⑥ Menu buttons Use in conjunction with the ▼▲ buttons to access the configuration menus. -
Page 14: Battery Life
For detachable antennas. ⑫ Removable AA Adapter Remove to use with a Shure SB900 rechargeable battery. Note: To remove adapter, open door and slide out. To reinstall adapter, place over the clip and press, there will be an audible click when seated. -
Page 15: Configuration Menu
Shure Incorporated < 0:15 < 0:10 < 0:10 < < 0:25 < 0:25 0:25 Total Battery Life 6:00 4:20 3:15 8:00 6:45 6:00 Power-save mode: When there are no earphones plugged in for 5 minutes, the receiver enters power-save mode to preserve battery life. -
Page 16: Audio Settings
Shure Incorporated Group number. Each group contains channels selected to work well together in a single installation. Channel number. Sets the receiver to a channel in the selected group. 888.888 MHz Displays the frequency to which the receiver is set. Highlight and use the ▼▲ buttons to set to a specific frequen- SQUELCH Adjusts the squelch setting. - Page 17 Shure Incorporated Volume Limiter (V LIM) V LIM Set a value (OFF to -48 dB, adjustable in 3 dB increments) to attenuate the highest possible volume level. Turning the volume knob through its entire range of motion still affects volume; the limit simply narrows the range of dB ad- justment.
- Page 18 Important: Note the number of available channels. If you have more rack units than available channels, elimi- nate potential sources of interference and try again, or call Shure Applications for assistance. 3. Sync the bodypack with the first rack unit by aligning the IR windows and pressing sync.
- Page 19 Shure Incorporated CueMode CueMode allows you to upload the name and frequency settings from multiple rack units and store them as a list on a single bodypack. You can then, at any time, scroll through that list to hear the audio mix from each transmit- ter, just as each performer does during a show.
-
Page 20: Frequency Scan
Shure Incorporated EXIT CUEMODE Exits CueMode and returns the bodypack to the previous frequency setting. Frequency Scan Use a frequency scan to analyze the RF environment for interference and identify available frequencies. • Channel Scan Press the scan button on the bodypack. Finds the first available channel. -
Page 21: Loop Applications
Shure Incorporated MixMode Some performers need to hear more of their own voice or instrument, while others want to hear more of the band. With MixMode, the performer creates their own mix using the balance control (▼▲ buttons) on the bodypack. -
Page 22: Squelch Settings
Point-to-Point Wireless Audio Use PTP mode to allow a P9T to transmit to a UHF-R receiver. This allows a transmitter and receiver setup where both units are racked and powered by AC. For more information visit: www.shure.com/americas/products/personal-monitor-systems 22/30... -
Page 23: Specifications
Shure Incorporated Specifications PSM 900 RF Carrier Range 470–952 MHz varies by region Compatible Frequencies Per band Tuning Bandwidth 36–40 MHz Note: varies by region Operating Range environment dependent 90 m (300 ft) Stereo Separation 60 dB Audio Frequency Response 35 Hz –15 kHz (±1 dB) - Page 24 Shure Incorporated Total Harmonic Distortion ref. ±34 kHz deviation @1 kHz <0.8% (typical) Companding Patented Shure Audio Reference Companding Spurious Rejection ref. 12dB SINAD >80 dB (typical) Frequency Stability ±2.5 ppm MPX Pilot Tone 19 kHz (±0.3 kHz) Modulation FM*, MPX Stereo *ref.
-
Page 25: Audio Input
Shure Incorporated Audio Input Connector Type Combination XLR and 6.35 mm (1/4") TRS Polarity Non- vert- (pin posi- tive with spect 6.35 mm (1/4") TRS posi- tive with spect ring Configuration Electronically balanced Impedance 70.2 kΩ (actual) Nominal Input Level switchable: +4 dBu, –10 dBV... -
Page 26: Audio Output
Shure Incorporated -10 dBV +12. 2 dBu Pin Assignments 1=ground, 2=hot, 3=cold 6.35 mm (1/4") TRS Tip=hot, Ring=cold, Sleeve=ground Phantom Power Protection Up to 60 V DC Audio Output Connector Type 6.35 mm (1/4") TRS Configuration Electronically balanced Impedance Connected directly to inputs... - Page 27 Shure Incorporated Adjacent Channel Rejection >70 dB Squelch Threshold 22 dB SINAD (±3 dB) default setting Intermodulation Attenuation >70 dB Blocking >80 dB Audio Output Power 1kHz @ 1% distortion, peak power, @16Ω 100 mW (per output) 4-band Parametric EQ 9.5 Ω...
- Page 28 Shure Incorporated Dimensions 83 x 65 x 22 mm H x W x D Battery Life 4–6 hours (continuous use) AA batteries Frequency Range and Transmitter Output Power Band Range Output 470 –506 MHz 10/50/100 mW 470–506 MHz 10/50/100 mW 470–506 MHz...
-
Page 29: Furnished Accessories
Shure Incorporated Furnished Accessories Omnidirectional Whip Antenna, Yellow Tip (470-542 MHz) UA700 Omnidirectional Whip Antenna, Black Tip (596-692 MHz) UA720 Omnidirectional Whip Antenna, Blue Tip (670-830 MHz) UA730 Omnidirectional Whip Antenna, Red Tip (830-952 MHz) UA740 1/2 Wave Omnidirectional Receiver Antenna for improved wireless signal recep-... - Page 30 This product meets the Essential Requirements of all relevant European directives and is eligible for CE marking. Hereby, Shure Incorporated declares that the radio equipment is in compliance with Directive 2014/53/EU. The full text of the EU declaration of conformity is available at the following internet address: http://www.shure.com/europe/ compliance (http://www.shure.com/europe/compliance)
Need help?
Do you have a question about the PSM900 and is the answer not in the manual?
Questions and answers