
Related Manuals for Kramer MODULAR TBUS-1A


Summary of Contents for Kramer MODULAR TBUS-1A
- Page 1 K R A ME R E LE CT R O N IC S L T D . USER MANUAL MODEL: MODULAR TBUS-1A Table Connection Bus P/N: 2900-300055 Rev 1...
-
Page 3: Table Of Contents
Contents Introduction Getting Started Achieving the Best Performance Glossary Overview Your TBUS-1A Enclosure TBUS-1A Optional Inserts TBUS-1A Optional Inner Frames Power Socket Options Power Cord Options Installing the TBUS-1A Assembling the Inner Frame Installing the Inner Frame Cutting an Opening in the Table Inserting the TBUS-1A through the Cut Out Opening Connecting the Pass-through Cables Connecting the Cables... -
Page 4: Introduction
GROUP 7: Scan Converters and Scalers, GROUP 8: Cables and Connectors, GROUP 9: Room Connectivity, GROUP 10: Accessories and Rack Adapters and GROUP 11: Sierra Products. Thank you for purchasing the Kramer TBUS-1A , which is ideal for boardrooms, conference and training rooms! TBUS-1A - Introduction... -
Page 5: Getting Started
Use Kramer high-performance high-resolution cables Go to http://www.kramerelectronics.com to check for up-to-date user manuals, a complete list of Kramer wall plates and module connectors, application programs, and to check if firmware upgrades are available (where appropriate). Achieving the Best Performance To achieve the best performance: •... -
Page 6: Overview
Section 7), or Legrand type power sockets (for use with Legrand’s white Mosaic™ series only) Order the power sockets separately from Kramer Electronics • Power socket openings for which you can order any of the following power sockets: USA, Germany-EU, Belgium-France, Italy, Australia, “Universal” for... -
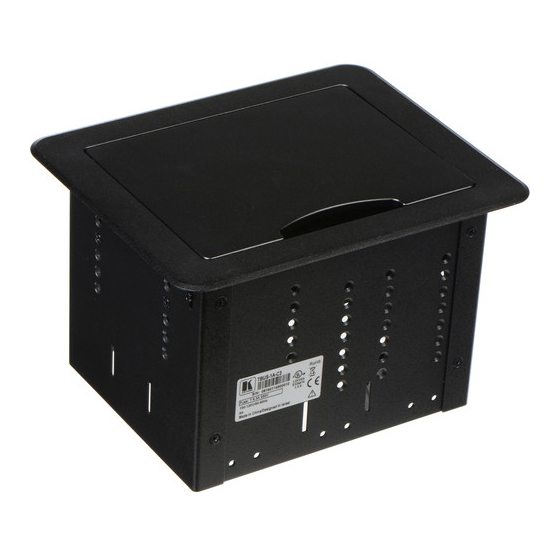
Page 7: Your Tbus-1A Enclosure
Remove it before installing the unit Enclosure Inserted into the table cut out Height Adjustment The screw holes are used for installing Kramer TOOLs Screw Holes (TOOLs) Tie Holes Insert the self-locking tie through the holes to fix the pass-through... -
Page 8: Tbus-1A Optional Inserts
4 power sockets 2 cable pass-through inserts 2 blank inserts Special Panel for RC-8IR (P/N: 80-000599) 1 special panel to fit the Kramer RC-8IR Control Panel into the appropriate frame (P/N 80-000399 or P/N 80-000499 instead of two power sockets) -
Page 9: Power Socket Options
TBUS-1A/IF/SI-1VGA/RC-3TB (P/N: 80-000699) 1 power socket 1 opening for Kramer SI-1VGA / RC-3TB 2 cable pass-through inserts 2 blank inserts Custom made inner frames can be designed if required. Contact Kramer Electronics for more details. Power Socket Options A choice of one or more power sockets per inner frame is available in several versions, including power sockets for the USA, Germany (the Europlug), Belgium- France, Italy, and Australia. - Page 10 Single Power Socket Assemblies: Power Specs Germany and EU: TBUS/PS/DE (80-001299) 100-240V AC, 50/60Hz, 5A Maximum 5A per power outlet Belgium and France: TBUS/PS/FR (80-001399) 100-240V AC, 50/60Hz, 5A Maximum 5A per power outlet Italy: TBUS/PS/ITALY (80-001499) 100-240V AC, 50/60Hz, 5A Maximum 5A per power outlet TBUS/PS/AUS (80-001599) Australia:...
- Page 11 Dual Power Socket Assemblies: Power Specs Universal: TBUS/DUAL PS/UNIV (80-001899) 100-240V AC, 50/60Hz, 5A Maximum 5A/2.5A per power outlet USA: TBUS/DUAL PS/US (80-001999) 100-240V AC, 50/60Hz, 5A Maximum 5A/2.5A per power outlet TBUS/DUAL PS/DE (80-002199) Germany and EU: 100-240V AC, 50/60Hz, 5A Maximum 5A/2.5A per power outlet TBUS/DUAL PS/FR (80-002299) France:...
-
Page 12: Power Cord Options
Power Cord Options You can order any of the following power cords to use with the TBUS: Power Cord Type Description 110V (North America) AC-POWER-CORD-6ft/110V 91-000099 125V (Japan) POWER-CORD-JAPAN-6ft/125V 91-000699 220V (Europe) Right Angle AC-POWER-CORD-RA/6ft/220V 91-000199 220V (Israel) AC-POWER-CORD-ISRAEL-6ft/220V 91-000999 250V (UK) AC-POWER-CORD-6ft(UK)/250V 91-000299... -
Page 13: Installing The Tbus-1A
1. Unscrew the two screws that fasten the blank plate to the inner frame and remove the blank plate. 2. Place the required Kramer insert over the opening, insert the two screws to fix the Kramer insert in place, and tighten them. -
Page 14: Figure 3: Tbus-1A Inner Frame (P/N: 80-000299)
Figure 3: TBUS-1A Inner Frame (P/N: 80-000299) Feature Function Blank Plates Four blank covers that can be replaced with wall plates as required Split Grommets Push apart slightly to insert cables Split Brackets Support the split grommet for the pass through-cables Power Socket Suitable for a single power socket Adjustable Height Screw... -
Page 15: Installing The Inner Frame
Installing the Inner Frame To install the inner frame: 1. Place the inner frame inside the TBUS-1A enclosure. 2. Set the required height using your fingers to bring the inner frame to the desired position, screw and tighten it in place using the height adjustment screws (supplied with the inner frame). -
Page 16: Inserting The Tbus-1A Through The Cut Out Opening
Take care not to damage the table. If needed, you can download a full-scale template from our Web site. Kramer Electronics is not responsible for any damage caused to the table. Inserting the TBUS-1A through the Cut Out Opening To install TBUS-1A in the opening: 1. -
Page 17: Connecting The Pass-Through Cables
Connecting the Pass-through Cables To insert the pass through cables (for example, to connect a laptop) do the following: 1. Remove the two screws attaching the split pass-through bracket. 2. Remove the split grommet. 3. Insert the cable through the rectangular opening. 4. -
Page 18: Connecting The Cables
Connecting the Cables When replacing blank inserts with connector inserts (for example, VGA, audio, HDMI and so on): 1. Insert the cables to their appropriate connectors from underneath. 2. Secure the cables to the tie holes on the TBUS-1A. Do not secure the cables too tightly or too loosely. Leave a small amount of slack. -
Page 19: Using The Tbus-1A
Using the TBUS-1A Once the TBUS-1A is installed, you can easily customize it to suit your own requirements by plugging in the required A/V equipment, as illustrated in the example in Figure Figure 7: TBUS-1A Boardroom Installation TBUS-1A - Using the TBUS-1A... -
Page 20: Technical Specifications Of The Assembled Tbus-1A
Technical Specifications of the Assembled TBUS-1A POWER SOURCE Single Socket Assemblies: (AC power limits): Universal 100-240V AC, 50/60Hz, 5A Maximum 5A per power outlet Fully compatible with power plugs in the UK, India, Italy and Denmark, as well as with the 2-prong Europlug. Partially compatible (if the polarity is reversed) with plugs in China, Switzerland, Israel and the USA. - Page 21 STORAGE HUMIDITY RANGE: 5 to 95% RHL, non-condensing DIMENSIONS: 22.1cm x 18.2cm x 13cm (8.17" x 5.88" x 5.13") W, D, H WEIGHT: TBUS-1A: 1.5kg (3.3lbs) approx. Table clamps: 0.26kg (0.57lbs) Metal template: 0.125kg (0.28lbs) ACCESSORIES: Power cord, six self-locking ties, metal template OPTIONS: Inner frames, passive wall plates and interfaces, power socket kits, power cord,...
- Page 22 1. Any product which is not distributed by us or which is not purchased from an authorized Kramer dealer. If you are uncertain as to whether a dealer is authorized, please contact Kramer at one of the agents listed in the Web site www.kramerelectronics.com.
- Page 23 For the latest information on our products and a list of Kramer distributors, visit our Web site where updates to this user manual may be found. We welcome your questions, comments, and feedback. Web site: www.kramerelectronics.com E-mail: info@kramerel.com SAFETY WARNING...
Need help?
Do you have a question about the MODULAR TBUS-1A and is the answer not in the manual?
Questions and answers