Table of Contents
Advertisement
Advertisement
Table of Contents

Subscribe to Our Youtube Channel
Related Manuals for Arctiko ULUF 120


Summary of Contents for Arctiko ULUF 120
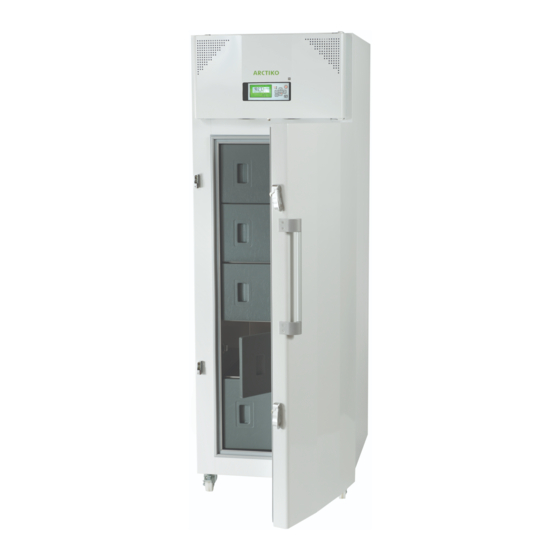
- Page 1 OPERATING INSTRUCTIONS ULUF - Models...
-
Page 2: Table Of Contents
INDEX ................PAGE Before using the appliance . -
Page 3: Before Using The Appliance
IMPORTANT Before using the appliance For safety reasons, the instructions should be read before the appliance is commissioned. The operating instructions should always be available and accessible to personnel! Safeguarding the environment 1. Packing The packing material is entirely recyclable and marked with recycling symbol. Please follow the local regulations for scrapping. -
Page 4: Installing The Freezer
Appliance with flammable refrigerant: As the appliance contains a mixture of refrigerants, which are flammable, it is essential to ensure that the refrigerant pipes are not damaged. Operating Instructions For safety reasons these operating instructions should be read before the freezer is commissioned. The operating instructions should always be available and accessible to personnel! The drawings and symbols in these operating instructions are for safety purposes when commissioning and using the freezer. -
Page 5: Before Commissioning
Warning Regulations require that this appliance be earthed: The manufacture declines all liability for injury to persons or animals and for damage to property resulting from failure to observe the above procedures and reminders. If the socket and plug are not of the same type either the socket or the plug must be replaced by a qualified electrician. -
Page 6: Control Panel
Control Panel (G-214 Controller) Alarm (red light) Alarm Battery (red light) On/off or exit menu Up, down, left, right button to scolls through the menu Return Enter (accesses the menu, accept) Mute alarm USB Data download Control Panel Description Push the UP button in order to generate 1. -
Page 7: Setting Icons
Setting icons Custom Settings Custom Settings Advanced Settings Advanced Settings Advanced Service Settings Advanced Service Settings Status Status Change / Reset password Change / Reset password... -
Page 8: Custom Settings
Custom Settings Enter password The menu Custom setting is protected with a password, wich is “0000” to access the menu. Under the menu Setpoint the temperature for the unit will be set. Under the menu Alarm Settings the below menu will be avaible. -
Page 9: Advanced Settings
Advanced Settings Enter password The menu Advanced Settings is protected with a password wich is “0000” to access the menu. The menu Calibration is the settings for offset of the tempe- rature in the display. The menu Automatic defrost is the setting of the time where a defrost automatic will be performed on the unit. -
Page 10: Service Settings
Service Settings Under the menu Service, there is information about the unit, which is important for service on the unit. Service The menu Compressor hours shows, how many hours the compressor has run. The menu Fan hours shows, how many hours the fan has run. -
Page 11: Status
Advanced Service Settings This menu is only used by the service department at the manufactorer. Advanced Service Settings Status The Current alarms shows the alarm, which have been on the unit with data and time. The Temp. last 24 hours shows the temperature of the unit the last 24 hours. -
Page 12: Download And Upload Data
Download Data Place the USB pen drive in the connection on the display and press the button right for read data from the unit to the USB pen. USB connected The Read data will be shown in the display when the data is loading to the USB pen drive. -
Page 13: Alarms On Display
Alarms on display Alarm icons The Door open alarm indicate, that the door is not correct closed The High temperature alarm indicate, that the temperature inside the unit is higher than permitted from setting of the unit. The Low temperature alarm indicate, that the temperature inside the unit is lower than permitted from setting of the unit. -
Page 14: Default Settings
Default settings ULUF 60/120/400/500/700/800: Description Arctiko default Customer settings settings 0000 Custom Settings (Password) Set point Freezer -40,0 Alarm Settings: Alarm delay Freezer 15 min Door open alarm Enable Freezer High temp. alarm Freezer Low temp. alarm Freezer Probe/eprom failure... - Page 15 Default settings ULUF 450/450-2M/550/550-2M/750/750-2M/850/850-2M: Description Arctiko default Customer settings settings 0000 Custom Settings (Password) Set point Freezer -80,0 Alarm Settings: Alarm delay Freezer 15 min Door open alarm Enable Freezer High temp. alarm Freezer Low temp. alarm Freezer Probe/eprom failure...
- Page 16 Default settings ULUF 15/65/125 : Description Arctiko default Customer settings settings 0000 Custom Settings (Password) Set point Freezer -80,0 Alarm Settings: Alarm delay Freezer 15 min Door open alarm Enable Freezer High temp. alarm Freezer Low temp. alarm Freezer Probe/eprom failure...
- Page 17 Default settings ULUF 490/590/890: Description Arctiko default Customer settings settings Custom Settings (Password) 0000 Set point -80,0 Freezer Alarm Settings: Alarm delay Freezer 15 min Door open alarm Enable Freezer High temp. alarm Freezer Low temp. alarm Freezer -100 Probe/eprom failure...
-
Page 18: The Cooling System
The cooling system The vaporiser is built into the shelves of the inner container. They will be approx -40°C (ULUF60/120/400/ 500/700/800), -86°C (ULUF15/65/125/450/550/750/850), -90°C (ULUF490/590/890), so there is a risk of frostbite if they are touched. Always use thermal gloves when touching the contents of the freezer. The condenser is placed on top of the cabinet behind the control panel. -
Page 19: Cleaning And Maintenance Of The Freezer
Cleaning and maintenance of the freezer: • Ice will form on the inner doors of the freezer. This ice should be removed with a scraper at regular intervals. (Remember safety gloves). • Ice on the inside of the cabinet should be removed as required. Take the contents out of the freezer. Pull out the plug and leave the door open until the ice can be removed. -
Page 20: Wiring Diagram
Wiring diagram ULUF 400/450/450-2M/500/550/550-2M/700/750/750-2M/ 800/850/850-2M PT1000 PT1000 PT1000... - Page 21 Wiring diagram for ULUF 15/60/65/120/125 PT1000 PT1000 PT1000...
- Page 22 Wiring diagram for ULUF 490/590/890 PT1000 PT1000 PT1000...
- Page 23 Notes:...
- Page 24 WWW.ARCTIKO.COM LAMMEFJORDSVEJ 5 DK-6715 ESBJERG N DENMARK TEL. +45 70 20 03 28 +45 70 20 03 29 INFO@ARCTIKO.COM 50 80 038-10-GB WWW.ARCTIKO.COM...
Need help?
Do you have a question about the ULUF 120 and is the answer not in the manual?
Questions and answers