Table of Contents
Advertisement
Advertisement
Table of Contents

Subscribe to Our Youtube Channel
Related Manuals for Arctiko ULTF 80


Summary of Contents for Arctiko ULTF 80
- Page 1 OPERATING INSTRUCTIONS ULTF 80 / 220 / 320 / 420...
-
Page 2: Table Of Contents
INDEX ............PAGE Before using the appliance . -
Page 3: Before Using The Appliance
IMPORTANT Before using the appliance For safety reasons, the instructions should be read before the freezer is commissioned. The operating instructions should always be available to and accessible for the personnel! The appliance concerned complies with the below Directives and standards except as refrigerant amount. -
Page 4: Operating Instructions
Operating Instructions Ultra Low Temperature Freezing Box For safety reasons, these operating instructions should be read before the freezer is commissioned. The operating instructions should always be available to the personnel! The drawings and symbols in these operating instructions are for safety purposes when commissioning and using the freezer. -
Page 5: Before Commissioning
Warning Regulations require that this appliance must be earthed: The manufacturer declines all liability for injury to persons or animals and for damage to property resulting from failure to observe the above procedures and reminders. If the socket and plug are not of the same type, please have the plug or socket replaced by a qualified electrician. -
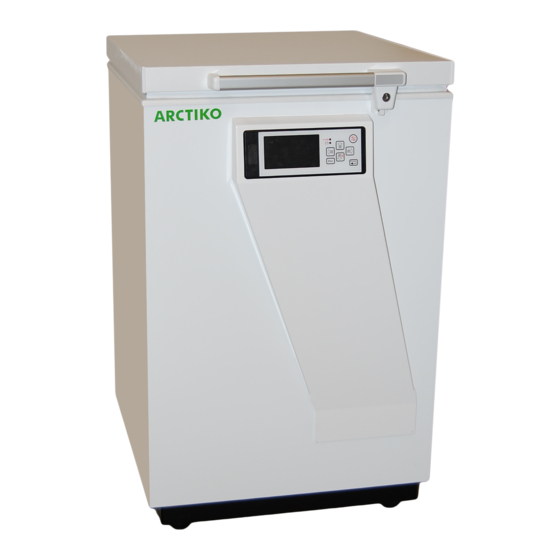
Page 6: Control Panel
CONTROL PANEL (Dixell XR30CX Controller) SET: To display target set point; in programming mode it selects a parameter or confirm an operation. (DEF): To start a manual defrost Figure 1 (UP): To see the max. stored temperature; in programming mode it browses the parameter codes or increases the displayed value. (DOWN): To see the min stored temperature;... -
Page 7: Main Functions
HOW TO RESET THE MAX AND MIN TEMPERATURE RECORDED 1. Hold press the SET key for more than 3s, while the max. or min temperature is displayed. (rSt message will be displayed) 2. To confirm the operation the “rSt” message starts blinking and the normal temperature will be displayed. MAIN FUNCTIONS HOW TO SEE THE SETPOINT 1. -
Page 8: How To Move A Parameter From The Hidden Menu To The First Level And Viceversa
3. Select the required parameter. 4. Press the “SET” key to display its value. 5. Use to change its value. 6. Press “SET” to store the new value and move to the following parameter. To exit: Press SET + wait 15s without pressing a key. NOTE1: if none parameter is present in Pr1, after 3s the “noP”... -
Page 9: Parameters
PARAMETERS REGULATION Differential: (0,1 ÷ 25,5°C / 1÷255 °F) Intervention differential for set point. Compressor Cut IN is Set Point + differential (Hy). Compressor Cut OUT is when the temperature reaches the set point. Minimum set point: (-100°C ÷ SET; [-148F ÷ SET): Sets the minimum value for the set point. Maximum set point: (SET÷150°C/ SET÷302°F). -
Page 10: Alarms
ALARMS ALC Temperature alarms configuration: (Ab; rE) Ab= absolute temperature: alarm temperature is given by the ALL or ALU values. rE = temperature alarms are referred to the set point. Temperature alarm is enabled when the temperature exceeds the “SET+ALU” or “SET-ALL” values. ALU MAXIMUM temperature alarm: (SET÷150°C;... -
Page 11: Power Failure
nPS Pressure switch number: (0 ÷15) Number of activation of the pressure switch, during the “did” interval, before signalling the alarm event (I2F= PAL). If the nPS activation in the did time is reached, switch off and on the instrument to restart normal regulation. -
Page 12: Alarm Signals
ALARM SIGNALS ALARM RECOVERY Probe alarm “P1” starts some seconds after the fault in the related probe; it automatically stops some seconds after the probe restarts normal operation. Check connections before replacing the probe. Temperature alarms “HA” and “LA” automatically stop as soon as the thermostat temperature returns to normal values. -
Page 13: Connections
CONNECTIONS XR30CX: 20A COMPRESSOR 12Vac/dc supply: connect to the terminals 7 and 8. 24Vac/dc supply: connect to the terminals 7 and 8. 120Vac supply: connect to the terminals 7 and 8. -
Page 15: Relocating Or Moving The Freezer
Relocating or moving the freezer Never leave the freezer to others without instructing these people in its use and the safety regulations described in the operating instructions. Always let an authorised electrician install the freezer. (Remember to wait for one hour before restarting it). •... -
Page 16: Wiring Diagram Ultf80
Wiring diagram for ULTF80... -
Page 17: Wiring Diagram Ultf220/320/420
Wiring diagram for ULTF 220 / 320 / 420... - Page 20 WWW.ARCTIKO.COM LAMMEFJORDSVEJ 5 DK-6715 ESBJERG N DENMARK TEL. +45 70 20 03 28 +45 70 20 03 29 INFO@ARCTIKO.COM 50 80 010-05-GB WWW.ARCTIKO.COM...
Need help?
Do you have a question about the ULTF 80 and is the answer not in the manual?
Questions and answers
Good afternoon Mr/Mrs, We get a problem with our ULTF 80, in every 2 weeks operation time, the temperature chamber is out of range, overheat. The compressor & condensor is normal. What should we do? Thank you
If the Arctiko ULTF 80 temperature chamber overheats every two weeks despite normal compressor and condenser operation, check the thermostat probe calibration for possible offset and adjust it within the range of -12.0 to 12.0°C. Also, verify if the compressor ON time during continuous cycle (CCt) or faulty probe settings (COn and COF) are causing extended compressor activity. If the issue persists, inspect temperature readings from the internal sensors and ensure proper installation and operation.
This answer is automatically generated
@Mr. Anderson Thank you for your response. We have tried re-adjusting the offset from -5.5 to -7.5. Since we are using the G-214 controller, we couldn't find the "****" and "COF" settings, so we are unable to verify the compressor's timing. Permit me to ask again, Mr. Anderson: 1. Current condition: Setpoint = -80°C, Hysteresis = 2°C. However, when the compressor turns on at -79°C, the temperature rises to -76°C. Is this behavior considered normal? 2. In installations, is it acceptable to weld the suction (low-pressure) and discharge (high-pressure) lines together? Or is this condition intended to protect the compressor from excessively low temperatures?(attached) Thank u very much