Table of Contents
Advertisement
Advertisement
Table of Contents

Related Manuals for Keysight Technologies 86120D


Summary of Contents for Keysight Technologies 86120D
- Page 1 Keysight 86120D and 86122C Multi-Wavelength Meters User’s Guide...
- Page 2 THE IMPLIED WARRANTIES OF The license set forth in the EULA represents MERCHANTABILITY AND FITNESS FOR A the exclusive authority by which the U.S. PARTICULAR PURPOSE. KEYSIGHT SHALL government may use, modify, distribute, or Keysight 86120D and 86122C Multi-Wavelength Meters User’s Guide...
-
Page 3: Table Of Contents
Step 1. Consider Measurement Limitations Step 2. Select Basic Measurement Setup Parameters Step 3. Define Laser-Line Peaks Step 4. Make Measurements Step 5. Adjust the Graph to Your Preference Step 6. Save Measurement Results Keysight 86120D and 86122C Multi-Wavelength Meters User’s Guide... - Page 4 Graphs and Tables Front Panel Buttons Menus The File menu The View menu The Setup menu The Measure menu The Utilities menu The Apps menu The Help menu Dialog Box Operation Hard Drive Recovery Keysight 86120D and 86122C Multi-Wavelength Meters User’s Guide...
- Page 5 How to clean instruments with a fixed connector interface Additional Cleaning Information Other Cleaning Hints 4 Specifications and Regulatory Information Definitions of Terms Specifications Compliance with German Noise Requirements Compliance with Canad ian EMC Requirements Declaration of Conformity Keysight 86120D and 86122C Multi-Wavelength Meters User’s Guide...
-
Page 7: Getting Started
Keysight 86120D and 86122C Multi-Wavelength Meters User’s Guide Getting Started General Safety Considerations Setting Up the Multi-Wavelength Meter / 14 Making Measurements / 39 Returning the Instrument for Service / 59 Keysight Technologies Service Offices / 62... -
Page 8: General Safety Considerations
Do not negate this protective action by the using an extension cord without a protective conductor. Never look directly into the end of a fiber or a connector, unless you are WARNING absolutely certain that there is no signal in the fiber. Keysight 86120D and 86122C Multi-Wavelength Meters User’s Guide... -
Page 9: Instrument Markings
This text denotes the instrument is an Industrial Scientific and Medical Group 1 Class A product. This marking is for China only and states compliance with the Chinese Toxic or Hazardous Substances and Elements requirements. General Recycling Mark. Keysight 86120D and 86122C Multi-Wavelength Meters User’s Guide... - Page 10 To prevent electrical shock, disconnect the instrument from mains WARNING before cleaning. Use a dry cloth or one slightly dampened with water to clean the external case parts. Do not attempt to clean internally. Keysight 86120D and 86122C Multi-Wavelength Meters User’s Guide...
- Page 11 Do not try to access or make changes to the Windows Operating system. Repairs caused by the improper use of the Multi-Wavelength Meter will not be covered under warranty. Keysight 86120D and 86122C Multi-Wavelength Meters User’s Guide...
- Page 12 There is no output laser aperture The Keysight 86120D and 86122C do not have an output laser aperture. However, light less than 1 nW escapes out of the front- panel OPTICAL INPUT connector. Operator maintenance or precautions are not necessary to maintain safety.
- Page 13 Laser Class according to IEC 60825-1 (2014) Class 1 Max. permissible CW output power 0.39 mW Max. CW output power is defined as the highest possible optical power that the laser source can produce at its output connector. Keysight 86120D and 86122C Multi-Wavelength Meters User’s Guide...
-
Page 14: Setting Up The Mul Ti-Wavelength Meter
Keep the shipping container and cushioning material until you have NOTE inspected the contents of the shipment for completeness and have inspected the instrument. Inspect the shipment Figure 1 • Inspect the shipping container for damage. • Inspect the instrument. Keysight 86120D and 86122C Multi-Wavelength Meters User’s Guide... - Page 15 Commercial Calibration Certificate with Test Data 86122C-UK6 Table 3 Instrument Options Option Description 86120D Multi-Wavelength Meter, 700 nm to 1650 nm, +/-1.5 ppm Optical Connectors 86120D-021 Straight Contact Interface-PC 86120D-022 Angled Contact Interface-APC Keysight 86120D and 86122C Multi-Wavelength Meters User’s Guide...
- Page 16 Rack Handle Kit 86122A-1CP Mount Kit plus Handles Table 5 Fiber-Optic Adapters Keysight Part Number Description 81000FI Connector Interface FC/PC/SPC 81000HI Connector Interface E-2000(PHYSICAL CONTACT) 81000KI Connector Interface SC 81000LI Connector Interface LC Keysight 86120D and 86122C Multi-Wavelength Meters User’s Guide...
-
Page 17: Step 2. Consider Environmental Specifications
< 90% R.H. at +65 °C for 24 hrs. < 95% R.H. at +40 °C for 5 day cycle Humidity is type tested. Type tested means tested, but not warranted, for NOTE continuous operation. Keysight 86120D and 86122C Multi-Wavelength Meters User’s Guide... - Page 18 14.5 kg (32 lb) Dimensions Height 138 mm (5.2 in) 138 mm (5.2 in) Width 425 mm (16.7 in) 425 mm (16.7 in) Depth 520 mm (20.5 in) 520 mm (20.5 in) Keysight 86120D and 86122C Multi-Wavelength Meters User’s Guide...
-
Page 19: Step 3. Configure For Bench Top Or Rack Mount Use
Ensure that the rack mount kit is complete If any items are damaged or missing from the kit, contact the nearest NOTE Keysight Technologies sales or service office to order a replacement kit. Items within the kit are not individually available. Table 8... - Page 20 Getting Started Figure 2 Front Handle Assembly are included with Option 86122A-1CP only. NOTE Keysight 86120D and 86122C Multi-Wavelength Meters User’s Guide...
-
Page 21: Step 4. Connect A Keyboard And Mouse (Optional)
USB mouse and keyboard with the USB port in the front panel of the instrument. A keyboard and mouse are not supplied with the multi-wavelength NOTE meter. Do not stack other objects on the keyboard; this will cause self-test NOTE failures at power-on Keysight 86120D and 86122C Multi-Wavelength Meters User’s Guide... -
Page 22: Step 5. Connect The Line Cord
AC power system. Crest factor (ratio of peak voltage to rms.) should be typically within the range of 1.3 to 1.6 at 10% of the nominal rms. mains voltage. Keysight 86120D and 86122C Multi-Wavelength Meters User’s Guide... -
Page 23: Step 6. Turn On The Line Power
“click,” please remember that you can always touch with your finger or stylus instead. The display will always function as a touch screen, even when a mouse NOTE and keyboard are connected. Keysight 86120D and 86122C Multi-Wavelength Meters User’s Guide... - Page 24 Getting Started Avoid touching the screen with a sharp object, as this could result in CAUTION damage to the display. Use your finger or the supplied stylus. Figure 5 Keysight 86120D and 86122C Multi-Wavelength Meters User’s Guide...
-
Page 25: Step 7. Calibrate The Touch Screen (Optional)
Touch the center of the X with your finger or a stylus. Several X will appear on different positions of the display screen. Touch them precisely as the first one. When the display is calibrated, the touch screen configuration utility closes. Keysight 86120D and 86122C Multi-Wavelength Meters User’s Guide... - Page 26 This will prevent the touch screen from being rendered useless due to a poor calibration. In case a failed touch screen calibration leads to a non-working condition, you can restart the touch screen calibration by using a USB mouse. Keysight 86120D and 86122C Multi-Wavelength Meters User’s Guide...
-
Page 27: Step 8. Set The Time And Date
Click the up or down arrows next to the time and date text boxes until the desired number is displayed. Click Set Time & Date Now to apply the changes and close the dialog box. Figure 8 Keysight 86120D and 86122C Multi-Wavelength Meters User’s Guide... -
Page 28: Step 9. Set The System Standby Mode
On the Setup menu, click Preferences. Select a time-out period from the System Standby list. You can choose 15 min., 30 min., 1 hr., 4 hrs., or Never. Selecting Never disables this feature. Keysight 86120D and 86122C Multi-Wavelength Meters User’s Guide... - Page 29 To reactivate the display • Touch the display screen or a front panel button • Move the mouse or press a key on the external keyboard (if attached) • Send a remote command Keysight 86120D and 86122C Multi-Wavelength Meters User’s Guide...
-
Page 30: Step 10. Add A Printer
Use of a printer with the instrument is optional. Follow the steps of your printer’s documentation. The multi-wavelength meter only supports USB and LAN printers (no NOTE parallel printer port). In the File menu of the multi-wavelength meter software, click Print Setup. Figure 10 Keysight 86120D and 86122C Multi-Wavelength Meters User’s Guide... - Page 31 Figure 11 b Using the pan and scan function, the lower end of the Printer Properties window becomes accessible. c Click OK /Cancel/Apply button to confirm, cancel or apply your changes. Keysight 86120D and 86122C Multi-Wavelength Meters User’s Guide...
- Page 32 Figure 12 Installation of programs other than drivers necessary for your printer is CAUTION not recommended or supported. Installation of additional software could render the 86120D or 86122C multi-wavelength meter software inoperable. Keysight 86120D and 86122C Multi-Wavelength Meters User’s Guide...
-
Page 33: Step 11. Change Region And Language Settings
Enter the protected functions password “exit to windows” and click Activate. Figure 13 From the Windows 7 Start menu, open the Control Panel. In the Control Panel, click Clock, Language and Region. Keysight 86120D and 86122C Multi-Wavelength Meters User’s Guide... - Page 34 Getting Started Figure 14 Keysight 86120D and 86122C Multi-Wavelength Meters User’s Guide...
- Page 35 Figure 15 b The Windows 7 task-bar may come up. In that case, move the cursor slightly upwards until the task-bar disappears, and the lower edge of the active window becomes visible again. Keysight 86120D and 86122C Multi-Wavelength Meters User’s Guide...
- Page 36 Getting Started Figure 16 c Click OK /Cancel/Apply button to confirm, cancel or apply your changes. Keysight 86120D and 86122C Multi-Wavelength Meters User’s Guide...
- Page 37 Getting Started Figure 17 Keysight 86120D and 86122C Multi-Wavelength Meters User’s Guide...
-
Page 38: Step 12. Avoid Costly Repairs
63 will help you get started using this instrument. • Refer to the Help. The Help opens the user’s and programmer’s guide in PDF format. • Visit our website at http://www.keysight.com. Use the keyword "86120D" or “86122C” in your search. Keysight 86120D and 86122C Multi-Wavelength Meters User’s Guide... -
Page 39: Making Measurements
+10 dBm is the maximum total displayed input power. Do not exceed +18 CAUTION dBm source power. The Keysight 86120D or 86122C’s input circuitry can be damaged when total input power exceeds this level. Figure 19 Keysight 86120D and 86122C Multi-Wavelength Meters User’s Guide... - Page 40 Always remove both ends of fiber-optic cables from any instrument, WARNING system, or device before visually inspecting the fiber ends. Disable all optical sources before disconnecting fiber-optic cables. Failure to do so may result in permanent injury to your eyes. Keysight 86120D and 86122C Multi-Wavelength Meters User’s Guide...
- Page 41 The maximum input range for 86120D is 700-1700 nm and the maximum input range for is 700 - 1650 nm. • Laser line widths are assumed to be less than 10 GHz for 86120D, and less than 2.5 GHz for 86122C. Keysight 86120D and 86122C Multi-Wavelength Meters User’s Guide...
-
Page 42: Step 2. Select Basic Measurement Setup Parameters
Select the Units The instrument can display wavelength and amplitude values in several types of measurement units. Press and click . Click the Units tab, and select the wavelength and amplitude units. Click Close. Keysight 86120D and 86122C Multi-Wavelength Meters User’s Guide... - Page 43 Narrowband devices include DFB lasers and modes of Fabry-Perot lasers. Broadband devices include LEDs, optical filters, and chirped lasers.4 Press and click Click the Device Type tab, and select Narrowband or Broadband. Click Close. Keysight 86120D and 86122C Multi-Wavelength Meters User’s Guide...
- Page 44 0.3 seconds (86122C Option 110) or every 0.5 seconds (86122C Option 100) or every 0.6 seconds (86120D). This is useful if you want the data to be continuously updated. You can also set up data logging to perform measurement sweeps at any desired interval.
-
Page 45: Step 3. Define Laser-Line Peaks
Response 2 is not identified as a peak because it is below the peak threshold. • Responses 4 and 5 are identified as one peak laser line. This is because the minimum point between 4 and 5 does not drop to the peak excursion limit. Keysight 86120D and 86122C Multi-Wavelength Meters User’s Guide... - Page 46 Click Close. Figure 26 Use Wavelength Limiting to Define Peaks Press and click Click the Wavelength Limiting tab. Select On Click the Limit Start Wavelength box and enter the start wavelength value. Keysight 86120D and 86122C Multi-Wavelength Meters User’s Guide...
- Page 47 Getting Started Click the Limit Stop Wavelength box and enter the stop wavelength value. Click Close. Figure 27 Keysight 86120D and 86122C Multi-Wavelength Meters User’s Guide...
-
Page 48: Step 4. Make Measurements
Select a channel as the reference by clicking in the “Ref” column of the desired row. To determine channel spacing from the reference, simply read the relative wavelength values in the “Delta WL” column. Keysight 86120D and 86122C Multi-Wavelength Meters User’s Guide... - Page 49 Laser Drift Laser drift can be easily measured by using the drift application. Press . and click Signal-to-Noise Ratio Signal-to-noise ratio can be easily measured by using the OSNR application. Press and click Keysight 86120D and 86122C Multi-Wavelength Meters User’s Guide...
- Page 50 10-dB attenuator on the front-panel connector, you should enter a power offset value of +10 dB. Negative values can also be entered if you connect an amplifier instead of an attenuator. Keysight 86120D and 86122C Multi-Wavelength Meters User’s Guide...
-
Page 51: Step 5. Adjust The Graph To Your Preference
Figure 28 • Select an x-axis control from the Graph Control list. Click anywhere on the graph and drag to the left or right. Keysight 86120D and 86122C Multi-Wavelength Meters User’s Guide... - Page 52 Getting Started Figure 29 Figure 30 Keysight 86120D and 86122C Multi-Wavelength Meters User’s Guide...
- Page 53 If ClickZoom is enabled, click any cell in the “Wavelength” column of the table.The peak marker will move the corresponding peak wavelength in the graph, and the graph will zoom in to that peak. To zoom out, click the “Wavelength” cell again. Keysight 86120D and 86122C Multi-Wavelength Meters User’s Guide...
- Page 54 Select Peak Marker from the Graph Control list. Click close to a peak on the graph. • Select Peak Marker from the Graph Control list. Click anywhere on the graph and drag to the left or right. Keysight 86120D and 86122C Multi-Wavelength Meters User’s Guide...
- Page 55 Select Trace Marker from the Graph Control list. Click any point on the graph. • Select Trace Marker from the Graph Control list. Click anywhere on the graph and drag to the left or right. Keysight 86120D and 86122C Multi-Wavelength Meters User’s Guide...
-
Page 56: Step 6. Save Measurement Results
Save Meas Data dialog box. Select a file name and click Save. Print Data Figure 35 Press to open the Print Setup dialog box. Select the Default Printer and Printout Type, and click Print. Keysight 86120D and 86122C Multi-Wavelength Meters User’s Guide... - Page 57 Getting Started Save Screen Image Figure 36 On the File menu, point to Save, and then click Save Screen Image. Select a file name and click Save. Figure 37 Keysight 86120D and 86122C Multi-Wavelength Meters User’s Guide...
- Page 58 • To log data for a turn-on transient test (to observe how lasers change during warm-up), set the data logging duration to 5 minutes, and the interval to 0 time (free run). Keysight 86120D and 86122C Multi-Wavelength Meters User’s Guide...
-
Page 59: Returning The Instrument For Service
Getting Started Returning the Instrument for Service The instructions in this section show you how to properly package the instrument for return to a Keysight Technologies service office. For a list ? of offices, refer to Keysight Technologies Service Offices on page 62. - Page 60 • • Surround the equipment with approximately 7 cm (3 inches) of packing material, • to protect the instrument and prevent it from moving in the carton. If packing Keysight 86120D and 86122C Multi-Wavelength Meters User’s Guide...
- Page 61 • and prevent it from moving in the carton. Seal the carton with strong nylon adhesive tape. Mark the carton “FRAGILE, HANDLE WITH CARE”. Retain copies of all shipping papers. Keysight 86120D and 86122C Multi-Wavelength Meters User’s Guide...
-
Page 62: Keysight Technologies Service Offices
• Visit http://www.keysight.com and click Contact Us. Service Center Before returning an instrument for service, you must first call the Keysight Technologies Instrument Support Center. • Visit http://www.keysight.com and click Contact Us. Keysight 86120D and 86122C Multi-Wavelength Meters User’s Guide... -
Page 63: Using The Multi-Wavelength Meter
Keysight 86120D and 86122C Multi-Wavelength Meters User’s Guide Using the Multi-Wavelength Meter Introduction / 64 Differences Between the 86120D, 86122C and Previous Models / 65 Front and Rear Panel Features / 68 Main Screen Layout / 70 Front Panel Buttons... -
Page 64: Introduction
Using the 86122C Introduction The Keysight 86120D and 86122C Multi-Wavelength Meters measure the wavelength and optical power of laser light in the 1270–1650 nm wavelength range (700-1700 nm for 86120D). Because the instruments simultaneously measure multiple laser lines, you can characterize dense-wavelength-division-multiplexed (DWDM) systems and the multiple lines of Fabry-Perot lasers. -
Page 65: Differences Between The 86120D, 86122C And Previous Models
86120D and 86122C, use the new parameter EXT1 (CALC1:TRAN:FREQ:POIN EXT1). • Elevation: There is no need to enter an elevation for the 86120D and 86122C because they have an internal weather station. The command SENS:CORR:ELEV remains for backward compatibility, but has no effect on the 86120D and 86122C. -
Page 66: Differences In Remote Commands
• Peak threshold: The 86120C peak threshold could only be set to a relative value. The 86120D and 86122C peak threshold can be set to a relative or absolute value. The command CALC2:PTHR:MOD allows you to select between an absolute or relative peak threshold, and CALC2:PTHR:ABS allows you to set the absolute value. - Page 67 Using the 86122C • CONF: For the 86120C, this command query returned the setting to be used for the default FETCH or READ commands. For the 86120D and 86122C, this command query returns the current configuration of the instrument. •...
-
Page 68: Front And Rear Panel Features
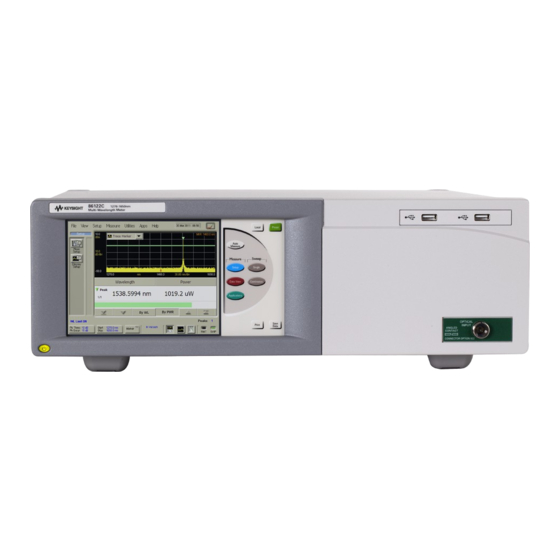
USB: For a USB keyboard and mouse. USB and LAN printers only (no parallel printer port) LAN: A keyboard must be used to set up LAN connectivity GPIB: Fully programmable, complies with IEEE 488.2 Keysight 86120D and 86122C Multi-Wavelength Meters User’s Guide... - Page 69 Using the 86122C Front Panel Figure 40 Line button Touch screen display Front panel buttons Two USB 2.0 ports Optical Input: 9/125 mm single-mode fiber Keysight 86120D and 86122C Multi-Wavelength Meters User’s Guide...
-
Page 70: Main Screen Layout
Messages also appear to inform you of errors that may have occurred. Marker Button: Click this button to enable or disable the trace marker. Keysight 86120D and 86122C Multi-Wavelength Meters User’s Guide... - Page 71 For example, • data logging • listing files in MMEMory subsystem commands • saving files • saving screen images • printing 15 Instrument Menus: The instrument menus provide access to all functions. Keysight 86120D and 86122C Multi-Wavelength Meters User’s Guide...
-
Page 72: Graphs And Tables
For more information, refer to Peak Criteria. • E: The peak marker is always displayed and allows you to associate a peak wavelength in the graph with a row of peak data in the table. Keysight 86120D and 86122C Multi-Wavelength Meters User’s Guide... -
Page 73: Front Panel Buttons
Press this button to return control of the instrument to the front panel. The Local and AC power buttons are the only front panel controls active when the instrument is in remote operation. Keysight 86120D and 86122C Multi-Wavelength Meters User’s Guide... - Page 74 Press this button to place the instrument in single sweep mode and initiate a single sweep of the instrument. Press this button to place the instrument in continuous sweep mode and initiate sweeping. Keysight 86120D and 86122C Multi-Wavelength Meters User’s Guide...
- Page 75 Press this button to open the Save Meas Data dialog box. Select a file name and click Save. Press this button to open the Print Setup dialog box. Select the Default Printer and Printout Type, and click Print. Keysight 86120D and 86122C Multi-Wavelength Meters User’s Guide...
-
Page 76: Menus
The instrument menus provide access to all functions. This section shows the layout of each menu. For detailed information on each of these menus, refer to the Help. The File menu Figure 44 Keysight 86120D and 86122C Multi-Wavelength Meters User’s Guide... -
Page 77: The View Menu
Using the 86122C The View menu Figure 45 Keysight 86120D and 86122C Multi-Wavelength Meters User’s Guide... -
Page 78: The Setup Menu
Using the 86122C The Setup menu Figure 46 The Measure menu Figure 47 Keysight 86120D and 86122C Multi-Wavelength Meters User’s Guide... -
Page 79: The Utilities Menu
Using the 86122C The Utilities menu Figure 48 The Apps menu Figure 49 The Help menu Figure 50 Keysight 86120D and 86122C Multi-Wavelength Meters User’s Guide... -
Page 80: Dialog Box Operation
Dialog boxes allow real-time changes to the instrument's settings. Because of this, the dialog boxes do not have OK, Apply, and Cancel buttons. When you have finished changing a setting, simply click Close. Figure 51 Keysight 86120D and 86122C Multi-Wavelength Meters User’s Guide... -
Page 81: Hard Drive Recovery
Press the 2 key for “Recover the original factory system image”. Press <Enter> key. A warning dialog will appear. Press <Enter> key to start the recovery. When completed the instrument will restart. 10 Check the correct operation of the recovered system. Keysight 86120D and 86122C Multi-Wavelength Meters User’s Guide... - Page 83 Keysight 86120D and 86122C Multi-Wavelength Meters User’s Guide Cleaning Information Cleaning Instructions / 84 Safety Precautions / 84 Why is it important to clean optical devices? / 84 What do I need for proper cleaning? / 85 Preserving Connectors / 90...
-
Page 84: Cleaning Instructions
If you are unsure of the correct cleaning procedure for your optical device, we recommend that you first try cleaning a dummy or test device. Keysight Technologies assume no liability for the customer’s failure to comply with these requirements. Safety Precautions Please follow the following safety rules: •... -
Page 85: What Do I Need For Proper Cleaning
• Compressed air Dust and shutter caps All of Keysight Technologies’ light-wave instruments are delivered with either laser shutter caps or dust caps on the light-wave adapter. Any cables come with covers to protect the cable ends from damage or contamination. - Page 86 Soft tissues These are available from most stores and distributors of medical and hygiene products such as supermarkets or chemists' shops. Keysight 86120D and 86122C Multi-Wavelength Meters User’s Guide...
- Page 87 It is essential that your compressed air is free of dust, water and oil. Only use clean, dry air. If not, this can lead to filmy deposits or scratches on the surface of your connector. This will reduce the performance of your transmission system. Keysight 86120D and 86122C Multi-Wavelength Meters User’s Guide...
- Page 88 An ultrasonic bath will gently remove fat and other stubborn dirt from your optical devices. This helps increase the life span of the optical devices. Only use isopropyl alcohol in your ultrasonic bath, as other solvents may damage. Keysight 86120D and 86122C Multi-Wavelength Meters User’s Guide...
- Page 89 Take care never to look into the end of a fiber or any other optical component, when they are in use. This is because the laser can seriously damage your eyes. Keysight 86120D and 86122C Multi-Wavelength Meters User’s Guide...
-
Page 90: Preserving Connectors
Keep the caps on the equipment always when it is not in use. All of Keysight Technologies’ lightwave instruments and accessories are shipped with either laser shutter caps or dust caps. If you need additional or replacement dust caps, contact your nearest Keysight Technologies Sales/Service Office. - Page 91 To assess the projection of the emitted light beam you can use an infrared sensor card. Hold the card approximately 5 cm from the output of the connector. The invisible emitted light is project onto the card and becomes visible as a small circular spot. Keysight 86120D and 86122C Multi-Wavelength Meters User’s Guide...
-
Page 92: How To Clean Connector Interfaces
CAUTION pipe-cleaner are hard and can damage the interface. Do not use pipe-cleaners on optical head adapters, as the hard core of normal pipe cleaners can damage the bottom of an adapter. Keysight 86120D and 86122C Multi-Wavelength Meters User’s Guide... -
Page 93: How To Clean Bare Fiber Adapters
They can deposit dissolved dirt in the groove, which can then dirty the surface of an inserted fiber. Preferred Procedure Use the following procedure on most occasions. Blow away any dust or dirt with compressed air. Keysight 86120D and 86122C Multi-Wavelength Meters User’s Guide... -
Page 94: How To Clean Instruments With A Fixed Connector Interface
This will degrade the performance of your transmission system. Never try to open the instrument and clean the optical block by yourself, because it is easy to scratch optical components, and cause them to be misaligned. Keysight 86120D and 86122C Multi-Wavelength Meters User’s Guide... -
Page 95: Additional Cleaning Information
They are liable to dirty the detector and impair its performance. They may also alter the property of depiction of your optical device, thus rendering your measurements inaccurate. Keysight 86120D and 86122C Multi-Wavelength Meters User’s Guide... - Page 96 Never open the instruments as they can be damaged. Opening the instruments puts you in danger of receiving an electrical shock from your device, and renders your warranty void. Keysight 86120D and 86122C Multi-Wavelength Meters User’s Guide...
- Page 97 Keysight 86120D and 86122C Multi-Wavelength Meters User’s Guide Specifications and Regulatory Information Definitions of Terms / 98 Specifications / 100 Compliance with German Noise Requirements / 103 Compliance with Canadian EMC Requirements / 103 Declaration of Conformity / 103...
-
Page 98: Definitions Of Terms
Linearity indicates the maximum power error in measuring the change in power of one laser line. • Polarization dependence indicates the maximum displayed power variation as the polarization of the input signal is varied. Keysight 86120D and 86122C Multi-Wavelength Meters User’s Guide... - Page 99 Measurement cycle time Measurement cycle time refers to the cycle time when measuring wavelength and power of laser lines. Specific advanced applications may require longer cycle times. Keysight 86120D and 86122C Multi-Wavelength Meters User’s Guide...
-
Page 100: Specifications
–32 dBm (1270 to 1600 nm) –30 dBm (1600 to 1650 nm) –22 dBm (1600 to 1650 nm) Multiple lines input 30 dB below total input power, but not less than single line input sensitivity Selectivity Keysight 86120D and 86122C Multi-Wavelength Meters User’s Guide... - Page 101 > 35 dB with 100 averages lines above –25 dBm > 27 dB with 100 averages Drift Fabry-Perot characterization amplitude, total power, sigma Additional features instrument states. Inputs/outputs Optical input Rear panel connectors Keysight 86120D and 86122C Multi-Wavelength Meters User’s Guide...
- Page 102 Dimensions (H x W x D) 138 mm x 425 mm x 520 mm (5.2 in x 16.7 in x 20.5 in) 14.5 kg (32 lb) Power requirements 50 Hz / 60 Hz Maximum power Keysight 86120D and 86122C Multi-Wavelength Meters User’s Guide...
-
Page 103: Compliance With German Noise Requirements
This ISM device complies with Canadian ICES-001. Cet appareil ISM est conforme a la norme NMB-001 du Canada. Declaration of Conformity For the latest Declarations of Conformity for Keysight products, browse the link: http://www.keysight.com/go/conformity Keysight 86120D and 86122C Multi-Wavelength Meters User’s Guide... - Page 104 This information is subject to change without notice. © Keysight Technologies 2017 Edition 4.0, October 2017 www.keysight.com...
Need help?
Do you have a question about the 86120D and is the answer not in the manual?
Questions and answers