
Related Manuals for Modern Forms VORTEX FR-W1810


Summary of Contents for Modern Forms VORTEX FR-W1810
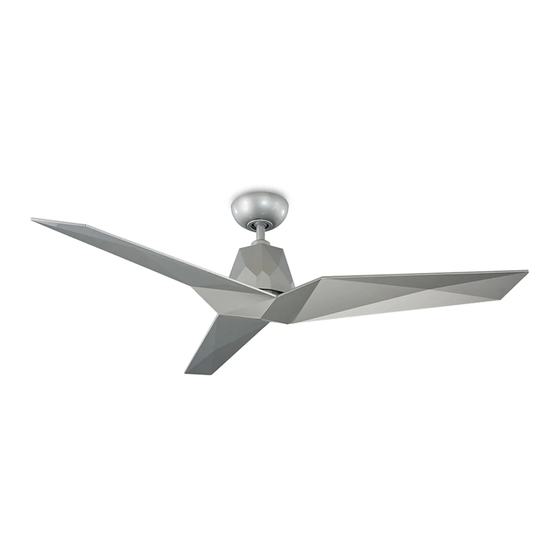
- Page 1 V O R T EX FR- W1 8 10 INSTALLATION INSTRUCTIONS SMART MOTOR works with the modernforms.com Google Assistant...
- Page 2 All Modern Forms Smart Fans are: SMART Durably fi nished and Rated for Able to coordinate with smart Wet location-listed to the strictest interior and exterior use devices for voice-activated and ETL/cETL safety regulations thermostat control MOTOR Quiet, reliable, and up to 70% Wi-Fi and RF enabled for more effi...
-
Page 3: Table Of Contents
TABLE OF CONTENTS 1. SAFETY RULES .............................4 2. FTC ENERGY GUIDE & SPECIFICATION ....................5 3. TOOLS AND MATERIALS REQUIRED ......................5 4. PACKAGE CONTENTS ..........................6 5. MOUNTING OPTIONS ..........................8 6. INSTALLING THE MOUNTING BRACKET ....................9 7. ASSEMBLING THE FAN BLADES ......................10 8. -
Page 4: Safety Rules
NOTE: A maximum of 12 fans can operate on a circuit through an on/ off switch or a breaker when utilizing the Modern Forms app for the fan After making electrical connections, spliced conductors should be control (without the wall control in the circuit). -
Page 5: Ftc Energy Guide & Specification
2. FTC ENERGY GUIDE & SPECIFICATION FAN SIZE VOLTS N.W. G.W. STANDARD ELECTRICITY AIR FLOW ENERGY FAN EFFICACY (lbs) (lbs) COSTS* High Speed 7742 CFM $8/yr 269.2 CFM/W Vortex 60” 6.44 9.95 Weighted Average 4642 CFM $6/yr 202 CFM/W NOTE: These are approximate measures. They do not include amps and wattage used by the light kit. 3. -
Page 6: Package Contents
4. PACKAGE CONTENTS Unpack your fan and check the contents. You should have the following items: REF. DESCRIPTION PART NO. Blade Set of 3 RPL-F1810-60-BD-** Hanger Assembly RPL-HGR-ASM-** - Mounting Bracket - Downrod Assembly Canopy w/ Trim Canopy Ring RPL-CAN-RND-** Coupling Cover RPL-COU-CVR-** Motor Assembly... - Page 7 4. PACKAGE CONTENTS (cont.) F R- W1 8 1 0...
-
Page 8: Mounting Options
5. MOUNTING OPTIONS Support Brace Joist If there isn’t an existing UL/cUL listed mounting box, then read the following instructions. Disconnect the power by removing fuses or turning off circuit breakers. Outlet box Secure the outlet box directly to the building structure. Use appropri- ate fasteners and building materials. -
Page 9: Installing The Mounting Bracket
6. INSTALLING THE MOUNTING BRACKET REMEMBER to disconnect the power by removing fuses or turning off circuit breakers. Follow the steps below to hang your fan properly: Disconnect power to the fan location. A licensed electrician must install the fan if required by your local electrical code (Fig. 5). FIGURE 5 Remove 1 of 2 screws from the bottom of the mounting bracket and loosen the other screws. -
Page 10: Assembling The Fan Blades
7. ASSEMBLING THE FAN BLADES FIGURE 8 Assemble the three blades together using the blade collector ring and the screws provided (Fig. 8 & 9). FIGURE 9 8. ATTACHING THE MOTOR Attach blade assembly to the motor assembly as shown with provided blade screws (Fig. -
Page 11: Hanging The Fan
9. HANGING THE FAN Downrod Assembly Remove the clevis pin and cotter pin and loosen the two collar screws from the motor collar (Fig.11). Feed motor wires through coupling cover, canopy ring, and Canopy canopy Feed motor wires through downrod assembly. Canopy Ring Thread the downrod assembly onto motor collar. - Page 12 9. HANGING THE FAN (cont.) Carefully lift the fan motor assembly up to the mounting bracket and seat the hanger ball in the mounting bracket socket. Make sure the tab on the mounting bracket socket is properly seated in the groove in the hanger ball. Rotate the socket assembly until the ball drops and locks into the hanger bracket screw (Fig.
-
Page 13: Making The Electrical Connections
10. MAKING THE ELECTRICAL CONNECTIONS REMEMBER to disconnect the power by removing fuses or turning off circuit breakers. Follow the steps below to hang your fan properly: WARNING: To avoid possible electrical shock, be sure electricity is turned off at the main fuse box before wiring. Mounting bracket WARNING: Installation of this fan requires that a... - Page 14 10. MAKING THE ELECTRIC CONNECTIONS (cont.) Outlet box Motor to receiver electrical connections: (Fig. 15) White (neutral) Black (hot) Green (Ground) Connect the hanger ball/downrod assembly ground wire, mount- ing bracket ground wire and receiver ground wire to the ground Black (“AC IN L”) White (“AC IN N”) wire in outlet box.
-
Page 15: Installing The Wall Control
11. INSTALLING THE WALL CONTROL WARNING: Remember to shut the power off at the circuit breaker or fuse box. Wall control to wall outlet box electrical connections: (Fig. 14) Connect ground wires - Important for proper control function. Connect the black wire marked “LINE IN” from the control to the black LINE VOLTAGE wire from the outlet box that feeds back to the breaker. - Page 16 11. INSTALLING THE WALL CONTROL (cont.) Carefully tuck the wire connections inside the junction box. Wall transmitter Secure the wall control with the two wall control mounting screws Wall outlet box Wall mounting provided. (Fig. 15) plate Attach the wall mounting plate over the wall control and secure with the two wall mounting plate screws provided.
-
Page 17: Finishing The Installation
12. FINISHING THE INSTALLATION Secure all wire connections with supplied wire ties to assist in canopy installation. Tuck connections neatly into ceiling outlet box. Slide the canopy up to the hanger bracket and place the key hole on the canopy over the screw on the hanger bracket. Turn canopy Canopy Canopy ring until it locks in place at the narrow section of the key holes... -
Page 18: Wall Control Operating Instructions
13. WALL CONTROL OPERATING INSTRUCTIONS Your DC brushless motor is equipped with an intuitive wall control. Restore power to ceiling fan and test the wall control as below for proper operation. Pairing the Wall Control to Your Fan Your fan is pre-paired at the factory, NO pairing is necessary. Wall Control Button Definitions These seven buttons are used to set the fan speed as follows: Button: turn the light ON or OFF... - Page 19 13. WALL CONTROL OPERATING INSTRUCTIONS (cont.) NOTE: Maximum of 2 fans can operate on a circuit through the wall transmitter. Maximum of 12 fans can operate on a circuit through an on/off switch or breaker when utilizing the app for the fan control (without the wall control in the circuit).
-
Page 20: Application
14. APPLICATION In addition to the included wall control, you can control the fan through the Modern Forms app. FIGURE 22 FIGURE 23 To use the app, download it for free from the App Store or Google Play. Open the app to create your account. You can also log in with your Facebook or Google account. -
Page 21: Troubleshooting
15. TROUBLESHOOTING Problem Solution Fan will not start. Check circuit fuses or breakers. Check wall control LED indicator light. If LED is not illuminated when pushing a button, it is not transmitting a signal. Please check power to wall control and all electrical connections. Assure that there are no more than 2 fans operating on a circuit through the wall control. - Page 22 Included with each fan 6 Fan speeds Dims light to 1% F-WC ON/OFF Wall control range: Up to 30ft from fan Works in conjunction with Modern Forms Fan receiver (Not included) COUPLER AS, BZ, CFI, DW, GB, XF-I Connects two downrods...
- Page 23 PRODUCT MODEL DESCRIPTION FINISH DOWNROD AS, CFI, LN, SS XF-12 12 in downrod BZ, DW, GB, GH, GW, MB, MW, OB, TT AS, CFI, LN, SS XF-18 18 in downrod BZ, DW, GB, GH, GW, MB, MW, OB, TT AS, CFI, LN, SS XF-24 BZ, DW, GB, GH, GW, 24 in downrod...
- Page 24 Español For instructions in Spanish please visit the link below. Para obtener instrucciones en español, visite el siguiente enlace. www.modernforms.com/fan-instructions-espanol Français For instructions in French please visit the link below. Pour obtenir des instructions en français, veuillez visiter le lien ci-dessous. www.modernforms.com/fan-instructions-francais FR -W 1 8 1 0...
- Page 25 Get Smart The Modern Forms app synchronizes seamlessly with smart home devices you already own. To learn more go to modernforms.com/mfappins works with the Google Assistant Free App Download Sync with our exclusive Modern Forms App to control fan speed, use smart features like Adaptive Learning, create groups and reduce energy costs.
- Page 26 FR -W 1 8 1 0...
- Page 27 F R - W1 8 10...
- Page 28 FR- W1 8 10 modernforms.com...
Need help?
Do you have a question about the VORTEX FR-W1810 and is the answer not in the manual?
Questions and answers