Keeler Pulsair Desktop Instructions For Use Manual
Hide thumbs
Also See for Pulsair Desktop:
- Instructions for use manual (48 pages) ,
- Instructions for use manual (110 pages) ,
- Instructions for use manual (90 pages)
Table of Contents
Advertisement
Advertisement
Table of Contents

Related Manuals for Keeler Pulsair Desktop


Summary of Contents for Keeler Pulsair Desktop
- Page 1 Instructions for use Next Next...
-
Page 2: Table Of Contents
Contents 1. Copyright and Trademarks ..........p3 10. Measurement procedures ..........p16 2. Introduction ..............p4 10.1 Preparing the device ..........p16 3. Symbols ................p5 10.2 Preparing the patient ...........p17 4. Safety ................p6 10.3 Taking the reading ..........p18 4.1 Device Classification ..........p6 11. Display examples ............p19 4.2 Warnings and cautions ..........p6 12. -
Page 3: Copyright And Trademarks
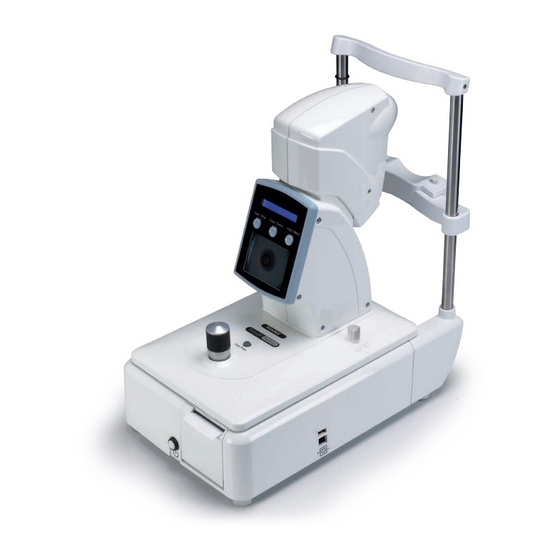
Description of the product The information contained within this manual must not be reproduced in whole or part without the manufacturer’s prior The Pulsair Desktop Tonometer is indicated for measuring written approval. intraocular pressure without contacting the eye to aid in the screening and diagnosis of glaucoma. -
Page 4: Introduction
2. Introduction Thank you for purchasing the Keeler Pulsair Desktop. The product has been designed and manufactured to ensure that you will enjoy many years of trouble free and safe use. Please follow the User Instructions to ensure optimum performance. -
Page 5: Symbols
3. Symbols Read user instructions for Warnings, Cautions and Power input port additional information On/Off The CE mark on this product indicates it has been tested to and conforms with the provisions noted 0088 within the 93/42/EEC Medical Device Directive Colour adjustment Double insulated Brightness adjustment... -
Page 6: Safety
• This product should be used in a room with subdued lighting • This equipment should only be used by trained personnel. • Before using the Pulsair Desktop, press the 'Clear/Demo' USA Federal law restricts this device to sale by or order of a button for 1 second to dispel any minute particles of dust or physician. -
Page 7: Cleaning Instructions
5. Cleaning instructions Only manual non-immersion cleaning as described should be used for this instrument. Do not autoclave or immerse in cleaning fluids. Always disconnect power supply from source before cleaning. a Wipe the external surface with a clean absorbent, non- shedding cloth dampened with a water / detergent solution (2% detergent by volume) or water / isopropyl alcohol solution (70% IPA by volume). -
Page 8: Power Supply Assembly
6. Power supply assembly Set Plug Replace the blanking plate with the appropriate mains plug adapter if required, or use IEC 60320 TYPE 7 connector (not supplied). IEC 60320 TYPE 7 connector Home Back Next... -
Page 9: Mounting
7. Mounting Your Pulsair Desktop is designed to be used on a sturdy flat surface, for example a medical instrument table or a purpose designed refraction system table top. Choose carefully the intended location for your Pulsair Desktop with particular consideration to health and safety aspects, for example the routing of the power lead, and it’s position in... -
Page 10: Tonometry Pressure Variations In The Human Eye
Up to 4 readings may be required in order to reduce the impact of these variants to a constant IOP. Pulsair Desktop software will recognise the readings and give a sound notification when two consecutive readings are +/- 1mmHg of each other indicating that further measurements may not be required. -
Page 11: Names Of Controls And Components
9. Names of controls and components 1. Travelling lock The Pulsair Desktop is fitted with a travelling lock to protect the moving parts from damage when in transit or when the device may be subject to sudden movement or shock. - Page 12 Standby. The Start/Stop button will reset the memory buffer, softness of the air puff. clearing all readings stored. Pressing this button while the unit is on standby, the Pulsair Desktop will start with the pump running D E M O P U F F and the system is initialised ready for use.
- Page 13 Pulsair Desktop. damaged or scarred cornea. This action is accompanied by sound and an additional momentary indication on the display.
- Page 14 Alignment is performed using the moving part of the Pulsair Desktop and the joystick for final alignment. The Pulsair Desktop will fire automatically when correctly positioned and aligned. See section 10 for detailed instructions on the alignment process.
- Page 15 4 readings per eye. displayed to one decimal place depending on the user setting accessed via the menu. In addition to IOP readings, the Pulsair Desktop also displays a The displayed running average is based on the actual readings number of messages on the character display when a which are taken to one decimal place.
-
Page 16: Measurement Procedures
3. Remove the protective dust cap from the puff tube. 4. Unscrew the transit lock if secured. 5. Using the joystick bring the moving part of the Pulsair Desktop back towards you and across to the left (to measure the right eye first). -
Page 17: Preparing The Patient
10.2 Preparing the patient Before taking a reading you should: Before using the Pulsair Desktop you should make your patient 1. Ask the patient to blink to ensure a good and reflective tear film. feel at ease and ensure they are located in an optimum reading location, preferably with their head supported. -
Page 18: Taking The Reading
10.3 Taking the reading 1. Holding the joystick, move with the other hand the moving part of the Pulsair Desktop until the patient’s eye to be measured is visible and central on the alignment video screen. Height adjustment is obtained by rotating the joystick. -
Page 19: Display Examples
11. Display examples The unit will display ‘STANDBY’ when the power is on. K E E L E R P U L S A I R S T A R T I N G . When a pressure (IOP) of greater than 25mmHg is detected, the unit will display >25. -
Page 20: Printing
12. Printing The results can be printed by pressing the print button at any time. Printing the results does not clear the print memory buffer. USB data out Pressing the print button sends a flat file to the usb port in the following format: [R] : xx, xx, xx, xx, [xx.x] PRINT BUTTON... -
Page 21: Replacing The Printer Paper
13. Replacing the printer paper 1. Access to the printer paper is via the printer cover, use your finger in the lip on the top of the cover and gently pull towards you to open the printer cover. Remove the empty paper roll. 2. -
Page 22: User Menu Options
14. User menu options 1. With the unit switched on, press and hold the ‘print/menu’ button Menu option Display Change options for > 3 second to enter the user menu. Buzzer Control BUZZER ON ON/OFF IOP Format DISPLAY XX XX / XX.X 2. -
Page 23: Calibration, Maintenance And Inspection
15. Calibration, maintenance and inspection Clean the puff tube lens on a weekly basis: 1. Moisten a cotton bud with Isopropyl Alcohol. 2. Move the tip of the bud around the lens in a circular motion. 3. After one circle the bud should be discarded to avoid smearing on the lens. - Page 24 The unit performs a self function check when switched on and will indicate if a fault is found. There are no user serviceable parts in this instrument. Service manuals will be available to authorised Keeler service centres and Keeler trained service personnel. Home...
-
Page 25: Specifications And Electrical Ratings
16. Specifications and electrical ratings Dimensions 450 x 435 x 245mm (H x D x W) Weight 16kg Calibrated range 5mmHg to 50mmHg Repeatability (Average <5% coefficient of variation) Accuracy +/-5mmHg (95% confidence level)* Working distance 20mm from surface of patient’s cornea to front surface of first lens. This equates to a nominal distance of 15mm from the front of the puff tube shroud to the front surface of the patient’s cornea Displayed scale Single line 16 character alphanumeric display... - Page 26 16. Specifications and electrical ratings It is well established that exposure of the eye to intense light sources for extended periods of time poses a risk of retinal photic injury. Many ophthalmic instruments illuminate the eye with intense light. The light levels on the Pulsair have been set at the lowest level possible.
- Page 27 Guidance and manufacturer’s declaration – electromagnetic emissions The Keeler Desktop is intended for use in the electromagnetic environment specified below. The customer or user should assure that it is used in such an environment. Emissions test...
- Page 28 16. Specifications and electrical ratings Guidance and manufacturer’s declaration – electromagnetic immunity The Keeler Desktop is intended for use in the electromagnetic environment specified below. The customer or user should assure that it is used in such an environment. Immunity test...
- Page 29 FM radio broadcast and TV broadcast cannot be predicted theoretically with accuracy. To assess the electromagnetic environment due to fixed RF transmitters, an electromagnetic site survey should be considered. If the measured field strength in the location in which the Keeler Desktop is used exceeds the applicable RF compliance level above, the Keeler Desktop should be observed to verify normal operation.
- Page 30 Recommended separation distances between portable and mobile RF communications equipment and the Keeler Desktop The Keeler Desktop is intended for the use in an electromagnetic environment in which radiated RF disturbances are controlled. The customer or the user of the Keeler Desktop can help prevent electromagnetic interference by maintaining a minimum distance between portable and mobile RF communications equipment (transmitters) and the Keeler Desktop as recommended below, according to the maximum output power of the communications equipment.
-
Page 31: Accessories And Warranty
Pulsair Warranty shall be made to the system except by the manufacturer or his The Pulsair Desktop and its components are covered by warranty authorized representative, without the prior written approval that they meet their performance standards and are free from of the manufacturer or his authorized representative (and in no any defects in materials or workmanship. -
Page 32: Contact, Packaging And Disposal Information
18. Contact, packaging and disposal information Manufacturer USA Sales Office Keeler Limited Keeler Instruments Inc Clewer Hill Road 3222 Phoenixville Pike Windsor Building #50 Berkshire Malvern, PA 19355 SL4 4AA Freephone: 0800 521251 Toll Free: 1 800 523 5620 Tel: +44 (0) 1753 857177...
Need help?
Do you have a question about the Pulsair Desktop and is the answer not in the manual?
Questions and answers