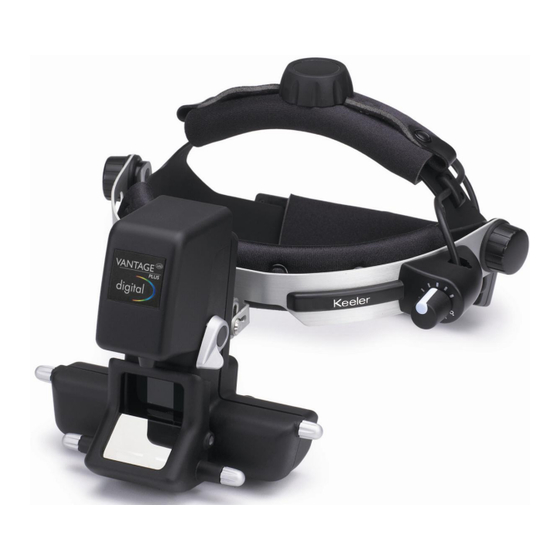
Keeler Vantage Plus Setup & Quick Start Manual
Digital indirect ophthalmoscope
Hide thumbs
Also See for Vantage Plus:
- Instructions for use manual (38 pages) ,
- Instructions manual (25 pages) ,
- Instructions for use (2 pages)

Related Manuals for Keeler Vantage Plus


Summary of Contents for Keeler Vantage Plus
- Page 1 Software Setup & Quick Start Guide The New Vantage Plus Digital Indirect Ophthalmoscope...
-
Page 2: Table Of Contents
Software Setup & Quick Start Guide Table of Contents Customer Notice ............................. 3 Specification ............................3 MINIMUM PC REQUIREMENTS ......................3 Hardware Setup Guide ..........................5 Quick Start Guide ............................ 6 Introduction ............................6 Software & Driver Setup .......................... 7 Introduction ............................ -
Page 3: Customer Notice
Software Setup & Quick Start Guide Customer Notice WE HIGHLY RECOMMEND YOU READ ALL SETUP INSTRUCTION PRIOR TO STARTING INSTALLATION! Specification Make sure your PC/Laptop meets our minimum hardware requirements; a specification PC/Laptop lower than that which has been specified may results in poor performance. MINIMUM PC REQUIREMENTS CPU: Intel Core 2 Duo 2.33GHz or higher Memory: 1GB RAM or higher... - Page 4 This also applies to any accessories and the monitor used with the system. 3. This manual is only available for the setup of the Keeler Vantage Plus Digital Indirect Ophthalmoscope. 4. The information in this document is subject to change without notice.
-
Page 5: Hardware Setup Guide
Hardware Setup Guide The following items are required to complete the hardware setup: 1 x Vantage Plus Digital Ophthalmoscope 1 x 5 meter USB cable 1. Begin by unwrapping the items list above from your kit to begin the hardware setup. -
Page 6: Quick Start Guide
Software Setup & Quick Start Guide Quick Start Guide Introduction This is a very quick guide to getting your camera up and running, for more a detailed overview on how to get your camera up and running please refer to the section entitled “Software & Driver Setup” Ready set.. -
Page 7: Software & Driver Setup
Introduction Below is a step by step guide for installing the camera divers and video capture software required to run the Vantage Plus Digital Indirect Ophthalmoscope. Follow each numbered step carefully. 1. Insert your Installation disc provided into your pc. - Page 8 Software Setup & Quick Start Guide 3. A new window “Keeler video camera setup” will appear as shown in Figure 5. Click on “Install the Videology drivers” as indicated by the circle. Figure 5. 4. A new window will appear as shown in Figure 6, Click “Next” to Continue. Once you have clicked next you should see the screen shown in Figure 7.
- Page 9 Software Setup & Quick Start Guide Figure 7 5. You will now be prompted to plug the camera into your USB port as shown in Figure 8. Click “Next” to continue as indicated by the arrow. Figure 8...
- Page 10 Software Setup & Quick Start Guide 6. Upon successful installation of the camera you should see the following screen shown in Figure 9. Click “Finish” to continue. Figure 9 7. A new window will popup “Videology USB2.0 Camera Software Setup” as shown in Figure 10, click on “Install Viewer”...
- Page 11 Software Setup & Quick Start Guide 9. Click on “Next” as indicated by the arrow, see Figure 11. Figure 11 10. Click on “Next” as indicated by the arrow, see Figure 12. Figure 12...
- Page 12 Software Setup & Quick Start Guide 11. Click on “Install” as indicated by the arrow, see Figure 13. Figure 13 12. Wait for the installation to complete and proceed to next step, see Figure 14. Figure 14...
- Page 13 Software Setup & Quick Start Guide 13. You have now finish installing the Videology camera viewer, click on “Finish” to continue as indicated by the arrow. 14. Click on the “Exit” button on the “Videology USB2.0 Camera Software Setup” as shown in Figure 15, to exit setup.
- Page 14 Software Setup & Quick Start Guide 15. Return back to the “Keeler video camera setup” and click on the “Install the debut software” as shown in Figure 16. Figure 16 16. Once you have followed the previous step correctly you should see the following screen shown in Figure 17.
- Page 15 Software Setup & Quick Start Guide 17. Having followed the instructions on the previous screen you should see the following screen shown in Figure 18. Click “Finish” as indicated by the arrow to complete installation of the Debut Video Capture. Figure 18...
- Page 16 Software Setup & Quick Start Guide 18. Debut Video Capture will launch straight after installation is complete and display the following screen as shown in Figure 19. Click “Cancel” and close the Debut Video Capture software. (As no sound is captured we do not need to configure microphone/sound settings) If you do have and built in microphone/separate microphone feel free to connect the device and carry on with the sound configuration.
-
Page 17: Setting The Output Resolution In Debut Video Capture
Software Setup & Quick Start Guide Finally… last but not least, you must configure the Debut Video Capture output resolution to 720 pixels x 576 pixels, follow the steps described bellow. Setting The Output Resolution In Debut Video Capture. 1. Open up Debut Video Capture if its not already open. 2. -
Page 18: All About Debut Video Capture
Device Recordings Video File Format Snap-Shot Record Pause Stop Device Clicking on device will enable you to view the image from the Vantage Plus Digital Indirect Ophthalmoscope. -
Page 19: Snap-Shot
Software Setup & Quick Start Guide Snap-Shot Allows you take a still picture of and image, (like a normal camera). Click on the button to take a picture. Also works while recording a video. Recordings (Ctrl + L Button on the Keyboard) Is an area where all still pictures and video recordings are stored. -
Page 20: Setting Up Your Accessories
Software Setup & Quick Start Guide Setting up your Accessories Remote or Foot Switch Introduction Below is a quick setup guide to installing your remote control/ foot switch. This process is broken down step-by-step on how to setup ONE button on the remote/foot switch; this process needs to be repeated FOR EACH switch you wish to use. - Page 21 Software Setup & Quick Start Guide 5. A new window will appear as shown in Figure 24. Click on the “Keys” tab as indicated by the arrow. Figure 24 6. If you have followed the previous step, you should see the following screen in Figure 25. Click on the “Add”...
- Page 22 Software Setup & Quick Start Guide 7. A new window called “Press Key” should pop up as shown in Figure 26. Click on “an appropriate button” of your choice on the remote/footswitch. Figure 26 8. Once you have clicked on the on “an appropriate button” of your choice on the remote/footswitch you should see the a new window “Select Command”...
- Page 23 Software Setup & Quick Start Guide 9. Once you have clicked on “OK” you should see a screen as shown in Figure 28, as you can see from the picture below you have setup your first button “Record” as indicated by the circle. Figure 28 10.
- Page 24 Software Setup & Quick Start Guide 11. Once you have setup all your buttons, e.g. Snap shot, Record,Pause, and stop you should see a screen as shown in Figure 30 with all the buttons listed as indicated by the circle. Click on “OK” to complete the setup.
-
Page 25: Troubleshooting Guide
Software Setup & Quick Start Guide Troubleshooting Guide When I record an image, it’s very shaky and I get jitters… The reason for this problem could be the specification of your computer. During the setup phase of installation we recommend you to select the resolution of *720 pixels x 576 pixels (maximum resolution for best picture quality). -
Page 26: When I Install The Camera, Its Installed As A "Usb 2820" Device
Software Setup & Quick Start Guide When I install the camera, its Installed as a “USB 2820” device Found New Hardware “USB 2820” Please refer to accompanied video” USB_2820_Tutorial.wmv” for a more detailed view. Some computers may mistakenly identify the camera as an audio only device and install incorrect drivers. -
Page 27: Default Software Settings
Software Setup & Quick Start Guide Default Software Settings. Shown below are the default factory settings for the camera after manufacture, the screen shots below will assist you to restore the factory settings should you accidentally change/alter any camera settings. We highly recommend you use our factory settings on the camera to obtain the best possible resolution. -
Page 28: Camera Feature Control
Software Setup & Quick Start Guide Camera Feature Control In the Videology Viewer click on “Control” -> “Camera Control” and you should see the screen shown on Figure 34, make sure your screen looks EXACTLY as the screen shown below. Figure 34... -
Page 29: Video Capture Filter Properties
Software Setup & Quick Start Guide Video Capture Filter Properties Video Proc Amp In the Videology Viewer, click on “Options” -> “Video Capture Filter Properties” -> click on the second tab “Video Proc Amp” and adjust the following settings:... - Page 30 Part of our policy for continued product development we reserve the right to amend specifications at any time without prior notice. Distributed by: Sales office: Manufactured by: Keeler Instruments Inc Keeler Scotland Keeler Ltd 456 Parkway 25 Deerdykes View Clewer Hill Road...
Need help?
Do you have a question about the Vantage Plus and is the answer not in the manual?
Questions and answers