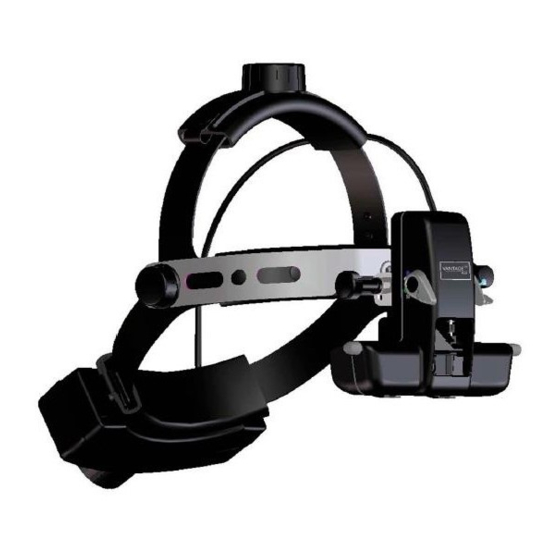
Keeler Vantage Plus Instructions For Use Manual
Indirect ophthalmoscope
Hide thumbs
Also See for Vantage Plus:
- Instructions for use manual (38 pages) ,
- Setup & quick start manual (30 pages) ,
- Instructions manual (25 pages)

Related Manuals for Keeler Vantage Plus


Summary of Contents for Keeler Vantage Plus
- Page 1 Vantage Plus and Vantage Plus LED Indirect Ophthalmoscope INSTRUCTIONS FOR USE A world without vision loss...
-
Page 3: Table Of Contents
SAFETY ......................... 3 PHOTOTOXICITY ..........................3 WARNINGS AND CAUTIONS ......................3 CONTRAINDICATION ........................5 CLEANING AND DISINFECTION INSTRUCTIONS ............ 6 SETTING UP AND USING THE VANTAGE PLUS ............7 CONTROLS AND COMPONENTS.....................7 HEADBAND ADJUSTMENT ......................7 OPHTHALMOSCOPE ANGLE ALIGNMENT ..................8 INTERPUPILLARY DISTANCE SETTING CONTROL (S)................8 OBTAINING A FUSED IMAGE ......................8... - Page 4 Catalogue number Serial number Translation Medical device The Keeler Vantage Plus and Vantage Plus LED Instruments are designed and built in conformity with Directive 93/42/EEC, Regulation (EU) 2017/745 and ISO 13485 Medical Devices Quality Management Systems. Classifi cation: CE: Class I FDA: Class II The information contained within this manual must not be reproduced in whole or part without the manufacturer’s...
-
Page 5: Indications For Use
VANTAGE PLUS AND VANTAGE PLUS LED by KEELER 1. INDICATIONS FOR USE NOTE: For users of the Vantage Plus Digital Indirect Ophthalmoscope, this instructions for use document must be read in conjunction with the instructions for use document (part number EP59-09863) for the Vantage Plus Digital. - Page 6 Never use the instrument if visibly damaged and periodically inspect it for signs of damage or misuse. • Check your Keeler product for signs of transport / storage damage prior to use. • Do not use in the presence of fl ammable gases / liquids, or in an oxygen rich environment.
-
Page 7: Contraindication
VANTAGE PLUS AND VANTAGE PLUS LED by KEELER • Use only Keeler approved batteries, chargers, and power supplies as per the accessories listed in Accessories and Spares page • The product has been designed to function safely when at an ambient temperature between +10°C and +35°C. -
Page 8: Cleaning And Disinfection Instructions
VANTAGE PLUS AND VANTAGE PLUS LED by KEELER 3. CLEANING AND DISINFECTION INSTRUCTIONS Before any cleaning of the instrument or the base unit, ensure the power lead is disconnected. Only manual non-immersion cleaning as described should be used for this instrument. Do not autoclave or immerse in cleaning fl uids. -
Page 9: Setting Up And Using The Vantage Plus
VANTAGE PLUS AND VANTAGE PLUS LED by KEELER 4. SETTING UP AND USING THE VANTAGE PLUS 4.1 CONTROLS AND COMPONENTS A Headband Size Adjustment Knob B Headband Height Adjustment Knob C Metal Outer Brow Band D Brow Band Tension Knob... -
Page 10: Ophthalmoscope Angle Alignment
VANTAGE PLUS AND VANTAGE PLUS LED by KEELER 4.3 OPHTHALMOSCOPE ANGLE ALIGNMENT For vertical alignment of the eyepieces and binocular block (O), adjust the height of the Metal Outer Brow Bar (C) if necessary by using the Brow Band Tension Knob (D) and/or the Ophthalmoscope Angle Knob (E), located on the sides of the headset (fig 3). -
Page 11: Mirror Angle Control (J)
4.8 SETTING THE APERTURE By rotating the knob (H) different apertures may be selected. The Keeler Vantage Plus has 3 light apertures which offer maximum stereopsis. When you select the aperture the illumination and viewing mirrors automatically adjust for maximum stereopsis. -
Page 12: Selecting Filters
VANTAGE PLUS AND VANTAGE PLUS LED by KEELER 4.9 SELECTING FILTERS Filter By rotating the Lever (I), different filters may be selected. Lever (I) Cobalt Blue filter Used with fluorescein dye for the detection and examination of corneal scars and abrasions. -
Page 13: Standard Slimline Lithium-Ion
VANTAGE PLUS AND VANTAGE PLUS LED by KEELER 5.3 STANDARD SLIMLINE LITHIUM-ION Inserting / replacing the Battery Pack 1. Release the battery by pressing release button and lift Battery Pack from cradle. 2. To insert new Battery Pack, place in the cradle until fully engaged. - Page 14 VANTAGE PLUS AND VANTAGE PLUS LED by KEELER 2. Place your spare Battery Pack or Headset into your Lithium Charger as shown. Spare Battery Press release Charging button and / Docking push up Station Spare Battery Power Supply Inlet Charging...
-
Page 15: Charging Cycle
VANTAGE PLUS AND VANTAGE PLUS LED by KEELER 5.5 CHARGING CYCLE Slimline Lithium-Ion The Battery attached to the Indirect will take approximately 2 hours to fully charge. The Battery will last approximately 1 hour on full power. The Spare Battery will take 2 hours to charge. -
Page 16: Smartpack And Wallpack
VANTAGE PLUS AND VANTAGE PLUS LED by KEELER Caution 6. SMARTPACK AND WALLPACK 6.1 PARTS LIST A Hex Key B Screws C Screws D Wall Plugs E Base Cap F Wall Mount G Adhesive Pads H Rechargeable battery Part No. EP39-22079... -
Page 17: Power Conversion
VANTAGE PLUS AND VANTAGE PLUS LED by KEELER J Power Supply K Australian Plug L UK Plug M Euro Plug N USA Plug 6.2 POWER CONVERSION Convert to either WallPack or SmartPack by following the illustration below. 6.3 FIXING THE WALL MOUNT Use the wall plugs and screws to mount the WallPack unit, attach the adhesive pads to the side of the case. -
Page 18: Led Displays
VANTAGE PLUS AND VANTAGE PLUS LED by KEELER Connection Insert the connectors into the sockets as shown. Before connecting ensure that both the dimmer control and mains outlet are switched off. Charge Time Charge the battery for 12-14 hours before initial use. Note: The unit becomes warm when charging, this is normal. -
Page 19: Bulb / Led Replacement
Changing headband rheostat from Bulb to LED operation Your Vantage Plus LED is already set to LED operation. If you want to change to Bulb operation, please move the switch backwards as shown in diagram. To return to LED operation, please move the switch forwards as shown in diagram. -
Page 20: Fitting Your Himag™ Lens (M) And Teaching Mirror (N)
Scleral Depressors are avaiable to view the ora serrata. 9. SPECIFICATIONS AND ELECTRICAL RATINGS The Keeler Vantage Plus and Vantage Plus LED are medical electrical instrument. The instrument requires special care concerning electromagnetic compatibility (EMC). This section describes its suitability in terms of electromagnetic compatibility of this instrument. When installing or using this instrument, please read carefully and observe what is described here. -
Page 21: Electromagnetic Emissions
9.1 ELECTROMAGNETIC EMISSIONS Guidance and manufacturer’s declaration – electromagnetic emissions The Keeler Vantage Plus or Vantage Plus LED is intended for use in the electromagnetic environment specified below. The customer or user should assure that it is used in such an environment. - Page 22 – guidance Test level Portable and mobile RF communications equipment should be used no closer to any part of the Keeler Vantage Plus or Vantage Plus LED, including cables, than the recommended separation distances calculated from the equation applicable to the frequency of the transmitter.
-
Page 23: Recommended Safe Distances
To assess the electromagnetic environment due to fixed RF transmitters, an electromagnetic site survey should be considered. If the measured field strength in the location in which the Keeler Vantage Plus or Vantage Plus LED is used exceeds the applicable RF compliance level above, the instrument should be observed to verify normal operation. -
Page 24: Technical Specifications
VANTAGE PLUS AND VANTAGE PLUS LED by KEELER For transmitters rated at a maximum output power not listed above, the recommended separation distance din metres (m) can be determined using the equation applicable to the frequency of the transmitter, where p is the maximum output power rating of the transmitter in watts (W) according to the transmitter manufacturer. -
Page 25: Accessories And Spares
VANTAGE PLUS AND VANTAGE PLUS LED by KEELER 10. ACCESSORIES AND SPARES Item Part Number Replacement Bulb 1012-P-5241 Large depressor 1201-P-6067 Small depressor 1201-P-6075 HiMag™ Lens 1202-P-7192 Binocular Indirect Face Shield 1205-P-7034 Standard battery pack for wireless Vantage Plus 1919-P-1013... -
Page 26: Warranty
VANTAGE PLUS AND VANTAGE PLUS LED by KEELER 12. WARRANTY The Keeler Vantage Plus and Vantage Plus LED products are guaranteed for 3 years and will be replaced, or repaired free of charge subject to the following: • Any fault due to faulty manufacture •... - Page 28 Contact Manufacturer Keeler Limited Clewer Hill Road Windsor Berkshire SL4 4AA UK Freephone 0800 521251 Tel +44 (0) 1753 857177 Fax +44 (0) 1753 827145 USA Sales Office China Office Keeler USA Halma China Group 3222 Phoenixville Pike 名称:沃迈(上海)机电有限公司 Building #50 地址:上海市闵行区金都路1165弄...
Need help?
Do you have a question about the Vantage Plus and is the answer not in the manual?
Questions and answers