
Subscribe to Our Youtube Channel
Related Manuals for Keeler Ophthalmoscope


Summary of Contents for Keeler Ophthalmoscope
- Page 1 Ophthalmic and Diagnostic Instruments Ophthalmoscope / Retinoscope / Otoscope Instructions for use Next Next...
-
Page 2: Table Of Contents
• Safety considerations ............ 10 • Using the GenMed Wall Unit ........26 5. Diagnostic Instrument heads • Dispos-A-Spec • Ophthalmoscope models ..........11 8. Lithium Chargers ..............27 • Lens wheels ..............12 • Lithium Mini Charger • Lens ranges •... -
Page 3: Copyright And Trademarks
Deluxe, Fibre-Optic, Pocket, Professional, Standard The products listed opposite are registered trademarks of Handles: Keeler Ltd 2012 C-size, Pocket, Slimline, GenMed Wall Unit Copyright © Keeler Limited 2012 Chargers: Published in the UK 2012 Lithium Duo Charger, Lithium Mini Charger, C-size NiCad Duo Home... -
Page 4: Introduction
2. Introduction Thank you for purchasing your Keeler diagnostic instrument. We have taken the greatest care in the design, development and manufacture of this product to ensure that you get many years of trouble free service. However, it is important that you read the... -
Page 5: Symbols
3. Symbols Read user instructions for warnings, cautions and Mandatory action sign Fragile additional information Material suitable Follow instructions for use The CE mark on this product indicates it has been for recycling tested to and conforms with the provisions noted High voltage within the 93/42/EEC Medical Device Directive Symbol for... -
Page 6: Safety
• Use only genuine Keeler approved parts and accessories or Warning device safety and performance may be compromised • Check your Keeler product for signs of transport / storage damage prior to use • Use only Keeler approved batteries, chargers and power supplies as per the accessories listed in section 12 •... - Page 7 • Ensure device is securely held in docking station to minimise risk of injury or damage to equipment Only Keeler handles with a red base can be used in the Keeler • Follow guidance on cleaning / routine maintenance to prevent Lithium Chargers.
- Page 8 • Do not mix battery types safe distance from such devices • Do not attempt to charge Non-Rechargeable batteries • Do not use Keeler Retinoscopes in ambient temperatures • Do not charge battery in an environment above 30°C where the temperature may exceed •...
- Page 9 Bulbs / LED’s can reach high temperatures in use – allow • Dry cell batteries should be removed if your instrument is not to cool before handling. If the ophthalmoscope has been to be used for long periods in the charging position for over 15 minutes, it must be •...
-
Page 10: Safety Considerations
3 minutes. The ophthalmoscope should not be continuously switched on for more than 15 minutes. If it is left on for 15 minutes or longer then it must be switched off and left to cool for at least 10 minutes before the next use. -
Page 11: Ophthalmoscope Models
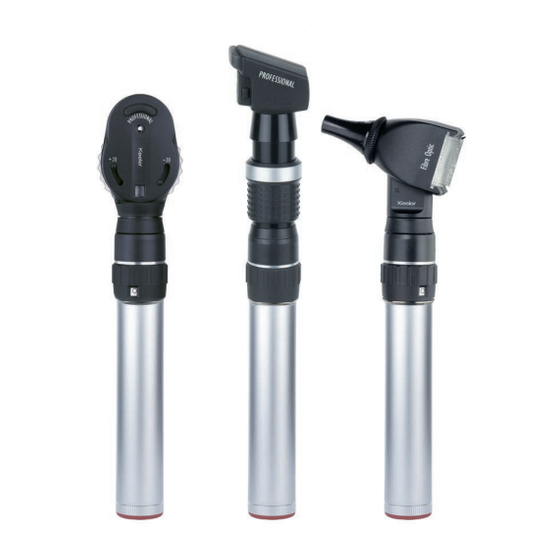
5. Instrument heads - Ophthalmoscopes Specialist Standard Graticule and Auxiliary Lens Filter Control Wheel Lens Wheel Lens Wheel Practitioner / Professional Pupilometer Filter Control Pocket Graticule Auxiliary Lens Lens Wheel Control Wheel Graticule and Filter Control Home Back Next... -
Page 12: Lens Wheels
5. Instrument heads - Ophthalmoscopes Lens Wheel Graticule Control The lens wheel is rotated to select the required lens. Lens The graticule control is used to select the required beam for powers are displayed in the viewing window as follows: examination. -
Page 13: Filters And Filter Control
This filter is particularly particularly useful when examining children. useful for diabetic retinopathy. The Graticule Range for each ophthalmoscope is as follows: Cobalt Blue* Is used in conjunction with flourescein dye for the Specialist detection and examination of corneal scars and abrasions. -
Page 14: Retinoscope Models
For all positions the effect is a plane mirror Control effect. Brow Rest The Keeler retinoscope is supplied with a choice of brow rests to accommodate spectacle wearers. To interchange the brow rest Focussing disconnect and attach as indicated. -
Page 15: Otoscope Models
5. Instrument heads - Otoscopes Practitioner Five permanent Speculae are provided with each Otoscope/Set. The diameters are as follows: 2.5, 3.5, 4.5, 5.5 & 8mm. These are attached to the Otoscope head as shown in the following diagrams. Standard / Pocket Deluxe Fibre Optic Home... - Page 16 5. Instrument heads - Otoscopes Disposable Speculae* Minor surgical Procedures Disposable speculae can be fitted to the Standard, Practitioner, Should you wish to use surgical instruments such for minor Fibre Optic and Pocket Otoscopes. procedures the following notes may be of assistance. Standard and Pocket Otoscopes The disposable speculae is attached as shown on the previous page.
-
Page 17: Bulb Replacement
• Remove the faulty bulb and dispose of in accordance with local environmental regulations • Keeler bulbs can only be used in the instrument for which they are designed – refer to part number list in section 12 • Replace the bulb with one of the correct voltage and type. -
Page 18: Instrument Handles
6. Instrument handles Slimline Pocket C-size Rechargeable 2 x AA or 2x AA or Rechargeable 2 x C or Battery MN1500 MN1500 Battery MN 1500 (Red Cap) (Blue Cap) (Blue Cap) (Blue Cap) (Red Cap) Home Back Next... - Page 19 Ensure the indicated to the left. connection between the head and handle is positive. Keeler C sizes Handles have a power indicator. This will show if the instrument is on or off. Compatibility Silver = off...
-
Page 20: Handle Identification
• Keeler Pocket Handle – 2 x AA size dry cell batteries – Duracell MN 1500 or equivalent. Blue base = 2.8v for dry cell batteries. • Keeler C size handle – 2 x 1.5v C size batteries. – Duracell MN Red base = 3.6v for rechargeable batteries. 1400 or equivalent. -
Page 21: Battery Conditioning / Charging
Keeler chargers only: Step 1 • Keeler Mini charger Fully charge your new Keeler rechargeable battery. This will take • Keeler Duo charger approximately 15 hours. Step 2 Note: Handheld diagnostic instruments can become hot Use the instrument WITHOUT RECHARGING UNTIL THE BATTERY during use and charging. -
Page 22: Genmed Wall Unit
7. GenMed Wall Unit – wall mounting Wall mounting 1.8m MAX Check the distance Secure the GenMed Wall Unit and Dispenser Unit as from the wall socket to shown below: the intended mounting position. For the Gen Med Wall Units drill two holes Ø6mm x 55mm deep and 110mm apart. -
Page 23: Wall Mounting Template
7. GenMed Wall Unit and Dispenser mounting template 249mm Home Back Next... -
Page 24: Power Supply Assembly
7. GenMed Wall Unit – power supply assembly Set Plug Replace the blanking plate with the appropriate mains plug adaptor if required, or use IEC 60320 TYPE 7 connector (not supplied). Connect to GenMed Wall Unit IEC 60320 TYPE 7 connector Home Back Next... -
Page 25: Connecting / Securing Heads
As an additional security measure, instrument heads may be locked onto Please note: Keeler cord handles by tightening This equipment may be affected by electromagnetic the built in screw with the hexagonal interference. key provided. -
Page 26: Using The Genmed Wall Unit
Only one handle can be used at a time. Replace the handle before using the other instrument. Refer to the instructions in section 5 for information on the controls and operation of Ophthalmoscope, Otoscope and Retinoscope heads. Dispos-A-Spec PULL To dispense a speculum, simply grasp the end of the required speculum and gently pull vertically. -
Page 27: Lithium Chargers
8. Chargers Lithium Mini Charger and Lithium Double Charger Charging No LED Battery is fully charged Power supply Flashing LED Top up charge Assemble the power supply as per the instructions in section 7, Solid LED Battery is charging and connect the lead to the power input port on the charger. The handle can be used at any time during the charging cycle and will automatically resume charging when handle is placed back in the charging well. -
Page 28: Cleaning Instructions
9. Cleaning Only manual non-immersion cleaning as described should be used The cleaning and sterilization of reusable speculum, metal tongue for this instrument. depressor, nasal dilator, laryngeal and post natal mirrors can be accomplished as follows: Do not autoclave or immerse in cleaning fluids. a Manually clean all surfaces of the units using a suitable brush and water/detergent solution (2% detergent by volume). -
Page 29: Specifications And Electrical Ratings
10. Specifications and electrical ratings The ophthalmoscope/retinoscope/otoscope, the power Transport, storage and operating conditions supply (EP29-32777) with its charging dock (1941-P-5289 Transport Storage Operation and 1941-P-5326) together constitute a Medical Electrical Temperature -40°C +10°C +10°C System as defined in EN 60601-1. -
Page 30: Annex I - Emc Statement And Guidelines
11. Annex I – EMC statement and guidelines Keeler Diagnostic Instruments and associated power systems are medical electrical instruments. These instruments require special care concerning electromagnetic compatibility (EMC). This section describes the suitability in terms of electromagnetic compatibility of these instruments. - Page 31 11. Annex I – EMC statement and guidelines Guidance and manufacturer’s declaration – electromagnetic immunity Keeler Diagnostic Instruments are intended for use in the electromagnetic environment specified below. The customer or the user should assure that they are used in such an environment.
- Page 32 11. Annex I – EMC statement and guidelines Guidance and manufacturer’s declaration – electromagnetic emissions Keeler Diagnostic Instruments are intended for use in the electromagnetic environment specified below. The customer or the user should assure that they are used in such an environment.
- Page 33 TV broadcast cannot be predicted theoretically with accuracy. To assess the electromagnetic environment due to fixed RF transmitters, an electromagnetic site survey should be considered. If the measured field strength in the location in which the Keeler Diagnostic Instruments are used exceeds the applicable RF compliance level above, the instruments should be observed to verify normal operation.
- Page 34 Recommended separation distances between portable and mobile RF communications equipment and Keeler Diagnostic Instruments Keeler Diagnostic Instruments are intended for the use in an electromagnetic environment in which radiated RF disturbances are controlled. The customer or the user of Keeler Diagnostic Instruments can help prevent electromagnetic interference by maintaining a minimum distance between portable and mobile RF communications equipment (transmitters) and the Keeler instruments as recommended below, according to the maximum output power of the communications equipment.
-
Page 35: Spare Parts And Accessories
12. Spare parts and accessories The following replacement bulbs are available for Keeler In addition the following accessories are available from the diagnostic instruments: distributor: Part Number Description Part Number Description 1011-P-7050 2x 2.8v Halogen Pocket ophthalmoscope bulbs EP29-32777 Power supply 1011-P-7106 2x 2.8v Xenon ophthalmoscope bulbs... -
Page 36: Warranty
No user serviceable parts – all preventative maintenance and servicing must only be performed by authorised Keeler representatives. Your Keeler product is guaranteed for 3 years and will be replaced, or repaired free of charge subject to the following:- • Any fault due to faulty manufacture •... -
Page 37: Contact And Disposal Information
14. Contact and disposal information Keeler Limited Keeler Instruments Inc Clewer Hill Road 3222 Phoenixville Pike Windsor Building #50 Berkshire SL4 4AA Malvern, PA 19355 Freephone: 0800 521 251 Toll Free: 1 800 523 5620 Tel: +44 (0)1753 857177 Tel: +1 610 353 4350...
Need help?
Do you have a question about the Ophthalmoscope and is the answer not in the manual?
Questions and answers