Table of Contents
Advertisement
Quick Links
ZUMMESH-KPAVBATT
Zūm™ Battery-Powered AV Keypads
Installation Guide
Description
The Crestron
®
ZUMMESH-KP10AV1BATT, ZUMMESH-KP10AV2BATT,
ZUMMESH-KP10AV3BATT, and ZUMMESH-KP10AV4BATT are AV keypads that expand
the capabilities of a Zūm commercial room lighting system.
NOTE: For simplicity within this guide, the ZUMMESH-KP10AV1BATT,
ZUMMESH-KP10AV2BATT, ZUMMESH-KP10AV3BATT, and ZUMMESH-KP10AV4BATT
are referred to as AV keypad.
NOTE: The AV keypad must be used in conjunction with an AV bridge
(ZUMMESH-AVBRIDGE) that is connected to a local AV control system (both not
included).
The AV keypad controls an AV system by sending serial commands to an AV bridge; the
AV bridge then relays the serial commands from the AV keypad to the AV control system.
Zūm Overview
A basic Zūm commercial lighting system consists of one room with Zūm mesh devices,
i.e., dimmers, switches, keypads, and sensors. The Zūm mesh devices in the room provide
room control and communicate directly with each other without the need for a centralized
gateway or processor.
For centralized control and monitoring from a Crestron control system (not included), use
the ZUMMESH-NETBRIDGE (not included) to connect to the control system.
NOTE: The ZUMMESH-NETBRIDGE requires a compatible J-box device (not included)
to provide power.
For simplified setup of a Zūm lighting system, use the Zūm app on a mobile device.
Additional Resources
Visit the product page on the Crestron website (www.crestron.com)
for additional information and the latest firmware updates. Use a QR
reader application on your mobile device to scan the QR image.
Button Configurations
The ZUMMESH-KP10AV1BATT, ZUMMESH-KP10AV2BATT, ZUMMESH-KP10AV3BATT,
and ZUMMESH-KP10AV4BATT keypads ship with the following button labels.
NOTE: The action of a button press on the AV keypad is determined by the AV control
system.
NOTE: The AV keypad is also available with custom engraving.
ZUMMESH-KP10AV1BATT Button Labels
ZUMMESH-KP10AV3BATT Button Labels
The ZUMMESH-KP10AV1BATT is labeled
The ZUMMESH-KP10AV3BATT is labeled
with ON, AIRMEDIA, LAPTOP, and OFF.
with POWER, AIRMEDIA, LAPTOP, and
CABLE/SAT.
ZUMMESH-KP10AV1BATT
ZUMMESH-KP10AV3BATT
ON
POWER
AIRMEDIA
AIRMEDIA
LAPTOP
LAPTOP
OFF
CABLE/SAT
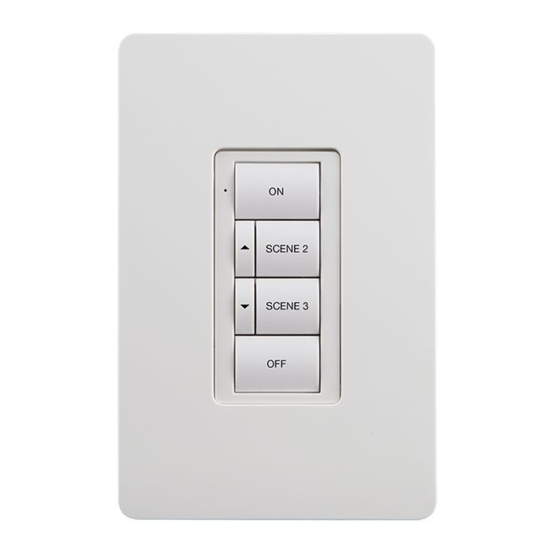
ZUMMESH-KP10AV2BATT Button Labels
ZUMMESH-KP10AV4BATT Button Labels
The ZUMMESH-KP10AV2BATT is labeled
The ZUMMESH-KP10AV4BATT is labeled
with ON, AIRMEDIA, LAPTOP, OFF, 3 (up),
with POWER, AIRMEDIA, LAPTOP,
and 4 (down).
CABLE/SAT, 3 (up), and 4 (down).
ZUMMESH-KP10AV2BATT
ZUMMESH-KP10AV4BATT
POWER
ON
AIRMEDIA
AIRMEDIA
LAPTOP
LAPTOP
OFF
CABLE/SAT
Installation
NOTE: Observe the following points.
• Codes: Install in accordance with all local and national electrical codes.
• Temperature: For use where temperatures are between 32° to 104 °F
(0° to 40 °C).
• Electrical Boxes: Several devices can be installed in one electrical box
(multigang). For a smooth appearance, install a one-piece multigang faceplate (not
included).
Mount the AV keypad to a single-gang box or directly to a flat surface using double-sided
tape.
Mount in a Single-Gang Box
Secure the AV keypad to a single-gang box using the two supplied screws. Attach a
decorator-style faceplate (not supplied).
AV Keypad Mounting
Two screws are supplied
for mounting the keypad to
a back box.
Mount with Double-Sided Tape
Secure the AV keypad to a flat, clean surface using the supplied double-sided tape.
1. Clean the mounting surface with a light cleaning agent that does not leave a residue.
2. Remove the backing of one piece of double-sided tape, and apply it to the back of the
keypad. Repeat for the other piece of double-sided tape.
Two pieces of tape are supplied
to mount the keypad without a
backbox.
3. Ensure that the keypad is vertical, and press it against the wall. Press firmly to ensure
that the keypad is properly secured to the wall.
CAUTION: Removing the keypad after installation may damage the mounting
surface.
Press rmly to ensure
proper adhesion.
Battery
Prior to operation, remove the battery tab to turn on the keypad.
Remove the battery tab prior
to operation.
Battery Replacement
WARNING: Refer to the following warnings before changing the batteries.
• Chemical burn hazard, do not ingest batteries.
• This product contains coin cell batteries. If a coin cell battery is swallowed, it can
cause severe internal burns in just 2 hours and can lead to death.
• Keep new and used batteries away from children. If the battery compartment does
not close securely, stop using the product and keep it away from children.
• If you think batteries have been swallowed or placed inside any part of the body,
seek immediate medical attention.
CAUTION: The battery used in this device may present a risk of fire or chemical burn
if mistreated. Do not recharge, disassemble, heat above 212°F (100°C), or incinerate.
Replace batteries with an identical CR2450 only. Use of another battery may present a
risk of fire or explosion.
To remove the battery, insert a pin or paper clip into the slot on the left side of the keypad.
The battery slides out of the opposite side of the keypad.
To remove the battery,
insert a pin or paper clip
into the hole on the side.
NOTE: The battery must be inserted properly.
NOTE: The keypad will not operate if the battery is inserted incorrectly.
To install a new battery, insert the battery into the battery slot. The — terminal faces away
from the wall.
Battery CR2032
(—) toward the front of the
keypad
Button Functions
The AV keypad functions by sending a serial command to the AV bridge when a button
is pressed. The serial command is comprised of the button press type, the button
number, the AVID, and the keypad serial number. For additional information, refer to the
ZUMMESH-AVBRIDGE Installation Guide (Doc. 7916) at www.crestron.com/manuals.
NOTE: After the AV bridge receives the command, the AV bridge sends the command
to the AV control system.
The AV keypad command format:
!button.[tap|hold|release].[button].[id].[SN]
• tap|hold|release - the type of button press
• button - the button number that is pressed
• id - the AVID of the keypad
• SN - the serial number of the keypad
The illustration that follows lists the button locations for the two styles of AV keypads.
Button 1
Button 2
Button 3
Button 4
Button 1
Button 5
Button 2
Button 6
Button 3
Button 4
Basic Room Setup
The Zūm mesh devices in the room communicate directly with each other without the
need for a centralized gateway or processor.
To set up a new single-room Zūm system, do the following:
Step 1a: Create a new single-room Zūm system.
Step 2: Add Zūm mesh devices to the room.
Step 3: Finish creating the single-room Zūm system.
To modify an existing Zūm system, do the following:
Step 1b: Place the system in Joining mode.
Step 2: Add Zūm mesh devices to the room.
Step 3: Finish creating the single-room Zūm system.
Advertisement
Table of Contents

Related Manuals for Crestron Zum Series


Summary of Contents for Crestron Zum Series
- Page 1 The serial command is comprised of the button press type, the button For centralized control and monitoring from a Crestron control system (not included), use number, the AVID, and the keypad serial number. For additional information, refer to the the ZUMMESH-NETBRIDGE (not included) to connect to the control system.
- Page 2 Crestron disclaims any proprietary CAN ICES-3(A)/NMB-3(A) interest in the marks and names of others. Crestron is not responsible for errors in typography or Ce produit est homologué selon les normes et les exigences UL applicables par Underwriters NOTE: This equipment has been tested and found to comply with the limits for a Class A digital device, The product warranty can be found at www.crestron.com/warranty.
Need help?
Do you have a question about the Zum Series and is the answer not in the manual?
Questions and answers