Osburn 2000 Installation And Operation Manual
Hide thumbs
Also See for 2000:
- Installation and operation manual (62 pages) ,
- Owner's manual (39 pages) ,
- Owner's manual (39 pages)
Table of Contents
Advertisement
Quick Links
Installation and Operation Manual
2000
(OB02015 model)
Safety tested according to ULC S627,
UL 1482 and UL 737 standards by an
accredited laboratory.
CONTACT LOCAL BUILDING OR FIRE OFFICIALS ABOUT RESTRICTIONS AND INSTALLATION INSPECTION REQUIREMENTS IN
LOCAL AREA.
READ THIS ENTIRE MANUAL BEFORE INSTALLATION AND USE OF THIS WOOD STOVE. FAILURE TO FOLLOW THESE
INSTRUCTIONS COULD RESULT IN PROPERTY DAMAGE, BODILY INJURY OR EVEN DEATH.
READ AND KEEP THIS MANUAL FOR REFERENCE
Printed in Canada
45926A
Advertisement
Table of Contents

Related Manuals for Osburn 2000


Summary of Contents for Osburn 2000
- Page 1 Installation and Operation Manual 2000 (OB02015 model) Safety tested according to ULC S627, UL 1482 and UL 737 standards by an accredited laboratory. CONTACT LOCAL BUILDING OR FIRE OFFICIALS ABOUT RESTRICTIONS AND INSTALLATION INSPECTION REQUIREMENTS IN LOCAL AREA. READ THIS ENTIRE MANUAL BEFORE INSTALLATION AND USE OF THIS WOOD STOVE. FAILURE TO FOLLOW THESE INSTRUCTIONS COULD RESULT IN PROPERTY DAMAGE, BODILY INJURY OR EVEN DEATH.
- Page 3 It is also highly recommended to register the warranty online at https://www.osburn-mfg.com/en/warranty/warranty-registration/ Registering the warranty will help to quickly find the information needed on the unit. Installation and Operation Manual - 2000 Page 3...
-
Page 4: Table Of Contents
8.1 General .........................39 8.2 Suitable Chimneys ......................39 8.3 Minimum Chimney Height ....................41 8.4 The Relationship Between the Chimney and the House .............41 8.5 Supply of Combustion Air ....................42 8.6 Installing the Chimney Connector ..................43 Page 4 Installation and Operation Manual - 2000... - Page 5 Appendix 7: Blower and optional thermodisc installation ............55 Appendix 8: Air Tubes and Baffle Installation ................56 Appendix 9: Exploded Diagram and Parts List ................. 58 Osburn Limited Lifetime Warranty ..................... 61 Dealer: Installer: Phone Number: Serial Number: Installation and Operation Manual - 2000 Page 5...
- Page 6 CERTIFICATION PLATE Page 6 Installation and Operation Manual - 2000...
-
Page 7: Part A - Operation And Maintenance
This product can expose you to chemicals including carbon monoxide, which is known to the State of California to cause cancer, birth defects or other reproductive harm. For more information go to www.P65warnings.ca.gov/ Installation and Operation Manual - 2000 Page 7... -
Page 8: General Information
Optimum overall efficiency at a specific burn rate (LHV). This appliance is officially tested and certified by an independent agency. Tested and certified in compliance with CFR 40 part 60, subpart AAA, section 60.534(a)(1(ii) and Draft ASTM WK47329-14. Carbon monoxide. Page 8 Installation and Operation Manual - 2000... -
Page 9: Specifications
CAN/CSA-Z240 MH standard. Tested and certified in compliance with CFR 40 part 60, subpart AAA, section 60.534(a)(1(ii) and Draft ASTM WK47329-14. Installation and Operation Manual - 2000 Page 9... -
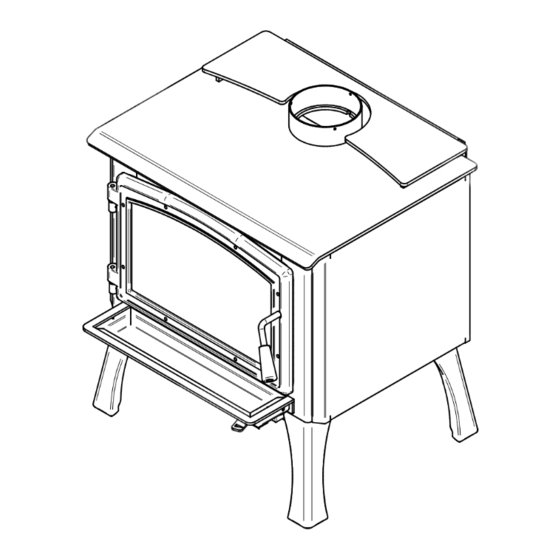
Page 10: Dimensions
343mm 6" Ø 150mm Figure 1: Top view 27" 685mm 17 1/8" 434mm 20 1/4" 514mm 21 1/2" 546mm 29" 735mm 26 7/8" 683mm Figure 2: Front view Figure 3: Side view Page 10 Installation and Operation Manual - 2000... - Page 11 343mm 6" Ø 150mm Figure 4: Top view 27" 685mm 17 1/8" 434mm 20 7/8" 529mm 21 1/2" 546mm 29" 735mm 26 1/4" 667mm Figure 5: Front view Figure 6: Side view Installation and Operation Manual - 2000 Page 11...
- Page 12 13 1/2" 343mm 6" Ø 150mm Figure 7: Top view 27" 685mm 17 1/8" 434mm 19" 481mm 21 1/2" 546mm 29" 735mm 25 1/8" 640mm Figure 8: Front view Figure 9: Side view Page 12 Installation and Operation Manual - 2000...
- Page 13 2.3.4 Combustion Chamber Dimensions 9" 228mm 17 1/2" 444mm 21" 533mm Figure 10: Door opening Figure 11: Front view - Combustion chamber 3/16" 5/16" 16 3/4" 423mm Figure 12: Side view - Combustion chamber Installation and Operation Manual - 2000 Page 13...
-
Page 14: Zone Heating And How To Make It Work For You
The body of your stove, which is most of its weight, is carbon steel. Should it ever become necessary many years in the future, almost the entire stove can be recycled into new products, thus eliminating the need to mine new materials. Page 14 Installation and Operation Manual - 2000... -
Page 15: Fuel
People who live in the coldest regions of North America usually have only spruce, birch and poplar, other low-density species to burn and yet they can heat their homes successfully. Installation and Operation Manual - 2000 Page 15... - Page 16 Firewood that is not dry enough to burn is the cause of most complaints about wood stoves. Continually burning green or unseasoned wood produces more creosote and involves lack of heat and dirty glass door. Page 16 Installation and Operation Manual - 2000...
- Page 17 Start with one manufactured log and see how the stove reacts. Never use more than two manufactured logs. Installation and Operation Manual - 2000 Page 17...
-
Page 18: Operating Your Stove
OPERATING WITH THE FIRE SCREEN INCREASES POSSIBILITIES OF GENERATING CARBON MONOXIDE. CARBON MONOXIDE IS AN ODOURLESS GAS THAT IS HIGHLY TOXIC WHICH CAN CAUSE DEATH AT HIGH CONCENTRATION IN AIR. Page 18 Installation and Operation Manual - 2000... -
Page 19: Blower Operation
Burn one or two small fires to begin the curing and conditioning process. Then build bigger and hotter fires until there is no longer paint smell from the stove. Installation and Operation Manual - 2000 Page 19... -
Page 20: Lighting Fires
Place two spit logs in the firebox. Place a few sheets of twisted newspaper between the logs. Now place some fine kindling across the two logs and some larger kindling across those, log cabin style. Light the newspaper. Page 20 Installation and Operation Manual - 2000... -
Page 21: Maintaining Wood Fires
The best time to remove ash is after an overnight fire when the stove is relatively cool, but there is still some chimney draft to draw the ash dust into the stove and prevent it from coming into the room. Installation and Operation Manual - 2000 Page 21... - Page 22 This heat surge is welcome when the room temperature is a little lower than desirable, but not welcome if the space is already warm. Page 22 Installation and Operation Manual - 2000...
-
Page 23: Building Different Fires For Different Needs
You will need to fire the load hot for long enough to fully char the log surfaces before you can turn the air down. Make sure the fire is flaming brightly before leaving the fire to burn. Installation and Operation Manual - 2000 Page 23... - Page 24 East-west loads are excellent for long, low output fires for relatively mild weather. Page 24 Installation and Operation Manual - 2000...
-
Page 25: Maintaining Your Wood Heating System
In order for your stove to burn at its best efficiency, the door must provide a perfect seal with the firebox. Therefore, the gasket should be inspected periodically to check for a good seal. The gasket seal may be improved with a simple latch mechanism adjustment. To adjust: Installation and Operation Manual - 2000 Page 25... - Page 26 Stick the end of the gasket to the middle of one edge, then press the edge of the glass down onto the gasket, taking care that it is perfectly centred on the gasket. Page 26 Installation and Operation Manual - 2000...
-
Page 27: Chimney And Chimney Liner Maintenance
Your new stove has the right characteristics to help you to burn clean fires with little or no smoke, resulting in less creosote in the chimney. Installation and Operation Manual - 2000 Page 27... - Page 28 Inspection and cleaning of the chimney is facilitated by the removable baffle. OPERATION OF YOUR STOVE WITHOUT THE BAFFLE MAY CAUSE UNSAFE AND HAZARDOUS TEMPERATURE CONDITIONS AND WILL VOID THE WARRANTY. Page 28 Installation and Operation Manual - 2000...
-
Page 29: Part B - Installation
This stove must be connected to a chimney complying with the requirements for Type HT chimneys in the Standard for Factory-Built Chimneys for Residential Type and Building Heating Appliances, UL 103 and ULC S629 or to a code-approved masonry chimney with a flue liner. Installation and Operation Manual - 2000 Page 29... -
Page 30: Clearances To Combustible Material
For a safe way to reduce clearances refer to section «7.4 Reducing Wall and Ceiling Clearances Safely» Page 30 Installation and Operation Manual - 2000... - Page 31 Figure 21: Clearances - Top Figure 22: Clearances - Side Figure 23: Clearances - Corner Installation and Operation Manual - 2000 Page 31...
- Page 32 48" (122 cm) 84" (213 cm) 84" (213 cm) The pipe distances listed in this table refer to the distances obtained when the stove is installed in accordance with the appliance clearances above mentioned. Page 32 Installation and Operation Manual - 2000...
- Page 33 48" (122 cm) 80" (203 cm) 80" (203 cm) The pipe distances listed in this table refer to the distances obtained when the stove is installed in accordance with the appliance clearances above mentioned. Installation and Operation Manual - 2000 Page 33...
- Page 34 48" (122 cm) 84" (213 cm) 84" (213 cm) The pipe distances listed in this table refer to the distances obtained when the stove is installed in accordance with the appliance clearances above mentioned. Page 34 Installation and Operation Manual - 2000...
-
Page 35: Floor Protector
Note 1: The floor protection at the back of the stove is limited to the stove’s required clearance if such clearance is smaller than 8 inches (203 mm). Note 2: Only required under the horizontal section of the connector. Must exceed each side of the connector by at least 2 inches (51 mm). See «Figure 22: Clearances - Side» Installation and Operation Manual - 2000 Page 35... -
Page 36: Reducing Wall And Ceiling Clearances Safely
Mounting hardware must not be located closer than 200 mm (8") from the vertical centre line of the appliance. G) Edge clearance for ceiling shields to side and back walls: 75 mm (3"). Shield extension beyond each side of appliance: 450 mm (18"). Page 36 Installation and Operation Manual - 2000... - Page 37 Figure 27: Heat shield clearances Figure 28: Heat shield clearances Figure 29: Heat shield clearances Installation and Operation Manual - 2000 Page 37...
- Page 38 Brick, spaced out at least 25 mm (1 in)* by non-combustible spacers 18 in Brick, with a minimum of 24 gauge (0.61 mm) sheet metal backing, spaced out at least 25 mm (1 in)* by non-combustible spacers 12 in Page 38 Installation and Operation Manual - 2000...
-
Page 39: The Venting System
Use only components intended for the brand and model of chimney you are using. Never substitute parts from other chimney brands or fabricate your own components. The chimney must be a type suitable for solid fuel. Installation and Operation Manual - 2000 Page 39... - Page 40 Do not downsize the flue to less than 6” unless the venting system is straight and exceeds 25 feet in height. When passing through a combustible wall, the use of an insulated listed thimble is required. Page 40 Installation and Operation Manual - 2000...
-
Page 41: Minimum Chimney Height
Although they are common in North America, chimneys that exit a house wall and run up outside can cause problems. Figure 30: Good System Design Figure 31: Inferior System Design Installation and Operation Manual - 2000 Page 41... -
Page 42: Supply Of Combustion Air
Only a wood stove certified and labelled as ‘mobile home approved’ may be installed in a mobile home. This Osburn 2000 stove is ‘mobile home approved’. Wood stoves installed in mobile homes must have a ducted supply of combustion air from outdoors. This air supply should be routed down through the house floor into the vented crawl space under the mobile home. -
Page 43: Installing The Chimney Connector
These components are not usually tested to a particular standard and certified as compliant. Therefore, a list of rules found in solid fuel installation codes apply to the installation of single wall pipe. Installation and Operation Manual - 2000 Page 43... - Page 44 • Maximum unsupported horizontal length: 1 m (3 feet). • Galvanized flue pipes must not be used because the coatings vaporize at high temperatures and release dangerous gases. Use black painted flue pipes. Page 44 Installation and Operation Manual - 2000...
- Page 45 A straight flue pipe assembly offers the least restriction to gas flow and results in stronger draft. Straight assemblies also need less maintenance because there are no corners to collect creosote. The chimney connector must be in good condition. Installation and Operation Manual - 2000 Page 45...
-
Page 46: Appendix 1 : Legs Installation
Remove the door, the firebricks, the spacers and the ash plug from the stove. DETAIL A Put the stove on its back. Remove and dispose of the two freight supports (D). Keep the nuts (C) and washers (B) for step 4. Page 46 Installation and Operation Manual - 2000... - Page 47 Install the legs (E) on the legs supports (F). Secure with the washers (G) and nuts (H) supplied with the leg assembly. DETAIL I With the nuts (K) and washers (J) removed in step 1; secure both leg assemblies to the stove. Installation and Operation Manual - 2000 Page 47...
- Page 48 Put the stove on its legs and install the ash drawer included with the kit. Put back the firebricks, the spacers, the cast iron ash plug and the door on the stove. See step 1. Page 48 Installation and Operation Manual - 2000...
-
Page 49: Appendix 2 : Pedestal Installation
Remove the door, the firebricks, the spacers and the ash plug from the stove. DETAIL A Put the stove on its back. Remove and dispose of the two freight supports (D). Keep the nuts (C) and washers (B) for step 3. Installation and Operation Manual - 2000 Page 49... - Page 50 Put the stove on its pedestal and install the fresh air panel (L) with the screws (M), the molding (K) with the screws (J) and install the ash drawer (H). Put back the bricks, the spacers, the ash plug and the door on the stove. See step 1. Page 50 Installation and Operation Manual - 2000...
-
Page 51: Appendix 3: Door Overlay Installation
Position the overlay (A) on the door frame and secure it in place from behind using the nuts (B). Note: It is not necessary to remove the glass to install the overlay. Installation and Operation Manual - 2000 Page 51... -
Page 52: Appendix 4: Decorative Panels Installation
Start by fixing the front part of the decorative panel (A) in the two clips (C) welded on the sides of the fire box. Then, fix the back of the decorative side with three screws (B) supplied. Line up the decorative sides parallel to the side of the appliance. Page 52 Installation and Operation Manual - 2000... -
Page 53: Appendix 5: Optional Fresh Air Intake Kit Installation
(HVAC type, must meet ULC S110 or UL 181 class 0 or class 1) (B), sold separately. Refer to air intake kit installation instructions for more details. Installation with legs (AC01316) Installation with pedestal (AC01336) Installation and Operation Manual - 2000 Page 53... -
Page 54: Appendix 6: Optional Fire Screen Installation
Lift the fire screen upwards and push the bottom part towards the stove then let the fire screen rest on the bottom of the door opening. Warning: Never leave the stove unattended while in use with the fire screen. Page 54 Installation and Operation Manual - 2000... -
Page 55: Appendix 7: Blower And Optional Thermodisc Installation
Ensure that the blower’s power cord is not in contact with any surface of the stove to prevent electrical shock or fire damage. Do not run the power cord beneath the stove. Installation and Operation Manual - 2000 Page 55... -
Page 56: Appendix 8: Air Tubes And Baffle Installation
Repeat steps 1 and 2 for the two tubes in the back then install the baffle before installing the two front tubes. To remove the tubes use the above steps in reverse order. Page 56 Installation and Operation Manual - 2000... - Page 57 Note that secondary air tubes (B) can be replaced without removing the baffle board (A) and that all tubes are identical. SECTION A-A Installation and Operation Manual - 2000 Page 57...
-
Page 58: Appendix 9: Exploded Diagram And Parts List
APPENDIX 9: EXPLODED DIAGRAM AND PARTS LIST Page 58 Installation and Operation Manual - 2000... - Page 59 BRUSH NICKEL PLATED CAST IRON LEG (BLACK PAINT IN THE BACK) OA10236 BRUSHED NICKEL CAST IRON STRUCTURAL LEG KIT WITH ASH DRAWER OA10235 BLACK CAST IRON STRUCTURAL LEG KIT WITH ASH DRAWER PL65866 LEFT OR RIGHT LEG SUPPORT PL65872 AIR CONTROL COVER Installation and Operation Manual - 2000 Page 59...
- Page 60 2" X 9" 1 1/4" REFRACTORY BRICK PL65088 AIR MATE 30506 SCREW PAN TORX TYPE F 1/4-20 X 1" BLACK PL65090 AIR DEFLECTOR PL65514 SECONDARY AIR TUBE 21389 C-CAST BAFFLE 20" X 12 1/2" X 1 1/4" Page 60 Installation and Operation Manual - 2000...
-
Page 61: Osburn Limited Lifetime Warranty
Labour cost and repair work to the account of the manufacturer are based on a predetermined rate schedule and must not exceed the wholesale price of the replacement part. Shall your unit or a components be defective, contact immediately your OSBURN dealer. To accelerate processing of your warranty claim, make sure to have on hand the following information when calling: •... - Page 62 NOTES :...
- Page 64 Resale is strictly prohibited. The manufacturer may update St-Augustin-de-Desmaures (Québec) Canada this document from time to time and cannot be responsible G3A 2H3 for problems, injuries, or damages arising out of the use 418-908-8002 of information contained in any document obtained from www.osburn-mfg.com/en unauthorized sources. tech@sbi-international.com...
Need help?
Do you have a question about the 2000 and is the answer not in the manual?
Questions and answers