Osburn 2300 Owner's Manual
Hide thumbs
Also See for 2300:
- Owner's manual (36 pages) ,
- Owner's manual (21 pages) ,
- Installation and operation manual (56 pages)
Table of Contents
Advertisement
Quick Links
OWNER`S MANUAL
OSBURN 2300 WOODSTOVE
Manufactured by : STOVE BUILDER INTERNATIONAL INC.
1700, Léon-Harmel, Québec (Québec) G1N 4R9
READ AND KEEP THIS MANUAL FOR REFERENCE
US ENVIRONMENTAL PROTECTION
AGENCY PHASE II CERTIFIED
ULC S627 and UL 1482 Standards by:
Tel : (418 ) 527-3060
Fax : (418) 527-4311
www.osburn-mfg.com
WOODSTOVES
Verified and tested following
45131A
Advertisement
Table of Contents

Subscribe to Our Youtube Channel
Related Manuals for Osburn 2300


Summary of Contents for Osburn 2300
- Page 1 OWNER`S MANUAL OSBURN 2300 WOODSTOVE US ENVIRONMENTAL PROTECTION AGENCY PHASE II CERTIFIED WOODSTOVES Verified and tested following ULC S627 and UL 1482 Standards by: Manufactured by : STOVE BUILDER INTERNATIONAL INC. 1700, Léon-Harmel, Québec (Québec) G1N 4R9 Tel : (418 ) 527-3060 Fax : (418) 527-4311 www.osburn-mfg.com...
-
Page 2: Table Of Contents
RELOADING ............................. 20 CREOSOTE FORMATION AND NEED FOR REMOVAL ............. 22 ASH DISPOSAL ..........................22 MAINTENANCE ..........................23 GLASS ..............................23 GASKETING ............................23 PAINT ..............................23 OSBURN LIMITED LIFETIME WARRANTY ................25 ... -
Page 3: Introduction
Keep your sales invoice. We also recommend that you register your warranty online www.osburn-mfg.com Registering your warranty online will help us track rapidly the information we need on your stove. -
Page 4: Technical Specifications
TECHNICAL SPECIFICATIONS Wood Combustible: Recommended Surface 500 to 2 300 ft (46 to 214 m 30 800 BTU/h Heating Capacity : E.P.A : (9.02 kW) 85 000BTU/h Seasoned cordwood: (24.91kW) 63 % Default EPA efficiency : Emissions: 5.7 g/h Flat Black Colors : 6’’... -
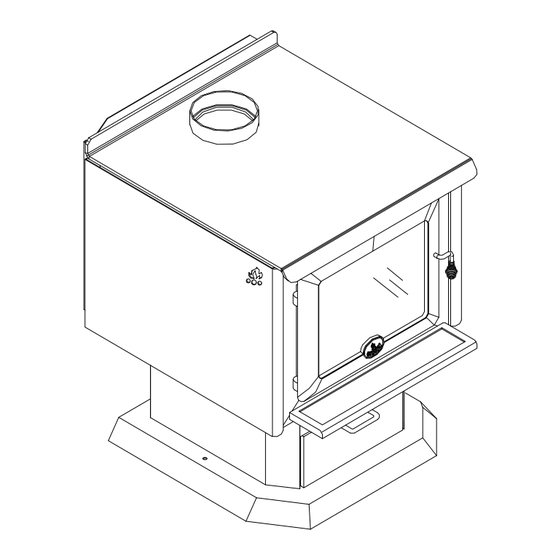
Page 5: Assembly
ASSEMBLY OSBURN 2300 Pedestal Base Installation: 1. Slide the ash pan in position. Side Panels : 1. Start by fixing the front part of the decorative side in the two clips welded on the sides of the fire box. 2. Then, fix the back of the decorative side with two screws and washers supplied. -
Page 6: Door Adjustment
DOOR ADJUSTMENT In order for your stove to operate properly, the door should be adjusted periodically to provide an air tight fit. To adjust: • Remove the lock pin (spring pin) by pulling and turning it using pliers ("wise grip") •... -
Page 7: Installation
INSTALLATION SAFETY NOTICE • I F THIS STOVE IS NOT PROPERLY INSTALLED A HOUSE FIRE MAY RESULT O REDUCE THE RISK OF FIRE FOLLOW THE INSTALLATION INSTRUCTIONS AILURE TO FOLLOW INSTRUCTIONS MAY RESULT IN PROPERTY DAMAGE BODILY INJURY OR EVEN DEATH •... -
Page 8: Floor Protector
FLOOR PROTECTOR Your wood stove should be placed on a non-combustible surface with a R value of 1.0. For multiple layers, add R-values of each layer to determine the overall R-value. The floor protector should be under the stove, eighteen inches beyond the front and eight inches beyond each side of the fuel loading and ash removal opening. -
Page 9: Clearances From Combustibles
It is of outmost importance that the clearances to combustible materials be scrupulously respected upon installation of the stove you have selected. Refer to the tables below : Single pipe / Double pipe Model OSBURN 2300 12/12 8.5/8.5 12.7/12.7 23.9/23.9 20.4/20.4 •... -
Page 10: Reduced Clearances (Canada Only)
REDUCED CLEARANCES (CANADA ONLY) You may decrease the clearances by installing heat radiation shields between the walls or the ceiling and the stove. These heat radiation shields must be installed permanently, and can include sheet metal, a rigid non-combustible sheet or a masonry wall. Clearances of not less than 1"... -
Page 11: Chimney
CHIMNEY Your wood stove may be hooked up with a factory built or masonry chimney. If you are using a factory built chimney, it must comply with UL 103 or ULC S629 standards; therefore it must be a Type HT (2100°F). It is extremely important that it be installed according to the manufacturer's specifications. -
Page 12: Chimney Connector (Stove Pipe)
CHIMNEY CONNECTOR (STOVE PIPE) Your chimney connector and chimney must have the same diameter as the stove outlet. If this is not the case, we recommend you contact your dealer in order to insure there will be no problem with the draught. The stove pipe must be made of aluminized or cold roll steel with a minimum thickness of 0.021"... -
Page 13: Typical Installations
TYPICAL INSTALLATIONS FACTORY BUILT CHIMNEY: RAIN CAP ROOF FLASHING 18" CLEARANCE RADIATION SHIELD WALL RADIATION SHIELD WALL SUPPORT CEILING SUPPORT Wall installation Vertical installation... - Page 14 MASONRY CHIMNEY: C lay liner Thimb le C lean out door...
- Page 15 FACTORY BUILT THIMBLE:...
- Page 16 BRICK THIMBLE:...
-
Page 17: Outside Combustion Air
OUTSIDE COMBUSTION AIR Your OSBURN stove is approved to be installed with an outside air intake which is necessary for a mobile home. This type of installation is also required in air tight houses and houses with negative pressure problems. You can purchase this option through your OSBURN dealer. -
Page 18: Woodstove Utilisation
WOODSTOVE UTILISATION Your heating unit was designed to burn wood only; no other materials should be burnt. Wastes and other flammable materials should not be burnt in your wood stove. Any type of wood may be used in your stove, but specific varieties have better energy yields than others. Please consult the following table in order to make the best possible choice. -
Page 19: Testing Your Wood
Smaller pieces of wood will dry faster. All logs exceeding 6" in diameter should be split. The wood should not be stored directly on the ground. Air should circulate through the cord. A 24" to 48" air space should be left between each row of logs, which should be placed in the sunniest location possible. -
Page 20: Heating
If you push on it until it stops the combustion air is reduced to a minimum. Your OSBURN stove burnt between .954 kg\h et 2.556 kg\h. of wood during EPA testing. Real operating conditions may give very different results than those obtained in the lab according to the species of wood used, its moisture content, the size and density of the pieces, the length of the chimney, altitude and outside temperature. - Page 21 USE OF THE BYPASS DAMPER Your stove is equipped with a bypass damper. This feature should be used, if needed, upon start-up of the stove to help heat-up the chimney faster. The bypass damper should be closed as soon as there is a fire going inside the firebox and smoke is moving upward through the exhaust system.
-
Page 22: Creosote Formation And Need For Removal
CREOSOTE FORMATION AND NEED FOR REMOVAL When wood is burned slowly, it produces tar and other organic vapours, which combine with expelled moisture to form creosote. The creosote vapours condense in the relatively cool chimney flue of a slow-burning fire. As a result, creosote residue accumulates on the flue lining. -
Page 23: Maintenance
Do not abuse the glass door by striking or slamming shut. Do not use the stove if the glass is broken. • If the glass on your stove breaks, replace only with glazing supplied from the Osburn dealer. -
Page 26: Osburn Limited Lifetime Warranty
Paint (peeling), gaskets, insulation, and ceramic glass (thermal breakage 1 year only*) *Pictures required Shall your unit or a components be defective, contact immediately your OSBURN dealer. Prior to your call make sure you have the following information necessary to your warranty claim treatment: • •...
Need help?
Do you have a question about the 2300 and is the answer not in the manual?
Questions and answers