
Related Manuals for Viking X-9S


Summary of Contents for Viking X-9S
- Page 1 INSTALLATION INSTRUCTIONS AND SAFETY INFORMATION SOLAR POWER FOR THE VIKING X-9S GATE OPER ATOR C L A S S I Residential Vehicular Swing Gate Operator...
- Page 2 The X-9S™ Viking Solar Gate Operator has the capacity to operate swing gates up to 600 lbs. and 14 ft. long under extreme conditions. This efficient operator provides a solution for residential swing gate solar applications thanks to its efficient electromechanical design. Equipped with the latest solar innovations, the X-9S™ is the most energy efficient articulated arm swing gate operator offered on the market.
- Page 3 X-9s Solar Vehicular Swing Gate Operator • Revision SX9MN10.D2 • February 2017 VIKING TECHNICAL SUPPORT 1.800.908.0884...
-
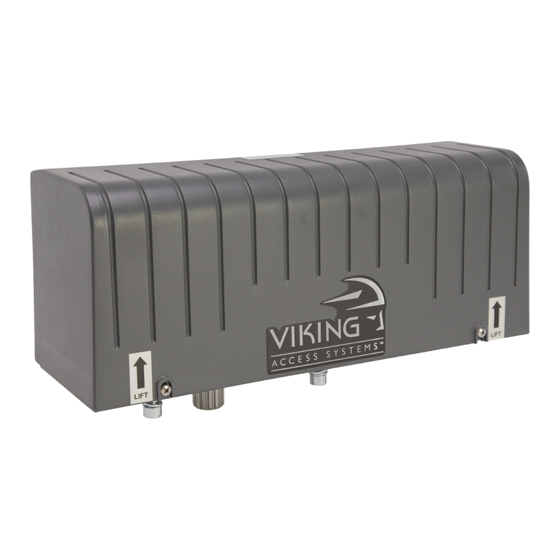
Page 4: Parts Diagram/Parts List
Strain Relief (X-9) VAX9ST Arm Assembly, articulated VAX9AA Limit Switch Holder VAX9LSH Limit Switch (2) VAX9LS Limit Cam & Holder VAX9LCS Terminal Block (Motor) VAX9TB Key Release VAX9KR Cover Screw (2) VAX9CS Positive Stop Extension VAX9PSE VIKING TECHNICAL SUPPORT 1.800.908.0884... - Page 5 ECU Cabinet Chassis VNXECUBB Alarm Reset Switch ECURW ECU Key Cylinder & Key(s) ECUKEYC20 ECU Access Key(s) ECUKEY20 Fuse Kit DUFSKNX Radio Antenna Kit VARAK Strain Relief (ECU) DH3/4NMCC Alarm DUAL10 6 Conductor Cable, 16 AWG Shielded VA-CB16 VIKING TECHNICAL SUPPORT 1.800.908.0884...
-
Page 6: Control Board References
14. “DIAGNOSE” LED 25. “EPS1” CONNECTOR provides power to the Slave Module. pg 23 informs that errors have been detected and communication for Viking Solar Charger. available on LCD Display. pg 36-38 3. FUSE HOLDER - 15 AMP 26. “EPS2” CONNECTOR for the Slave motor circuit. -
Page 7: Table Of Contents
Anti-Tailgate, Open Commands, Guard Station Viking Loop Rack Guidelines for Loop Installations Barrier Arm (B-12) Synchronization Option TROUBLESHOOTING 34-39 LED References 34-35 LCD Display References 36-38 Solutions APPENDIX A, B & C 40-43 VIKING EXPANSION PRODUCTS VIKING TECHNICAL SUPPORT 1.800.908.0884... -
Page 8: Important Safety Information
5. The gate operator controls must be placed so that the user has full view of the gate area when the gate is moving AND AWAY FROM THE GATE PATH PERIMETER. VIKING TECHNICAL SUPPORT 1.800.908.0884... -
Page 9: Important Installation Instructions
One or more contact sensors shall be located at the bottom edge of a vertical barrier (arm). h. Use only Miller Edge edge sensor (refer to pages 10 -11). VIKING TECHNICAL SUPPORT 1.800.908.0884... -
Page 10: Maintenance
• In particular, regular checks are recommended in order to verify that the safety devices are operating correctly. All installation, maintenance and repair work must be documented and made available to the user. VIKING TECHNICAL SUPPORT 1.800.908.0884... -
Page 11: Operator Classification
Install the gate operator only when: The operator is appropriate for the construction of the gate and the Usage Class of the gate. VIKING TECHNICAL SUPPORT 1.800.908.0884... -
Page 12: Secondary Entrapment Protection Requirements
(also, refer to page 43) • Use only UL Listed Edge Sensor and Photoelectric Beams. Photo Beam (non-contact sensor) Edge Sensor (contact sensor) VIKING TECHNICAL SUPPORT 1.800.908.0884... -
Page 13: Secondary Entrapment Protection Installation
WARNING! Not Following these instructions may cause severe injury or death. Secondary Entrapment Protection Installation STEP 1 Connect the secondary entrapment protection sensor(s) to the Viking control board as illustrated below. Up to four 10K resistor based sensors can be wired in parallel. STEP 2 Confirm the number of sensors connected: •... -
Page 14: Audible Alarm Reset Installation
• A minimum of two placards shall be installed. • A placard is to be installed in the area of each side of the gate and be visible. VIKING TECHNICAL SUPPORT 1.800.908.0884... -
Page 15: Important Installation Information
3. At least 6 feet away from all moving parts of the gate. 14 ft. 600 lb. X-9S Specifications: UL Application Class: Class I Maximum Gate Length: 14 ft. Maximum Gate Weight: 600 lb. Operating Temperature: -4°F (-20°C) to 160°F (71°C) VIKING TECHNICAL SUPPORT 1.800.908.0884... -
Page 16: Gate Operator Installation
2. Swing gates are not to open into public access areas. Varying from the dimensions provided above may severely af fect the speed and performance of the gate operator. VIKING TECHNICAL SUPPORT 1.800.908.0884... -
Page 17: Push To Open Installation
2. Swing gates are not to open into public access areas. Varying from the dimensions provided above may severely af fect the speed and performance of the gate operator. VIKING TECHNICAL SUPPORT 1.800.908.0884... -
Page 18: Mounting The Gate Operator
Part # VA-X9PS Pipe Stand is available for the X-9 Operator as an option to welding the operator to the gatepost. Mounting hardware provided for 3.00” O.D. pipe. 2. Mounting Bracket is powder coated 1/4” steel. VIKING TECHNICAL SUPPORT 1.800.908.0884... -
Page 19: Limit Switch Setup
NOTE: The Positive Stop is designed only to eliminate free play in the arms when the gate is fully closed and should not trip the Obstruction Detection Sensor “ODS”. VIKING TECHNICAL SUPPORT 1.800.908.0884... -
Page 20: Ecu Box Installation
Plate. The plate is held in NOTE: Anchors are Not the inside of the control the box by four screws. Supplied. box). Mounting Fastener (Customer Supplied) Sealed Washer (Supplied with Unit) Control Box Mounting Surface VIKING TECHNICAL SUPPORT 1.800.908.0884... -
Page 21: Electrical Installation
• Observe proper polarity orientation between the battery Conduit and charging circuit. Solar Panel Selection • Solar panel(s) are sold separately. • Use only UL Listed 12V solar panel(s), such as Viking part #s: Open-Circuit Short-Circuit Wattage Viking Part# Voltage... -
Page 22: Solar Panel Care & Installation Tips
• Always use a single bonding point for grounding. • All ground wires must be as short and as thick as possible. • Prevent unnecessary turns or loops in all ground wires. Ground Rod VIKING TECHNICAL SUPPORT 1.800.908.0884... -
Page 23: Solar Connection & Power Saving Tips
Indicates that there is no voltage being provided from the solar panel. NO PANEL ERR NO Solar board can’t detect a solar gate operator. Sol UNIT ERR CHRG Potential problem with the Solar Charger. HIGH ERR BAT The battery is low VIKING TECHNICAL SUPPORT 1.800.908.0884... -
Page 24: Motor Cable
Place the terminal block in the proper location for the gate opening direction. • “OPEN RIGHT” Connector if the gate opens Inside to the Right or Outside to the Left. • “OPEN LEFT” Connector if the gate opens Inside to the Left or Outside to the Right. VIKING TECHNICAL SUPPORT 1.800.908.0884... - Page 25 Place the terminal block in the proper location for the gate opening direction. • “OPEN RIGHT” Connector if the gate opens Inside to the Right or Outside to the Left. • “OPEN LEFT” Connector if the gate opens Inside to the Left or Outside to the Right. VIKING TECHNICAL SUPPORT 1.800.908.0884...
-
Page 26: Limit Indications
“Limit Close” LED “Limit Open” LED indicates SLAVE is at indicates SLAVE is at the close limit. the open limit. Reference Wiring Diagram VIKING TECHNICAL SUPPORT 1.800.908.0884... -
Page 27: Control Board Setup
Turning the dial between “0” and “OFF” For Master/Slave or dual applications, will disable this feature, requiring a close the Master will delay to open and the command to close the gate. slave will delay to close. VIKING TECHNICAL SUPPORT 1.800.908.0884... -
Page 28: Initial Settings
“COM” and “N.O.”. 2. Until gate reaches either limit: “AUX. PWR” terminals provide 24VDC. “Sync” Used only in conjunction with the Viking Barrier gate operator model B-12. Activating this feature allows for synchronized operation with the B-12 operator. See page 33. “EXT”... -
Page 29: Obstruction Detection Sensor (Primary Entrapment Protection)
“Alarm Reset” switch has been when it has been triggered. actuated. (refer to page 12) A. Solid: Obstruction. Detected a sudden or abrupt increase in gate resistance. B. Flashing: Overload. Detected a more subtle, but sustained increase in gate resistance. VIKING TECHNICAL SUPPORT 1.800.908.0884... -
Page 30: Accessory Connections
“Re-Open” terminal on the control board. to the control board and individual Typically, these are the transmitter/ input terminal functions, refer to receiver type photo beams. “Appendix (A)”, pages 40-41. VIKING TECHNICAL SUPPORT 1.800.908.0884... -
Page 31: Radio Receiver (Typical)
TECHNICAL TIP: For more information regarding accessory connections and terminal functions, refer to “Appendix (A)” on pages 40-41. See “Appendix (B)” on page 42 for connecting common radio receiver models. VIKING TECHNICAL SUPPORT 1.800.908.0884... -
Page 32: Anti-Tailgate, Open Commands, Guard Station
“C” connection to “GND”. “ATG” Anti-Tailgate This input will stop the gate when the vehicle triggers the sensor, then closes the gate when the vehicle leaves the sensor, preventing unauthorized vehicles from entry. N.O. VIKING TECHNICAL SUPPORT 1.800.908.0884... -
Page 33: Viking Loop Rack
This operator may be equipped with a pre-wired Loop Rack that plug-in type loop detectors can be connected to. This provides a convenient alternative to the box type loop detectors that would need to be wired to the control board. Viking does not provide either type of loop detectors. -
Page 34: Guidelines For Loop Installations
Perimeter (ft.) Number of Turns 30-40 50-100 Dimension “A” - 5’ for Single Gate 6’ for Dual Gate Outside Inside Center Exit Reopen Reopen Loop Loop Loop Loop Make Even with Open Gate Gate in Open Position VIKING TECHNICAL SUPPORT 1.800.908.0884... -
Page 35: Barrier Arm (B-12) Synchronization Option
This type of application opens and closes in the following pattern: 1. Open Command is provided only to the Viking B-12 Barrier Arm Operator. 2. The Barrier Arm will delay to open until this Gate Operator reaches its Open Limit. -
Page 36: Troubleshooting
Control Board is receiving an input from a device connected to the Re- 9, 10 Open terminal (pg 28, 31, 40). “ATG” Normal Condition. SOLID Control Board is receiving an input from a device connected to the ATG 9, 10 terminal (pg 30, 40). VIKING TECHNICAL SUPPORT 1.800.908.0884... - Page 37 S3 “Limit Open” (slave) Slave gate is not at the open limit position. SOLID Slave gate is at the open limit position. FLASHING Indicates a problem with the limit switches or wires on the slave operator. VIKING TECHNICAL SUPPORT 1.800.908.0884...
-
Page 38: Lcd Display References
“DIAGNOSE” LED on the Slave Module. (pg 27, 34, 35 @ S1) UL LEARN Indicates the number of connected Secondary Entrapment Protection Sensors that are being monitored through the UL input terminal. (pg 11) SENSOR _ VIKING TECHNICAL SUPPORT 1.800.908.0884... - Page 39 SOL VOLT This is the actual voltage from the solar panel. __._ VAC CHARGE Indicates the voltage being supplied to the Control Board from the Viking Solar Charger. __._ VDC BAT VOLT This is the actual voltage from the Battery __._ VDC...
- Page 40 One, or more, of the internal reference voltages from the VFlex (Master) Control Board are incorrect. WRONG ERR UL There is a problem with the required monitored sensor(s) connected to the “UL” input terminal (pg 10-11). SENSOR VIKING TECHNICAL SUPPORT 1.800.908.0884...
-
Page 41: Solutions
Manually adjust any setting on the Control Board to clear all wireless override settings. Not applicable to this model. Not applicable to this model. Check the secondary entrapment protection sensors connected to “UL” terminal. pg 10-11 Call Viking Technical Support for further assistance. VIKING TECHNICAL SUPPORT 1.800.908.0884... -
Page 42: Appendix A, B & C
Each input Terminal (i.e. Radio, Exit, Re-Open, UL) has a corresponding Status LED that when illuminated indicates an input is currently being provided to the terminal and the gate is responding accordingly. (See pages 34-35 LED References) VIKING TECHNICAL SUPPORT 1.800.908.0884... - Page 43 APPENDIX (A) Relays In General NOTE: Viking Access Systems does not provide the external safety devices and access controls. These items can be purchases from your dealer or distributor. In General Glossary of Terms 1. Terminal: Wire Connections. In regards to the Viking control board, 2.
- Page 44 Appendix (B) Common Radio Receivers - Connections VIKING TECHNICAL SUPPORT 1.800.908.0884...
- Page 45 ALL sensors connected to the UL input terminal are desired to reverse the gate all the way to the OPEN LIMIT position. STEP 1 Connect the Monitored Sensor to the Viking control board input terminals “UL” and “GND” as illustrated. STEP 2...
-
Page 46: Viking Expansion Products
Off-site access to operator diagnostics and perform firmware updates from just about anywhere with cellular service. With the Viking App, this tool allows you to monitor and label multiple operators by site and location for quick reference. Provides error notifications, operator status, settings and diagnostic information. - Page 47 OUR CONTINUOUS COMMITMENT TO EXCELLENCE Viking Access Systems is continuously working hard to identify and design products that will appeal to the industry and its needs. As technology continues to advance, we have developed a completely efficient and intelligent line of gate operators to meet the changing demands.
- Page 48 Power Saving Technology minimizes current • Inherent Overload Protection; Redundancy draw. Design with multiple types of protection. • Viking Solar Power Management System • Articulated Arm Actuator. maximizes the number of cycles per day • Easy access to manual operation, allowing •...