
Related Manuals for ESAB Renegade ET 300i


Summary of Contents for ESAB Renegade ET 300i
- Page 1 ET 300i, ET 300iP Welding power source TIG 300 A Instruction manual Valid for: serial no. 721-, 742-xxx-xxxx 0463 416 001 GB 20171016...
-
Page 3: Table Of Contents
TIG settings....................6.3.1 Hidden TIG functions................6.3.2 Measured values ..................TIG functions explanation ............... 6.4.1 Foot pedal functions explanation............MMA settings .................... 6.5.1 Hidden MMA functions ................6.5.2 Measured values ..................MMA functions explanation..............0463 416 001 © ESAB AB 2017... - Page 4 Routine maintenance ................Cleaning instruction................. TROUBLESHOOTING ................... 36 ERROR CODES..................... 37 Error code descriptions ................ORDERING SPARE PARTS ................39 DIAGRAM ......................ORDERING NUMBERS ..................ACCESSORIES ....................Rights reserved to alter specifications without notice. 0463 416 001 © ESAB AB 2017...
-
Page 5: Safety
Data Sheets (SDSs). Safety precautions Users of ESAB equipment have the ultimate responsibility for ensuring that anyone who works on or near the equipment observes all the relevant safety precautions. Safety precautions must meet the requirements that apply to this type of equipment. The following recommendations should be observed in addition to the standard regulations that apply to the workplace. - Page 6 • Protect your eyes and body. Use the correct welding screen and filter lens and wear protective clothing. • Protect bystanders with suitable screens or curtains. NOISE - Excessive noise can damage hearing Protect your ears. Use earmuffs or other hearing protection. 0463 416 001 - 6 - © ESAB AB 2017...
- Page 7 For further information contact the nearest ESAB dealer. ESAB has an assortment of welding accessories and personal protection equipment for purchase. For ordering information contact your local ESAB dealer or visit us on our website. 0463 416 001 - 7 -...
-
Page 8: Introduction
Overview The ET 300i and ET 300iP are welding power sources intended for TIG welding and for welding with covered electrodes (MMA). ESAB accessories for the product can be found in the "ACCESSORIES" chapter of this manual. Equipment The power source is supplied with: •... -
Page 9: Technical Data
Open-circuit voltage U 48 V 48 V Open-circuit voltage U 34 V 34 V max with VRD 35 V activated 12.4 kV 12.4 kV Operating temperature -10 to +40 °C (+14 to +104 °F) 0463 416 001 - 9 - © ESAB AB 2017... - Page 10 Equipment marked IP23 is intended for indoor and outdoor use. Application class The symbol indicates that the power source is designed for use in areas with increased electrical hazard. 0463 416 001 - 10 - © ESAB AB 2017...
-
Page 11: Installation
B. Minimum 200 mm (8 in.) WARNING! Secure the equipment - particularly if the ground is uneven or sloping. Lifting instructions Mechanical lifting must be done with both outer handles. 0463 416 001 - 11 - © ESAB AB 2017... -
Page 12: Mains Supply
380–415 V mains supply. If other mains voltage is required, the mains cable may be changed according to relevant national regulations. For recommendations, see section Recommended fuse sizes and minimum cable area. 0463 416 001 - 12 - © ESAB AB 2017... - Page 13 11. Ensure that the IP shield is correctly mounted on the inside of the side panel (E). 12. Reassemble the side panel (F). 13. Tighten the screws on the side panel with 3 ±0.3 Nm (26.6 ±2.7 in. lb). 3-phase 0463 416 001 - 13 - © ESAB AB 2017...
- Page 14 4 INSTALLATION 1-phase WARNING! In 1-phase operation the terminal L3 is powered, even though not connected. Make sure to keep terminal L3 disconnected. 0463 416 001 - 14 - © ESAB AB 2017...
-
Page 15: Recommended Fuse Sizes And Minimum Cable Area
A 16 A mains fuse may enable the use of a 16 A mains plug in combination with a 3×2,5 mm mains cable. MMA 1~ 230 V 16 A 100% 200 A* 150 A 120 A 28.0 V 26.0 V 24.8 V 0463 416 001 - 15 - © ESAB AB 2017... - Page 16 Generators with Automatic Voltage Regulation (AVR) or with equivalent or better type of regulation, with rated power 20 kW, are recommended. 0463 416 001 - 16 - © ESAB AB 2017...
-
Page 17: Operation
Welding cable or return cable Gas supply output USB connection TIG torch trigger Connection for cooling unit Connection (-): TIG: torch MMA: Return Mains cable cable or welding cable Connection for remote control unit 0463 416 001 - 17 - © ESAB AB 2017... -
Page 18: Tig Welding
Turning the mains power on/off Turn on the mains power by turning switch to the ”I” position. Turn the unit off by turning the switch to the ”O” position. 0463 416 001 - 18 - © ESAB AB 2017... -
Page 19: Connect To Cooler Ec 1000
The fan starts again when welding restarts. During energy-saving mode the fan will start occasionally and run for a few minutes. 0463 416 001 - 19 - © ESAB AB 2017... -
Page 20: Thermal Protection
The VRD function ensures that the open-circuit voltage does not exceed 35 V when welding is not being carried out. This is indicated by a lit VRD indicator on the panel. Contact an authorised ESAB service technician to activate this function. -
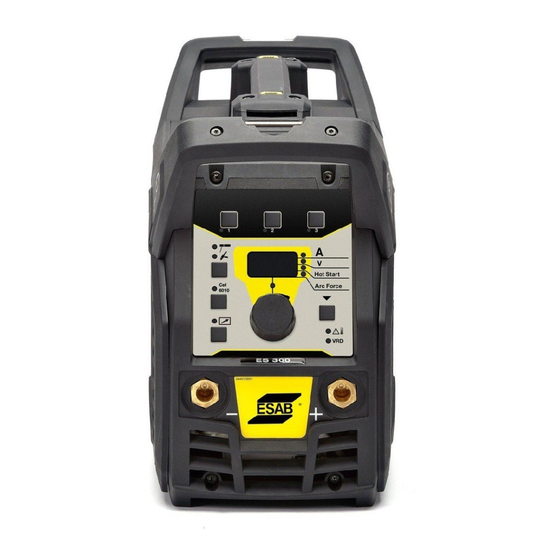
Page 21: Control Panel
By pressing the button (11) different values can be shown. Use the knob (7) to change the values. The sequence is: Set current value. Measured current value. Measured voltage value. Slope down (TIG only) Gas post flow (TIG only) 0463 416 001 - 21 - © ESAB AB 2017... -
Page 22: Weld Program
(1). Press selection button 1, 2 or 3 for 3 seconds to store a weld program in the memory. The memory indicator will be lit when finished. To switch between the different weld programs press button 1, 2 or 3. 0463 416 001 - 22 - © ESAB AB 2017... -
Page 23: Et 300Ip
Parameter selection button, selection indicated by (18). Also used for access to hidden functions. Slope up indicator. Overheating indicator. Direct current or pulse current indicator. VRD function (reduced open-circuit voltage) indicator. Pulse balance. 0463 416 001 - 23 - © ESAB AB 2017... -
Page 24: Navigation
The set indicator (4) is off when measured values are shown. Weld parameters The weld parameters are stored for pulse and no pulse respectively. The values are changed when changing between pulse and no pulse. 0463 416 001 - 24 - © ESAB AB 2017... -
Page 25: Tig Settings
0.01–999 Hz 0.10–0.99: 0.01 100 Hz frequency 1.0–9.9: 0.1 10–100: 1 100–300: 10 300–999: 100 Remote min 0–99% current *) Parameter cannot be changed while welding H = Hidden function 0463 416 001 - 25 - © ESAB AB 2017... -
Page 26: Hidden Tig Functions
In order to minimize the risk of tungsten contaminations the start current is very low and will slope up to the set current (controlled by the slope up function). 0463 416 001 - 26 - © ESAB AB 2017... - Page 27 Slope up The slope up function is used to control the time of the current increase in the weld initiation process to avoid any possible damage to the tungsten electrode. 0463 416 001 - 27 - © ESAB AB 2017...
-
Page 28: Foot Pedal Functions Explanation
Release the TIG torch trigger switch (2) to start to slope down the current and terminate the arc. The shielding gas will continue to flow in order to protect the weld and the tungsten electrode. 0463 416 001 - 28 - © ESAB AB 2017... - Page 29 Release the foot pedal to start to slope down the current and to terminate the arc. The shielding gas will continue to flow in order to protect the weld and the tungsten electrode. 0463 416 001 - 29 - © ESAB AB 2017...
-
Page 30: Mma Settings
3 seconds again. Letter Function Settings Arc force 0–99 Hot start 0–99% 6.5.2 Measured values Measured current Measured value in the display for welding current A is arithmetic average value. 0463 416 001 - 30 - © ESAB AB 2017... -
Page 31: Mma Functions Explanation
The hot start function temporarily increases the current in the beginning of the weld, thus reducing the risk of lack of fusion in the starting point. Hot start only applies to MMA welding. 0463 416 001 - 31 - © ESAB AB 2017... -
Page 32: Maintenance
To maintain the performance and increase the lifetime of the power source it is mandatory to clean it regularly. How often depends on: • the welding process • the arc time • the working environment 0463 416 001 - 32 - © ESAB AB 2017... - Page 33 Since the power source contains one "dirty side" (the right side) and one "clean side" (the left side), it is important that you do not remove the left side panel before cleaning the right side of the power source. 0463 416 001 - 33 - © ESAB AB 2017...
- Page 34 The IP shield should be angled approximately 90° into the power source, so that it is positioned between the welding outlet connector and the transformer outlets. 0463 416 001 - 34 - © ESAB AB 2017...
- Page 35 7 MAINTENANCE Tighten the screws on the side panels with 3 Nm ± 0.3 Nm (26.6 in lb. ± 2.6). 0463 416 001 - 35 - © ESAB AB 2017...
-
Page 36: Troubleshooting
• Check and clean the cooler. The maximum current • Check that the power source is connected to 3-phase setting is limited to 200 A mains power supply. • Check the mains power supply fuses. 0463 416 001 - 36 - © ESAB AB 2017... -
Page 37: Error Codes
If several errors have been detected only the code for the last occurring error is displayed. Error code descriptions Error codes that the user can handle are listed below. If any other error code appears, contact an authorised ESAB service technician. Error code Description Err 1 Temperature fault The temperature of the power source is too high. - Page 38 Action: If a water cooled torch is used make sure it is connected to the cooling unit. If a water cooled torch is not used, press a button on the control panel to cancel the error. If the error persists, contact a service technician. 0463 416 001 - 38 - © ESAB AB 2017...
-
Page 39: Ordering Spare Parts
Spare parts and wear parts can be ordered through your nearest ESAB dealer, see the back cover of this document. When ordering, please state product type, serial number, designation and spare part number in accordance with the spare parts list. -
Page 40: Diagram
DIAGRAM DIAGRAM 0463 416 001 - 40 - © ESAB AB 2017... -
Page 41: Ordering Numbers
ET 300i 0445 100 920 Welding power source ET 300iP 0463 423 001 Spare parts list 0463 424 001 Service manual Technical documentation is available on the Internet at www.esab.com 0463 416 001 - 41 - © ESAB AB 2017... -
Page 42: Accessories
Return cable kit 3 meter, incl. clamp and OKC 50 connector 0700 006 889 Return cable kit 5 meter, incl. clamp and OKC 50 connector 0160 360 881 OKC 50 male contact, pack 4 pcs 0463 416 001 - 42 - © ESAB AB 2017... - Page 43 0445 254 881 Interconnection cable, 6 pin, 10 m (32.8 ft) 0445 139 880 1 to 3 phase adapter Note! Only for use with Renegade ES 300i (0445 100 880), ET 300i (0445 100 900) and ET 300iP (0445 100 920) 0463 416 001 - 43 - © ESAB AB 2017...
- Page 44 ESAB subsidiaries and representative offices Europe THE NETHERLANDS North and South America SOUTH KOREA ESAB Nederland B.V. ESAB SeAH Corporation AUSTRIA Amersfoort ARGENTINA Kyungnam ESAB Ges.m.b.H Tel: +31 33 422 35 55 CONARCO Tel: +82 55 269 8170 Vienna-Liesing Fax: +31 33 422 35 44...
Need help?
Do you have a question about the Renegade ET 300i and is the answer not in the manual?
Questions and answers