
Related Manuals for ESAB Fabricator ET 410iP


Summary of Contents for ESAB Fabricator ET 410iP
- Page 1 Fabricator ET 410iP Welding power source TIG 410 A Instruction manual Valid for: Serial number: ZG147YY-XXXXXX 0447 209 001 GB 20220520...
-
Page 3: Table Of Contents
Error codes overview ................. Power supply phase loss protection ....................Over voltage protection .................... Under voltage protection ......................Temperature fault ....................... ORDERING SPARE PARTS ..........................WIRING DIAGRAM ............................. ACCESSORIES ......................... ORDERING NUMBERS 0447 209 001 - 3 - © ESAB AB 2022... -
Page 4: Safety
(SDSs). Safety precautions Users of ESAB equipment have the ultimate responsibility for ensuring that anyone who works on or near the equipment observes all the relevant safety precautions. Safety precautions must meet the requirements that apply to this type of equipment. The following recommendations should be observed in addition to the standard regulations that apply to the workplace. - Page 5 If equipped with ESAB cooler Use ESAB approved coolant only. Non-approved coolant might damage the equipment and jeopardize product safety. In case of such damage, all warranty undertakings from ESAB cease to apply. Recommended ESAB coolant ordering number: 0465 720 002. For ordering information, see the "ACCESSORIES" chapter in the instruction manual.
- Page 6 There may be potential difficulties in ensuring electromagnetic compatibility of class A equipment in those locations, due to conducted as well as radiated disturbances. 0447 209 001 - 6 - © ESAB AB 2022...
- Page 7 ESAB has an assortment of welding accessories and personal protection equipment for purchase. For ordering information contact your local ESAB dealer or visit us on our website. 0447 209 001 - 7 - ©...
-
Page 8: Introduction
The Fabricator ET 410iP is a welding power source intended for TIG welding and for welding with covered electrodes (MMA). ESAB accessories for the product can be found in the "ACCESSORIES" chapter of this manual. Equipment The power source is supplied with: •... -
Page 9: Technical Data
Constant sound pressure when idling <70 db (A) Dimensions l × w × h 525 × 280 × 475 mm Weight 38.5 kg (84.88 lbs) Insulation class Enclosure class IP 23S Application class 0447 209 001 - 9 - © ESAB AB 2022... - Page 10 Equipment marked IP23S is intended for indoor and may be used outdoors if sheltered during precipitation. Application class The symbol indicates that the power source is suitable for welding in an environment with an increased risk of electric shock. 0447 209 001 - 10 - © ESAB AB 2022...
-
Page 11: Installation
Position the power source so that its cooling air inlets and outlets are not obstructed. A. Minimum 200 mm (8 in.) B. Minimum 200 mm (8 in.) WARNING! Secure the equipment - particularly if the ground is uneven or sloping. 0447 209 001 - 11 - © ESAB AB 2022... -
Page 12: Lifting Instructions
TECHNICAL DATA chapter. Make sure it is protected by the correct fuse rating. A protective earth connection must be made, in accordance with regulations. 1. Rating plate with supply connection data 0447 209 001 - 12 - © ESAB AB 2022... -
Page 13: Recommended Fuse Sizes And Minimum Cable Area
Connect the adaptor to the cooling unit by the provided M6×10 screws. 2. Connect the Cool 2 Adaptor to the Fabricator ET 410iP: a. Remove the feet from the power source and install on the cooling unit. 0447 209 001 - 13 - © ESAB AB 2022... - Page 14 Place the power source on the adaptor and connect the cable through the bottom plate to PCBA. Plug the connector into P6. d. Assemble the power source and the adaptor with the screws. 0447 209 001 - 14 - © ESAB AB 2022...
- Page 15 4 INSTALLATION e. Reattach the side panel of the power source with the screws. 0447 209 001 - 15 - © ESAB AB 2022...
-
Page 16: Operation
For TIG welding, the welding power source shall be supplemented with: • a TIG torch with gas valve • an argon gas cylinder • an argon gas regulator • tungsten electrode • return cable (with clamp) 0447 209 001 - 16 - © ESAB AB 2022... -
Page 17: Mma Welding
The protection is automatically reset when the temperature has been sufficiently reduced. 0447 209 001 - 17 - © ESAB AB 2022... -
Page 18: Voltage Reduction Device (Vrd)
If this channel did not have any settings before, the display shows: ---, and no settings will be loaded. To exit memory function, press the memory button (9) shortly. 0447 209 001 - 18 - © ESAB AB 2022... -
Page 19: Control Panel
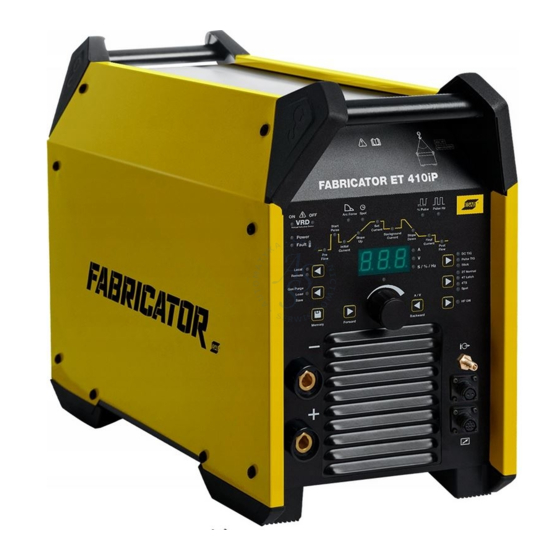
6 CONTROL PANEL CONTROL PANEL Fabricator ET 410iP 0447 209 001 - 19 - © ESAB AB 2022... -
Page 20: Navigation
The set indicator (13) is off when measured values are shown. Weld parameters The weld parameters are stored for pulse and no pulse respectively. The values are changed when changing between pulse and no pulse. 0447 209 001 - 20 - © ESAB AB 2022... -
Page 21: Tig Settings
Measured current Measured value in the display for welding current A is arithmetic average value. Measured voltage Measured value in the display for arc voltage V is arithmetic average value. 0447 209 001 - 21 - © ESAB AB 2022... -
Page 22: Tig Functions Explanation
(3), the current will slope down to the final current. Release the trigger switch (4) to terminate the arc. The shielding gas will continue to flow in order to protect the weld and the tungsten electrode. 0447 209 001 - 22 - © ESAB AB 2022... - Page 23 In 4T latch/PULSE TIG mode, press the TIG torch trigger switch (1) to start the shielding gas flow and initiate the arc. The current goes to start pulse for 20 ms then goes to initial current. Release the 0447 209 001 - 23 - © ESAB AB 2022...
- Page 24 Release the trigger switch (8) again to terminate the arc. The shielding gas will continue to flow in order to protect the weld and tungsten electrode. 0447 209 001 - 24 - © ESAB AB 2022...
- Page 25 The current goes to start pulse for 20 ms then goes to set current. The current change between set current and background current. Keep pressing the trigger switch, the machine will 0447 209 001 - 25 - © ESAB AB 2022...
- Page 26 The higher of the two current values when using a pulsed current or the maximum current range in DC TIG remote mode. Background current The lower of the two current values when using a pulsed current. 0447 209 001 - 26 - © ESAB AB 2022...
-
Page 27: Mma Settings
Measured current Measured value in the display for welding current A is arithmetic average value. Measured voltage Measured value in the display for arc voltage V is arithmetic average value. 0447 209 001 - 27 - © ESAB AB 2022... -
Page 28: Mma Functions Explanation
The start pulse (similar to hot start) function temporarily increases the current in the beginning of the weld, thus reducing the risk of lack of fusion in the starting point. 0447 209 001 - 28 - © ESAB AB 2022... -
Page 29: Maintenance
Area to maintain Every 3 months Clean or replace Clean weld terminals. Check or replace weld unreadable labels. cables. Every 6 months Clean inside equipment. Use dry compressed air with reduced pressure. 0447 209 001 - 29 - © ESAB AB 2022... -
Page 30: Cleaning Instructions
2. Remove the screws holding the right side panel (R) and remove the panel. 3. Clean the right side of the power source, using dry compressed air with reduced pressure. 0447 209 001 - 30 - © ESAB AB 2022... - Page 31 6. Make sure that there is no dust left on any part of the power source. 7. After having finished cleaning the power source, reattach the power source panels in the reverse order. 8. Tighten the screws on the side panels with 5 Nm ± 0.3 Nm (44.25 in lb. ± 2.6). 0447 209 001 - 31 - © ESAB AB 2022...
-
Page 32: Troubleshooting
Check and clean the cooler The maximum current setting Check that the power source is connected to 3-phase mains power can't reach 410 A supply Check the mains power supply fuses. 0447 209 001 - 32 - © ESAB AB 2022... -
Page 33: Error Codes
If several errors have been detected only the code for the last occurring error is displayed. Error codes that the user can handle are listed below. If any other error code appears, contact an authorised ESAB service technician. Power supply phase loss protection The power supply to the power source loses any phase. -
Page 34: Ordering Spare Parts
Spare parts and wear parts can be ordered through your nearest ESAB dealer, see esab.com. When ordering, please state product type, serial number, designation and spare part number in accordance with the spare parts list. -
Page 35: Wiring Diagram
APPENDIX APPENDIX WIRING DIAGRAM 0447 209 001 - 35 - © ESAB AB 2022... -
Page 36: Accessories
TIG torch, SR-B 400-8 m-ED 0700 500 084 MMA 4 Analogue Remote Control incl. 10 m cable and 8-pin connector 0465 427 880 Cool 2 0447 248 001 Cool 2 Adaptor (Connect Fabricator ET 410iP with Cool 2) 0447 209 001 - 36 - © ESAB AB 2022... -
Page 37: Ordering Numbers
0447 219 001 Spare parts list Fabricator ES 410iC & ET 410iP 0447 220 001 Service manual Fabricator ES 410iC & ET 410iP Technical documentation is available on the Internet at: www.esab.com 0447 209 001 - 37 - © ESAB AB 2022... - Page 38 For contact information visit http://esab.com ESAB AB, Lindholmsallén 9, Box 8004, 402 77 Gothenburg, Sweden, Phone +46 (0) 31 50 90 00 http://manuals.esab.com...
Need help?
Do you have a question about the Fabricator ET 410iP and is the answer not in the manual?
Questions and answers