Table of Contents
Advertisement
Quick Links
Futuro Futuro
Futuro Futuro
RANGE HOOD
INSTALLATION MANUAL
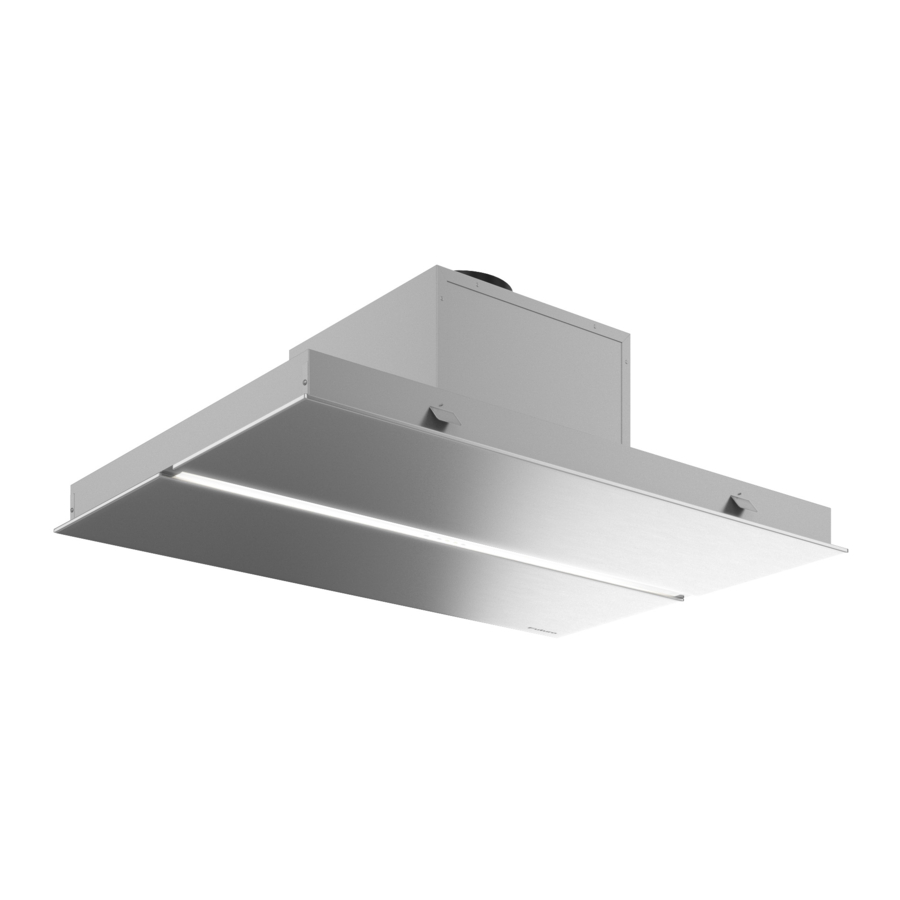
MODEL: SAVONA CEILING
NOTE: PRIOR TO INSTALLATION
Please inspect range hood visually,
as well as connect it to power supply
and test its operation.
34 5/8"
25 1/2"
PREPARATION
2
1.) The outer panel is held in place by magnets.
To open the panel, pull down on the edge of the panel,
in BOTH of the indicated spots - in order to avoid
potentially warping the panel.
1
34"
13"
4 5/8"
4 5/8"
24"
2.) Remove filter panels
(2 on 36" version, 4 on 48" version)
& remove screws as shown.
INSTALL RETAINING FRAME
3
1.) Remove mounting bolts from hood.
2.) Place retaining frame against ceiling,
mark locations of screw holes, and drill holes.
NOTE: for concrete or masonry ceilings,
use plastic anchors as necessary.
3.) Secure retaining frame
to ceiling with mounting bolts.
GENERAL DIMENSIONS
NOTE: Inch dimensions are approximate, and
given for reference / convenience only.
Always measure the actual items on-site and
make drilling / cutting marks according to
actual materials & measurements - not estimates.
10 1/2"
4 1/4"
4 7/8"
3.) Disconnect blower cable.
4.) Close cover panels.
5.) Separate the retaining frame
(upper portion) from the
hood body (lower portion).
34"
13"
10 1/2"
35 1/2"
35 1/2"
4 1/4"
25 1/2"
Advertisement
Table of Contents

Related Manuals for Futuro Futuro SAVONA CEILING


Summary of Contents for Futuro Futuro SAVONA CEILING
-
Page 1: Range Hood
/ convenience only. Always measure the actual items on-site and INSTALLATION MANUAL make drilling / cutting marks according to actual materials & measurements - not estimates. MODEL: SAVONA CEILING 34” 34” NOTE: PRIOR TO INSTALLATION 13” 4 5/8”... - Page 2 CHOOSE BLOWER EXHAUST DIRECTION VARIABLE BLOWER DIRECTION This range hood features a blower enclosure that can be rotated in 90-degree increments, To change the direction of the in order to exhaust in different directions. If the factory default exhaust direction doesn’t exhaust: fit your installation needs - see sidebar on right for instructions on changing exhaust direction.
Need help?
Do you have a question about the SAVONA CEILING and is the answer not in the manual?
Questions and answers