
Related Manuals for Stanley MSD 1000


Summary of Contents for Stanley MSD 1000
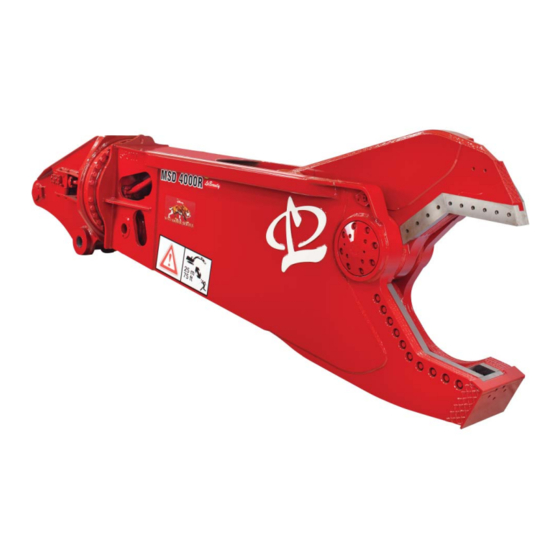
- Page 1 Safety, Operation & Maintenance Manual Saber Series™ Shears Part Number 512141...
- Page 2 TABLE OF CONTENTS INTELLECTUAL PROPERTY – PATENT INFORMATION This product is covered by one or more of the following patents. U.S. PATENT NUMBERS: 5,474,242 7 ,240,869 5,531,007 7 ,487 ,930 5,992,023 7 ,578,461 7 ,322,273 7 ,832,130 8,146,256 8,104,384 EPO Patent Numbers 435,702 737 ,107 1,682,299...
-
Page 3: Table Of Contents
TABLE OF CONTENTS SECTION 1 INTRODUCTION TO SAFETY Introduction ..........................1-2 Understand Signal Words ......................1-2 Safety Summary .........................1-3 Attachment Decals ........................1-5 SECTION 2 ABOUT THE ATTACHMENT Model Description ........................2-2 Features ............................2-2 Attachment Terms........................2-3 Attachment Glossary ......................... 2-4 Flow and Pressure Requirements ....................2-7 SECTION 3 INSTALLATION Shear Mounting Procedure ......................3-2... - Page 4 TABLE OF CONTENTS SECTION 5 MAINTENANCE continued Lubrication ...........................5-9 Bolt Torque Guidelines ........................5-10 Metric Capscrew Size Guide ......................5-10 Torque Values for Metric Fasteners..................... 5-11 Slide Screw Maintenance ......................5-12 Blade Removal ..........................5-14 Blade Bolt Torque Specifi cations ....................5-15 Torque Values for Blade Bolts......................5-15 Guide Blade Shimming and Rotation ..................5-16 Cutting Blade Rotation Procedure ....................
- Page 5 TABLE OF CONTENTS SECTION 6 ROTATOR MAINTENANCE continued Rotation Control Valve Assembly Schematics and Descriptions ..........6-8 Internal Rotation Control System (if equipped) ................6-9 Accumulator Control Valve Assembly (if equipped) ..............6-10 Maintenance Intervals for Internal Rotation (if equipped) ............6-11 Accumulator Maintenance ......................
- Page 6 TABLE OF CONTENTS...
- Page 7 MSD SABER SERIES SHEARS SECTION 1 INTRODUCTION TO SAFETY Introduction ..........................1-2 Understand Signal Words ......................1-2 Safety Summary .........................1-3 Attachment Decals ........................1-4 Introduction to Safety Section 1 Page 1...
-
Page 8: Introduction
MSD SABER SERIES SHEARS UNDERSTAND SIGNAL INTRODUCTION WORDS Your safety and the safety of others is a direct result of how you operate and maintain your equipment. When you see the following symbols and signal words Read and understand this manual and other safety on your equipment or in this manual, be alert to information provided with the base machine and be the potential for personal injury or equipment... -
Page 9: Safety Summary
MSD SABER SERIES SHEARS SAFETY SUMMARY DO NOT close the attachment on a structure and If the attachment is not functioning properly, reverse the excavator in an attempt to pull down you MUST shut the machine down and follow material. proper lock-out, tag-out and repair procedures. - Page 10 MSD SABER SERIES SHEARS SAFETY SUMMARY continued DO NOT weld on any structural member unless specifi cally authorized by LaBounty. Any Under no circumstances should any unauthorized welding or welding procedures modifi cations be made to LaBounty equipment will void the warranty, and may cause structural without factory authorization.
-
Page 11: Attachment Decals
MSD SABER SERIES SHEARS ATTACHMENT DECALS STANLEY LABOUNTY BRAND DECALS (REPLACEMENT DECALS AVAILABLE UPON REQUEST) FIGURE 1-1 MODEL DECAL FIGURE 1-2 SAFETY FIRST DECAL PART NUMBER 503590 (INCLUDED WITH MANUALS) FIGURE 1-3 Introduction to Safety Section 1 Page 5... - Page 12 PART NUMBER 116404 5,992,023 7,578,461 1,682,299 FIGURE 1-5 7,322,273 7,832,130 1,789,225 8,146,256 8,104,384 STANLEY LABOUNTY 1538 Highway 2 1-800-522-5059 Two Harbors, MN 55616 www.stanleyhydraulic.com FOREIGN PATENTS AND OTHER PATENTS PENDING 116404 SAFETY DECAL PART NUMBER 503647 FIGURE 1-8 SAFE VIEWING DISTANCE DECAL...
-
Page 13: About The Attachment
MSD SABER SERIES SHEARS SECTION 2 ABOUT THE ATTACHMENT Model Description ........................2-2 Features ............................2-2 Attachment Terms........................2-3 Attachment Glossary ......................... 2-4 Flow and Pressure Requirements ....................2-7 About the Attachment Section 2 Page 1... -
Page 14: Model Description
– even in the harshest conditions. The main pivot shaft of every model is manufactured for long life and pivots on Stanley LaBounty’s specially designed bearings. These shears are designed to draw the material into the jaws to the point where the shear force is greatest, making them the most effi... -
Page 15: Attachment Terms
MSD SABER SERIES SHEARS ATTACHMENT TERMS ROTATOR ROTATING HEAD CYLINDER TURNTABLE BEARING CONNECTION TURNTABLE BEARING FRONT CYLINDER PIN FRONT CYLINDER PIN HYDRAULIC UPPER SHEAR MANIFOLD BLOCK BOOM PIVOT CUTTING SPEED VALVE BLADES (INSIDE SHEAR) SHEAR STICK GUIDE (SHEAR BODY) BLADE SLIDE SCREW RIGHT LOWER... -
Page 16: Attachment Glossary
MSD SABER SERIES SHEARS ATTACHMENT GLOSSARY Accumulator Used in a hydraulic rotation kit to store hydraulic fl uid to drive the rotation motor. Adjustment Custom-made plates that precisely adjust the lower cutting blades to the upper blades. These plates Plates make it possible to achieve a uniform blade gap on the shear. - Page 17 MSD SABER SERIES SHEARS ATTACHMENT GLOSSARY continued Guide Blade A replaceable component located opposite the cutting blades in the lower shear. The main purpose of the guide blade is to support the upper shear during the cutting cycle. This is a very important maintenance item.
- Page 18 Regenerative hydraulic valve mounted on the cylinder of LaBounty® MSD Saber Series shears that increases the shear closing speed (cylinder extend function) when the shear is not under a load, thereby reducing cycle times and increasing effi ciency. Stanley LaBounty uses a spool-type speed valve design for better durability over cartridge-type regenerative valves.
-
Page 19: Flow And Pressure Requirements
SHEAR RECOMMENDED 8, 10, 12, AND 14 SECOND CYCLE TIMES MODEL PRESSURE RANGE 8 SEC 10 SEC 12 SEC 14 SEC MSD 1000 MSD 1500 MSD 2000 4000 - 5500 PSI MSD 2500 (276-379 BAR) MSD 3000 MSD 4000 MSD 4500... -
Page 21: Installation
MSD SABER SERIES SHEARS SECTION 3 INSTALLATION Shear Mounting Procedure ......................3-2 Mobile Shear Start-up Procedure ....................3-4 Shear Removal Procedure ......................3-5 Shear Storage ..........................3-5 External Rotation Control System Installation (if equipped) ............3-6 Electrical Installation - Internal Rotaiton Control System ............3-6 Electrical Schematic - Internal Rotation Control System ............ -
Page 22: Shear Mounting Procedure
MSD SABER SERIES SHEARS SHEAR MOUNTING PROCEDURE Take note whether yours is a second member or a third member installation. A second member mount is where the shear replaces the excavator stick; a third member mount is where the shear replaces the bucket. - Page 23 MSD SABER SERIES SHEARS SHEAR MOUNTING PROCEDURE continued 7. Extend the cylinder rod or bucket linkage and move into position as necessary to pin this connection. Install shear supplied pin. It may be necessary to use a lifting device (overhead hoist, forklift, etc.) to position the cylinder or linkage correctly.
-
Page 24: Mobile Shear Start-Up Procedure
MSD SABER SERIES SHEARS MOBILE SHEAR START-UP PROCEDURE Air must be bled out of the cylinder prior to operation of the shear. Trapped air in the system leads to cavita- tion, oxidation of the oil, and excessive heat. These conditions promote hydraulic oil break down, contamina- tion, noise, sluggish operation, reduced component life and potential cylinder damage. -
Page 25: Shear Removal Procedure
MSD SABER SERIES SHEARS MOBILE SHEAR REMOVAL PROCEDURE 1. Position shear under the boom of the excavator as far as the stick cylinder will extend and lower shear to the ground. 2. Use blocking to support the stick cylinder from the excavator boom. -
Page 26: Internal Rotation Control System Installation (If Equipped)
MSD SABER SERIES SHEARS INTERNAL ROTATION INSTALLATION CONTROL SYSTEM 1. Place the foot switch or other preferred control INSTALLATION switch inside the cab in a convenient location for operating. if equipped 2. Route the electrical cord with the plug up the boom (and stick if the shear replaces the bucket). -
Page 27: Electrical Schematic Internal Rotation Control System
MSD SABER SERIES SHEARS ELECTRICAL SCHEMATIC INTERNAL ROTATION CONTROL SYSTEM if equipped 12V OR 24V DC ELECTRICAL CORD POWER SUPPLY 15-AMP FUSE OR RECEPTACLE PLUG BREAKER WHITE WHITE WHITE BLACK BLACK BLACK GREEN GREEN GREEN GROUND ON CHASSIS CONTROL VALVE ASSEMBLY FOOT SWITCH (INSIDE OPERA-... -
Page 28: Hydraulic Return Line Installation Instructions Internal Rotation Control System
MSD SABER SERIES SHEARS HYDRAULIC RETURN LINE INSTALLATION INSTRUCTIONS INTERNAL ROTATION CONTROL SYSTEM 1. Always relieve all hydraulic pressure of the base machine by working the controls in all directions with the engine off before beginning work on any hydraulic component. See Figure 3-6. -
Page 29: Hydraulic Schematic Internal Rotation Control System
MSD SABER SERIES SHEARS HYDRAULIC SCHEMATIC INTERNAL ROTATION CONTROL SYSTEM Check your internal rotation control system regularly. TO ATTACHMENT ROTATION CIRCUIT INPUT FLOW FROM HY- DRAULIC MANIFOLDS ACCUMULATOR FIGURE 3-7 1. DIRECTIONAL CONTROL VALVE 2. RELIEF VALVE - SET AT 3000 PSI (200 BAR) 3. - Page 30 MSD SABER SERIES SHEARS Page 10 Section 3 Installation...
-
Page 31: Operation
MSD SABER SERIES SHEARS SECTION 4 OPERATION Before You Start ..........................4-2 First Things First .........................4-2 Safety Devices You’ll Need ......................4-2 General Rules for Safe Operation ....................4-3 Mobile Shear Controls ........................4-4 Operating the Rotator .........................4-6 Backdriving the Rotator ......................4-6 Operating the Internal Rotation Control System .................4-6 Recharging the Accumulator with Fluid ..................4-6 Speed Valve Operating Characteristics ..................4-7 Getting the Feel of the Attachment ....................4-7... -
Page 32: Before You Start
MSD SABER SERIES SHEARS BEFORE YOU START FIRST THINGS FIRST KNOW YOUR SAFETY PROGRAM 1. Ensure all safe viewing distance decals are installed and legible; contact LaBounty for 1. Read and understand the safety section of this replacements as required. manual and the base machine manual. -
Page 33: General Rules For Safe Operation
MSD SABER SERIES SHEARS GENERAL RULES FOR SAFE 14. DO NOT close the shear on a structure and OPERATION reverse the excavator in an attempt to pull down material. This is not only dangerous, but will likely 1. Read the Operator’s Manual for the base machine damage the excavator and shear. -
Page 34: Mobile Shear Controls
MSD SABER SERIES SHEARS MOBILE SHEAR CONTROLS There are four basic movements of a mobile shear plus one for rotating the shear if it is equipped with the rotation option. Mobile shear controls will vary slightly depending on the type of base machine and whether the shear is mounted as a second or third member. - Page 35 MSD SABER SERIES SHEARS MOBILE SHEAR CONTROLS (CONTINUED) SECOND MEMBER INSTALLATION Shear replaces stick FIGURE 4-2 BUCKET CURL = SHEAR CLOSE ARM IN = SHEAR IN ARM OUT= SHEAR OUT Operation Section 4 Page 5...
-
Page 36: Operating The Rotator
MSD SABER SERIES SHEARS OPERATING THE ROTATOR if equipped The rotator gives the shear 360˚ of continuous rotation in both directions for easy, accurate processing at all angles. The rotator requires special attention when operating the shear. The rotator is to be used only to position the shear, not as a means of bending, twisting, or breaking material. -
Page 37: Speed Valve Operating Characteristics
MSD SABER SERIES SHEARS NOTICE • The amount of rotation your shear will achieve per fl uid charge depends on the shear model. • Continuous rotation can be achieved by cracking an excavator function that charges the accumulator. • The accumulator needs to be charged with fl uid when the base machine is fi rst started up. The unloading valve is designed to drain to the accumulator whenever the base machine is shut off. - Page 38 MSD SABER SERIES SHEARS Page 8 Section 4 Operation...
-
Page 39: Maintenance
MSD SABER SERIES SHEARS SECTION 5 MAINTENANCE Scheduled Maintenance ......................5-2 Recommended Spare Parts List ....................5-3 Maintenance Safety Procedures ....................5-4 General Rules for Maintenance ....................5-4 8-Hour Service Recommended ....................5-5 80-Hour Service Recommended ....................5-5 2000-Hour Service Recommended ....................5-5 8-Hour Inspection Checklist ......................5-6 80-Hour Inspection Checklist ......................5-7 8-Hour Inspection Rotator Checklist ....................5-8 Lubrication ...........................5-9... - Page 40 MSD SABER SERIES SHEARS SERVICE AND MAINTENANCE PROCEDURES 8 HOURS 2,000 HOURS HOURS • Visually inspect shear for damage • Inspect all safety decals • Inspect cab protection on excavator • Confi rm all excavator warning systems are operational • Lubricate each side of main pivot group (2 each side) •...
-
Page 41: Recommended Spare Parts List
MSD SABER SERIES SHEARS RECOMMENDED SPARE PARTS LIST The following is a description of the parts Stanley LaBounty recommends to have on hand for these benefi ts. 1. Less downtime for lack of a part. 2. Original equipment manufacturer parts are inspected to Stanley LaBounty standards for proper fi t and function. -
Page 42: Maintenance Safety Procedures
• Inspect the shear daily. DO NOT operate a poorly 7. DO NOT enter the pivot group of the shear maintained or damaged shear or major structural without fi rst consulting your dealer or the Stanley damage could result. LaBounty Customer Service Department. -
Page 43: 8-Hour Service Recommended
MSD SABER SERIES SHEARS GENERAL RULES FOR 80-HOUR SERVICE MAINTENANCE RECOMMENDED continued 19. DO NOT let hot hydraulic oil get in contact with Cutting Blades: Measure blade gap, rotate blades the skin as it could cause severe burns. and shim blades according to procedures in this 20. -
Page 44: 8-Hour Inspection Checklist
MSD SABER SERIES SHEARS 8-HOUR INSPECTION CHECKLIST Shear Model _____________________Excavator Hour Meter________________________ Shear Serial Number ______________________________ Date______________________ _______ 1. Visually inspect shear for any damage _______ 2. Inspect safety devices _______ a. All safety decals in place and legible - seal decal and label maintenance section _______ b. -
Page 45: 80-Hour Inspection Checklist
It is recommended that this work by performed by an authorized Stanley LaBounty Dealer. The Nylock lock ring must be replaced each time a new seal kit is installed. -
Page 46: 8-Hour Inspection Rotator Checklist
MSD SABER SERIES SHEARS 8-HOUR INSPECTION ROTATOR CHECKLIST Shear Model _____________________Excavator Hour Meter________________________ Shear Serial Number ______________________________ Date______________________ _______ 1. Visually check all turntable bearing bolts and replace any that are loose or damaged _______ 2. Grease the turntable bearing - refer to the Rotator Maintenance section for instructions _______ 3. -
Page 47: Lubrication
MSD SABER SERIES SHEARS LUBRICATION Regular lubrication of the attachment is absolutely vital to proper operation and long life of the attachment. The speed valve feature accelerates the shear cycle time and allows the shear to open and close more often throughout the day. -
Page 48: Bolt Torque Guidelines
1. Always replace bolts and nuts with the same size and class of fastener. Replacement fasteners can be ordered from the Stanley LaBounty Parts Department to ensure the correct part is used (refer to Figure 5-2). Unless otherwise specifi ed, use class 10.9 metric hex head capscrews, class 10.9 metric fl at head cap- screws, and class 12.9 metric socket head capscrews. -
Page 49: Torque Values For Metric Fasteners
MSD SABER SERIES SHEARS TORQUE VALUES FOR METRIC FASTENERS IMPORTANT Please note that some parts of the shear require special torque values. These parts are listed below with the page number where the proper torque values for that area can be found. They include: •... -
Page 50: Slide Screw Maintenance
MSD SABER SERIES SHEARS SLIDE SCREW MAINTENANCE Maintenance of the slide screw area is very important for keeping the cutting blades in line and for proper operation of the shear. This critical area should be inspected and adjusted every 80 hours. Use the following instructions to maintain and adjust the slide screw. - Page 51 MSD SABER SERIES SHEARS SLIDE SCREW MAINTENANCE continued NOTICE • Some models (2500) have a spacer beneath the lock plate. • MSD 1000/1500 and 1000/1500R do not have slide screws on the right (cutting blade) side. SLIDE SCREW LOCK PLATE FIGURE 5-5 Maintenance...
-
Page 52: Blade Removal
NOTICE Full blade kits are available by calling Stanley LaBounty Customer Service at 800-522-5059. For Make sure the blade is well supported before best service, please have the shear serial number removing the blade bolts. -
Page 53: Torque Values For Blade Bolts
Blade bolts and washers can typically be used for the life of the accompanying blade set. Due to the critical nature of these fasteners, Stanley LaBounty requires that blade fasteners (bolts and washers) be replaced with each set of new blades. -
Page 54: Guide Blade Shimming And Rotation
MSD SABER SERIES SHEARS GUIDE BLADE SHIMMING AND ROTATION The guide blade gap is another adjustment that keeps the shear blades in line and ensures the proper opera- tion of the shear. This adjustment should be checked daily. 1. Close the shear until the Saber Tip on the upper shear begins to bypass the guide blade (see Figure 5-8). Use a feeler gauge to check the gap and record it. - Page 55 MSD SABER SERIES SHEARS GUIDE BLADE SHIMMING AND ROTATION continued 5. To shim the blade, loosen the guide blade bolts and move the guide blade out far enough to slide the shims between the blade seat and the guide blade. If all fi ve shims are installed and the gap still exceeds 0.030"...
-
Page 56: Cutting Blade Rotation Procedure
Dry Bolt Torque Chart in this section. Always use the same size and class of bolts. Refer to your Parts Catalog to order replacement bolts from your authorized Stanley LaBounty dealer. 1. Discard lower blades. 4. Cross blade and guide blade maintenance should 2. -
Page 57: Cutting Blade Rotation Procedure
MSD SABER SERIES SHEARS CUTTING BLADE ROTATION continued NOTICE The holes in the front of the cross plate can be used to dislodge the cross blade from its seat. Place a soft metal punch or pin through these holes and up against the blade. - Page 58 MSD SABER SERIES SHEARS CUTTING BLADE ROTATION continued 10. After rotation or replacement, place the guide blade back in its seat without shims. Use a new set of guide blade bolts and tighten them until snug. Do not apply torque to the bolts yet. Make sure the blade is seated snugly.
-
Page 59: Weld-In Tip Cutting Blade Rotation Procedure
Dry Bolt Torque Chart in the SOM. Always use the same size and class of bolts. Refer to your Parts Catalog to order replacement bolts from your authorized Stanley LaBounty dealer. -
Page 60: Cutting Blade Shimming
If the gap is not even, contact your Stanley LaBounty dealer. 4. Once the blade gap is checked and recorded, open the shear. Shim the lower blades by using the same amount of shims that you were able to slip between the blades earlier. -
Page 61: General Guidelines For Build-Up And Hardsurfacing
Detailed instructions on maintaining specifi c Quality and attention to detail in welding can signifi - areas of the shear are on the following pages. cantly affect the life of the shear. Stanley LaBounty strongly recommends that only qualifi ed and certi- PREHEAT fi... -
Page 62: Build-Up Recommendations
If you and ductility that are essential for LaBounty applica- have questions about what hardsurface material to tions. use, please contact the Stanley LaBounty Customer Service Department. Shielded Metal Arc Welding - Stick Electrodes • E7018 Failure to adhere to LaBounty hardsurfacing rec- •... -
Page 63: Critical Wear Areas
If you have any questions regarding this information, please call the Stanley LaBounty Service Department at (218)-834-6901. Close attention must be paid to the “crosshatch” hardsurfacing. This area should be inspected daily. When the crosshatch is worn down almost to the base metal surface, clean the surface by wire brushing, preheat to 400°, and apply new underlayment beads to the pattern using E-7018 welding rod, or E-70 series wire. - Page 64 MSD SABER SERIES SHEARS CRITICAL WEAR AREAS continued CROSSHATCH HARDSURFACING See Figure 5-21. A. In some applications, this area can be built up for added wear resistance. Taper and blend the top edge of the weld procedure. B. Maintain build-up in this critical area. Area to be built up fl...
-
Page 65: Upper Shear Build-Up And Hardsurfacing
MSD SABER SERIES SHEARS UPPER SHEAR BUILD UP AND HARDSURFACING 1. Apply a bead of hardsurface rod on top of each of the underlayment beads. It is important to use an air operated slag peener on each pass to relieve weld stress. 2. -
Page 66: Weld-In Tip Maintenance
(see Figure 5-27). If there is a gap, this area needs to be built up. 3. Use the build-up template provided by Stanley LaBounty to determine the amount of build-up needed on the front and bottom surfaces of the tip. Line up the template with the edges of the cutting blade and check the wear (see Figure 5-28 on page 31). - Page 67 MSD SABER SERIES SHEARS WELD-IN TIP MAINTENANCE continued 6. Apply build up to the worn areas (see General Rules for Build Up and Hardsurfacing). Peen each pass vigor- UPPER BUILD-UP ously to relieve weld stress and remove slag. TEMPLATE NOTICE Check temperature frequently during this procedure.
-
Page 68: Weld-In Tip Replacement
400°F (200°C) and tack the tip in place. 6. Check the tip profi le with the build up template supplied by Stanley LaBounty (see Figure 5-32). 7. Close the shear until the tip begins to enter the lower shear and check the clearance of the new tip. - Page 69 MSD SABER SERIES SHEARS WELD-IN TIP REPLACEMENT continued The upper shear must be grounded when welding on the upper shear to prevent the possibility of electric shock and arcing through the cylinder or main pivot components. NOTICE Check temperature frequently during this procedure. Main- tain 400-450ºF (200-230ºC).
-
Page 70: Front Wear Plate Replacement
400°F (200°C) and a maximum of 450° (230°C). Maintain this temperature range throughout the process. Temperature/melt sticks are available from Stanley LaBounty. 2. Air-arc the old wear plate to remove it completely. Please note that the upper shear has a machined sur- face for the wear plate. -
Page 71: Lower Wear Plate Replacement
(230°C). Maintain this temperature range throughout the process. Temperature/melt sticks are available TOP WEAR PLATE from Stanley LaBounty. 2. Air-arc the old wear plates to remove them com- CROSSPLATE pletely from the nose plate. 3. Use a grinder to make sure the surfaces are fl at and smooth with all weld and carbon residue re- moved. -
Page 72: Lower Shear Build-Up And Hardsurfacing
MSD SABER SERIES SHEARS LOWER WEAR PLATE REPLACEMENT continued 5. Position the new top wear plate so it is also centered across the width of the cross plate. This wear plate should overhang the front edge of the cross plate to be fl ush with the face of the front wear plate. Clamp the wear plate into position, bring the preheat back up to 400°F (200°C) and tack weld in place. - Page 73 MSD SABER SERIES SHEARS LOWER SHEAR BUILD UP AND HARDSURFACING continued 6. Apply build up to the worn areas in single passes, USE STRAIGHT EDGE ACROSS SURFACES side-by side, running with the grain of the base material (see General Rules for Build Up and Hard- surfacing).
- Page 74 MSD SABER SERIES SHEARS LOWER SHEAR BUILD UP AND HARDSURFACING continued NOTICE • Keep the outside passes at least 1/4"(6 mm) back from the blade seat and outer edges. • Stagger the ends of the welds and do not end a weld adjacent to a blade bolt hole.
-
Page 75: Hydraulic System Maintenance
fi ttings, mounting hardware, etc.) every 80 hours. 4. Have the shear cylinder seals replaced by an au- thorized Stanley LaBounty dealer every 2,000 hours. 5. Whenever hydraulic lines are disconnected, hoses must be capped and ports must be plugged to prevent contamination of the hydraulic system. -
Page 76: Flange Type Hose Fittings
MSD SABER SERIES SHEARS FLANGE TYPE HOSE FITTINGS Check fl ange fi ttings for smooth, tight fi t of matching surfaces. If any cap screws are loose or matching sur- faces are not tight, tighten the loose cap screw then tighten the diagonally opposite cap screw. Tighten the two remaining cap screws then torque all four screws as specifi... -
Page 77: Applying Split Flange Clamps
MSD SABER SERIES SHEARS APPLYING SPLIT FLANGE 4. Torque the fasteners in diagonal sequence, in CLAMPS small increments, until fi nal torque level is achieved. Torque values for fl ange connections are listed on 1. Clean sealing surfaces and make certain they are page 34. -
Page 78: Cylinder Gap Check
MSD SABER SERIES SHEARS CYLINDER GAP CHECK FIGURE 5-43 Periodically check (minimum once per week) the gap between the rod eye shoulder and head face (X) with the cylinder fully retracted (see Figure 5-43). If the gap exceeds the dimensions given in the table, below, by more than .06", it could be an early indication of required maintenance. -
Page 79: Hydraulic Schematic - Standard Rotating Shears
MSD SABER SERIES SHEARS HYDRAULIC SCHEMATIC - STANDARD ROTATING SHEARS TO EXCAVATOR SPEED VALVE ASSEMBLY HYDRAULIC MANIFOLD BLOCKS (ON SHEAR) TEST PORT ROTATION CONTROL VALVE CASE DRAIN LINE ASSEMBLY MOTOR TEST PORT TO EXCAVATOR MOTOR FIGURE 5-44 HYDRAULIC SCHEMATIC - STANDARD NON-ROTATING SHEARS SHEAR CYLINDER TO EXCAVATOR HYDRAULIC... -
Page 80: Speed Valve Adjustment
Wear adequate 1. Open-end or box end wrenches (12-19 mm sizes) protective clothing and safety equipment. 2. Digital gauge kit (Stanley LaBounty P/N 169832) 3. Allen wrenches (4-12 mm sizes) SAFETY POINTS Stanley LaBounty recommends that the following... - Page 81 REGENERATIVE VALVE DESIGN The design of the regenerative fl ow valve used in Stanley LaBounty Mobile Shears consists of a pilot valve mounted onto a spool valve. The pilot valve is used for regulating the movement of the spool valve in shift- ing the valve into and out of regenerative mode.
- Page 82 MSD SABER SERIES SHEARS SPEED VALVE ADJUSTMENT continued FIGURE 5-46* A. MAIN SPOOL VALVE ADJUSTMENT B. PILOT VALVE C. PILOT VALVE HOUSING D. MAIN SPOOL HOUSING *Your speed valve may vary slightly from this isometric illustration, which is not to scale. Page 44 Section 5 Maintenance...
- Page 83 Place a drainage basin below the ports to capture all escaping fl uid. continued 5. Install the test fi ttings supplied with the Stanley The following procedure is recommended by Stanley LaBounty Digital Gauge Kit, P/N 169832 into the LaBounty for speed valve adjustment on any fully MBS and MAZ ports on the Speed Valve.
- Page 84 MSD SABER SERIES SHEARS 14. Verify the shift pressure. Have the excavator SPEED VALVE ADJUSTMENT operator cycle the shear to the fully closed position continued and carefully monitor the pressure gauge attached 10. Have the excavator operator cycle the shear to to the MAZ test port.
- Page 85 #513029, which is used in MSD 1500, 2000, 2500, 3000, 4000 and 4500 shears. For MSD 7500 and above, refer to your parts catalog for the speed valve part number and call Stanley LaBounty for torque values. MSD 1000 models do not have speed valves.
- Page 86 MSD SABER SERIES SHEARS SPEED VALVE ADJUSTMENT continued SPEED VALVE ASSEMBLY TORQUE VALUES: MAIN VALVE ASSEMBLY MAIN VALVE ASSEMBLY P/N 513080 USED IN MSD 1500,2000, 2500, 3000, 4000, AND 4500 SHEARS FIGURE 5-48 ITEM PART NUMBER DESCRIPTION TORQUE 511515 Hex Nut 15 ft lbs/20 Nm 513086 Hex Nut...
- Page 87 MSD SABER SERIES SHEARS SPEED VALVE ADJUSTMENT continued SPEED VALVE ASSEMBLY TORQUE VALUES: PILOT VALVE ASSEMBLY PILOT VALVE P/N 512288 USED IN MSD 1500,2000, 2500, 3000, 4000, AND 4500 SHEARS FIGURE 5-49 ITEM PART NUMBER DESCRIPTION TORQUE 512317 Valve Seat 73 ft lbs/100 Nm 512318 Spring Cap...
- Page 88 MSD SABER SERIES SHEARS SPEED VALVE ADJUSTMENT continued SPEED VALVE ASSEMBLY TORQUE VALUES: CHECK VALVE ASSEMBLY CHECK VALVE ASSEMBLY P/N 511540 USED IN MSD 1500,2000, 2500, 3000, 4000, AND 4500 SHEARS FIGURE 5-50 ITEM PART NUMBER DESCRIPTION TORQUE 511579 Screw Plug 103 ft lbs/140 Nm Page 50 Section 5 Maintenance...
- Page 89 1. Always replace bolts and nuts with the same size and class of fastener. Replacement fasteners can be ordered from the Stanley LaBounty Parts Department to ensure the correct part is used. Unless otherwise specifi ed, use class 10.9 metric hex head capscrews, class 10.9 metric fl at head capscrews, and class 12.9 metric socket head capscrews.
- Page 90 MSD SABER SERIES SHEARS SPEED VALVE ADJUSTMENT continued SPEED VALVE ASSEMBLY TORQUE VALUES: MSD 7500, 9500 SHEARS MAIN BLOCK ASSEMBLY P/N 512330 USED IN MSD 7500 AND 9500 SHEARS FIGURE 5-52 ITEM PART NUMBER DESCRIPTION TORQUE 512338 Screw Plug M8X1 7 .5 ft lbs/10Nm Page 52 Section 5 Maintenance...
- Page 91 MSD SABER SERIES SHEARS SPEED VALVE ADJUSTMENT continued SPEED VALVE ASSEMBLY TORQUE VALUES: MSD 7500, 9500 SHEARS REGEN VALVE P/N 512327 USED IN MSD 7500 AND 9500 SHEARS FIGURE 5-53 ITEM PART NUMBER DESCRIPTION TORQUE 512338 Screw Plug M8X1 7 .5 ft lbs/10 Nm 511515 Screw Plug 7/16-20 15 ft lbs/20 Nm...
- Page 92 MSD SABER SERIES SHEARS DECAL AND LABEL MAINTENANCE Be sure that all safety decals are installed and visible (see Figure 5-54). Replacement decals are available from your Stanley LaBounty dealer. Complete label installation kits are available upon request. FIGURE 5-54 ITEM...
-
Page 93: Rotator Maintenance
MSD SABER SERIES SHEARS SECTION 6 ROTATOR MAINTENANCE Major Components of Typical Rotation Systems ................6-2 The Rotator ..........................6-3 Bolt Torque ..........................6-3 Torque Values for Turntable Bolts ....................6-3 Torque Values for Rotation Assembly Bolts .................6-3 Planetary Gearbox Lubrication (if equipped) ................6-4 Lubricant Change-out Procedure ....................6-4 Planetary Gearbox Lubricants .....................6-5 Synthetic Specifi... -
Page 94: Major Components Of Typical Rotation Systems
MSD SABER SERIES SHEARS MAJOR COMPONENTS OF TYPICAL ROTATION SYSTEMS Typical second member upper head assembly (see Figure 6-1, below), with an internal drive rotator, a gearbox and standard rotation. CONTROL VALVE MOTOR MANIFOLD FIGURE 6-1 GEARBOX HYDRAULIC PORT ROTATION PORT GREASE FITTING TURNTABLE BEARING (BEHIND RING) -
Page 95: The Rotator
If bolts are found to be loose after operation, they should never be retorqued more than one time before they are replaced. Please contact the Stanley LaBounty Service Department for specifi c information about replacement. -
Page 96: Planetary Gearbox Lubrication (If Equipped)
MSD SABER SERIES SHEARS PLANETARY GEARBOX LUBRICATION if equipped The planetary gearbox is used if changes in gear ratios are required between the hydraulic motor and turn- table bearing to rotate the shear. Correct lubricant and change-out procedures are critical to maintain depend- able gearbox operation. -
Page 97: Planetary Gearbox Lubricants
MSD SABER SERIES SHEARS PLANETARY GEARBOX LUBRICANTS OPERATING AMBIENT TEMPERATURE RANGE RECOMMENDED GRADES 5ºF to 120°F (-14ºc to 49ºC) SAE 80W - 90 -50ºF to 120ºF (-46°C to 49°C) Synthetic ISO 150 @ 104ºF -25°F to 180°F (-32°C to 82°C) Synthetic ISO 460 @ 104ºF APPROVED SOURCE/GRADE GRADE... -
Page 98: Turntable Bearing
MSD SABER SERIES SHEARS TURNTABLE BEARING LUBRICATION FREQUENCY Equipment operating frequently in extreme environments should be lubricated at least every eight hours. If the old grease is noted to be in good condition and free of contamination, the interval may be extended. Converse- ly, if the old grease is contaminated or deteriorated, the interval should be shortened. -
Page 99: Hydraulic Requirements
Diagnostic fi ttings (which require a Parker PD Series coupler or gauge) are installed in the manifold to provide a means of checking pressure. Contact the Stanley LaBounty Service Department for the proper procedure for performing this check. CASE DRAIN A case drain is required because back pressure can develop in the hydraulic motor case as a result of metering fl... -
Page 100: Rotation Control Valve Assembly Schematics And Descriptions
MSD SABER SERIES SHEARS ROTATION CONTROL VALVE ASSEMBLY SCHEMATICS AND DESCRIPTIONS Please refer to the Parts Catalog to identify the control valve assembly in your specifi c attachment. ROTATION CONTROL VALVE USED ON MODELS MSD 1500R AND MSD 2000R MOTOR WORK PORTS (A &... -
Page 101: Internal Rotation Control System (If Equipped)
MSD SABER SERIES SHEARS INTERNAL ROTATION CONTROL SYSTEM if equipped The optional Internal Rotation Control System is designed to provide a medium pressure, low-fl ow hydraulic power source for rotating the shear. The system is factory installed inside the rotating head of the shear and consists of the following major components: Accumulator, accumulator control valve assembly, and foot switch. -
Page 102: Accumulator Control Valve Assembly (If Equipped)
MSD SABER SERIES SHEARS ACCUMULATOR CONTROL VALVE ASSEMBLY if equipped ADJUSTMENT SCREW PRESSURE REDUCING VALVE MANIFOLD BLOCK MANUAL OVERRIDE CHECK VALVES FLOW CONTROL VALVE ADJUSTMENT KNOB CONDUIT JUNCTION GAUGE PORT RELIEF VALVE UNLOADING VALVE DIRECTIONAL VALVE SOLENOID FIGURE 6-6 Page 10 Section 6 Rotator Maintenance... -
Page 103: Maintenance Intervals For Internal Rotation (If Equipped)
MSD SABER SERIES SHEARS MAINTENANCE INTERVALS FOR INTERNAL ROTATION if equipped A program of regular service should be established for the shear, including maintenance of the Internal Rota- tion Control System. Use the base machine hour meter to determine service intervals. The 8-Hour Inspection Checklist in this manual includes the rotation system and should be used daily to check for wear, loose hose connections or components, and other signs of potential failure. -
Page 104: Testing The Accumulator Precharge
MSD SABER SERIES SHEARS TESTING THE ACCUMULATOR TESTING THE ACCUMULATOR PRECHARGE PRECHARGE Once the test united is attached, make sure the Once the test united is attached, make sure the relief valve is closed and then turn the spindle. When relief valve is closed and then turn the spindle. -
Page 105: Operating Flow For Internal Rotation
MSD SABER SERIES SHEARS OPERATING FLOW FOR To adjust the operating pressure, fi rst loosen the INTERNAL ROTATION lock nut on the Pressure Reducing Valve (see Figure 6-8). Then slowly turn the adjustment screw in the The operating fl ow of the Internal Rotation Control end of this valve to adjust the pressure until it falls System directly affects the speed at which the shear within the specifi... -
Page 106: Troubleshooting
MSD SABER SERIES SHEARS SECTION 7 TROUBLESHOOTING Cutting Performance Troubleshooting Guide ................7-2 Rotation Circuit Troubleshooting Guide ..................7-5 Internal Rotation Control System Troubleshooting Guide (if equipped) ........7-7 Speed Valve Troubleshooting Guide .................... 7-10 Troubleshooting Section 7 Page 1... -
Page 107: Cutting Performance Troubleshooting Guide
MSD SABER SERIES SHEARS CUTTING PERFORMANCE TROUBLESHOOTING GUIDE The information contained in this guide provides for troubleshooting the LaBounty shear only. Any references to the excavator will be made only to give some guidance as to where a problem may exist. Any specifi c main- tenance and troubleshooting information will need to be provided by the Original Equipment Manufacturer of the excavator or the authorized dealer. - Page 108 MSD SABER SERIES SHEARS CUTTING PERFORMANCE TROUBLESHOOTING GUIDE continued SYMPTOM PROBABLE CAUSE REMEDY 5. Does not shear material a. Wrong type of material for shear i. Check material size and type then consult your size LaBounty dealer or factory b. Worn blades i.
- Page 109 MSD SABER SERIES SHEARS CUTTING PERFORMANCE TROUBLESHOOTING GUIDE continued IMPORTANT NOTE: If the shear is jammed with material caught in the jaws and will not open, lubricate the blades with penetrating oil and attempt to cycle the shear open. If the jam persists, remove the lower blades and guide blades fasteners and open the shear.
-
Page 110: Rotation Circuit Troubleshooting Guide
MSD SABER SERIES SHEARS ROTATION CIRCUIT TROUBLESHOOTING GUIDE The information contained in this guide provides for troubleshooting the LaBounty shear only. Any reference to the excavator will be made only to give some guidance as to where a problem may exist. Any specifi c maintenance and troubleshooting information will need to be provided by the original equipment manufacturer of the excavator or the authorized dealer. - Page 111 MSD SABER SERIES SHEARS ROTATION CIRCUIT TROUBLESHOOTING GUIDE continued SYMPTOM PROBABLE CAUSE REMEDY 2. Rotation is excessively d. Internal leakage in manifold block on i. Replace manifold block on motor slow, continued motor ii. Check cartridge valve seals for damage e.
- Page 112 MSD SABER SERIES SHEARS INTERNAL ROTATION CONTROL SYSTEM TROUBLESHOOTING GUIDE if equipped The information contained in this guide provides for troubleshooting the Internal Rotation Control System only. Any references to the attachment or the base machine will be made only to give some guidance as to where a problem may exist.
- Page 113 MSD SABER SERIES SHEARS INTERNAL ROTATION CONTROL SYSTEM TROUBLESHOOTING GUIDE if equipped, continued SYMPTOM PROBABLE CAUSE REMEDY 1. Will not rotate, continued e. Directional valve not operating i. Check electrical signal to valve coils. If - spool sticking the electrical signal is good, the coil is - faulty electrical signal faulty and must be replaced.
-
Page 114: Internal Rotation Control System Troubleshooting Guide (If Equipped)
MSD SABER SERIES SHEARS INTERNAL ROTATION CONTROL SYSTEM TROUBLESHOOTING GUIDE if equipped, continued SYMPTOM PROBABLE CAUSE REMEDY 2. Rotation very slow, continued f. Internal leakage of valve i. Remove unloading valve and relief valve cartridges in control valve cartridges; check for contamination or seal manifold damage. -
Page 115: Speed Valve Troubleshooting Guide
For complete step-by-step instructions on adjusting the speed valve, please refer to page 4-37 . If the problem still exists after attempting these adjustments, please contact your Stanley LaBounty dealer or the Stanley LaBounty Customer Service Department for further instructions. -
Page 116: Warranty
4. Authorized repair can occur at the Stanley LaBounty factory or authorized Stanley LaBounty Dealer. Labor for warranty repair will be paid under a formula determined by Stanley LaBounty. Stanley LaBounty is not liable for incidental or consequential costs or losses incurred by the product, purchaser or user. Limited Warranty To validate the Limited Warranty, a completed warranty certifi... - Page 117 512141(ver 6/2012) The STANLEY and LABOUNTY names and logos are registered trademarks of Stanley Infrastructure Solutions...
Need help?
Do you have a question about the MSD 1000 and is the answer not in the manual?
Questions and answers