Table of Contents
Advertisement
Quick Links
Download this manual
See also:
User Manual
WTP-8B66-10W
User's Manual
Version V1.0
Copyright © 2018, ALL RIGHTS RESERVED.
All other brand names are registered trademarks of their respective owner
Copyright Notice
Copyright © 2018
All Rights Reserved.
Printed in Taiwan.
The information contained in this document is subject to change without any notices.
Advertisement
Table of Contents

Related Manuals for Wincomm WTP-8B66


Summary of Contents for Wincomm WTP-8B66
- Page 1 WTP-8B66-10W User’s Manual Version V1.0 Copyright © 2018, ALL RIGHTS RESERVED. All other brand names are registered trademarks of their respective owner Copyright Notice Copyright © 2018 All Rights Reserved. Printed in Taiwan. The information contained in this document is subject to change without any notices.
- Page 2 Acknowledgments Greeting & Setup Thank you for purchasing the WTP-8B66 Panel PC. We wish that this unit will be durable and reliable in providing your needs. Please follow the instructions below to ensure the unit continues to have high performance Unpacking After opening the carton, there will be a unit with an accessory box.
- Page 3 If the unit is not going to be in use for an extended period of time, remember to disconnect the unit. Connect the unit to a power source with the same numerical value as spec. label shown. Please use only the power cord provided by the dealer to ensure safety and EMC compliance.
- Page 4 When part replacement is needed. Make sure service technician uses replacement parts specified by the manufacturer, or those with the same characteristics and performance as the original parts. If unauthorized parts are used it may result in starting a fire, electrical shock and/or other dangers. Battery Installation Follow below instructions and notice the caution for replacing and disposing of the RTC Lithium battery CR2032 for safety consideration.
- Page 5 The specification is subject to change without notice. Version Change History Date Version Description Remark 2018/07/10 V1.0 First release...
-
Page 6: Table Of Contents
How to Use This Manual ............ 1 System Overview............2 Table Stand Assemble Instruction ......5 Wall Mount Stand Assemble Instruction ....6 System View ............... 9 Setting up the System ............10 Installing System Software ..........10 Installing the Drivers ............10 BIOS Setup Information ......... -
Page 7: How To Use This Manual
This manual is written for the system integrator, PC technician and knowledgeable PC end user. It describes how to configure your WTP-8B66 Panel PC to meet various operating requirements. The user’s manual is divided into three chapters, with each chapter addressing a basic concept and operation of the server board. -
Page 8: System Overview
System Overview MotherBoard SBC-212-WT Intel® Atom E3845 processor 10W Chipset Graphic Intel® Gen7 Graphics DX11 Audio 1 line out n tel I210x2 Memory Single Channel DDR3L 1600 MHz SDRAM MAX 8GB Serial ATA SATA II controller (3.0Gb/sec) Port x 2 Serial port RS232/RS422/RS485 x 1, RS232 x 3 USB 2.0 type a x 6, USB 3.0 x 2 -256 Segments, 0, 1, 2, ……255sec/min... - Page 9 COM + power 5V / 12V USB 3.0 TPM Module 1000 nits high brightness LCD LCD auto dimming Super dimming Barcode reader XGA LCD panel Packing list WTP-8B66-10W DVD-Title for driver and manual Power adapter Power cord Regulatory FCC, CE (EMC), VCCI class B...
- Page 10 (3 shock for each ± 21-40.99 lb 32 in. axis) (9.53-18.59kg) (0.813 Orientation Y and : ± ± ± Z axes Configurations: 1. WTP-8B66-10W, Atom E3845, Wide temp 2G RAM, wide temp128G SSD , 4 USB, 2 COM, 1 LAN...
-
Page 11: Table Stand Assemble Instruction
Table Stand Assemble Instruction Step 1. Please check out the following parts before assemble. Item Quantity Table Stand Black Silicone Washer Black Handle Step 2. Please follow the picture diagrams to assemble. Explode View... -
Page 12: Wall Mount Stand Assemble Instruction
Step 3. Please tighten the black handle in a clockwise direction. Wall Mount Stand Assemble Instruction Step 1. Please check out the following parts before assemble. Item Quantity Wall Mount Stand Black Silicone Washer... - Page 13 Black Handle Step 2. Please follow the picture diagrams to assemble. Explode View...
- Page 14 Step 3. Please tighten the black handle in a clockwise direction.
-
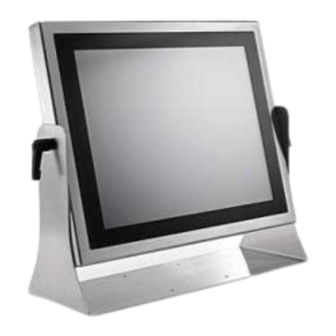
Page 15: System View
System View WTP-8B66-10W Outline Drawing... -
Page 16: Setting Up The System
Some distributors and system integrators may have already pre-installed system software prior to shipment of your Panel PC. Installing software requires an installed HDD. Software can be loaded in the WTP-8B66 Panel PC using any of below methods: Method 1: Use the Ethernet... - Page 17 Step 1 – Install Intel® INF Driver 1. Open fie of chipset 2. Click on the setup.exe 3. Follow the instructions that the window shows 4. The system will help you install the driver automatically 5. Reboot system Step 2 –Install Intel® VGA Driver 1.
-
Page 18: Bios Setup Information
BIOS Setup Information BIOS Introduction The AMI BIOS (Basic Input / Output System) installed in your computer system’s ROM supports Intel processors. The BIOS provides critical low-level support for a standard device such as disk drives, serial ports and parallel ports. It also adds virus and password protection as well as special support for detailed fine-tuning of the chipset controlling the entire system. - Page 19 Main This section provides information on the BIOS information, Embedded controller information and Battery information System Date Set the system date. Use the <Tab> key to switch between data elements. System Time Set the system time. Use the <Tab> key to switch between time elements.
- Page 20 Advanced CPU Configuration CPU Configuration parameters Intel Speedstep Technology Intel Speedstep technology allows processors to switch between multiple frequencies and voltage points for better power saving and heat dissipation CPU C States Support Enable CPU C States Support for power saving. It is recommended to keep C3, C6 and C7 all enabled for better power saving.
- Page 21 Enable/Disable onboard HD audio. Front Panel Select Front Panel Type. Onboard HDMI HD Audio Enable audio for the onboard digital outputs Onboard LAN 1 Enable or disable the onboard network interface controller. Onboard LAN 2 Enable or disable the onboard network interface controller. Deep S5 Select System deep S5 configuration.
- Page 22 COM3 Configuration Set Parameters of COM1 Serial Port Enable or Disable Serial Port (COM) COM4 Configuration Set Parameters of COM1 Serial Port Enable or Disable Serial Port (COM) COM Port IRQ Mode Set COM Port IRQ Mode WDT Timeout Reset Enable/Disable Watch Dog Timer Timeout to reset system.
- Page 23 H/W Monitor CPU_FAN1 Setting Quiet Fan Function Control CHA_FAN1 Setting Quiet Fan Function Control Case Open Feature Enable or disable the feature of case Open Over Temperature Protection 1 To enable or disable the OTP 1. Over Temperature Protection 2 To enable or disable the OTP 2.
- Page 24 Security Supervisor Password Set or change the password for the administrator account. Only the administrator has authority to change the settings in the UEFI setup Utility. Leave it blank and press enter to remove the password User Password Set or change the password for the user account. Users are unable to change the settings in the UEFI Setup Utility.
- Page 25 Boot Boot Option #1 Sets the system boot order Hard Drive BBS Priorities Set the order of the legacy devices in this group Fast Boot Enables or disables boot with initialization of a minimal set of devices required to launch active boot option.
- Page 26 Save & Exit Save Changes and Exit Exit system setup after saving the changes. F10 key can be used for this operation. Discard Changes and Exit Exit system setup without saving any changes. ESC key can be used for this operation. Discard Changes Discard Changes done so far to any of the setup options.
-
Page 27: Jumpers Setup
Jumpers Setup...
Need help?
Do you have a question about the WTP-8B66 and is the answer not in the manual?
Questions and answers