Advertisement
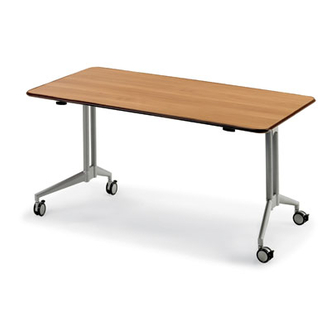
UXL Nest and Fold Table
SPECIAL NOTES
1.
Check that all components are accounted for and undamaged before
assembling.
2.
Please assemble product in a clean dry area.
3.
For larger units, you may need another person to help assemble the
product.
4.
Clean the product with a mild cleaner and a damp cloth.
For assistance in assembling product, missing or damaged parts, or to place an order, please contact
Form #179977
customer service at 800-328-1061.
You may also place your order online at
www.smithsystem.com
08/2016
Advertisement
Table of Contents

Related Manuals for SMITH SYSTEM UXL Nest and Fold Table


Summary of Contents for SMITH SYSTEM UXL Nest and Fold Table
- Page 1 ASSEMBLY INSTRUCTIONS UXL Nest and Fold Table SPECIAL NOTES Check that all components are accounted for and undamaged before assembling. Please assemble product in a clean dry area. For larger units, you may need another person to help assemble the product.
- Page 2 COMPONENTS & HARDWARE P/N: 70054 M4X.7X6mm M5X.8X10mm ¾” Wood Screw Machine Screw Machine Screw QTY: 14 QTY: 2 QTY: 4 Caster Wrench Nest & Fold Nest & Fold QTY: 1 Support caps Threaded Caster QTY: 2 QTY: 4 Casters Nest & Fold Nest &...
- Page 3 ASSEMBLY INSTRUCTIONS Step 1: Lay the frame with the attached top upside down on a clean dry surface. Step 2: Pull the handle towards the front of the table to unlock the mechanisms and flip both mechanisms up. Step 3: Remove the top plate from both legs. For assistance in assembling product, missing or damaged parts, or to place an order, please contact customer service at 800-328-1061.
- Page 4 Step 4: Slide the leg around the beam ensuring that the longer leg faces towards the handle and the shorter leg faces away from the handle. (FACE LEG’S FEET OUTWARDS) Step 5: Attach both legs to each side of the beam and tighten using a 5mm Allen Wrench, bolts, and plate removed in Step 2.
- Page 5 Step 7: Ensure legs are locked into position and place table into upright position. Step 8: To level table, adjust caster up or down by turning the hex nut below silver knurled disc - clockwise or counter-clockwise until level. Lock in place by turning.
Need help?
Do you have a question about the UXL Nest and Fold Table and is the answer not in the manual?
Questions and answers