
Related Manuals for Olympus OER-Elite


Summary of Contents for Olympus OER-Elite
-
Page 1: Table Of Contents
INSTALLATION MANUAL INSTRUCTIONS Labels and Symbols Important Information — Please Read Before ENDOSCOPE REPROCESSOR Chapter 1 Checking the Package Contents OER-Elite¥ Chapter 2 Nomenclature and Functions Chapter 3 Installation of Accessories Chapter 4 Installation of Equipment Installation Work Check Points... - Page 3 Inspection of the retaining rack ................41 Installation of the washing case (MAJ-2121) ............42 Installation of the stylus pen holder ..............43 Required items ........................43 Installing the stylus pen holder .................... 43 Inspecting the accessory holder ................44 OER-Elite INSTALLATION MANUAL...
- Page 4 4.19 Installation of the detergent tank ................ 126 Required items ........................127 Installing the detergent tank ....................127 4.20 Setup of the disinfectant solution ............... 134 Required items ........................136 Setup of the disinfectant solution ..................136 OER-Elite INSTALLATION MANUAL...
- Page 5 4.23 Checking the operation of optional accessories ..........180 Checking the operation of the bar code reader (MAJ-2130) ..........180 Checking the operation of the printer (MAJ-1937) ............. 186 Installation Work Check Points ............191 Installation work check points ..................191 OER-Elite INSTALLATION MANUAL...
- Page 6 Contents OER-Elite INSTALLATION MANUAL...
-
Page 7: Labels And Symbols
Endoscope reprocessor Manufacturer Authorized representative in the European Community Lot number Serial number Safety-related labels and symbols are attached to the equipment at the locations shown below. If labels or symbols are missing or illegible, contact Olympus. OER-Elite INSTALLATION MANUAL... - Page 8 Labels and Symbols Front panel UDI label A label required by some countries’ regulations regarding identification of medical device also known as Unique Device Identification (UDI). RFID marking OER-Elite INSTALLATION MANUAL...
- Page 9 Labels and Symbols Inner side Rotation direction indicator label Indicates the rotation direction for locking and releasing gas filter case (tank). Rating plate Shows the product model, power rating, and serial number. Date of manufacture OER-Elite INSTALLATION MANUAL...
- Page 10 Labels and Symbols Rear panel CSA/UL MARKING OER-Elite INSTALLATION MANUAL...
- Page 11 Labels and Symbols Top panel Rotation direction indicator label Indicates the rotation directions for locking and releasing gas filter case (lid). OER-Elite INSTALLATION MANUAL...
- Page 12 Labels and Symbols Reprocessing basin Fonts displayed on the touch screen Ricoh bitmap fonts designed by RICOH Company, Ltd. are used. OER-Elite INSTALLATION MANUAL...
-
Page 13: Important Information - Please Read Before Use
OER-Elite components and the endoscopes being reprocessed. Endoscopes must be subject to cleaning by the user prior to reprocessing; however, use of the OER-Elite enables the user to perform modified manual cleaning of the endoscope prior to automated cleaning and high-level disinfection in the OER-Elite. -
Page 14: Terms Used In These Manuals
Cleaning fluid Refers to filtered water with detergent that is used during the cleaning process. Cleaning process A series of operations programmed into the equipment that enable it to perform ultrasonic cleaning and detergent cleaning of endoscopes. OER-Elite INSTALLATION MANUAL... - Page 15 Important Information — Please Read Before Use Detergent Olympus-validated detergent. Refer to Section 2.8, “Consumable accessories (Optional)” for details. Disinfectant solution Olympus-validated disinfectant solution. Refer to Section 2.8, “Consumable accessories (Optional)” for details. Disinfection process A series of operations programmed into the equipment that enable it to perform disinfection of endoscopes.
- Page 16 (MRC) specified by the disinfectant manufacturer) User ID Identity information specific to each reprocessing operator. It can be recorded in the histories of reprocessing, etc. For the user ID input method, refer to Section 3.6, “Entering ID” in “Instructions-Operation manual”. OER-Elite INSTALLATION MANUAL...
-
Page 17: Ensuring The Safety Of Reprocessing Personnel
All personal protective equipment should be inspected before use and replaced periodically before it is damaged. • When using disinfectant solution and alcohol, Olympus recommends the use of gas filters and running this equipment in well-ventilated areas. -
Page 18: Equipment Compatibility
Olympus has not tested the efficacy of cleaning and high-level disinfection on this equipment in combination with endoscopes that are not listed on the “List of compatible Endoscopes/Connecting Tubes <OER-Elite>”. - Page 19 An electromagnetic interference with other devices may shorten the communications distance of the designated ID tag and cause signals to become unreadable. Try to take mitigation measures such as keeping the affecting device away from this equipment. OER-Elite INSTALLATION MANUAL...
-
Page 20: Outline Of Functions
The function for heating the disinfectant solution until the specified temperature by the specified time. For details, refer to Section 7.3, “Heat LCG Timer” in “Instructions-Operation manual”. Mix LCG This function is mixing the disinfectant solution to the appropriate concentration concentration and enables accurate concentration check. OER-Elite INSTALLATION MANUAL... - Page 21 This function drains the remaining fluid from the basin after an irregularity occurs, or if the process is stopped before it completes. Air purge also eliminates residual fluid from the endoscope channels. For details, refer to Section 7.6, “Air purge” in “Instructions-Operation manual”. OER-Elite INSTALLATION MANUAL...
- Page 22 This function diagnoses the auto leak test function of the device. It is performed automatically at the end of Load LCG function or as an independent operation. For details, refer to Section 7.13, “Self-check of auto leak test” in “Instructions-Operation manual”. OER-Elite INSTALLATION MANUAL...
-
Page 23: Chapter 1 Checking The Package Contents
Check that the package contains all the items listed below. Inspect each item for damage. If the device is damaged, a component is missing, or there is any question regarding items, do not use the device and contact Olympus immediately. ... - Page 24 Gas filter (2 pcs) (MAJ-822) Gas filter adapter (splash guard) (GC949900) Washing case (MAJ-2121) Air filter (MAJ-823) Water filter (MAJ-824 or MAJ-2318) Stylus pen holder (RA016500) Hex wrench (GT804300) M4 × 10 mm cap bolt (2 pcs) Stylus pen (GT944200) OER-Elite INSTALLATION MANUAL...
- Page 25 Disinfectant collection hose (GJ668000) Disinfectant removal tube Filter tube (GJ460500, 2 pcs) Water filter wrench (GC601300) (GJ460200) Drain connector (GL366300) Connector jig (RU726500) Spare fuse (DB181500, 2 pcs) Water supply piping disinfection Card holder (GT271000, 2 pcs) hose (RU205800) OER-Elite INSTALLATION MANUAL...
-
Page 26: Oer-Elite
User ID master card (GT970600) Accessory for use in record management Ch.1 Portable memory (MAJ-1925) Manuals Instructions-Installation Manual Instructions-Operation Manual List of Compatible (this manual) Endoscopes/Connecting Tubes <OER-Elite> OER-Elite Quick Reference Guide OER-Elite Operation Guide OER-Elite INSTALLATION MANUAL... -
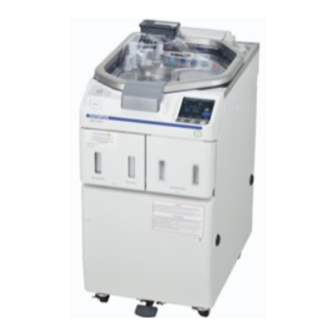
Page 27: Chapter 2 Nomenclature And Functions
Checks the amount of alcohol remaining. Detergent tank check window Checks the amount of detergent remaining. Detergent/alcohol drawer Accommodates the specially designed tanks of detergent for cleaning and alcohol for alcohol flush. Portable memory port Insert the portable memory into this port. OER-Elite INSTALLATION MANUAL... -
Page 28: Top Panel
Accommodates the gas filter for removing the odor and vapor of the disinfectant solution. Ventilation openings on the This is the hole for taking and exhausting air into/from the reprocessing basin. Do gas filter case not block the ventilation openings on the gas filter case. OER-Elite INSTALLATION MANUAL... -
Page 29: Inside
For use in draining water from the water filter housing. filter housing Water filter (housing) Accommodates the 0.2-micron internal water filter. Connector above water For use in draining water and air from the water filter housing. filter housing OER-Elite INSTALLATION MANUAL... -
Page 30: Rear Panel
Power cord receptacle Connect the power cord. 100BASE-TX terminal Used to access the Olympus-designated external devices (for trained service personnel only). Printer communication port Connects the printer (MAJ-1937) provided with the optional printer set (MAJ-2144). Do not connect any devices other than the specified printer. -
Page 31: Side Panel
Used to attach the provided stylus pen holder. holes Connector hanger Used to attach the optional connector hanger (MAJ-865). The printer set cannot attaching holes be attached if the connector hanger is already attached. Grommet attaching holes Used to attach the grommets. (×4) OER-Elite INSTALLATION MANUAL... -
Page 32: Reprocessing Basin
2.6 Reprocessing basin Reprocessing basin Ch.2 OER-Elite INSTALLATION MANUAL... - Page 33 Water supply/circulation Supplies water for cleaning. Also, supplies the cleaning fluid or disinfectant nozzle solution aspirated through the circulation port for circulation. Water level scale (× 3) Marks for confirming that the equipment is level. OER-Elite INSTALLATION MANUAL...
-
Page 34: Control Panels
The indicator lights when the Heat LCG Timer is in progress. Heat LCG Timer button Press this button to active the Heat LCG Timer. Stop button Press this button to stop process. Start button Press this button to start process. OER-Elite INSTALLATION MANUAL... -
Page 35: Touch Screen - Menu Screen
Section 8.1, “Replacement of consumable items menu” in Consumable Items “Instructions-Operation manual”. Information Press this button to go to Information menu. oRefer to Chapter 12, “Information Menu Screen” in “Instructions-Operation manual”. NOTE The operational buttons are expressed by a box with gradation. Figure 2.1 OER-Elite INSTALLATION MANUAL... -
Page 36: Touch Screen - Reprocessing Standby Screen
Heat LCG indicator Indicate that the Heat LCG is incorporated in the reprocessing program. Heat LCG cannot be eliminated from the reprocessing process. Menu button Returns to the Menu screen, LCG Info. button Goes to the LCG info. screen. OER-Elite INSTALLATION MANUAL... - Page 37 Temperature of disinfectant solution during reprocessing process. MRC Check Result Input result of MRC check. Display Program Info. Press to display the information of the selected reprocessing program on the area of button No.3. Refer to No.1. OER-Elite INSTALLATION MANUAL...
-
Page 38: Touch Screen - Reprocessing Process Screen
Press this button to display the LCG Info. screen. MRC Check Result button During the reprocessing process, it cannot be operated with this button. LCG Info./Program Press this button to display the reprocessing program information about the information button selected reprocessing program. OER-Elite INSTALLATION MANUAL... -
Page 39: Consumable Accessories (Optional)
If these items are expired, effectiveness of items Ch.2 may be compromised. Internal 0.2 micron water filter. Figure 2.2 Gas filters (MAJ-822) Incorporated in the gas filter cases to absorb disinfectant odors and vapors. Figure 2.3 OER-Elite INSTALLATION MANUAL... - Page 40 Remarks Best Sanitizers, Inc 2.8 L disposable tank for EndoQuick Alkaline detergent (154 Mullen Drive, use in OER-Elite Walton, KY) Table 2.1 NOTE EndoQuick is distributed by Olympus America, Inc. To obtain EndoQuick listed above, contact Olympus. OER-Elite INSTALLATION MANUAL...
- Page 41 Best Sanitizers, 1,065 ml Peracetic Acid Inc. (154 Mullen cassette bottles Acecide-C K091210 (PAA) Drive, Walton, For use in OER-Elite Table 2.2 NOTE Acecide-C is distributed by Olympus America, Inc. To obtain Acecide-C listed above, contact Olympus. OER-Elite INSTALLATION MANUAL...
- Page 42 Name Manufacturer 510(k) number Best Sanitizers, Inc. (154 ACECIDE test strips K091210 Mullen Drive, Walton, KY) Table 2.3 NOTE ACECIDE test strips is distributed by Olympus America, Inc. To obtain ACECIDE test strips listed above, contact Olympus. OER-Elite INSTALLATION MANUAL...
-
Page 43: Chapter 3 Installation Of Accessories
Inspect the retaining rack. Section 3.5 on page 41 Install the washing case (MAJ-2121). Section 3.6 on page 42 Install the stylus pen holder. Section 3.7 on page 43 Inspect the accessory holder. Section 3.8 on page 44 OER-Elite INSTALLATION MANUAL... -
Page 44: Installation Of The Grommets
Insert two grommets into the grommet attaching holes on each sides of the reprocessor (four grommets in total). CAUTION Be sure to attach the grommets. Otherwise, fluid may penetrate the grommet attaching holes and cause equipment damage. Figure 3.1 OER-Elite INSTALLATION MANUAL... -
Page 45: Installation Of The Buckling Guard
Ch.3 Align the holes on the buckling guard with the screw holes threaded on the rear panel and attach using the three buckling guard retaining screws. Bucking guard Figure 3.2 OER-Elite INSTALLATION MANUAL... -
Page 46: Inspection Of The Mesh Filters
Step on the foot pedal to open the lid. Check that the drain port mesh filter and two circulation port mesh filters are attached inside the reprocessing basin. Circulation port mesh filters Drain port mesh filter Figure 3.3 OER-Elite INSTALLATION MANUAL... -
Page 47: Inspection Of The Retaining Rack
Make sure the retaining rack is attached properly to the reprocessing basin and that the ring of the retaining rack fits onto the projection on the temperature sensor. Ch.3 Temperature sensor Ring of retaining rack Figure 3.4 OER-Elite INSTALLATION MANUAL... -
Page 48: Installation Of The Washing Case (Maj-2121)
Otherwise the reprocessing may become insufficient. Cutout of Washing case holder Washing case mount Washing case Washing case holder mount Washing case protrusion Figure 3.5 OER-Elite INSTALLATION MANUAL... -
Page 49: Installation Of The Stylus Pen Holder
3.7 Installation of the stylus pen holder Installation of the stylus pen holder The stylus pen offered is used to operate the touch screen of the OER-Elite. „ Required items Check Required items M4 × 10 mm cap bolt Hex wrench (GT804300) Ch.3... -
Page 50: Inspecting The Accessory Holder
Less frequently used accessories should be dried completely and then stored together in a place not exposed to dust or direct sunlight. OER-Elite INSTALLATION MANUAL... -
Page 51: 3.10 Installation Of The Optional Accessories
• The communication cable should not be sharply bent, pulled, twisted, or crushed. Cable damage can result, and bar codes may not be properly scanned. Connecting diagram Bar code reader port Communication cable Bar code reader Figure 3.8 OER-Elite INSTALLATION MANUAL... -
Page 52: Installation Of The Printer Set (Maj-2144)
Do not bend the AC power cord forcibly, or place heavy objectives on the AC power cord. Doing so may damage the AC power cord and cause a fire or an electric shock. If the AC power cord is damaged, discontinue using it and contact Olympus. Ch.3 CAUTION •... - Page 53 3.10 Installation of the optional accessories Connecting diagram AC power Printer outlet cord (RU6517) attached to printer Printer communication port Ch.3 AC adapter (RU6518) attached to printer Printer MAJ-1937 Interface cable Figure 3.9 OER-Elite INSTALLATION MANUAL...
- Page 54 3.10 Installation of the optional accessories Ch.3 OER-Elite INSTALLATION MANUAL...
-
Page 55: Chapter 4 Installation Of Equipment
• To prevent an electric shock, do not touch the power cord plug or directly touch the power source with wet hands. • When using disinfectant solution and alcohol, Olympus recommends the use of gas filters and running this equipment in well-ventilated areas. - Page 56 • Although the reprocessor incorporates a water filter, it may still fail or the water filter use life may be reduced if the water contains a large amount of debris and sediment. If this is the case, contact Olympus to have a strainer installed in the water supply piping.
- Page 57 • Before installing the equipment, be sure to check that the installation meets the conditions provided in Section 4.3, “Installation conditions”. If not, water leaks, malfunction, or failure of the equipment may result. OER-Elite INSTALLATION MANUAL...
-
Page 58: Installation Workflow
Set the date and the time. Section 4.9 on page 74 Install the gas filters. Section 4.10 on page 79 Install the air filter. Section 4.11 on page 90 Inspect air leakage from the air filter connectors. Section 4.12 on page 96 OER-Elite INSTALLATION MANUAL... - Page 59 Set up the disinfectant solution. Section 4.20 on page 134 Check the functions. Section 4.21 on page 145 Disinfect the water supply piping. Section 4.22 on page 162 Check the functions of the optional accessories. Section 4.23 on page 180 OER-Elite INSTALLATION MANUAL...
-
Page 60: Installation Conditions
• The elevation above sea level should not exceed 3,000 m (9,842 ft) • The equipment should be used indoors. • When using the disinfectant solution, and alcohol, Olympus recommends the use of gas filters and running this equipment in well-ventilated areas. - Page 61 • Power supply capacity should be enough for the equipment rating (120 V AC, 5.5 A, 60 Hz, voltage fluctuations within ±10%, frequency fluctuations within ±1 Hz). • The power outlet should be a hospital-grade, wall mains power outlet (3-conductor, grounded). OER-Elite INSTALLATION MANUAL...
- Page 62 1172 mm (46.1 in) Drain hose Right Rear Front connector side Power cord connector 945 mm (37.2 in) 180 mm 165 mm (7.0 in) (6.4 in) 92 mm 67 mm (2.6 in) (3.6 in) Figure 4.1 OER-Elite INSTALLATION MANUAL...
-
Page 63: Checking The Installation Position
The tilt of the equipment will be corrected in Section 4.15, “Correction of equipment tilt”. Open the front door and press the foot pedal to open the lid. Make sure that the door and the cover do not come into contact with other equipment or with the walls. Ch.4 OER-Elite INSTALLATION MANUAL... -
Page 64: Connection Of The Water Supply Hose
The water supply plug of this equipment is designed to be connected to an ordinary tap water faucet with 3/4” GHT (garden hose thread), or the Olympus Pre-Filter Assembly (MF01-0033PL). If a different type of the water faucet is used, have a plumber enable a safe and secure connection. - Page 65 Figure 4.6 Open the water faucet slowly while checking to make sure that water does not leak from the hose connection area. If water leaks, close the water faucet and reconnect the water supply hose. OER-Elite INSTALLATION MANUAL...
-
Page 66: Connection Of The Drain Hose
Insert the other end of the drain hose into the drain hole on the floor and secure it so that it does not come out of the drain hole during discharge. NOTE If the drain hose is too long, cut it to an appropriate length. OER-Elite INSTALLATION MANUAL...
Need help?
Do you have a question about the OER-Elite and is the answer not in the manual?
Questions and answers
Does the potable water connection require backflow protection?