Advertisement
Table of Contents
- 1 Table of Contents
- 2 ALOKA F75 Components
- 3 Moving and Unpacking the Unit
- 4 Cleaning the Unit
- 5 Getting Started - Basic Setup and Shutdown
- 6 Creating a Patient File
- 7 Changing Scopes between Cases
- 8 B Mode Image Brightness
- 9 Depth, Frequency, Contrast and Focus
- 10 Doppler Modes
- Download this manual
Advertisement
Table of Contents

Related Manuals for Olympus Aloka ProSound F75


Summary of Contents for Olympus Aloka ProSound F75
- Page 1 Quick Reference Guide...
-
Page 2: Table Of Contents
Table of contents General instructions ALOKA F75 components – Moving and unpacking the unit – Cleaning the unit – Getting started Basic setup and shutdown – Creating a patient file OPTION 1: Manual entry – OPTION 2: Import from server –... -
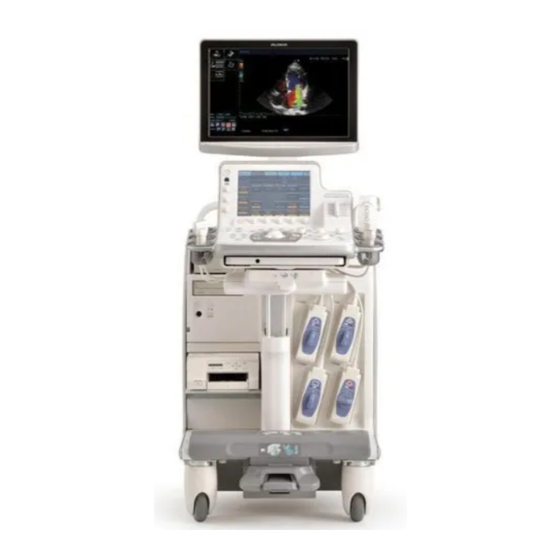
Page 3: Aloka F75 Components
Aloka Prosound F75 Quick Reference Guide ALOKA F75 components Monitor Touchscreen Operation panel Main body Moving and unpacking the unit The ALOKA F75 should be packed down when moving, to avoid damage to its components. To unpack: Lock front wheels by pressing down on front outer pedal... -
Page 4: Getting Started - Basic Setup And Shutdown
Aloka Prosound F75 Quick Reference Guide Getting Started – basic setup and shutdown Press PROBE PRESET Select the desired probe and preset on the touchscreen (both Attach EUS Connector Cable to the scope and to port, located should be yellow) on the front side of the main body Press B GAIN to freeze the image. -
Page 5: Creating A Patient File
Aloka Prosound F75 Quick Reference Guide Creating a patient file: OPTION 1 Manual entry Creating a patient file: OPTION 2 Import from server Press NEW PATIENT Press NEW PATIENT Use trackball and ENTER to navigate cursor on the monitor Use the trackball and ENTER to navigate cursor on the monitor. -
Page 6: Changing Scopes Between Cases
Aloka Prosound F75 Quick Reference Guide Changing scopes between cases Press B GAIN to freeze the image Preset Probe Disconnect old scope and connect new scope Press B GAIN. This prompts the unit to look for connected probes Press PROBE PRESET... -
Page 7: B Mode Image Brightness
Aloka Prosound F75 Quick Reference Guide B Mode image brightness Depth, frequency, contrast and focus B GAIN adjusts overall brightness DEPTH/ZOOM adjusts the tissue depth that is displayed on the monitor. This corresponds to the ruler on the left of the image... -
Page 8: Doppler Modes
Aloka Prosound F75 Quick Reference Guide Doppler modes FLOW displays directional colour doppler (velocity scale) eFLOW displays directional power doppler (signal strength scale) at high sensitivity for detecting small vessels Press ENTER to toggle between full-line and dashed doppler box,... - Page 9 Aloka Prosound F75 Quick Reference Guide Measurement – live or frozen image mode Comments (annotation) Press + key to start measurement function Press ARROW to begin annotation function Use trackball to move caliper to the start point Use trackball to move cursor on the monitor to point of interest...
- Page 10 Aloka Prosound F75 Quick Reference Guide Storing images onto the hard drive Storing video clips onto the hard drive A patient file must be created first; see page 5 Image must be in live scan mode (press B GAIN to unfreeze) Press B GAIN to freeze the image Press STORE to begin recording video.
- Page 11 Aloka Prosound F75 Quick Reference Guide Searching for files on drives Copying files onto USB Press ARROW and move cursor to the thumbnail area of Search for files on hard drive, or press REVIEW to display the the monitor current case as thumbnails...
- Page 12 OLYMPUS AU STRALIA PTY LTD OLYMPUS NEW ZEALAND LIMITED 3 Acacia Place, Notting Hill VIC 3168, Australia 28 Corinthian Drive, Albany, Auckland NZ 0632 Customer Service: 1300 132 992 | www.olympusaustralia.com.au Customer Service: 0508 659 6787 | www.olympus.co.nz QR 04.027 V3.0 November 2019...
Need help?
Do you have a question about the Aloka ProSound F75 and is the answer not in the manual?
Questions and answers