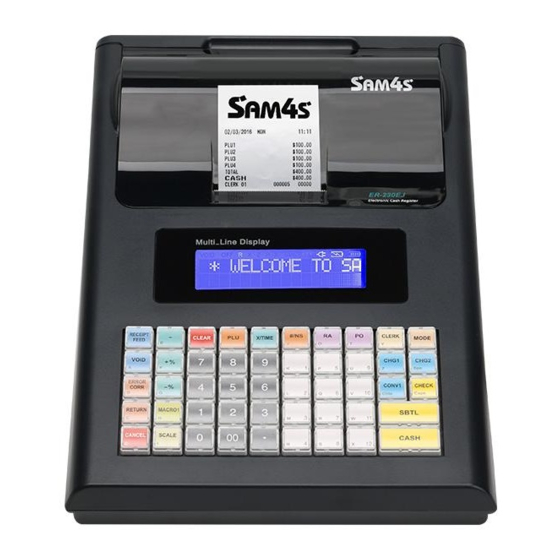
Sam4s ER-230EJ Quick Setup Manual
Hide thumbs
Also See for ER-230EJ:
- Operating and programming manual (176 pages) ,
- Operating and programming manual (176 pages)
Table of Contents
Advertisement
Quick Links
Sam4s ER-230EJ - Quick Setup Guide
Memory Allocation Reset & Configuration
Note –
This reset procedure has been carried out at the factory and
need only be carried out again if the default file sizes needs increasing or
decreasing to match your needs.
Important:-The following procedure resets the machine back to factory
defaults. This will remove all current program and sales information.
3
Power OFF/ON whilst holding CHEQUE key shown below
The display will show the prompt RAM ALL CLEAR
-
Press the Top Left, Bottom Left, Top Right, Bottom Right keys
on the keyboard
The display will show RAM ALL CLEAR, and will spell GOOD for each of
the 4 corner key presses.
-
At the LOAD DEFAULT SET prompt
Either Press CASH to load and print the default values.
The S Mode menu is shown when completed.
or
Continue as shown below to change the values
-
Press X/TIME to begin entering new values
-
When prompted with the file name i.e. PLU, GROUP
Either Enter the New Value and press CASH
or
Press CASH to bypass and keep default values
-
At the ARE YOU SURE prompt press CASH
The process is now complete and the preset values printed.
-
Press 3 then the MODE key to select REG mode
-
Enter 1 then press CLERK # to sign on
Menu Navigation function
The register uses a menu system which makes setup easy to do without
reliance on a manual. In order to use the menu system the following
keys are required: -
-
CHARGE2 / CHEQUE up and down menu / options
-
Numeric direct to menu option
-
CASH select menu option / exit + save program option
-
CLEAR select previous menu / cancel program option
To Install Till Roll
-
Plug the power cord of the cash register into the AC outlet
-
Remove the printer cover
-
Pull the black arm so paper can be inserted
-
Ensure that the paper roll is being fed from the
bottom of the roll
As shown in the picture to the right
-
Insert the paper
-
Push the black arm onto the paper, making sure that it is clipped in
Basic Sale
The cash register has PLU buttons 1-12 through which to register your
sales. The purpose of these is to assist you in analysing your business.
example PLU 1 could be used for entering 'Food' and PLU 2 could be used
for 'Non-Food' etc.)
By pressing the appropriate PLU button and registering
your sale you will begin to analyse your sales, with a report.
-
Press 3 then the MODE key to select REG mode
-
Press the PLU key on the keyboard (i.e. 1 ) if the button has a preset
price
or
enter an amount on the numeric keypad
£2.99, enter: 299)
Do not use the decimal key and press the PLU
key on the keyboard
-
To enter another sale repeat as above
-
Press the SUBTOTAL button to show the amount due
-
If you would like to calculate change, enter the value of money given to
you by the customer. Do not use the decimal key
£10.00 enter: 1000)
-
If you do not wish for the change due to be displayed then go on to the
next stage
-
Press the CASH button to open the drawer
-
If the money given has been entered, then the change will be displayed
on the receipt
Reporting
The cash register has two reporting modes. X mode for printing out the
information without clearing any figures. Z mode for printing and clearing
the figures back to zero ready for the next day.
-
Press the 5 then the MODE key to select Z mode
-
Press CASH four times
-
The end of day report is then printed
Further reports can be found in the Programming/Operation Manual
Time & Date
-
Press 6 then the MODE key to select PGM mode
-
Enter 6 and press the CASH button
-
Then press the CASH button
-
Enter the time (i.e HHMM)
-
Then press CASH
-
Enter the Date (i.e DDMMYY)
-
Then press CASH
-
Then press CASH
Return to the REG position ready for normal use.
(For
Receipt Logo
The following shows how to program the Receipt logo.
-
Press 6 then the MODE key to select PGM mode
-
Enter 8 and press the CASH key
-
Enter 1
(preamble)
-
Select the line number and press the CASH key
(For example, for
-
Type in the text using the alpha layout and press the CASH key
-
Press CLEAR three times to finish and return to REG mode
Note: - For bitmap image printing please refer to the manual, or press
the help key for instructions on printing 1 of 20 preset images.
(For example, for
Product Creation
New items are created or edited in PGM mode.
Naming Products
-
Press 6 then the MODE key to select PGM mode
-
Enter 1 and press the CASH key three times
-
Select the product by
Either Pressing the item key
or
Entering the code number and pressing the PLU No Key
-
Select DESC: and press the CASH key
-
Type in the name using the alpha layout and pressing CASH
-
Press CLEAR four times to finish and return to REG mode
Also the price can be programmed here be going down to option 2
Product Pricing
-
Press 6 then the MODE key to select PGM mode
-
Enter 1 and press the CASH key three times
-
Select the product by
Either Pressing the item key
or
Entering the code number and pressing the PLU No Key
-
Select Price/HALO1
-
Enter the price without the decimal point followed by CASH
-
Press CLEAR four times to finish and return to REG mode
or 2
(postamble)
and press the CASH key
(or Price/HALO 2)
and press the CASH
Advertisement
Table of Contents

Subscribe to Our Youtube Channel
Related Manuals for Sam4s ER-230EJ


Summary of Contents for Sam4s ER-230EJ
- Page 1 Sam4s ER-230EJ - Quick Setup Guide Time & Date Memory Allocation Reset & Configuration To Install Till Roll Plug the power cord of the cash register into the AC outlet Press 6 then the MODE key to select PGM mode Note –...
Need help?
Do you have a question about the ER-230EJ and is the answer not in the manual?
Questions and answers