Table of Contents
Advertisement
Installation Instructions
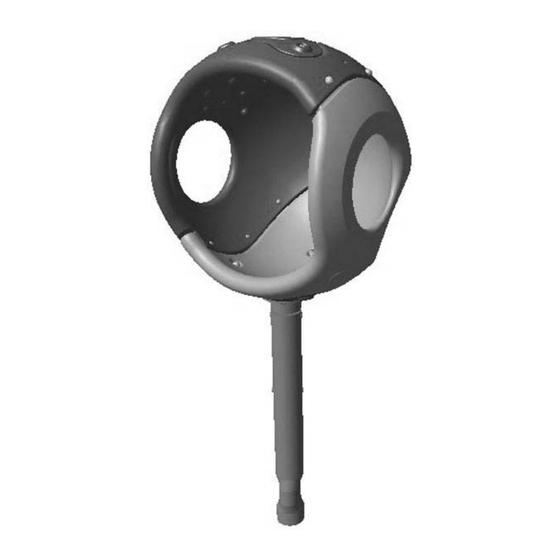
Assembly View
Equipment Use Zone
A - (ASTM) 72 in. (1830 mm)
A
A
Page 1 of 8
(CSA) 1800 mm
(EN) 2000 mm
Installation Instructions
Playworld Systems
Cozy Cocoon
Spinning Post Mount
Installation Preparation
Recommended Crew: ........................... Two (2) adults
Installation Time: ................................... 1.5 man-hours
Concrete Required: ............................... 0.13 cubic yard (0,10 cubic meters)
Use Zone: .............................................. Refer to information below
User Group Age (years): ....................... ASTM/CSA: 2-12, EN: 2-14
ICON KEY
Fully Tighten
Hardware
Do Not Fully TIghten
Hardware
Drill
Hammer
Model XX0483
®
Add 1 Drop of
Thread Locking Adhesive
Pour Concrete
Dig Footing Holes
Critical Fall Height
Model XX0483
PA1380
Advertisement
Table of Contents

Related Manuals for Playworld Systems Cozy Cocoon


Summary of Contents for Playworld Systems Cozy Cocoon
- Page 1 Installation Instructions Installation Instructions Playworld Systems Model XX0483 ® Cozy Cocoon Spinning Post Mount Installation Preparation Recommended Crew: ......Two (2) adults Installation Time: ........1.5 man-hours Concrete Required: ....... 0.13 cubic yard (0,10 cubic meters) Use Zone: ..........Refer to information below User Group Age (years): .......
-
Page 2: Installation Instructions
Installation Instructions Position Unit of Measurement Top View Top # Inches Bottom # [Millimeters] Footing Diagram ASTM/CSA: 14" (356 mm) EN: 48.4" (1245 mm) Elevation Views Page 2 of 8 Model XX0483 PA1380... - Page 3 Installation Instructions Follow the details in alphabetical order. For clarifi cation, each detail references the step description. The step descriptions start on page 5. Cocoon Cover Casting AAU0718 3/8" Button Head Nut (1 Total) BAE0663 (3 Total) Plastic Washer BPL0300 Cocoon Half (3 Total) BPL3150...
- Page 4 Installation Instructions 3/8" x 2-3/4" 3/8" Button Head Nut Button Head Bolt Plastic Washer BAE0663 BPL0300 BAE06677 (4 Total) (3 Total) (3 Total) 3/8" Flat Washer BAE0595 3/8" I.D. x 1-1/4" O.D. Cocoon Post Casting (3 Total) AAU0715 Fender Washer BAE0936 (1 Total) (3 Total)
- Page 5 Installation Instructions Notes Before You Begin: Do not over tighten bolts during assembly, only snug Final Details. tighten them until assembly is complete. Do not install bolt caps until the structure Step 8: Plumb and level the component in it's footing. Block and brace for is completely assembled and properly footed.
-
Page 6: Bill Of Materials
Bill of Materials Installation Instructions XX0483 - COZY COCOON SPINNING POST MOUNT PART NO. DESCRIPTION QTY. AAU0715 COCOON MOUNT (POST/BEARING) AAU0718 COCOON COVER APL1722 PLATE - 7.75" O.D. x 12 GA ASY0258 ASSEMBLY - COCOON BEARING BAE0595 WASHER - 3/8" SAE FLAT BAE0633 NUT - 3/8"-16 x 1.63 BARREL... -
Page 7: Equipment Maintenance
Model XX0483 ® • Inspect for loose fasteners. • Inspect metal parts for fi nish damage. Cozy Cocoon Tightening torque specifi cations are: To repair painted surfaces, sand damaged area with Bolts and Nuts: Snug tighten and tighten an additional sandpaper and wipe clean. -
Page 8: Inspection Checklist
Inspection Form Installation Instructions Preventive Maintenance • Be sure that you are using a copy of this Inspection Form and not your original..for Safety's Sake! • Use the Inspection Codes listed below and record condition of equipment at time of examination on the Inspection Checklist. - Page 9 Guidelines Important ! Please Read Completely Before Beginning Installation. According • CSA compliance: For rotating play equipment, the use zone should extend on to a report published by the U. S. Consumer Product Safety Commission (C.P.S.C.) all sides a minimum distance of 1800 mm. This use zone may not be overlapped 72% of all playground injuries result from accidental falls.
- Page 10 IMPORTANT! Because accidental falls around your playground equipment must be developed for each playground and strictly followed. All equipment can occur, Playworld Systems recommends that the area under and around the must be inspected frequently for any potential hazards. Special attention must to structure be covered with a resilient material such as sand, bark mulch, or wood be given to moving parts and other components that can be expected to wear.
- Page 11 Footing Details (in ground) Support Post Support Post Factory-Applied Protective Factory-Applied Protective Protective Surfacing Level Protective Surfacing Level Surfacing Level Sticker Surfacing Level Sticker Ground Level Ground Level Varies Varies 2" (51 mm) 2" (51 mm) 48" 36" (1219 mm) (914 mm) 54"...
- Page 12 Protective Surfacing Level on packed stone or other porous material. Ground Level Varies • The footings shown on Playworld Systems’ documentation are recommendations 2" (51 mm) based on historical performance in average soil conditions. Footing dimensions 36" may be modifi ed by the owner based on actual soil conditions.
- Page 13 Footing Detail (surface mount) Footing Notes Surface Mount Post FOOTING NOTES (SURFACE MOUNT) • Most support posts and component support legs will have either a factory-applied Protective sticker with line, or factory-applied mark designating protective surfacing level Surfacing Level on a clear and level installation site. Anchor Bolts Concrete Base •...
-
Page 14: Final Inspection
FINAL INSPECTION • Insure that hard surface warning/Playworld Systems identifi cation labels are ® • Playworld Systems insists on the installation of protective surfacing within the properly affi xed to the play equipment. Labels are to be plainly visible according ®...
Need help?
Do you have a question about the Cozy Cocoon and is the answer not in the manual?
Questions and answers