Table of Contents
Advertisement
Quick Links
Advertisement
Table of Contents

Related Manuals for Quadstick Quadstick

Summary of Contents for Quadstick Quadstick
- Page 1 Quadstick User Manual User guide 2018...
-
Page 2: Table Of Contents
USB Emulation mode 4 (PS4) ......................72 USB Emulation mode 5 (Nintendo Switch) ..................74 Connecting to Consoles and PCs ......................75 PS4 ..............................77 Quadstick to PS4, Direct: ......................78 CronusMax ...........................80 CronusMax – Full Crossover ....................81 CronusMax – Partial Crossover ....................82 CronusMax Gamepacks ......................84 CronusMax –... - Page 3 Bluetooth ..............................112 Settings ............................113 Serial communication: .......................115 Wireless only operation: ......................116 Data Channel assignment: ......................117 Infrared Remote Control ........................118 The Quadstick Manager Program ......................121 Game Files Tab ..........................122 Joystick Tab .............................127 Firmware Tab ...........................130 Voice Control Tab ..........................132 Voice Commands ........................135 Vocola files: ..........................137...
-
Page 4: Introduction
USB or Bluetooth connection. The sip/puff pressure sensors, joystick and lip position sensors are all analog sensors. In addition to its own hardware inputs, the Quadstick can be used with other devices, such as a PC’s mouse, an UltraStik 360, or a Tobii Eyegaze device. - Page 5 Quadstick’s flash memory by the Quadstick Manager Program or manually using a PC's file manager. The Quadstick can contain many configuration files and the user can control which one is currently active by use of a long hard sip on the side tube.
-
Page 6: Compliance Information
Cet appareil numérique de la classe B est conforme à la norme NMB-003 du Canada. CE Statement QuadStick controllers are CE-marked, indicating compliance with the essential health and safety requirements set out in European Directives. The QuadStick has been tested for compliance with the following standards: •... -
Page 7: Hardware Features
Hardware Features... -
Page 8: Front
Front Status Leds Five Blue/Red Status LEDs used to indicate: ◦ Sensor activation ◦ Active configuration profile ◦ Boot process and self test ◦ USB connection status Mouthpiece Mouthpiece attached to Joystick ◦ Three Sip/Puff tubes. Analog pressure sensors. ◦ XY motion Lip Button Lip Position Sensor. - Page 9 ◦ External Outputs Status on top pair ◦ External Inputs Status on bottom pair Side Tube Mode selector sip/puff tube. Used to switch between different operating modes.
-
Page 10: Back Panel
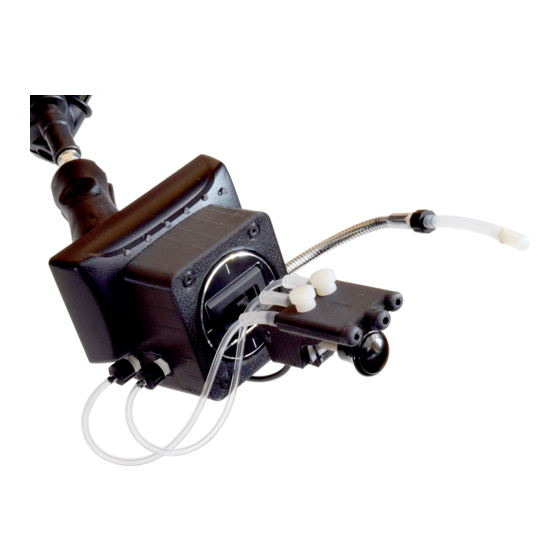
Back Panel Output Jack ◦ 3.5 mm stereo jack with two optically isolated outputs Lip Button Jack ◦ Linear position sensor input Input Jack ◦ 3.5 mm stereo jack for Ability Switch inputs. ◦ TTL-3.3Volt Serial Port. Compatible with TTL-232R-3V3-AJ ◦... - Page 11 ◦ USB-B Main connector for power and/or data connection to Host device USB A Jack USB-A connector ◦ For hosting second daisy chained gamepads, such as the UltraStik 360, Mayflash F300 Fightstick or the Dual Shock 4. ◦ Auxiliary Digital Inputs for 8-way external joystick ◦...
-
Page 12: Fps Models
FPS models: Both the Original and FPS models use the same software and internal electronics. The difference is the joystick gimbal. The joystick gimbal in the Original model is the same part used in ordinary game controllers connected to an aluminum rod to which the mouthpiece is attached. An extra spring is used to help hold up the weight of the mouthpiece and Lip button assembly and stiffen the movement. - Page 13 TIGHTEN. It only needs to be snug. It is possible to break the plastic bracket or crush the lip sensor if this is over-tightened. Right Mouthpiece Hole Luer Fitting Connection for right hole tube Side Tube Luer Fitting Sip/Puff tube typically used to control overall operation of the Quadstick.
-
Page 14: Sensors And Inputs
Sensors and Inputs... -
Page 15: The Mouthpiece
The Mouthpiece The mouthpiece has three sip/puff holes plus a lip button sensor. The lip sensor activation and sensitivity is adjustable from a slight movement to up to one-half inch from the inactive position. A thumbscrew allows the lip sensor to be placed in a comfortable position. The Sip/Puff tube openings in the mouthpiece can be individually selected or used in combination, by positioning the mouth over one, two or three holes. - Page 16 <TODO : Control Name> <TODO>: Insert description text here... <TODO : Control Name> <TODO>: Insert description text here...
-
Page 17: Sip/Puff Sensors
LED lights to give feedback to the user. Red for puff and Blue for sip. When user sips or puffs the Quadstick will make either a click or beep to indicate it detected a hard or soft sip/puff, respectively. The hard sip/puff is detected the moment the pressure exceeds the high threshold. -
Page 18: Joystick
& right. The general topic of Preference settings is covered in a later chapter. These settings can be adjusted using the Quadstick Manager Program's Joystick tab. joystick_deflection_minimum percent Defines center dead zone. - Page 19 (1). If you prefer the action of the original square dead zone instead, the preference can be set to 0 in the misc tab in the QuadStick Manager Program by turning off the Enable Circular Dead Zone check box.
- Page 20 When used with a discrete output, like the D-Pad buttons, the joystick’s position is divided up into a series of zones, such as North, South, East and West, which triggers a signal when the joystick is moved into a zone. The discrete zones are further divided into the Ordinal directions, North-East, South-East, etc as well as into Inner ring and Outer ring zones, in a manner similar to the dual pressure thresholds for the Sip/Puff sensors.
- Page 21 The following table contains the name of all the Joystick Zones input signals, with a brief description and if the adjustable delay timer is used to detect the input. Input Name Description Delay left Joystick Left Analog value instant right Joystick Right Analog value instant Joystick Up Analog value...
-
Page 22: Using External Inputs
Using External Inputs External input switches can be connected to the Quadstick. All input signals are “logic level” signals and require switch contacts suitable for low current applications. -
Page 23: Input Jack With Two Switches
Input Jack with Two Switches The Inputs jack on the back of the Quadstick is a 3mm stereo connector with the two input circuits (Tip & Ring) and Shield (or Ground). Two switches may be connected using the following circuit. - Page 24 The digital inputs can be used in the configuration spreadsheet just like a sip/puff input:...
-
Page 25: Usb-A Jack With Two Switches
Input Name Description Delay digital_in_3 USB-A Data - to Gnd (SW2) instant digital_in_4 USB-A Data + to Gnd (SW1) instant Table 3: External Digital Inputs 3 & 4 The Quadstick can detect closures of Switches 1 and 2 independently and simultaneously. -
Page 26: Lip Sensor Jack With Two Switches
Lip Sensor Jack with Two Switches The Lip jack on the back of the Quadstick is a 3mm stereo connector with the two input circuits (Tip & Ring) and Shield (or Ground). Two switches may be connected using the following circuit. -
Page 27: Summary
Summary The goal of the Quadstick is to be able to extract as much information as possible using the mouth, lips, and external sensors, to take advantage of any inputs the user can actuate. -
Page 28: Configuration
Lip button is pressed, the file will activate and control the operation of the Quadstick. The Quadstick Manager Program can print a list of files contained in the Quadstick’s flash, along with the LED patterns that identify the selected file. -
Page 29: Google Drive Spreadsheets
Spreadsheet cloud service is used for creating and modifying configuration files. When a new configuration is ready to be loaded into the Quadstick, the user selects a menu command that converts the spreadsheet into a CSV file and downloads it into the Quadstick flash drive or uses the QuadStick Manager Program download function. - Page 30 Any other text will break the configuration file. CSV filename The name of the text file that actually goes into the Quadstick. The Quadstick sorts the names of its configuration files alphanumerically, with the exceptions that "default.csv" is always first, and "prefs.csv"...
- Page 31 Any column after J is not part of the configuration and can be used for comments. Mode Sheet Name Descriptive name of the sheet. Only "Reference Card" is reserved. The position of the sheet determines the number of the mode it is for.
-
Page 32: Dropdown Lists Used In Profiles
Dropdown lists used in Profiles Dropdown lists of all the Inputs and Outputs that were discussed in previous sections for the sensors and emulated devices are used to guide the user when creating a new profile. • To chose an Output command or Input source, click in the desired cell and an arrow symbol will display near the upper right corner. -
Page 33: Dropdown List For Outputs
Dropdown list for Outputs The output names may use either the PlayStation or XBox names for the controller buttons. Selecting the desired output names in cell A3 will automatically convert the names to the new convention. -
Page 34: Playstation Output Names
PlayStation Output Names Output names for the PlayStation 3 & 4. -
Page 35: Xbox Output Names
XBox Output Names Output names for XBox One and 360... -
Page 36: Dropdown List For Inputs
Dropdown list for Inputs The list of inputs: center, mp_left_sip,... - Page 37 mp_left_puff, mp_center_sip, mp_center_puff, mp_right_sip, mp_right_puff, mp_left_center_sip, mp_left_center_puff, mp_right_center_sip, mp_right_center_puff, mp_left_right_sip, mp_left_right_puff, mp_triple_sip, mp_triple_puff, mp_left_sip_soft, mp_left_puff_soft, mp_center_sip_soft, mp_center_puff_soft, mp_right_sip_soft, mp_right_puff_soft, mp_left_center_sip_soft, mp_left_center_puff_soft, mp_right_center_sip_soft, mp_right_center_puff_soft, mp_left_right_sip_soft, mp_left_right_puff_soft, mp_triple_sip_soft, mp_triple_puff_soft, right_sip, right_puff, right_sip_soft, right_puff_soft, lip, lip_soft, left, right, down, N_inner, NE_inner, E_inner, SE_inner, S_inner, SW_inner, W_inner,...
- Page 38 usb_1_left, usb_1_right, usb_1_up, usb_1_down, usb_2_left, usb_2_right, usb_2_up, usb_2_down, usb_1_N, usb_1_NE, usb_1_E, usb_1_SE, usb_1_S, usb_1_SW, usb_1_W, usb_1_NW, usb_1_N_inner, usb_1_NE_inner, usb_1_E_inner, usb_1_SE_inner, usb_1_S_inner, usb_1_SW_inner, usb_1_W_inner, usb_1_NW_inner, usb_2_N, usb_2_NE, usb_2_E, usb_2_SE, usb_2_S, usb_2_SW, usb_2_W, usb_2_NW, usb_2_N_inner, usb_2_NE_inner, usb_2_E_inner, usb_2_SE_inner, usb_2_S_inner, usb_2_SW_inner, usb_2_W_inner, usb_2_NW_inner, usb_1_button_1, usb_1_button_2, usb_1_button_3,...
- Page 39 usb_2_button_2, usb_2_button_3, usb_2_button_4, usb_2_button_5, usb_2_button_6, usb_2_button_7, usb_2_button_8, usb_2_button_9, usb_2_button_10, usb_2_button_11, usb_2_button_12, usb_2_button_13, usb_2_button_14, usb_2_button_15, digital_in_1, digital_in_2, digital_in_3, digital_in_4, digital_in_5, digital_in_6, digital_in_7, digital_in_8...
-
Page 40: Dropdown List For Ouput Functions
Dropdown list for Ouput Functions normal The output is active only when the input is active. toggle... - Page 41 When the input activates, the output will toggle, or latch, its on/off state. It will hold its last on/off state until the next input activation or if the user changes to a mode that does not have the output configured with a toggle. repeat As long as the input is active, the output will turn on and off repeatedly.
- Page 42 Will prevent the output from turning on for a period of time (in ms) after an input goes active. The default delay is 1000 ms. An optional parameter can control the delay. If an optional second parameter is present, the output will pulse for the duration of the second parameter and turn off.
-
Page 43: Usb/Bluetooth Channel Selection
It can be selected from a dropdown list that contains USB and Bluetooth choices for the input group. The QuadStick can have a USB connection to one device while having a simultaneous Bluetooth connection to another. When the profile mode sheet becomes active, the chosen channel receives the data stream. -
Page 44: Quadstick Menu
• The Save As CSV command will convert the spreadsheet into a CSV file and download it to the user's computer for users that are not running the QMP. Copy the new file into the Quadstick's flash drive to make it available for use. - Page 45 • The Reference Card command will add a new sheet that contains a summary of the IO assignments that may be printed and used the remind the user of configuration details:...
- Page 46 • List unused inputs will open a dynamically updated list of currently unused inputs for the active sheet.
-
Page 48: Reference Cards
Reference Cards Playstation output names: XBox output names:... -
Page 49: Changing Profiles
Far Cry 4 changes the mode from 1 to 3 and brings up the scope when mp_left_puff is activated. left_2 toggle mp_left_puff increment_mode normal mp_left_puff increment_mode normal mp_left_puff Voice mode commands can also switch the Quadstick directly to any desired mode. -
Page 50: Selecting Output Names For Playstation And Xbox
The game consoles use different names for buttons that have the same function. Using the Default Configuration as an example: To make it easier to remember button assignments, the Quadstick can use either PlayStation or XBox button names and the spreadsheets can convert them from one to the other. -
Page 51: Preferences
The Default Preferences spreadsheet contains the values in the prefs.csv file when the Quadstick is new. The user can create their own copy of the Preferences spreadsheet and modify the values then download the CSV file into the Quadstick, or use the Quadstick Manager Program to adjust them. The values in the prefs.csv file can be... - Page 52 Preferences sheet in the active game profile. Likewise, each mode sheet can modify preferences that are active only on that sheet. Every time the configuration changes in the Quadstick, the prefs.csv file is read, then any values in a Preference sheet in the active game configuration file are read, then the any individual preferences in the active mode sheet are applied.
- Page 53 joystick_D_Pad_inner percent Inner Zone Ring as percent of scaled Signal joystick_D_Pad_outer percent Outer Zone Ring as percent of scaled Signal sip_puff_threshold_soft percent Percent of full scale Pressure to detect Soft Sip/Puff sip_puff_threshold percent Percent of full scale Pressure to detect Hard Sip/Puff sip_puff_maximum percent Percent of full scale Pressure to scale into 100% button push press...
- Page 54 The joystick_D_Pad_inner and _outer settings are relative to the scaled signal calculated as a result of the earlier deflection settings. Mouse_speed controls how fast the mouse moves based on the scaled position from the joystick calculations. When adjusting the joystick deflections and mouse speed, first adjust the joystick in a game controller mode, then adjust the mouse speed second.
-
Page 55: Usb: Emulated Devices
The Quadstick is often used with the CronusMax Plus or Brook Accessory Super Converter USB protocol converters for use with the XBox One/360 or PS4. The Quadstick is directly compatible with the PS3, PS4, PC or Mac, and the Nintendo Switch. -
Page 56: Human Interface Devices
Human Interface Devices The Quadstick normally appears on the USB bus to the host PC or console as a Composite USB Device that consists of Gamepad, Mouse and Keyboard Devices. These devices are generically called Human Interface Devices (HID). They each have a specific data report they send to the host over the USB connection. From the perspective of the Quadstick, the data in these reports are the Outputs to which we connect the Inputs from the joystick or sip/ puff sensors in the configuration spreadsheets. -
Page 57: Flash Drive
Flash Drive When in USB emulation modes 0, 2 & 4, the Quadstick also appears on the USB bus as a small removable storage device, a Flash drive. This drive is used to hold the customized configuration files the user may wish to use for a particular game or for updating the internal software (firmware) that runs the Quadstick. -
Page 58: Emulation Preference Settings
The preference variable that controls the emulation mode for a specific game configuration spreadsheet is on a Preferences sheet formatted like this: The number to the right of “enable_DS3_emulation” controls which emulation mode the Quadstick uses while that game configuration is active. -
Page 59: Usb Emulation Mode 0 (Default Composite Device)
USB Emulation mode 0 (default composite device): In USB Emulation mode 0, the Quadstick functions as a Mouse, Keyboard, Game controller and Flash drive. This mode is compatible with PC's, Macs, PlayStation 3, Brook Super Converters and the CronusMax. -
Page 60: Gamepad
The following illustration and table contain the names of the PS3 outputs used in configuring the Quadstick. We break down compound controls, like the D-Pad or thumbsticks into each their individual elements to allow the greatest flexibility in choosing appropriate inputs to control them. - Page 61 left_joy_down PS3 Left Joystick Down right_joy_left PS3 Right Joystick Left side right_joy_right PS3 Right Joystick Right side right_joy_up PS3 Right Joystick Up right_joy_down PS3 Right Joystick Down left_1 PS3 Left Button 1 left_2 PS3 Left Button 2 (trigger) left_3 PS3 Left Button 3 (Press joystick) right_1 PS3 Right Button 1 right_2...
-
Page 62: Mouse
The default response curve is “mixed”: the average between parabolic and linear curves. In the Quadstick Manager Program, the mouse preferences are on the Miscellaneous tab. There is a slider to control the mouse_speed and settings for the shape of the center dead-zone and the response curve:... - Page 63 Output Name Description mouse_left Mouse Left movement mouse_right Mouse Right movement mouse_up Mouse Up movement mouse_down Mouse Down movement mouse_wheel_up Mouse Wheel Up rotation mouse_wheel_down Mouse Wheel Down rotation mouse_pan_left Mouse Pan Left tilt mouse_pan_right Mouse Pan Right tilt mouse_back Mouse Button Back mouse_forward Mouse Button Forward...
-
Page 64: Keyboard
The key-codes are treated like the outputs of the other HID devices. An individual key-code output can be triggered by one of the sensor inputs or by a sequence of inputs in a specific order. The Quadstick can press up to six keys simultaneously, plus the Windows, Shift, Control and Alt keys. -
Page 66: Usb Emulation Mode 1 (Ds3)
In the Dual Shock 3 mode (0), the Quadstick has the ability to control the Gyroscope and Acceleromter outputs of the Dual Shock 3 / Six Axis controller. This can be useful in games that require those outputs to play the game,... -
Page 67: Usb Emulation Mode 2 (X360Ce)
USB Emulation Mode 2 (X360CE) X360ce is an open source software project that allows the QuadStick to emulate an XBox 360 controller on a PC for many games. The Quadstick's normal controller emulation mode is not the best match for some games when using x360ce. - Page 70 Next, start the game and it should respond to the QuadStick as an XBox 360 controller.
-
Page 71: Usb Emulation Mode 3 (Xbox 360)
USB Emulation mode 3 (XBox 360) The Quadstick can emulate the XBox 360 controller on PC’s (not on the XBox 360 console – you still need a CronusMax for that). While in the XBox360 emulation mode, the mouse, keyboard & flash drive functions are not available. -
Page 72: Usb Emulation Mode 4 (Ps4)
Manager Program has a setting on the Misc tab to accomplish this. When the Quadstick starts and the PS4 mode is enabled, it detects if it is connected to a CronusMax, PS4 or PC (or Mac) and switches automatically to the appropriate USB emulation mode. This feature is only available in firmware builds 1242 and up. - Page 73 acceleration_z_up normal acceleration_z_down normal down gyroscope_y_cw normal left gyroscope_y_ccw normal right gyroscope_x_cw normal left gyroscope_x_ccw normal right gyroscope_z_cw normal gyroscope_z_ccw normal down...
-
Page 74: Usb Emulation Mode 5 (Nintendo Switch)
When powering up a Nintendo Switch, the A button must be pressed within 45 seconds or the Switch will go back to sleep. Since the Quadstick will not be in the NS mode with it starts up, the user will need to quickly select the correct game file that has the protocol emulation set to 5 and then activate the input that controls the A button. -
Page 75: Connecting To Consoles And Pcs
Connecting to Consoles and PCs The Quadstick can be used with the PS3, PS4, XBox One, XBox 360, Wii, Wii U, Switch, PC & Mac. A USB protocol converter is required or recommended for some game consoles. The Quadstick can connect directly to the PS3,... -
Page 77: Ps4
CronusMax – Partial Crossover Support. Approximately every seven minutes the USB connection between the Quadstick and the console is interrupted for less than half a second to reset the timer in the console that enforces the authentication timeout. This works with many games, but some games will be stopped when the interruption occurs. -
Page 78: Quadstick To Ps4, Direct
Quadstick. If the DS4 is not connected to the USB A port, the connection between the Quadstick and the PS4 will be briefly interrupted every seven minutes. Some games will react to the interruption, however many others are not affected by it. - Page 79 The user has the option of not connecting the DS4 to USB A and operating in partial-crossover if a second player needs to use the DS4. The Quadstick will need to be unplugged and plugged back in to the PS4 again if the DS4 is removed after power is applied.
-
Page 80: Cronusmax
CronusMax Since the release of fimware build 1799 and later, the CronusMax no longer needed to achieve the best connection to the PS4. It still may useful for special situations, like when combining the Quadstick with other 3 party devices, like the UltraStik or a mouse. -
Page 81: Cronusmax - Full Crossover
CronusMax – Full Crossover • Requires a USB 2.0 Hub that is connected to the INPUT port on the CronusMax A Dual Shock 4 (DS4) controller connects to one port on the hub and the Quadstick connects to another. If U/A •... -
Page 82: Cronusmax - Partial Crossover
• Brief interruption every 7 minutes • Not suitable for two player games • Allows running Gamepacks in the CronusMax • Partial Crossover support must be enabled using CronusPro • Compatible with all Quadstick USB emulation modes except mode 2 (x360ce). - Page 83 Preference sheet with the "enable PS3 emulation" set to 4, if the PS4 specific outputs are used in that spreadsheet, but in general the user does not want the Quadstick to boot up in PS4 mode. If not using the PS4 emulation mode, the...
-
Page 84: Cronusmax Gamepacks
One method of selecting the active slot is using the button on the CronusMax, but they can also be selected by using a combination of controller buttons on the Quadstick if that feature is enabled in the Options dialog box in CronusPro. - Page 85 Typical configuration settings for the PS4 Crossover Essentials gamepack. The Select (or Share) button is remapped as Press Touchpad. To remap the Right Analog Stick to control the location the touchpad is touched, hold Select & press Circle. select normal mp_right_puff_soft circle delay_on 100 mp_right_puff_soft...
-
Page 86: Cronusmax - Pcprog
CronusMax – PCPROG If you would like to combine the Quadstick with other devices, like the UltraStik 360, mouse, trackball, eye tracker, etc, you will want to consider using the PCPROG port and/or serial port method to add the additional inputs into the mix. - Page 87 Since the Quadstick can emulate a game controller, mouse or keyboard at the same time, it can compliment the other input devices. If being used with another game controller, the Quadstick can be configured as a mouse &...
-
Page 88: Preparing The Dual Shock 4 Controller
These instructions must be followed for either the PS4 Direct, the CronusMax Plus Full Crossover or PCPROG connections. 99% of users having trouble with the PS4 not responding to the Quadstick after 7 minutes have not carried out the following instructions:... - Page 89 With the DS4 connected to the PS4 and turned on, change the Communication Method to "Use USB Cable" if the controller is a Version 2 controller. Older systems may not have this feature. For this next step, the DS4 controller can be off or connected over USB to the PS4: Remove the DS4 controller from the Bluetooth Devices:...
- Page 91 (If you see Disconnect, select it then come back to this point in the process again) Press the Options button, then X to Forget Device:...
- Page 92 Turn off the PS4, then turn it back on from the FRONT PANEL, not the DS4. Then plug the DS4 into the back of the Quadstick and then plug the Quadstick into the PS4. Do not turn on the DS4 or touch any button on it. When the Quadstick first powers up, there may be a slowly varying dim yellow light from the DS4 as it is charging.
-
Page 93: Xbox One
XBox One The XBox One consoles can be used with either a CronusMax Plus or a Brook Super Converter. -
Page 94: Brook Accessory Ps3/Ps4 To Xbox One Super Converter
The Brook Super Converter (BSC) simply connects between the Quadstick and the console. Unlike the CronusMax, there is no need to “authenticate” the converter each time power is applied. A Windows PC may be needed occasionally for firmware updates. The Quadstick operates in USB emulation modes 0 or 1 when used with the BSC. - Page 95 BrookAccessory website BrookAccessory Facebook page Quadstick The Quadstick USB emulation mode should be set to Default (0) or Dual Shock 3 (1). In QMP make sure "Enable boot in PS4 USB mode" is NOT checked on the Misc tab.
-
Page 96: Cronusmax Plus
CronusMax Plus... - Page 98 Remove Batteries If the battery pack is not removed, the Wireless controller will prevent the CronusMax from working. Quadstick Must be in USB emulation modes 0 (Default), 1 (Dual Shock 3, 3 (XBox 360), or 4 (PS4). USB emulation modes 2 (X360CE) and 5 (Nintendo Switch), will not work.
-
Page 99: Without A Usb Hub
• Connect the XBox controller to the CronusMax Input port. • Wait for the U/A to stop flashing on the CronusMax display. Replaced by a number (the active slot. Default is 0) • Unplug the XBox controller. • Plug in the Quadstick. -
Page 100: With A Usb Hub
Plug the hub into the CronusMax input port with the XBox controller connected to one port and the Quadstick • connected to the other. • The CronusMax display should display a number after a few seconds. • If U/A continues to flash, reverse the order of the ports used by the Quadstick and the XBox controller. -
Page 101: Pcprog Port
PCPROG port • See PS4 CronusMax – PCPROG... -
Page 102: Nintendo Switch
USB emulation mode 5) and the A button pressed within 45 seconds. If the console is first turned on with its original controller, the 45 second time out does not apply. If the Switch goes into sleep mode, the Quadstick will reset continuously and may need to be unplugged and plugged in again to work. -
Page 103: Connecting Devices And Hosts To The Usb A Port
Connecting Devices and Hosts to the USB A port The USB A port on the back of the Quadstick can be used in two different ways: • As a Host to 3 party devices, like game controllers or joysticks (firmware 1799+). -
Page 104: Host Mode
• Dual Shock 4, for authentication messages for the PlayStation Four console. • UltraStik 360, an arcade style joystick which can be incorporated into the array of inputs available to configure the Quadstick. • Mayflash F300 Fightstick. Another arcade style joystick with eight large buttons. -
Page 105: Dual Shock 4
When used for authentication with a PS4, the DS4 is simply plugged into the USB A port and left off. Turn on the console from the front panel. The DS4 will appear to be off but it is supplying the Quadstick with a stream of data for... -
Page 106: Ultrastik 360
The UltraStik 360 is an Analog stick with optional button input jacks. It is automatically recognized when connected to the USB A port. Its joystick data show up in the same inputs as when it is used through the Quadstick Manager Program. -
Page 107: Mayflash F300 Fightstick
Mayflash F300 Fightstick The Mayflash F300 is a heavy arcade style fightstick with an eight-way digital joystick and eight large buttons. The joystick can control either the D-Pad buttons or the Left Analog stick (outputs 0 or 100% only). Since it is not analog, it is not really suitable for applications requiring fine control, but works well for WASD or character movement in first person shooters. -
Page 108: Device Mode
Device Mode Through the use of a USB A-to-A cable, the Quadstick can switch to a second Host, like a PC or game console. The enable_usb_a_device preference on a Preferences sheet controls which port is active: Preferences Value Preference enable_usb_a_device Do not set the value of the enable_usb_a_device to 1 in the prefs.csv or default.csv files. -
Page 109: Connection Examples
Connection Examples With all the connection possibilities it can be more than a little confusing to devise a way that will work best for your setup. The following table shows some of the ways the Quadstick can be used. Emulation... - Page 110 XBox 360 CronusMax XBox 360 without Hub US360/F300 0 CronusMax XBox 360 with Hub USB Hub, then CM US360/F300 0 CronusMax PCPROG with XBox 360 US360/F300 0 Nintendo Switch NS Direct US360/F300 5 1820+ Coov N100 USB Converter N100 US360/F300 3 Brook PS3/PS4 to Switch Super Converter US360/F300 0 or 1 US360/F300 0, 2 or 4...
- Page 111 USB emulation Legend modes compatib PlayStation 4 console Keyboard and F Dual Shock 4 controller Dual Shock 3 e X360CE comp PlayStation 3 console Keyboard and F Dual Shock 3 controller XBox 360 game compatib CronusMax Plus USB protocol converter Keyboard and F Brook Accessory Super Converter Nintend Switch...
-
Page 112: Bluetooth
Mouse and/or Keyboard, plus it can emulate a generic Gamepad, or a Joystick, or it can be used as a serial connection for relaying voice commands. The Quadstick Manager Program can also use the serial connection over Bluetooth to copy and manage configuration files in the flash drive and relay UltraStik 360 data. -
Page 113: Settings
Bluetooth mouse report interval in ms. The "bluetooth_throttle" parameter controls how often the Quadstick sends mouse or game controller data over the Bluetooth channel. If updates are sent more quickly than the channel can deliver them to the host, the user may... - Page 114 When changing the Device mode from one type of device to another, like from mouse to combo, it may be necessary to first un-pair the Quadstick from its host, then re-pair it, before the new device type will be functional.
-
Page 115: Serial Communication
Voice commands and remote file management by the QMP can utilize the Bluetooth serial connection. Alternatively, the IN port on the back of the Quadstick, normally used as a switch input, can be used as a physical serial connection with a... -
Page 116: Wireless Only Operation
Wireless only operation: When used as a Bluetooth mouse, keyboard, or combo, the Quadstick can be powered by a battery pack, like the Anker Astro E1 5200mAh or similar instead of receiving power from a host. -
Page 117: Data Channel Assignment
Data Channel assignment: The data destined for the mouse, keyboard or game controller outputs is only sent to the USB port by default. When using the Bluetooth for one of these devices, the Data Channel must be changed to “bluetooth” in cell C3 of the appropriate mode sheets. -
Page 118: Infrared Remote Control
Infrared Remote Control The Infrared transmitter LED on the back panel can be programmed to send IR Remote Control codes. The IR command names are listed below are treated the same as outputs for other kinds of devices in a configuration profile sheet. - Page 119 Table 1: Infrared Remote Control command list An example of controlling a TV: The output names refer to the codes on the Infrared sheet: Infrared Samsung Most Models - Set #: 595 http://irdb.globalcache.com/ Command Name Hex Code 0000 006D 0000 0022 00AA 00AA 0014 003F 0014 003F 0014 003F 0014 0014 0014 0014 0014 0014 0014 0014 0014 0014 0014 003F 0014 003F 0014 003F 0014 0014 0014 0014 0014 0014 0014 0014 0014 0014 0014 0014 0014 003F ir_tv_on_off...
- Page 120 The IR transmitter on the back of the Quadstick may not be bright enough or aimed in the right direction to be seen by the TV’s sensor. If so, an IR repeater may be useful.
-
Page 121: The Quadstick Manager Program
The Quadstick Manager Program The Quadstick Manager Program (QMP) is a Windows desktop application that is used for setting up and modifying the preference settings that control the Quadstick and for connecting the Quadstick to other inputs devices, such as voice commands and external devices. It is available for download from the Quadstick.com website. -
Page 122: Game Files Tab
Game Files Tab List of configuration files in the Quadstick CSV files are sorted alphbetically, except default.csv is always number one and prefs.csv is not a game configuration file. The number next to the filename corresponds with the LED lit when selecting the active configuration file. - Page 123 "Enable Voice Commands over USB" is checked on the Misc tab, if a Bluetooth or Serial cable connection is not used. Print file list button Open the default browser with a list of the configuration files loaded into the Quadstick's flash along with the LED patterns that indicate the file number for each file.
- Page 124 Various status messages from the program. When requesting technical support, copying the contents of this window and pasting it into the request can be helpful. Remove from QuadStick button Will delete the selected file from the Quadstick's flash. Download to QuadStick button...
- Page 125 "Download to Quadstick" button to copy the new changes into the Quadstick's flash. If you do not have editing rights and wish to make changes to the spreadsheet, make a copy of the spreadsheet, make your changes, then click on the Add-ons->Quadstick->Download to Quadstick with QMP"...
- Page 126 Select a spreadsheet in the User Custom list and click on this button to remove the spreadsheet from the list. The spreadsheet still will be in your Google Drive unless you delete it there as well. Add Game to User List button An alternative method of adding a spreadsheet to the User Custom list is to copy the URL of the new spreadsheet into the dialog box that will open when this button is pressed.
-
Page 127: Joystick Tab
Joystick Tab The sensitivity the joystick is adjustable. This tab allows the user to change the sensitivity of the joystick's movement in each of the four directions by sliding the indicator to control how far the joystick needs to move to generate a 100% output signal to the corresponding output. - Page 128 The dead-zone is the distance the joystick needs to move before it generates an output signal greater than 0%. If the dead-zone is too small, the natural small variations in the position the joystick when it is released, or when the user slightly touches it can cause unwanted outputs.
- Page 129 Close the Quadstick Manager Program Reload from QuadStick button Click this button the reload the preferences that are currently in the Quadstick if you wish to start over. Joystick Preference Settings These are the actual preference settings that are calculated from the Sliders that go into the prefs.csv file.
-
Page 130: Firmware Tab
Firmware updates are copied into the flash drive to reprogram the Quadstick. When new firmware is loaded into the flash drive, the Quadstick will reboot after a few seconds then copy the new firmware into the CPU’s internal memory. This process re-formats the flash drive so any configuration files will be erased and must be rewritten to the flash drive from a backup copy or a fresh download from a configuration spreadsheet. - Page 131 2. Download the desired “Joystick.bin” firmware from http://fw.quadstick.com 3. Copy the Joystick.bin file into the Quadstick’s flash and wait for the Quadstick to reboot. It can take a minute or two. 4. Once the Quadstick has rebooted, it will be empty and running a simple default profile with a mouse in mode 5, USB emulation mode 0.
-
Page 132: Voice Control Tab
A VCL file is associated with a specific program by matching the name of the file with the name of the program. The QuadStick.vcl file, which was installed as part of the Vocola package, contains the voice commands for the QMP. - Page 133 If the voice commands are to be used with a game console, then a serial connection is required. Controller output status When the Quadstick is connected to the PC, this table will display the current values of the outputs. This can be used for troubleshooting configuration files. Natlink Window: The "Messages from Natlink"...
- Page 134 It can be closed after DNS has finished starting up.
-
Page 135: Voice Commands
Left Stick: player | move Right Stick: look | camera | view Direction: up | down | left | right <stick> <direction> <stick> <direction> [<pct>] [for <sec> seconds] Quadstick operational control Reset | stop # releases all buttons Mode <mode #> reboot quad stick... - Page 136 D pad inner (1..100) D pad outer (20..100) joy stick dead zone (circle | square) anti dead zone (0..50)
-
Page 137: Vocola Files
Vocola VCL and VCH files are usually located in the Documents\Natlink\Vocola folder. The main file for the Quadstick Manager Program is QuadStick.vcl. Whenever the QMP is the front-most window, this file controls how Vocola maps spoken phrases to Quadstick commands. It “includes” two VCH files: _qs_common.vch and _includes.vch. - Page 138 Start Toggle Releases or Holds button Left One Left Two Left Three Right One Right Two Right Three D-Pad North D-Pad Up North East D-Pad Up and Right East D-Pad Right South East D-Pad Down and Right South D-Pad Down South West D-Pad Down and Left West...
- Page 139 Restarts the Quadstick Load Call of Duty Loads cod.csv file Default Loads config.csv file Plus direct commands for controlling the operation of the Quadstick: Command Description mode,# Change selected profile mode to new value reset Clear all output states and values to zero...
- Page 140 Examples: Vocola file: set volume <pct> = Command( "volume," $1); When “set volume 25” is spoken, the command seen by the Quadstick is: volume,25 Vocola file: set brightness <pct> = Command( "brightness," $1); When “set brightness 50” is spoken, the command seen by the Quadstick is:...
-
Page 141: Sample Vch File
The file name, the contextual command section name and the changeTitle parameter must all match. Voice commands that are always available Contains commands that are always available. Usually commands that activate the contextual section and the Quadstick. Spoken phrase Word or phrase the program is listening for. - Page 142 Commands The text parameter is passed to the Quadstick via the serial or USB connection. Contextual Command Section Commands following the label will only be active when the title of the QMP contains the word before the colon. The label must match the name of the VCH file. In this example, the VCH file is named "cod.vch"...
-
Page 143: D-Pad Tab
D-Pad Tab For the details about the behavior of the D-Pad inputs, see the Joystick topic. Sip/Puff tab Select the D-Pad tab to adjust the D-Pad zone settings. Inner Ring delay How long the joystick must stay between the Inner and Outer rings to be detected as an "inner" ring input. -
Page 144: Miscellaneous Tab
Miscellaneous Tab Misc tab Digital outputs inital state Bluetooth Module Device operating mode Bluetooth Module Authentication mode Bluetooth Module Connection mode... - Page 145 The QMP and CronusPro cannot both access the CronusMax Plus PCPROG port at the same time. Turn this setting off if using the CronusPro while the QMP is open. If using the QMP to relay Quadstick data to the CronusPro PCPROG port, this setting must turned on.
- Page 146 Enable file management over serial port If a serial connection is found to the Quadstick, via a cable or Bluetooth SPP, and the Quadstick is not connected to the PC, turning this setting on will allow configuration file management over that serial connection.
- Page 147 Read the prefs.csv file from the Quadstick and update the controls in the program Save preferences to QuadStick Nothing is saved to the Quadstick until this button is clicked. A new prefs.csv file will be created and copied into the Quadstick's flash.
-
Page 148: Installation
Installation The Quadstick Manager Program installer can be downloaded from the Downloads page of the Quadstick.com website. Click Next then select the installation folder:... - Page 149 In a few seconds the final screen will display:...
- Page 150 After the Quadstick Manager Program is installed, the optional Vocola/Natlink package can be installed if the user wants to use voice commands with the Quadstick. Vocola requires Dragon Naturally Speaking to operate. Installing the optional Vocola program for using the Quadstick with Dragon Naturally...
- Page 152 If the computer does not already have a copy of Microsoft support files needed by Vocola, the following installer may launch:...
- Page 153 Install Python for all users:...
- Page 154 Do not change the destination directory from the default:...
- Page 158 After Python is installed, two companion programs will be installed:...
- Page 166 The "View README.win32.txt check box can be turned off, or just close the readme file when it opens:...
- Page 167 This window will show for a few minutes:...
- Page 168 Once the prerequisite Python programs are installed, Natlink and Vocola will install:...
- Page 175 When this program opens, press any key to continue:...
- Page 176 This is where 99% of users that have problems with Vocola make their mistake. You MUST Enable both Natlink and Vocola before things will run. Click on Natlink Enable, then on Vocola Enable:...
- Page 177 When the Vocola Enable button is pressed, the following window will open. The Vocola folder can be found in the Documents/Natlink folder:...
- Page 179 Next click on (re)Register Natlink. This will connect Natlink with Dragon Naturally Speaking.
- Page 180 You will see this reminder to reboot when the installer finishes:...
- Page 181 Just in case you forgot..Another reminder to Reboot... Did I mention, you need to reboot?
-
Page 182: External Pointers Tab
External Pointers Tab Up to two UltraStik 360's can be used in combination with the QuadStick at the same time. The XY position of the UltraStiks can be used in a Game Configuration file just like the Mouth Operated Joystick position itself. - Page 183 The mouse pointer can be controlled by any mouse or mouse substitute, like a TrackIR or Tobii Eye Gaze system.
-
Page 184: Recognition Mode
To use pattern recognition, the user moves the joystick into a zone and momentarily pauses to signal the QuadStick to detect that location. The QuadStick uses the velocity of the joystick dropping to a low value to determine the user's intention and flashes the center Blue LED when it registers that location while recording the pattern. If the user moves through a zone quickly, the QuadStick will not include that zone when matching the pattern, which makes it possible to create patterns that include non-adjacent zones.. -
Page 187: The Singleton Default Configuration
The Singleton default configuration The Quadstick Singleton is a single tube version of the Quadstick. With the single tube, four combinations of hard/ soft-sip/puff are used along with joystick movement pattern recognition to expand on the number of inputs available. - Page 188 A soft sip is used to control the active mode. From the Mouse mode, a soft sip puts the Singleton into a pattern recognition mode where the next sip/puff or movement triggers a keyboard key or performs a specific function, like selecting a new mode for the Singleton.
-
Page 189: Cleaning Mouthpiece
Soaking can help. In multi-user settings, individual mouthpieces are recommended. Contact QuadStick for bulk mouthpiece purchases. The PLA material currently being used is compatible with ETO and can be autoclaved after cleaning. -
Page 190: Appendix
Appendix... -
Page 191: Creating An Osk Shortcut
Creating an OSK Shortcut Creating a Desktop shortcut to launch the On Screen Keyboard (OSK): 1. Right click on the Desktop and select new→Shortcut from the context menu. 2. Browse to the location of the OSK.EXE file. 3. Give it a name, click on Finish. 4. -
Page 193: Platform Notes
Platform Notes... -
Page 194: Android
Bluetooth and being powered by another source. The catch is, the Android device will not accept external power while in this mode (unless Rooted and running special software), so both the Android device and the QuadStick will get their power from the device's battery. It's useful for portable situations, but for a more permanent setup,...
Need help?
Do you have a question about the Quadstick and is the answer not in the manual?
Questions and answers