
Related Manuals for Morita Tri Auto ZX2


Summary of Contents for Morita Tri Auto ZX2
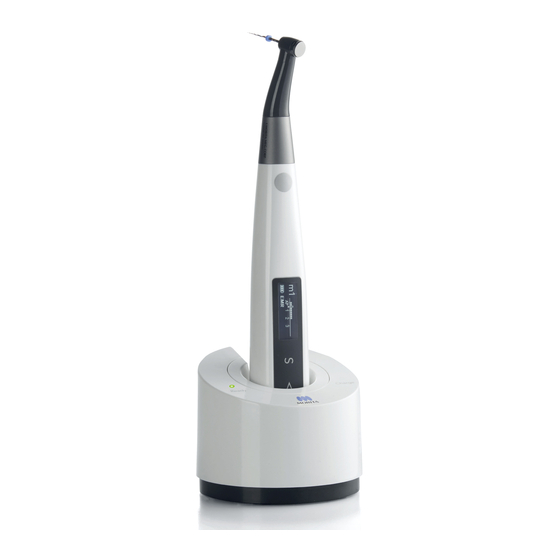
- Page 1 Multipurpose Dental Treatment Motor Tri Auto ZX2 Operation Instructions Thinking ahead. Focused on life.
- Page 2 Thank you for purchasing the Tri Auto ZX2. For optimum safety and performance, read this manual thoroughly before using the instrument and pay close attention to warnings and notes. Keep this manual in a handy place for quick and easy reference.
-
Page 3: Overview And Features
Tooth Icons Canal Shapes Modes Normal Canals The Tri Auto ZX2 has 5 different operating Almost all canals can be treated with the Canals with normal shapes. modes which can be used for depending on default settings of the memories from m1 This is for most canals. -
Page 4: Table Of Contents
Table of Contents Overview and Features ........................3 Prevent Accidents ..........................6 Parts Identification and Display Screens ..................8 Parts Identification ................................. 8 Display Screens for 5 Operation Modes and Standby ....................10 Display during Operation ..............................11 Usage ..............................12 1. Operation, Transport and Storage Environments ..................2. - Page 5 Torque (N・cm) ..............................35 Settings for Canal Measurement Linkage ....................... 36 Apical Action ................................ 36 Auto Start ................................37 Auto Stop ................................37 Flash Bar Position ..............................37 Set Other Functions ..............................38 Apical Slow Down ..............................38 Torque Slow Down ............................... 38 Apical Torque Down..............................
-
Page 6: Prevent Accidents
After instructing the customer in the operation of the instrument, have him fill out and sign the warranty. Then fill in your own section of the warranty and give the customer his copy. Do not fail to send the manufacturer’s copy to J. MORITA MFG. - Page 7 (7 .(Fires, earthquakes, floods, lightning, natural disasters, or acts of God. The useful life of the Tri Auto ZX2 is 6 years (based on self-certification) from the date of shipment provided it is regularly and properly inspected and maintained.
-
Page 8: Parts Identification And Display Screens
Parts Identification and Display Screens Parts Identification ⹅ Handpiece File Holder Contrary Electrode Contra Angle Probe Cord Main Switch LCD Display Motor Handpiece Select Switch ( Set Switches ( ⹅ Battery Charger * Power Plug Power Plug Battery Charger p.27 “Using and handling the power plug for the AC Adapter. - Page 9 Contrary Electrodes (3) Tester (1) HP Protective Sleeve Spray Nozzle (1) * Keep this nozzle and use it LS SPRAY (1) or MORITA MULTI SPRAY(1) Type A (30) again when replacing the (sold separately) * Replace for each patient. spray can.
-
Page 10: Display Screens For 5 Operation Modes And Standby
Display Screens for 5 Operation Modes and Standby EMR Mode This mode is for canal measurement. Memory No. Residual Battery Power * The motor does not run in this mode. Operation Mode Flash Bar Position CW Mode Memory No. The motor rotates forward 360º. Residual Battery Power Torque reverse and other functions can be used. -
Page 11: Display During Operation
Display during Operation ⹅ Torque Display (This appears when the motor is running.) Meter shows the torque load on the file. The color of the display changes depending on the torque load as shown below. There is some discrepancy in the torque value depending on the condition of the motor and contra angle and this value is used only as a reference as follows : There could be some discrepancy in the torque value caused by decreased efficiency of contra angle from poor maintenance or deterioration of motor. -
Page 12: Usage
Atmospheric pressure: 70 kPa to 106 kPa * Do not expose the Tri Auto ZX2 to direct sunlight for an extended period of time. * If the instrument has not been used for some time, make sure it works properly before using it again. -
Page 13: Connect Probe Cord
Connect Probe Cord * This is not required if the canal measurement function will not be used. • Do not bang or bump the plugs when they are inserted. • Make sure the plug is all the way in. Otherwise canal measurements Connect the probe cord to the motor handpiece. -
Page 14: Operation Check
The torque meter appears when the motor is running. Press the Main switch and make sure the motor runs If there are abnormal vibrations or noises, stop using the instrument im- mediately and contact your local dealer or J. MORITA OFFICE. smoothly. ⹅ Check Canal Measurement Function Check the following before turning on the instrument. -
Page 15: Check With Tester
1. number 1, the instrument cannot make an accurate mea- surement. In this case, stop using the instrument immedi- ately and contact your local dealer or J. MORITA OFFICE. ⹅ Calibration Calibrate the instrument at the following times: •... -
Page 16: Operation
3. Operation Select the memory appropriate to the treatment to be performed. The main uses, operation modes, and apical actions for the default settings of each mode are listed below. The following explanation is base on the default settings. • Since the following is based on the default settings, use changed settings for your own treatment procedures. •... - Page 17 • Before use, run the Tri Auto ZX2 outside the oral cavity to make sure it is operating normally. • Depending on the condition of the tooth, the type of case, and the condition of the instrument, it may not be possible to shape and measure a canal prop- erly.
-
Page 18: Canal Measurement
Canal Measurement Examples using default settings Measure a canal and determine its working length. Turn Power On Press the Main switch to turn on the instrument. EMR mode is now selected. The stand by display (m1) will appear. Apply Contrary Electrode •... - Page 19 Figure 1 Figure 2 • Do not clip them as shown in figure 2. This will prevent accurate mea- surement and will damage the tip of the file holder. Clip the file or reamer as shown in figure 1. Canal Measurement (m1) •...
-
Page 20: Canal Shaping (For Normal Canals)
Examples using default settings This can usually be done using memories 1 to 4. Use these four memories to shape canals until you get used to using the Tri Auto ZX2. Turn Power On Press the Main switch to turn on the instrument. - Page 21 Main switch to start the motor. Canal Shaping (m4) * If the Tri Auto ZX2 is used without being linked to the canal measurement function, do not use the contrary electrode and start and stop the motor by pressing the Main switch.
-
Page 22: Canal Shaping (For Complex Canals)
Canal Shaping (for complex canals) Examples using default settings For complex canals such as extremely curved ones or those that may produce ledge formation, use memories m5 to m7 after measuring the canal. Turn Power On Press the Main switch to turn on the instrument. The stand by display (m1) will appear. - Page 23 Glide Path (m6) gered, press the Main switch to start the motor. * If the Tri Auto ZX2 is used without being linked to the canal measurement function, do not use the contrary electrode and start and stop the motor by pressing the Main switch.
-
Page 24: Emr (Electric Measurement Of Root Canal Length)
Sometimes the Tri Auto ZX2 meter reading and the X-ray image Re-treatment of a root filled with gut- will not correspond. This does not mean that the Tri Auto ZX2 is not working properly or that the X-ray exposure is a failure. An X-ray... -
Page 25: After Use
4. After Use Turn Power Off Hold down ● Auto Power Off Function p.40 “Auto Power Off Time” While the standby display is on, you can turn off the instru- If no switches are pressed for 10 minutes, the instrument will ment by holding down the Select switch ( ) and pressing automatically turn off (default setting). -
Page 26: Battery Charging
Plug the DC end of the adapter cable all the way into the • Do not use the battery charger for any device except the Tri Auto ZX2. bottom of the charger, and plug the other end into a pow- er outlet. - Page 27 Using and handling the power plug for the AC Adapter. The main plug for the AC adapter is not connected when the Tri Auto ZX2 is shipped. Four types of plugs are provided as shown below. Select the one suitable for your region.
-
Page 28: Maintenance
5. Maintenance There are 3 ways to clean and disinfect components depending on the component. Be sure to follow the procedure below when performing daily maintenance. Wash and Wipe with Ethanol Wipe with Ethanol for Disinfection Autoclavable Components for Disinfection (Ethanol 70 to 80 vol%) (Ethanol 70 to 80 vol%) Contra Angle... - Page 29 80 vol%) and wrung out thoroughly. the potential damage to the plastic components of the Tri Auto ZX2. ・CaviWipes™ ・CaviCide™...
- Page 30 LS SPRAY or MORITA MULTI SPRAY. maintenance unit for lubricating the contra angle. • Do not use any type of spray other than the LS SPRAY or MORITA MULTI SPRAY. • Failure to lubricate the contra angle will result in a malfunction.
- Page 31 Ethanol for Disinfection (Ethanol 70 cleaning products and similar cleaning products listed below because of the potential damage to the plastic components of the Tri Auto ZX2. to 80 vol%) and wrung out thoroughly. ・CaviWipes™...
- Page 32 Ethanol for Disinfection (Ethanol 70 cleaning products and similar cleaning products listed below because of the potential damage to the plastic components of the Tri Auto ZX2. to 80 vol%) and wrung out thoroughly. ・CaviWipes™...
-
Page 33: How To Make Various Settings
How to Make Various Settings Rotation Controls The Tri Auto ZX2 has the rotation controls listed below. These controls can be assigned to each memory. Some functions cannot always be used or set depending on the operation mode and other settings for various functions. -
Page 34: Set Operation Mode
Operation Mode Set Operation Mode Turn Power On Select Memory Number Show Setting Display Hold down Hold down the Select switch ( ) for 1 second Press the Set switches ( ) to select a Press the Main switch to turn on the instru- or more. -
Page 35: Set Speed And Torque
・ Speed (r/min) Torque (N Set Speed and Torque Turn Power On Select Memory Number Show Setting Display Hold down Hold down the Select switch ( ) for 1 second Press the Set switches ( ) to select a Press the Main switch to turn on the instru- or more. -
Page 36: Settings For Canal Measurement Linkage
Apical Action Auto Start Settings for Canal Measurement Linkage Auto Stop Flash Bar Position Turn Power On Select Memory Number Show Setting Display Hold down Hold down the Select switch ( ) for 1 second Press the Set switch ( ) to select a Press the Main switch to turn on the instru- or more. -
Page 37: Auto Start
Auto Start Rotation starts automatically when the file is inserted into the canal and the canal length indicator bar lights up more than 2 bars. : Motor starts automatically. More than 2 bars : Motor does not start when file is inserted into the canal. The Main switch is used to start and stop the motor. -
Page 38: Set Other Functions
Apical Slow Down Torque Slow Down Apical Torque Down Set Other Functions Rotation Angle Beeper Volume Turn Power On Select Memory Number Show Setting Display Hold down Hold down the Select switch ( ) for 1 second Press the Set switch ( ) to select a Press the Main switch to turn on the instru- or more. -
Page 39: Apical Torque Down
Apical Torque Down The torque limit automatically decreases as the file approaches the apex. : Automatically decreases. : Does not change. • Possible Apical Torque Down settings for various modes. CW (forward) CCW (reverse) If Apical Slow Down or Torque Slow Down is turned on or the torque is set for 0.2 or R.L (torque reverse less), this cannot be turned on. -
Page 40: Other Handpiece Functions
Other Handpiece Functions In addition to the rotation control functions, the Tri Auto ZX2 has the following functions as well. These settings are common for all memories. ⹅ Default Handpiece Settings The default settings are listed below. These settings can be changed as needed. -
Page 41: Reset Memories To Original Default Settings
Reset Memories to Original Default Settings All memories and handpiece settings will revert to their original default settings. * All memories (m1 to m8) and handpiece functions will be initialized. It is not possible to initialize just one of them. Turn Power On Hold down With the instrument turned off, hold down the Left-Set switch (... -
Page 42: Replacement Parts
Battery Connector (5) Connect the new battery and put it in the motor handpiece. • Use only the battery designed for the Tri Auto ZX2. Other batteries could cause over- heating. • Do not use a battery if it is leaking, deformed, discolored or if its label is peeled off. It might overheat. - Page 43 Replacing Built-in Electrode If the canal length indicator bars flicker during use, or if all the bars in the meter do not light up when the file touches the contrary electrode, and cleaning the rotor axle and built-in electrode does not solve the problem, then the built-in electrode is worn out and must be replaced with a new one according to the following procedure.
-
Page 44: External File Electrode
External File Electrode If you use a file that cannot make a measurement with the built-in electrode, replace it with external file electrode (sold sepa- rately). (1) Loosen the screw and remove the built-in electrode. Built-in Electrode Screw (2) Hold down the push button, insert the guide bar and turn it back and forth until it fits into the latch groove. - Page 45 (7) Hold down the push button on the contra angle and insert the file. Turn the file back and forth until it is lined up with interior latch groove and slips into place. Release the button to lock the file into the contra angle.
-
Page 46: Maintenance And Inspection
• Run the motor in CW mode and make sure the torque meter changes according to the load on the file. * For repairs contact your local dealer or J. MORITA OFFICE. ⹅ Standards and Procedures for the Disposal of Medical Devices... -
Page 47: Troubleshooting
If the instrument does not seem to be working properly, the user should first try to inspect and adjust it himself. * If the user is unable to inspect the instrument himself or if the instrument fails to work properly after being adjusted or after parts are replaced, contact your local dealer or J. MORITA OFFICE. Problem... - Page 48 3. The Ready LED (green) lights up. If the motor handpiece is not fully charged, put it back into the charger again. If the Charge LED (orange) still does not light up, contact your local dealer or J. MORITA OFFICE. Operation 2018-04-06...
-
Page 49: Abnormal Stop
If the instrument stops, turn it off and then back on again. If the error message appears again, stop using the instrument and contact your local dealer or J. MORITA OFFICE. Make a note of the error number and report it when requesting assistance. -
Page 50: Technical Specifications
European Directive 93/42/EEC IIa Degree of Protection (IEC 60529) IPX0 The Tri Auto ZX2 device is a cordless endodontic treatment motorized handpiece with root canal measurement capability.It can be used to Indications for use enlarge the canals while monitoring the position of the file tip inside the canal.It can be used as a low-speed motorized handpiece and device for... -
Page 51: Symbols
Symbols * Some symbols may not be used. Serial number E.g.) G A XXXX E.g.) K322 XXXXXX K Lot No. Year of Manufacture 000001, 000002, 000003... E.g.) G: 2018, H: 2019... Month of Manufacture E.g.) A: Jan., B: Feb., C: March... Lot No. -
Page 52: Service Contacts
• Technicians employed by authorized J. MORITA dealers and specially trained by J. MORITA. • Independent technicians specially trained and authorized by J. MORITA. For repairs or other types of service, contact your local dealer or J. MORITA OFFICE. Consumable and Replacement Parts... -
Page 53: Appendix-Electromagnetic Declaration
• The Tri Auto ZX2 (hereafter referred to as the TR-ZX2) needs special precautions regarding EMC and needs to be installed and put into service according to the EMC information provided in the ACCOMPANYING DOCUMENTS. - Page 54 Guidance and Manufacturer’s Declaration – Electromagnetic Immunity The TR-ZX2 is intended for use in the electromagnetic environment specified below. The customer or the user of the TR-ZX2 should as- sure that it is used in such an environment. Immunity Test IEC 60601 Test Level Compliance Level Electromagnetic Environment –...
-
Page 55: Safety And Accident Prevention For The Operation Of Electrical Medical Devices
Safety and Accident Prevention for the Operation of Electrical Medical Devices (1.(Only fully trained and qualified personnel may operate device. (2.(Items to be duly noted when installing device. (1) Locate the instrument in a place where it will not get wet. (2) Install the instrument in a location where it will not be damaged by air pressure, temperature, humidity, direct sun- light, dust, salts, or sulfur compounds. - Page 56 The authority granted to the authorized representative, MEDICAL TECHNOLOGY PROMEDT Consulting GmbH, by J. MORITA MFG. CORP . is solely limited to the work of the authorized representative with the requirements of the European Directive 93/42/EEC for product registration and incident report.
Need help?
Do you have a question about the Tri Auto ZX2 and is the answer not in the manual?
Questions and answers