
Related Manuals for Morita Tri Auto mini


Summary of Contents for Morita Tri Auto mini
- Page 1 Cordless Endodontic Treatment Motorized Handpiece Tri Auto mini INSTRUCTIONS FOR USE 2024-05-21 Pub. No.: K215-81002-503 (en)
- Page 2 Thank you for purchasing the Tri Auto mini. For optimum safety and performance, read this manual thoroughly before using the equipment and pay close attention to warnings and notes. Keep this manual in a readily accessible place for quick and easy reference.
-
Page 3: Table Of Contents
Table of Contents Warnings and Prohibitions ............................4 Features..................................5 Parts Identification and Accessories ........................6 Usage ..................................7 (1) Before Use ....................................7 Charge Battery ..................................7 Connect Contra Angle ................................8 File Installation ..................................9 Check Operation ................................... 10 (2) Operation ....................................11 Basic Operation ..................................11 Memory Settings: Primary Functions ............................ - Page 4 Prevent Accidents Attention Customers Do not fail to receive clear instructions concerning the various ways to use this equipment as described in this accompanying Operation Instructions. To access the warranty information for this product, scan the following QR code and visit our website. Attention Dealers Do not fail to give clear instructions concerning the various ways to use this equipment as described in this accompanying operator’s manual.
- Page 5 The Useful Life ■ The useful life of the Tri Auto mini is 6 years from the date of installation provided it is regularly and properly inspected and maintained. In Case of Accident If an accident occurs, the Tri Auto mini must not be used until repairs have been completed by a qualified and trained technician authorized by the manufacturer.
-
Page 6: Warnings And Prohibitions
• Do not use this equipment on patients who have a pacemaker or an Implantable Cardioverter Defibrillator (ICD). • Illumination devices such as fluorescent lights and film viewers which use an inverter can cause the Tri Auto mini to operate erratically. -
Page 7: Features
It may be connected to the Root ZX mini, an apex locator (sold separately). Instructions for how to use the Tri Auto mini when it is connected to the Root ZX mini are printed on a blue background like this one. -
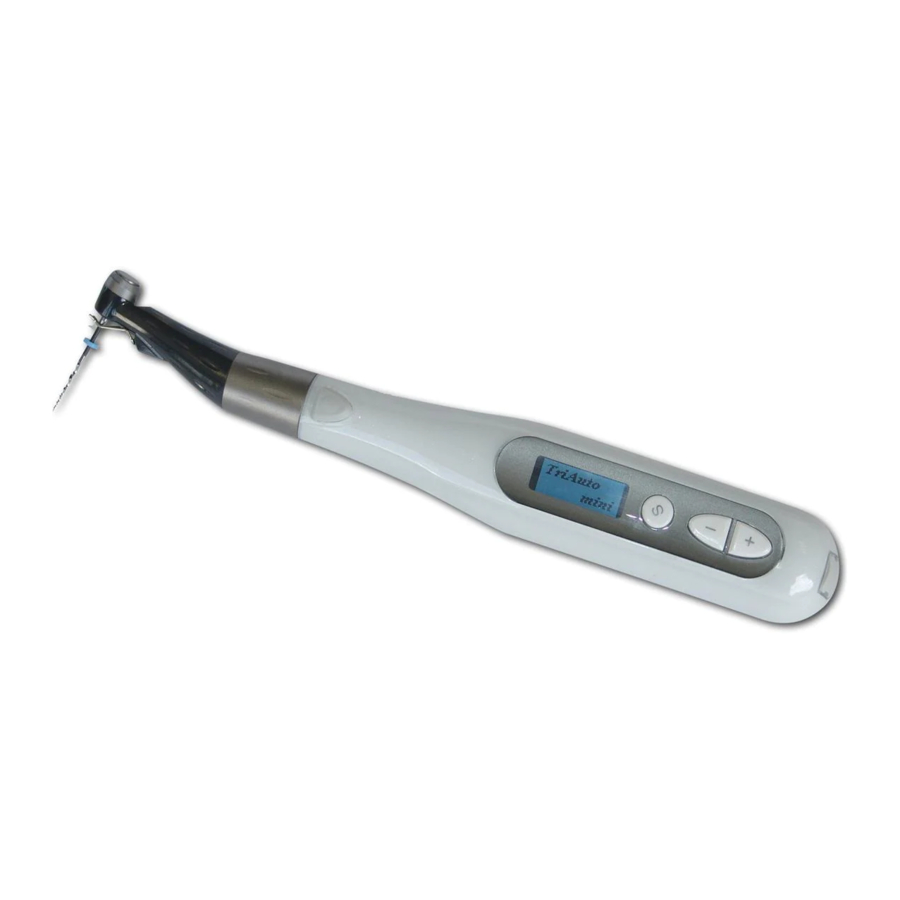
Page 8: Parts Identification And Accessories
Battery Power Supply Cord Spray Nozzle AR SPRAY or *Inside motor handpiece * Use this same nozzle when MORITA MULTI SPRAY replacing a can of AR SPRAY or * Sold Separately MORITA MULTI SPRAY. Handpiece Holder Transmission Cable File Electrode... -
Page 9: Usage
Usage ⹅ Operating Environments Temperature: + 10 °C to + 35 °C (+ 50 °F to + 95 °F) Humidity: 30 % to 80 % (without condensation) Atmospheric Pressure: 70 kPa to 106 kPa * If the unit has not been used for some time, make sure it works properly before using it again. (1) Before Use Be sure to perform reprocessing on the respective parts before using them for the first time. -
Page 10: Connect Contra Angle
Line up the match marks and push the contra angle onto the handpiece until there is an audible click. * The contra angle must be lubricated with the AR SPRAY or MORITA MULTI SPRAY before using for the first time. -
Page 11: File Installation
• Inserting and removing files without holding the file release button down will damage the chuck. • Make sure the Tri Auto mini is turned off before inserting or removing files. • Do not connect the file electrode if the handpiece is not connected to the Root ZX mini. -
Page 12: Check Operation
• Do not press the file release button while the motor is running. It could heat up and cause a burn, or the file could come out and cause an injury. • Stop using the Tri Auto mini if you feel or notice anything unusual. The Tri Auto mini cannot be used for every canal and should be used along with manual enlargement. -
Page 13: Operation
1. Turn Tri Auto mini on: Press Main switch. The standby display will appear. When the standby display is being shown, you can turn the Tri Auto mini off by holding down the Select Switch and pressing the Main Switch * The Tri Auto mini turns itself off automatically if it is not used for 3 minutes (factory setting). -
Page 14: Memory Settings: Primary Functions
Memory Settings The factory settings are shown below. These settings can be changed. Memory Setting M1, M4 M2, M5 M3, M6 Speed (rpm) Torque Reverse (Ncm) Rotation Direction Forw ard Torque Slow Down Canal Measurement Linkage** Apical Reverse or Stop** R ever se Auto Start or Stop**... -
Page 15: Memory Settings: Additional Operation Settings
Memory Settings: Additional Operation Settings Additional Functions: Torque Slow Down (TORQ.SL.D.), Linked to canal measurement (LINKED FUNCTION Apical Reverse or Stop (APICAL ACT. ), Auto Start and Stop (AUTO STT/STP ), Apical Slow Down (APICAL SL.D. ), Apical Torque Reduction (APICAL TRQ.D. 1. -
Page 16: Memory Settings: Other Settings
Memory Settings: Other Settings Other Settings: The factory settings are shown below. Beeper (BEEP VOLUME) Right or Left Handed (DOMI. HAND) Ri ght Auto Power Off (AUTO PWR) 3 min. Backlight (B.L.COLOR CHANGE) Positive/Negative Display (DISP. TYPE) P os i Return to Standby Time (S.S.R TIME) 5 sec. -
Page 17: After Use
Restore Default Memories Restore the original factory settings for the memories in the following way. * This will restore the original memory settings. You cannot restore settings for just one memory. 1. Hold down the Select Switch, the Plus Switch and the Minus Switch and then turn the unit on with the Main Switch. 2. -
Page 18: Usage; Operation With The Root Zx Mini
Usage; Operation with the Root ZX mini Install File Electrode Bracket Electrode Site Cap Contact (gold) File Electrode Take out the black screw and remove the cap that covers Take out the silver screw used to secure the file electrode. the elctrode installation area. - Page 19 Install File Electrode File release button File Electrode Swing the electrode back as shown in the illustration. Hold down the file release button. Insert the file and turn it back and forth until it lines up with the latch mechanism. Push the file all the way into the latch.
-
Page 20: Connect The Transmission Cable
Connect the Transmission Cable * Refer to the user manual for the Root ZX mini. Plug: White Plug: Gray Take off the cap and plug the cable’s white plug all Plug the cable’s gray plug into the Root ZX mini. the way into the handpiece. -
Page 21: Meter Display
If the file tip goes past the Flash Bar, an alarm will sound and the backlight will blink on and off. Operation Turn on the Tri Auto mini and Root ZX mini. The backlight for the display will be yellow. - Page 22 Operation Select a memory number (M1 to M6) with the Plus or Minus switch. * Before using motor handpiece, use a small hand file, such as #10 or #15, to penetrate the root canal manually down to the apical constriction. * The file electrode must be clipped onto the file for accurate measurement and instrument control.
- Page 23 * Contact your local dealer or J. MORITA OFFICE to Pay special attention to the area where the file electrode is get new file electrodes.
-
Page 24: Reprocessing
Reprocessing There are two ways to perform reprocessing depending on the items. Parts to be Disinfected Parts to be Sterilized p. 28 p. 23 Motor Handpiece Contra Angle Handpiece Holder Charger (Option) File Electrode Transmission Cable (Option) (Option) After use, perform reprocessing promptly. Before reprocessing, make sure that all the parts (e.g., file, etc.) are separated individually. -
Page 25: Parts To Be Sterilized
(1) Parts to be Sterilized Be sure to perform the reprocessing procedures in the following order promptly after use with each patient. Cleaning & Disinfection Lubrication Packing Sterilization Pre-treatment Only the contra angle needs to be lubricated. Handpiece Holder File Electrode Contra Angle (Option) (Option) -
Page 26: Cleaning & Disinfection
Cleaning & Disinfection Put parts in the parts washing basket. (For the contra angle, set it in a handpiece holder.) Select the washer-disinfector’s mode as shown in the chart and start the process. Recommended Conditions for Washer-Disinfectors Detergent Rinse Unit Name Mode (concentration) (concentration) -
Page 27: Lubrication
Lubrication Before autoclaving, make sure that you lubricate and clean the contra angle with the AR SPRAY or MORITA MULTI SPRAY. * Lubrication and excess oil removal can be performed by J. MORITA’s dental handpiece maintenance device. Spray Nozzle Before autoclaving, clean and lubricate the contra angle. -
Page 28: Packing
Packing Place the parts individually in a sterilization pouch. Use only FDA-cleared pouches. ( for U.S.A.) Use sterilization pouches that conform to ISO 11607. Do not use any sterilization pouches that contain hydrosoluble adhesive ingredients such as PVA (polyvinyl alcohol). Otherwise, its adhesive ingredi- ent may elute, seep into the contra angle during the sterilization, resulting in a solid residue and a failure to rotate properly. -
Page 29: Sterilization
Sterilization Autoclave the autoclavable parts. After autoclaving, store the parts in a clean and dry environment. Recommended Autoclave Settings Country : U.S.A. Country : Other than U.S.A. Sterilizer Drying time Sterilizer Drying time Temperature Time Temperature Time type after sterilization type after sterilization + 132 °C... -
Page 30: Parts To Be Disinfested
(2) Parts to be Disinfested Be sure to perform the reprocessing procedures in the following order promptly after use with each patient. Cleaning & Disinfection Pre-treatment Transmission Cable Motor Handpiece Charger (Option) Pre-treatment This must be performed after use with each patient. Wipe the parts with a piece of gauze or microfiber cloth (e.g., Toraysee for CE - Medical Equipment and Instruments Mainte- nance Cloth) that has been dampened with tap water to remove visible contaminants. -
Page 31: Cleaning & Disinfection
Be sure not to tug on the cable when you clean the parts. This could cause the wire to break. Do not use disinfectants other than those designated by J. MORITA MFG. CORP. For details on handling disinfectants, refer to the accompanying user manual for each disinfectant. -
Page 32: Replacement Parts, Transport And Storage Environments
Do not tighten the cover screw too much; this could strip the threads. • Use only the battery designed for the Tri Auto mini. Other types could cause overheating. • Do not use a battery if it is leaky, deformed, discolored or if its label is peeled off. It might overheat. - Page 33 File Electrode Replacement When connected to the Root ZX mini, refer to page 21 for how to replace the file electrode. Transport and Storage Environments Temperature: -10 °C to +45°C (+14°F to +113°F) Humidity: 10% to 85% (without condensation) Atmospheric pressure: 70 kPa to 106 kPa Do not expose to direct sunlight frequently or for long times.
-
Page 34: Inspection
■ This apparatus should be inspected every 6 months in accordance with the following maintenance and inspection items. ■ J. MORITA MFG. CORP. will supply replacement parts and be able to repair the product for a period of 10 years after the manufacture of the product has been discontinued. - Page 35 The Tri Auto mini may be repaired and serviced by: • The technicians of J. MORITA’s subsidiaries all over the world. • Technicians employed by authorized J. MORITA dealers and specially trained by J. MORITA. • Independent technicians specially trained and authorized by J. MORITA.
-
Page 36: Troubleshooting
If the instrument does not seem to be working properly, the user should first try to inspect and adjust it himself. * If the user is unable to inspect the instrument himself or if the instrument fails to work properly after being adjusted or after parts are replaced, contact your local dealer or J. MORITA OFFICE. Problem... - Page 37 Problem Check Points Response Canal measurement • Is the contrary electrode for the Root ZX • Hook the contrary electrode in the corner of the display does not mini hooked in the patient’s mouth? patient’s mouth. appear. • Did you press the Select switch while the •...
-
Page 38: Technical Specifications
Degree of Protection against Ingress of Water IPX0 The Tri Auto mini is a compact and cordless endodontic treatment mo- torized handpiece for preparation and enlargement of root canals. It can be connected to the Root ZX mini, an apex locator (sold separately). It... -
Page 39: Symbols
Symbols * Some symbols may not be used. CE(0197) marking Conforms with the European Type BF applied part Directive, 93/42/EEC. CE marking Conforms with the European Directive, 2011/65/EU. Serial number Class II equipment Marking of electrical equipment in accordance with the European GS1 DataMatrix Directive 2012/19/EU (WEEE) Manufacturer... -
Page 40: Electromagnetic Disturbances (Emd)
Electromagnetic Disturbances (EMD) The Tri Auto mini (hereafter “this device”) conforms to IEC 60601 - 1 - 2 : 2014 Ed. 4 . 0 , the relevant international standard for electromagnetic disturbances (EMD). The following is the “Guidance and Manufacturer’s Declaration” which is required by IEC 60601 - 1 - 2 : 2014 Ed. 4 . 0 , the relevant international standard for electromagnetic disturbances. - Page 41 Guidance and Manufacturer’s Declaration – Electromagnetic Immunity This device is intended for use in the electromagnetic environment specified below. The customer or the user of this device should assure that it is used in such an environment. Immunity Test IEC 60601 Test Level Compliance Level Electromagnetic Environment –...
Need help?
Do you have a question about the Tri Auto mini and is the answer not in the manual?
Questions and answers