
Subscribe to Our Youtube Channel
Related Manuals for Morita Signo T500


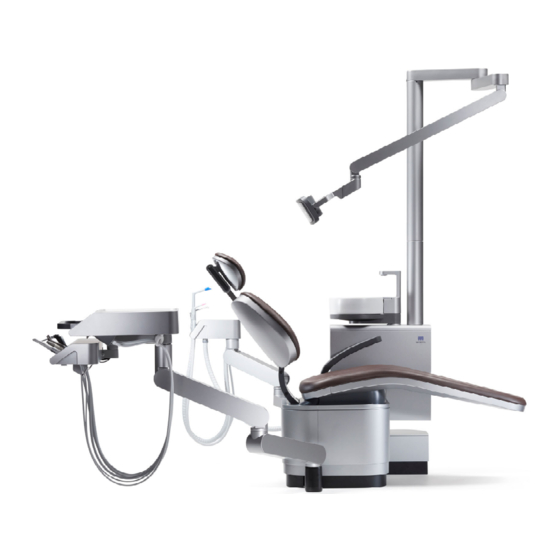
Summary of Contents for Morita Signo T500
- Page 1 Signo T500 Operation Instructions Root Canal Length Measurement Function Thinking ahead. Focused on life.
- Page 2 Thank you for purchasing Signo T500. For optimum safety and performance, read this manual thoroughly before using the equipment and pay close attention to warnings and notes. Keep this manual in a readily accessible place for quick and easy reference.
-
Page 3: Table Of Contents
Table of Contents 1. Prevent Accidents 2. Warnings and Prohibitions 3. Parts Identifi cation and Accessories 4. Usage 4.1 Preparation Before Use 4.1.1 Connecting the Probe Cord 4.1.2 Checking Function (for Each Patient) 4.1.3 Checking Function with the Tester (Once a Week) 4.2 Settings 4.2.1 Switching Reference Numbers 4.2.2 Flash Bar Position... - Page 4 5 Maintenance 5.1 Cleaning 5.1.1 Autoclaving 5.1.2 Wiping with Ethanol for Disinfection (Ethanol 70 vol% to 80 vol%) 5.2 Micromotor 5.3 Ultrasonic Scaler 5.4 Transport and Storage 6 Maintenance and Inspection 7 Troubleshooting 7.1 Items to be Checked before Requesting Repair 7.2 Error Display 8 Technical Specifi...
-
Page 5: Prevent Accidents
After instructing the customer in the operation of the equipment, have them fi ll out and sign the warranty. Then fi ll in your own section of the warranty and give the customer their copy. Be sure to send the manufacturer’s copy to J. MORITA TOKYO MFG. - Page 6 (7) Natural disasters such as fi res, earthquakes, fl oods, lightning, etc. • J. MORITA TOKYO MFG. CORP. will stock replacement parts for the product for a period of 10 years after manufacture of the product has been discontinued. We will supply these parts and be able to repair the product through this period.
-
Page 7: Warnings And Prohibitions
2. Warnings and Prohibitions * J. MORITA TOKYO MFG. CORP. is not responsible for any accidents or other types of trouble that are caused by not following the warnings and prohibitions noted below. • During a lightening storm, there is a risk of getting an electric shock so turn the instrument off and do not touch it or its cord. -
Page 8: Parts Identifi Cation And Accessories
3. Parts Identifi cation and Accessories File Holder Contrary Electrode Probe Cord Accessories * (Quantity) Probe Cord (1) File Holder (3) Contrary Electrode (5) Tester (1) - Page 9 3. Parts Identifi cation and Accessories Display The display switches when the probe cord is connected or the fi le holder is touched with the contrary electrode to cause a short circuit with the handpiece retracted, unless: • When the user is picking up the micromotor and using the equipment in EMR-interlock endodontic mode. •...
-
Page 10: Usage
4. Usage Operating Environments: Temperature: 10°C to 35°C (50°F to 95°F), Humidity: 30% to 80% (without condensation) Atmospheric Pressure: 70kPa to 106kPa * If the equipment has not been used for some time, make sure it works properly and safely before using it again. 4.1 Preparation Before Use 4.1.1 Connecting the Probe Cord Insert the probe cord completely into the jack on the shoulder... -
Page 11: Checking Function With The Tester (Once A Week)
* If the reading is four or more bars away from 1, the equipment will not make an accurate measurement. Contact your local dealer or J. MORITA OFFICE. The meter indicates within three bars... -
Page 12: Settings
4. Usage 4.2 Settings 4.2.1 Switching Reference Numbers This changes the reference numbers and sets the position of the Flash Bar and the beep alarm sound volume. USER A Reference No. 1 REF.1 • Do not fail to check the Flash Bar setting whenever change... -
Page 13: Operation Method
4. Usage 4.3 Operation Method 4.3.1 Meter and Beep Alarm Sounds The position of the fi le tip is shown by the meter on the display. The Flash Bar starts blinking when the fi le is inserted into the canal. White •... -
Page 14: Measurement
4. Usage 4.3.2 Measurement Hook the contrary electrode in the corner of the patient’s mouth. • Make sure that the contrary electrode, fi le holder and connecting portions of these parts do not come into contact with an electric power source such as an electrical socket. This could result in a severe electrical shock. - Page 15 4. Usage Select the reference number (1/2/3). USER A REF.1 Insert the fi le and advance it down the canal. * Measurement settings and chair operation are unavailable when root ca- nal length measurement is being performed and two or more bars on the meter are blinking., USER A Two bars...
-
Page 16: Micromotor
4. Usage 4.4 Micromotor 4.4.1 Operation Modes For details on how to handle the micromotor and handpiece, be sure to read the separate operation instructions and medical device package insert. This manual will provide information on the operation modes of the micromotor: “Endodontic mode” and “EMR-interlock endodontic mode.”... - Page 17 4. Usage Operation Mode-Specifi c Default Settings Operation mode Endodontic mode EMR-interlock endodontic mode Setting options Endo1 Endo2 Endo3 Endo4 Endo1 Endo2 Endo3 Endo4 Variable speed ratio 10:1 10R:1 10R:1 10R:1 10R:1 Clockwise Clockwise Clockwise Counterclockwise Clockwise Counterclockwise Operation mode rotation rotation rotation...
-
Page 18: Switching Between Endodontic Mode And Emr-Interlock Endodontic Mode
4. Usage 4.4.2 Switching Between Endodontic Mode and EMR-Interlock Endodontic Mode Switching operation Pick up the micromotor. The handpiece that was picked up earlier is preferentially selected. The micromotor selection screen (normal cutting) is displayed. Press the micromotor key. USER A The screen is displayed to select “UL-H”... - Page 19 4. Usage Switches the endodontic mode screen to the EMR- Option USER A interlock endodontic mode screen. Endo Press the variable speed ratio setting key on the endodontic mode screen to display the selection screen. Endo 1 : 1 100 rpm Press the “10R:1”...
- Page 20 4. Usage Operation mode-specifi c basic screen When the micromotor is TR-S3 or TR-S3-O Endodontic mode When the micromotor is TR-S3-R-O and does not meet the operational requirements for EMR-interlock endodontic mode (☞p. 14) Page Switching between the variable speed/constant speed ☞ p.
- Page 21 4. Usage EMR-interlock endodontic mode When the equipment meets all operational requirements for the EMR-interlock endodontic mode (☞ p. 14) * Connect the probe cord to the probe cord jack to use the EMR-interlock endodontic mode. Page Switching between the variable speed/constant speed ☞ p.
-
Page 22: Basic Operations
4. Usage 4.4.3 Basic Operations • Pull the micromotor and main tube gently to confi rm that they are securely connected. Insuffi cient connection may cause detachment of the main tube and harm to humans. • Confi rm that the micromotor to be used is indicated on the system display and it is properly confi gured. Perform calibration before using EMR-interlock endodontic mode. -
Page 23: Memory Selection
4. Usage 4.4.4 Memory Selection The equipment has a memory function for storing up to four patterns of settings such as rotational motion, rotation angle and number of rotations. Switching the memory can also be performed using the foot control operation. Endodontic mode Press the “Endo1”... -
Page 24: Setting Rotational Motions
4. Usage 4.4.5 Setting Rotational Motions Switching Rotational Motions Rotational motions can be changed on the system display or through the foot control operation. Check the rotation direction by rotating the micromotor outside the patient’s mouth before use. EMR-interlock endodontic mode Endodontic mode Page Page... - Page 25 4. Usage Overview of OGP and OTR and Switching Rotation Angles OGP and OTR control rotational motion and are eff ective functions for endodontic treatment. These functions are available only in EMR-interlock endodontic mode. ● OGP (optimum glide path) function EMR-interlock endodontic mode Page A glide path can be created through the rotational motion made using the...
- Page 26 4. Usage Setting of torque limit value/trigger torque value You can set the following torque values: - When rotational motion is set to torque reverse: Torque value when changing from clockwise rotation to counterclockwise rotation (Torque limit value) - When rotational motion is set to OTR: Torque value when operating the OTR function (Trigger torque value) The above torque values can be set only when the rotational motion is set to torque reverse or OTR.
-
Page 27: Setting The Number Of Rotations
4. Usage 4.4.6 Setting the Number of Rotations Setting the Number of Rotations You can set the number of bar point fi le rotations. The number of bar point fi le rotations is determined by applying the variable speed ratio of the handpiece to the number of micromotor rotations. - Page 28 4. Usage ● Setting range of the number of bar point fi le rotations (rpm) Variable speed ratio ☞ p. 26 Operation mode 10R:1 (constant speed) (speed reduced by 1/10) (self-selected reduced speed) Endodontic mode 100–2,000 100–2,000 100–1,000 EMR-interlock endodontic mode * During OGP operation* :...
- Page 29 4. Usage Switching between Variable Speed and Constant Speed Switching is not possible during micromotor operation. If the rotational motion is set to torque reverse, only constant speed is available. Endodontic mode EMR-interlock endodontic mode Page Page USER A USER A Endo Endo Endo Endo...
-
Page 30: Calibration
4. Usage 4.4.7 Calibration Optimize rotation control in order to improve torque detection accuracy during endodontic treatment. These functions are available only in EMR-interlock endodontic mode. ● You should calibrate the micromotor: - Before using it for the fi rst time after purchasing. - After replacing your handpiece with a new one. -
Page 31: Setting Water Fl Ow And Tip Air
4. Usage 4.4.8 Setting water fl ow and tip air • Pay careful attention to prevent water fl ow from turning OFF, because cutting with no or only a small volume of water fl ow will cause the cutting part to heat up. Switching water fl... - Page 32 4. Usage Adjusting Water Flow Adjust the water fl ow volume using the valves on the underside of the table. Turn the valve in the direction of the arrow to increase the Water water fl ow volume and air fl ow volume. Fifth circuit Fourth circuit Third circuit...
-
Page 33: Setting The Function Interlocking With Root Canal Length Measurement (Apical Action)
4. Usage 4.4.9 Setting the Function Interlocking with Root Canal Length Measurement (Apical Action) For the chair unit incorporating the apex locator (option), the meter is indicated on the endodontic mode and EMR-interlock endodontic mode screens. In EMR-interlock endodontic mode, you can use the rotation control function (apical action) in coordination with the root canal length measurement function. - Page 34 4. Usage Switching Apical Actions In this setting, you can set the motion of the micromotor when the fi le tip reaches a self-set position in the root canal (Flash Bar position). These functions are available only in EMR-interlock endodontic mode. EMR-interlock endodontic mode Page OAS(Optimum apical stop)
-
Page 35: Setting Beep Alarm Sound Volumes
4. Usage 4.4.10 Setting Beep Alarm Sound Volumes Beep alarm sound volumes can be set for the following. A beep alarm sound volume is set for each micromotor. - Beep alarm sound alerting you that torque reverse is being operated - Beep alarm sounds corresponding to the fi... -
Page 36: Setting The Handpiece Light
4. Usage 4.4.11 Setting the Handpiece Light In this setting, you can switch the handpiece light between ON/OFF and two levels of brightness. Each press switches the light from OFF to L (low brightness) and H (high brightness). For devices without a light, this function is not available (light remains off ). Endodontic mode EMR-interlock endodontic mode Page... -
Page 37: Ultrasonic Scaler (Solfy) Option
4. Usage 4.5 Ultrasonic Scaler (Solfy) Option For details on how to operate the ultrasonic scaler (built-in model), be sure to read the separate operation instructions and medical device package insert. 4.5.1 Basic Screen Page Switching water fl ow ON/OFF Switching the Apical Stop Function ☞ p. -
Page 38: Basic Operation
4. Usage 4.5.2 Basic Operation Pick up the ultrasonic scaler. The ultrasonic scaler selection screen is displayed. USER A SCALING SOFT Ultrasonic scaler selection screen (model with built-in apex locator) Step on the foot control pedal to start the micromotor and release the pedal to stop. -
Page 39: Setting The Function Interlocking With Root Canal Length Measurement (Apical Stop)
4. Usage 4.5.3 Setting the Function Interlocking with Root Canal Length Measurement (Apical Stop) For chairs that incorporate the apex locator (option), the meter is indicated on the right corner of the screen. Switching the Apical Stop Function In this setting, you can switch vibration ON/OFF when the fi le tip reaches a self-set position in the root canal (the Flash Bar position). -
Page 40: Setting Water Flow
4. Usage 4.5.4 Setting Water Flow Switching water fl ow ON/OFF Water fl ow can be switched ON/OFF on the system display or using the foot control switch. Page USER A Water fl ow ON SCALING SOFT Water fl ow OFF Foot control operation “Switching water fl... -
Page 41: Handpiece Light Setting
4. Usage 4.5.5 Handpiece Light Setting You can switch the handpiece light ON/OFF and change the brightness. Page USER A Handpiece light OFF SCALING SOFT Handpiece light L (low brightness) Handpiece light H (high brightness) 4.6 After Use Disconnect Probe Cord. Always disconnect the cord by gripping the connector. -
Page 42: Electronic Meter Reading (Emr)
4. Usage 4.7 Electronic Meter Reading (EMR) Root Canals not Suitable for Electronic Measurement Accurate measurement cannot be obtained with the root canal conditions shown below. Root Canal with a large apical foramen Root Canal with blood overfl owing from the opening Clean If blood overfl... - Page 43 4. Usage Crown or metal prosthesis touching gingival tissue Cutting debris on tooth, Granulation, Pulp inside canal Crown Debris Granulation, pulp Accurate measurement cannot be obtained if the fi le touches Thoroughly remove all cutting debris on the tooth. a metal prosthesis that is touching gingival tissue. In this Thoroughly remove all the pulp inside the canal;...
-
Page 44: Maintenance
5 Maintenance 5.1 Cleaning There are two ways to maintain components depending on the item. Be sure to follow the appropriate procedure according to the component when performing daily maintenance. Autoclavable Components Wipe with ethanol for disinfection Contrary Electrode Tester Probe Cord File Holder Do not autoclave the probe cord. -
Page 45: Wiping With Ethanol For Disinfection (Ethanol 70 Vol% To 80 Vol%)
5 Maintenance Sterilization Autoclave the components after use for each patient. Recommended temperature and time: 135°C (275°F), six minutes minimum in a sterilization pouch. • Do not sterilize the components by any method other than autoclaving. • The fi le holder and contrary electrode are extremely hot after autoclaving; do not touch them until they cool off... -
Page 46: Maintenance And Inspection
Consult your local dealer or J. MORITA OFFICE for details. * If your equipment needs to be repaired, contact your local dealer or J. MORITA OFFICE for details. Items to be inspected •... -
Page 47: Troubleshooting
If the equipment does not seem to be working properly, the user should fi rst try to inspect and adjust it themselves. * If the user is unable to inspect the equipment themself or if the equipment fails to work properly after being adjusted or after parts are replaced, contact your local dealer or J. MORITA OFFICE. Problem... - Page 48 7 Troubleshooting Problem Check Points Response The canal length meter overreacts or is Is blood or a chemical solution If blood or other fl uids overfl ow the canal, too sensitive. overfl owing from the opening of the the current will leak to the gums and (Measurements are too short.
-
Page 49: Error Display
If the error is not resolved even when the following checks and actions are performed, or if any abnormality other than those described in the table is found, please stop using the device and consult your reseller or nearest J. MORITA OFFICE. -
Page 50: Technical Specifi Cations
AC 80 mV, maximum Measurement Current 10 μA, maximum Manufacturer J. MORITA MFG CORP. 9 Electromagnetic Disturbances (EMD) The Root ZX mini U (Built in Model) conforms to the relevant international standard for electromagnetic disturbances (EMD). For details, refer to the accompanying user manual for the dental treatment unit. -
Page 51: After-Sales Service And Contact Information
The Root ZX mini U (Built-in Model) may be repaired and serviced by: • The technicians of J. MORITA’s subsidiaries all over the world. • Technicians employed by authorized J. MORITA dealers and specially trained by J. MORITA. • Independent technicians specially trained and authorized by J. MORITA. - Page 52 Please note that specifi cations and appearance may change without prior notice for product improvement purposes. The company name and product names mentioned are trademarks, or registered trademarks of J. MORITA CORP . and J. MORITA TOKYO MFG. CORP .
Need help?
Do you have a question about the Signo T500 and is the answer not in the manual?
Questions and answers