Table of Contents
Advertisement
Quick Links
Advertisement
Table of Contents
Troubleshooting

Subscribe to Our Youtube Channel
Related Manuals for Morita Veraview IC5 HD


Summary of Contents for Morita Veraview IC5 HD
- Page 1 2022-02-21 Pub. No.: X251-93001-501 (EN) Printed in Japan...
- Page 2 Keep this manual in a handy place for ready reference. ■ Trademarks (™) and Registered Trademarks (®): The names of companies, products, services, etc. used in this manual are either trademarks or registered trade- marks owned by each company. © 2010 J. MORITA MFG. CORP.
-
Page 3: Table Of Contents
Table of Contents Prevent Accidents ........................2 Warnings and Cautions for Safe Operation .................4 Parts Identification .........................6 Operation ..........................9 Getting Ready ............................9 Emergency Stop Switch ........................11 Exposure Procedures ........................12 After Use ............................25 Maintenance, Parts Replacements, and Storage............... 26 Maintenance ............................26 Replacement Parts ..........................26 Storage ............................26 Regular Inspection .......................27... -
Page 4: Prevent Accidents
Do not fail to give clear instructions concerning the various ways to use this equipment as described in this accompanying Operator’s Manual. After instructing the customer in the operation of the equipment, have him fill out and sign the warranty. Then fill in your own section of the warranty and give the customer his copy. Do not fail to send the manu- facturer’s copy to J. MORITA MFG. CORP. SAFETY INSTRUCTIONS AND RECORDING INFORMATION When the Veraview IC5 is installed, the installer or other responsible party must explain the precautions and usages in the Instructions for Use to the user and the person responsible for maintenance and management. -
Page 5: Intended Operator Profile
Experienced person with operating X-ray devices. No special training is required except in cases where this is required by legal regulations of the relevant country or region. RELATED DOCUMENTS • Installation Instructions ATTENTION • J. MORITA MFG. CORP. will not be responsible for accidents, instrument damage, or bodily injury resulting from: (1) Repairs made by personnel not authorized by J. MORITA MFG. CORP. (2) Any changes, modifications, or alterations of its products. (3) The use of products or instrument made by other manufacturers, except for those procured by J. MORITA MFG. CORP. (4) Maintenance or repairs using parts or components other than those specified by J. MORITA MFG. -
Page 6: Warnings And Cautions For Safe Operation
Warnings and Cautions for Safe Operation • This X-ray unit may be dangerous to PATIENT and OPERATOR unless safe exposure factors and operat- ing instructions are observed. • Only dentists and other legally qualified and authorized personnel are allowed to operate this equipment. • Do not use this equipment for patients when it is being maintained or serviced. • Make sufficient space around the Main Switch so that it is easily accessible in case of emergency. • Make sufficient space around the Power Plug so that it is easily unplugged in case of emergency. • To avoid the risk of electric shock, this equipment must only be connected to a supply mains with protec- tive earth • To avoid the risk of electric shock, do not replace the power supply cord. • The EQUIPMENT should not be used adjacent to or stacked with other equipment and that if adjacent or stacked use is necessary, the EQUIPMENT should be observed to verify normal operation in the configu- ration in which it will be used. • When an examination requires X-ray irradiation to implantable or wearable electronic medical device, the operator must take proper care after referring to the operation manual (and related safety information) for such implantable or wearable electronic medical devices because if a diagnostic X-ray device directly irra- diates an implantable or wearable electronic medical device, it can cause sufficient electronic interference to affect the function and operation of the medical device. - Page 7 • The patient and operator must be provided with appropriate X-ray protection gear such as lead-impreg- nated clothing that conforms to local regulations. • The operator must be able to see the exposure emissions lights and hear the audible signal during opera- tion of the equipment. • The operator must be able to see and hear the patient during the operation of the equipment. • Responsible organization in medical institution needs for providing means for audio and visual communi- cation between the operator and the patient.
-
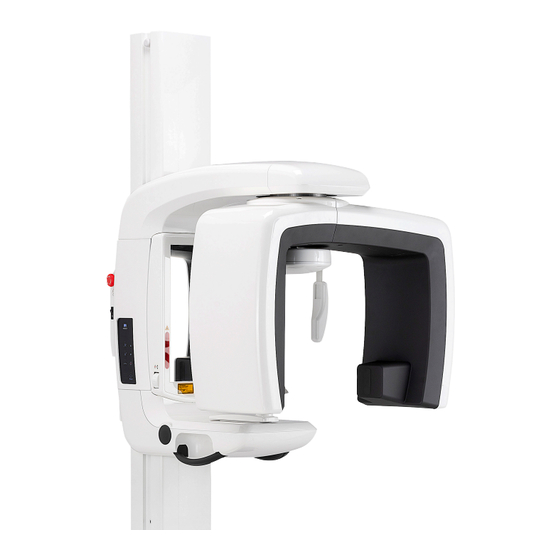
Page 8: Parts Identification
Parts Identification Parts Identification Lift Emergency Stop Switch Head Stabilizer Main Switch Lift Motor Unit Operation Panel X-ray Head Frankfort Beam Dial Bite Block or Lip-nose Rest Image-layer Dial Patient Frame Patient Handle X-ray Sensor Support Column Base... -
Page 9: Operation Panel
Operation Panel and Control Box Descriptions Operation Panel Panorama Key Press this to make a standard pan- orama. The green LED will light up. Up Key Hold this down to raise the lift. Pedodontic Panorama Key Press this to make a pedodontic pan- Down Key orama. The green LED will light up. Hold this down to lower the lift. TMJ Key Beams On and Off Key Press this to make a quadruple TMJ Press this key to turn the beams exposure. The green LED will light up. -
Page 10: Control Box
Control Box Emission Button Emission Light Yellow. Light up during x ray emission. Ready Light • Green. Blinks when unit is turned on. Stays on after Ready Key on the arm is pressed, arm moves to its Start position, and the unit is ready to make and exposure. • Orange. Blinks during data transmission. Power Light • Blue. Lights up when main power is turned on. Handswitch... -
Page 11: Operation
Operation * If an accident occurs, the equipment must not be used until repairs have been completed by a qualified and trained technician provided by the manufacturer. * Have patients remove glasses, necklaces, earrings and other accessories which could interfere with diagnosis. * If the unit has not been used for some time, make sure it operates normally and safely before actually using it. In case of lightning, avoid the risk of electrical shock: stop using the equipment immediately and have the patient move away from it. Do not touch the equipment or the main power cord. -
Page 12: Operation Check
Turn the Main Switch On Press the top of the main switch ( | ) on the support column to turn the Veraview IC5 on. The blue Power light on the control box will light up. * If the unit is not used for 30 minutes, it will automatically go into power-save mode. * Press the Ready key to go back to normal operation mode. Check Resolution Place the mouse cursor on the resolution icon on the task bar and see what it is set for. High Speed Mode (192 um) High Definition Mode (96 um) To change the resolution, click the resolution icon. Operation Check Press the Ready key; the arm will move to its Start position. Check that the green Ready light lights up. Then hold the emission button down. Check that the arm starts to rotate, X-rays are emitted, the yel- low emission lamp lights up and the audible signals sounds. Check that X-ray emission and arm rotation stop after the irradiation time is * T o test the arm rotation without emitting any X-rays, right-click the resolution icon in the task bar and set the unit for “No X-ray”. -
Page 13: Emergency Stop Switch
In Case the Emergency Switch Has Been Pressed Turn to release Turn the main switch off. Then turn the emergency switch in the direction indicated by the arrow to put the unit back into its normal and safe operating mode. Restart the computer. Turn the X-ray unit back on and check that it operates normally in panorama mode. If it does not, contact your local dealer or J. MORITA MFG. CORP. If the emergency stop switch was pressed during the transmission of data, wait until the transmission is completed before turning off the main switch. However, if the transmission is not completed after 3 minutes, go ahead and turn off the main switch anyway. Usage Note •... -
Page 14: Exposure Procedures
Exposure Procedures Standard and Pedodontic Panorama Exposures [Patient Positioning and Exposure Procedure] 1. Press the Panorama or Pedodontic key. Panorama Key Pedodontic Panorama Key 2. Grip the base of the plates for the head stabilizer and spread them out as far as they will go. * The plate for the forehead slides up and down. Bite Block Cover 3. Put a cover on the bite block and then put it in its holder. Press the Image-layer Dial to free it. - Page 15 4. Have the patient wear an X-ray protection apron and stand in front of the bite block. A new, uncontaminated bite block cover must be used for each patient to prevent from cross-contamination. Bite Block Have patients remove glasses, earrings and any other accesso- ries that might interfere with making a good exposure. Usage Note • Store the covers for the Bite Block in a clean, uncontaminated area. 5. Use the Up and Down keys to adjust the height of the patient frame to the patient’s height. Have the patient pull his chin in and stand as straight as possible. Observe the patient from the rear to make sure he is standing straight and not leaning to the side.
- Page 16 7. Line up the patient’s sagittal plane with the sagittal beam. Frankfort Plane Dial Make sure the patient’s frankfort plane is level, and then use the frankfort plane dial to line up the beam with the frankfort plane. Frankfort Plane Beam Move the Bite Block with the Image-layer Dial so that the image- layer beam is lined up with the distal side of the patient’s upper, left canine (tooth 23). Then press the dial to lock it in place.
- Page 17 Examples of Correct and Poor Patient Positioning Correct Positioning Patient Looking Down V-shaped Dental Arch Patient Looking Up Jaw is cut off Patient Looking to the right X rays go through (easily saturated) Larger Smaller...
- Page 18 Patient Looking to the left X rays go through (easily saturated) Smaller Larger Image-layer Beam too far forward Larger Image-layer Beam too far back Smaller...
- Page 19 8. Press the Ready key. The arm will move to its Start position. The green LED will light up to show that the unit is ready to make an exposure. Make sure the X-ray arm does not hit the patient’s shoulder after you press the Ready key, and it starts moving. 9. Make sure the green Ready light on the control box is on (not blink- ing). Pick up the handswitch and hold down the emission button. During X-ray emission, the yellow Emission light on the control box lights up and an audible signal sounds. • Leave the X-ray booth to hold down the emission button. • In an emergency release the emission button to stop the arm and X-ray emission or press the emergency switch. • Tell the patient not to move during X-ray emission and while the audible signal is sounding; otherwise, the arm might strike the patient or the exposure might be ruined.
- Page 20 A portion of the Bite-Block will be visible in the image as it lies within the X-ray field. * Do not try to make another exposure before the image is dis- played on the computer monitor. * After the exposure is completed, the X-ray image will be display on the computer’s monitor. * Density compensation is automatically applied to digital images, but in cases where a part of the image is unusually dark, the image including the dark area may become somewhat whitish or milky.
- Page 21 TMJ Quadruple Exposure [Patient Positioning and Exposure Procedure] This procedure will produce four images of the TMJ: one each when the mouth is opened and closed for both the left and right sides. This requires the arm to make two rotation cycles. Do not fail to perform both cycles. 1. Press the TMJ key. 2. Take the bite block out of the holder and replace it with the lip-nose rest.
- Page 22 3. Grip the base of the plates for the head stabilizer and spread them out as far as they will go. * The plate for the forehead slides up and down. 4. Have the patient wear an X-ray protection apron and stand in front of the lip-nose rest. Have the patient remove glasses, earrings or other objects that could spoil the X-ray. Lip-nose Rest 5. Use the Up and Down keys to adjust the height of the patient frame to the patient’s height. Have the patient pull his chin in and stand as straight as possible. Observe the patient from the rear to make sure he is standing straight and not leaning to the side.
- Page 23 6. Use the Image-layer Dial to move the lip-nose rest and line it up with the gray mark; then lock it in place. Making sure the patient keeps a good posture, have him move forward and put his nose on the lip-nose rest and also lightly grip the patient handles. Gray Mark Image-layer Dial Patient Handle Press the Beams On and Off key to turn the beams on.
- Page 24 8. Have the patient close his mouth and line him up with the sagittal beam. Make sure the patient’s frankfort plane is level, and then use the frankfort plane dial to line up the beam with the frankfort plane. Frankfort Plane Beam Frankfort Plane Dial Close the head stabilizer to immobilize the patient’s head.
- Page 25 10. R elease the emission button when the arm stops moving. 11. P ress the Ready key to return the arm to its Start position. Have the patient open his mouth. Make sure the X-ray arm does not hit the patient’s shoulder after you press the Ready key, and it starts moving. 12. M ake sure the green Ready light on the control box is on (not blinking). Pick up the handswitch and hold down the emission button. The arm will start moving and make exposures of the left and right joints. X-rays will be emitted twice before the arm stops. During X-ray emission, the yellow Emission light on the control box lights up and an audible signal sounds.
- Page 26 13. W hen the exposure is completed, the Ready light will change to orange and blink on and off, the Emission light will go out, and the audible signal will stop. The arm will then go to the patient egress position. Release the Emission button and hang the handswitch up on the control box. Never turn off the main switch while data is being transmitted. This will cause the image to be lost and the computer to freeze. During data transmission, the Data Transmission Indicator on the operation panel and the Ready light on the control panel will change to orange and blink on and off. * Do not try to make another exposure before the image is dis- played on the computer monitor. * After the exposure is completed, the X-ray image will be display on the computer’s monitor.
-
Page 27: After Use
Patient Egress Release the head stabilizer and carefully guide the patient away from the X-ray unit. Remove the lip-nose rest and replace it with the bite block. • Make sure the head stabilizer is all the way open and be very careful when guiding the patient away from the X-ray unit. Other- wise, the patient could be injured, or the head stabilizer might be broken. • Do not accidentally hit the patient’s eye with the head stabilizer. • To stop the arm in an emergency when it is returning to its start position, press the Ready key on the operation panel, the emis- sion button or the emergency switch. After Use Turn the main switch off. Press the bottom of the main switch on the support column (the side marked with a circle). The Power Light on the control box will go out. Do not fail to turn the unit off after use; this will avoid the risk of electrical leakage or unintended operation. -
Page 28: Maintenance, Parts Replacements, And Storage
Replacement Parts - Replace the parts as necessary depending on degree of wear and length of use. For details, see page 29 “Service Life, Consumables, and Replacement Parts”. - Order replacement parts from your local dealer or J. MORITA OFFICE. Storage - No frequent or continuous exposure to direct sunlight. - Store the bite block covers in an aseptic environment. - If the unit has not been used for some time, make sure it works properly before using it again. -
Page 29: Regular Inspection
- The inspection items marked * may only be performed by the service personnel for further preventive inspec- tion and maintenance during the life of the device. * F or repair or other types of service contact your local dealer or J. MORITA OFFICE. Regular Inspection List Power Supply and Physical Stability 1. Power Supply Voltage * Use a digital or analog tester to measure the unit’s power supply. The result must be nominal Voltage ± 10%... - Page 30 6. Head Stabilizer, Bite Block, and Lip-nose Rest Make sure the head stabilizer opens and closes properly. Make sure Bite Block and Lip-nose rest are properly secured. 7. Positioning Beam Keys Make sure the Sagittal, Frankfort plane, and Image-layer Beams light up properly and turn off automatically after 1 minute. 8. Operation Panel and Control Box Make sure all switches and lights on the operation panel and the control box work properly. Lift 1. Movement Press the up and down keys. Make sure the lift moves smoothly and stops properly. Repeat this 3 times. 2. Wire Cables Check the wire cables for broken strands. Make sure the ends are properly secured. Grease the cables with the grease provided by the manufacturer.
-
Page 31: Service Life, Consumables, And Replacement Parts
Service Life, Consumables, and Replacement Parts Service life refers to the standard period the unit or individual components can be expected to be usable as long as inspection and maintenance procedures specified by J. MORITA MFG. CORP. are followed. Component Service Life List refers to components that can be expected to wear out, degrade or break depending on frequency and conditions of usage, which greatly affects how long these components retain their performance standards. Consumables refer to parts and components that inevitably are degraded and need to be replaced periodically and are not covered by the warranty. The product warranty is good for 3 years after delivery. The components on the Component Service Life List that are noted “Yes” are critical for safety. These com- ponents must be inspected and replaced or have appropriate maintenance performed as necessary without fail before their standard service life expires. - Page 32 F1, F2 (Main fuse for EX-2) F6.3 A, 250 V Size: 5 × 20 mm Fuse shall be replaced by qualified person. The user should never replace the fuse himself. Some portion remains “live” even if the main switch is turned off. Be sure to turn off the circuit breaker for EX-2 or unplug the power supply cord for EX-1 before servicing to avoid electrical shock. Service The Veraview IC5 may be repaired and serviced by: • The technicians of J. MORITA’s subsidiaries all over the world. • Technicians employed by authorized J. MORITA dealers and specially trained by J. MORITA. • Independent technicians specially trained and authorized by J. MORITA. The circuit diagrams, component parts lists, descriptions, calibration instructions, or other information will be available on request, only for the service personnel authorized by J. MORITA MFG. CORP. to repair those parts.
-
Page 33: Troubleshooting
- The inside parts of the equipment are charged with high voltage. Do not attempt to perform maintenance or adjustment that is not described in the troubleshooting table. - If an accident occurs, the equipment must not be used until repairs have been completed by a qualified and trained technician provided by the manufacturer. - Contact your local dealer or J. MORITA OFFICE. for repairs if the apparatus does not work normally even after performing the steps recommended below. Problem Response •... - Page 34 • Cannot release the image-layer When the patient is resting their chin on the bite block, pressing dial. (It does not pop up even when the dial may not release it. Slightly push the bite block to the back the dial is properly pushed.) (direction towards the patient). If it still does not move, carefully guide the patient away from the X-ray unit. Then pinch the dial and pull it out. (Do not push the dial forcibly.) * If it is difficult to release the dial, contact your local dealer or J. MORITA OFFICE.
- Page 35 • Malfunction during transmission to computer. • Problem with X-ray unit’s transmission circuitry All LEDs (Response) Blink Red Turn the X-ray unit off and restart the i-Dixel application. Then check the connections between the unit and the computer. Turn the X-ray unit back on. If this does not solve the problem, contact your local dealer or J. MORITA OFFICE. Error C3 Rapid beeping and 8 LEDs blinking in the pattern shown to the left Rapid Beeping indicate error C3. (Possible Causes) • Disconnected LAN cable between X-ray unit and HUB 8 LEDs • HUB is not turned on.
- Page 36 Error C6 Rapid beeping and 3 LEDs blinking in the pattern shown to the left Rapid Beeping indicate error C6. (Possible Causes) • Application (i-Dixel) is not running 3 LEDs (Response) Blink Red • Make sure application is running Error C0 Rapid beeping and the LED shown to the left blinking indicate error Rapid Beeping (Possible Causes) • Application (i-Dixel) is not ready for an exposure. An LED (Response) Blinks Red • Restart application.
- Page 37 • If emergency switch was pressed, restore the emergency switch to its normal setting and then turn the unit off. Wait 10 seconds and then Red LEDs light up turn the unit back on again. • If the emergency switch has not been pressed, turn the unit off imme- diately and contact your dealer or J. MORITA OFFICE. Arm Error The photo at the right shows what happens when there is an arm error. Beeping lasts for about 5 seconds (Response) •...
-
Page 38: Veraview Ic5 Ddae Verification Procedure
Veraview IC5 DDAE Verification Procedure Content For V3.00 First Edition 1. Introduction 1-1. DDAE Verification 1-2. DDAE Verification Flowchart 1-3. Warnings and Caution 2. Setup 2-1. Equipment Checklist 2-2. Set Test Piece 2-3. Explanation of Test Program 2-3-1. Dxladj 2-3-1-1. Startup 2-3-1-2. Acquire Panorama Image Average 2-3-2. DDAE Verification Tool 2-3-2-1. Startup 2-3-2-2. Window Explanation 3. Verification Procedure 4. Troubleshooting... -
Page 39: Introduction
1. Introduction 1-1. DDAE Verification This procedure tests the effectiveness of the auto exposure (DDAE) function, which regulates X-ray emission depending on the transparency or opacity of the X-ray subject. 1-2. DDAE Verification Flowchart Perform the DDAE verification according to the following procedure: Start Verification Startup Verification Program Turn Veraview IC5 Power On Expose Test Piece (Step 1 – Step 8) Observe Results Turn Veraview IC5 Power Off Exit Verification Program End Verification 1-3. Warnings and Caution * If any errors occur during the verification procedure, turn off Veraview IC5 immediately and exit the verification program. Repeat the procedure from “Start Verification”. -
Page 40: Setup
2. Setup 2-1. Equipment Checklist • CDROM that includes the Verification Program • Test Piece which is used for the verification test (option) 2-2. Set Test Piece Set the test piece as follows when asked by the verification program. The test piece consists of three copper plates: (1), (2), (3). • If the following dialog is displayed, set test pieces (1), (2), (3). • If the following message is displayed, set test pieces (1) and (2). *Notice Close the Head stabilizer Remove the bite block and its rod... - Page 41 2-3. Explanation of the Test Program 2-3-1. Dxladj 2-3-1-1. Startup 1. Exit the data base application and startup Dxladj.exe. 2. File-->Click the host name setting of the connected X-ray device. Change the IP address to 192.168.240.17. 2-3-1-2. Acquire Panorama Image Average After the exposure, the “Panorama Image Average” is displayed in the status bar.
- Page 42 2-3-2. DDAE_Verification_tool 2-3-2-1. Startup Double-click the “DDAE_Verification_tool.exe” file on the CDROM. 2-3-2-2. Window Explanation Step Buttons Results display "Panorama Image Average" input boxes • Step Buttons Set the device modes according to the selected step. • “Panorama Image Average” input boxes After the exposure, input the acquired “Panorama Image Average” for the step performed. • Verify Button Performs DDAE verification based on the input parameters. • Application exit button Closes the application. • Results display. Display the results of the DDAE verification.
-
Page 43: Verification Procedure
3. Verification Procedure (1) Exit the database application then run the Dxladj program and set the host name. (2) Start the DDAE Verification Tool. (3) Turn on Veraview IC5. (4) When the resolution icon is displayed on the task bar, set the test piece then expose it by performing steps 1 through 8 in order. * Resolution icon: 1. Press the “Step 1” Button. 2. Set the test pieces listed in the message box and click “OK”. 3. When the exposure mode is set correctly, the following message is displayed with a confirmation sound. Click “OK” to start the exposure. After the image transfer, enter the “Panorama Image Average” which is displayed in the Dxladj status bar into the Step 1 input box. "Panorama Image Average" Step 1 Input box... - Page 44 4. Do Steps 2 through 8 the same way as Step 1, each time recording the resulting Panorama Image Average. 5. Verify the results of steps 1 through 8. Click the “Verify” button to view the results of steps 1 through 8. Display the result of each exposure mode: High Speed Mode (192 um), and High Definition Mode (96 um). OK: DDAE verification succeeded. Failed: DDAE verification failed. 6. Turn off Veraview IC5. 7. Exit the DDAE Verification tool. 8. Exit Dxladj.
-
Page 45: Troubleshooting
4. Troubleshooting 1. [Problem] The following error message from Dxladj is displayed: [Cause] The database application and Dxladj are running at the same time. [Solution] Shutdown the database application then restart Dxladj. 2. [Problem] The following error message from the DDAE Verification tool is displayed: [Cause] The required communication acknowledgement signal was not received from Veraview IC5. [Solution] Turn off Veraview IC5 and close Dxladj and the DDAE Verification tool. Restart the procedures from Step 1. 3. [Problem] The following error message from the DDAE Verification tool is displayed: [Cause] Non-integer characters are present in the “Panorama Image Average” input boxes or the box has been left blank. [Solution] Ensure the correct value has been added to the “Panorama Image Average” box. -
Page 46: Technical Specifications
Technical Specifications Specifications Product Name Veraview IC5 (The Veraview IC-5 is an identical product to the Veraview IC5.) Model XDP1 Type EX-1, EX-2 Classification Protection against Electric Shock Class I, Type B Type B Applied Parts Head Stabilizers, Bite Block and Plate, Chin Rest, Lip-nose Rest and Patient handles (No conductive connection to patient.) Protection against Ingress of Liquids IPX 0 Operating Altitude 3000 m (max) Pollution Degree Overvoltage Category Mode of Operation Non-continuous operation Duty Cycle 1:29, for example 10 sec. exposure per 5 minutes cool-down period. Disinfection Methods - Between patients, type B applied parts disinfect by wiping them with ethanol (70 vol% to 80 vol%). If it is not possible to obtain ethanol (70 vol% to 80 vol%), use one of the disinfectants listed below; do not use any other type of disinfectant. • DÜRR DENTAL’s FD 322 quick disinfectant... -
Page 47: Power Requirements
Generator / X-Ray Head Assembly Operating Tube Potential 60 to 70 kV (Automatic control) (accuracy of programmed setting values ± 10 %) Operating Tube Current 1 mA to 7.5 mA (Automatic control) (accuracy of programmed setting values ± 10 %) Reproducibility of Air Kerma Coefficient of variation max. 0.05 Maximum Output Power 525 W (70 kV, 7.5 mA) Filtration Inherent filtration minimum 2.5 mm Al, 70 kV/HVL 3 mmAl (X-ray tube filtration: min. 1.0 mm Al, Al filter: 1.5 mm) Beam Quality HVL minimum 1.5 mm Al at 70 kV Primary Protective Shielding Minimum 0.5 mm Pb or equivalent Outer Shell Temperature 45ºC maximum Duty Cycle 1:29 Filament Preheated Rectification Direct Current Cooling Oil cooling Maximum Heat Unit of 116 kJ (1 HU = 1.35 Joule, 1 J = 1 Ws) Leakage Radiation Max. 1.0 mGy/h at 1 m Weight of X-ray Head Approximately 6 kg Assembly Minimum mAs 4.8 mAs Auto Exposure (DDAE) Tube Voltage... -
Page 48: Mechanical Parameters
Mechanical Parameters SID 520 mm (± 20 mm) SSD Min. 150 mm Magnification 1.234 to 1.3 Weight Main Unit Approximately 110 kg Boxed Control Box Approximately 0.33 kg Boxed Outer Dimensions Main Unit W 890 × D 970 × H 2,350 mm W 890 × D 970 × H 2,180 mm (Option) Control Box W 120 × D 60 × H 120 mm Vertical Height of Focal Spot 1,045 to 1,830 mm ± 20 mm, 960 to 1,660 mm ± 20 mm (Option) Positioning Beams 3 provided (Sagittal, Frankfort, Image layer) Class 2 Laser Wavelength: typical 655 nm Beam divergence: 120 mm ± 10 % in length, 0.8 ± 0.2 mm in width @ 250 mm Pulse duration and repetition rate: Continuous Maximum energy output: 1 mW (based on IEC60825 - 1,21 CFR PART 1040.10) Attenuation Equivalent of Head Stabilizer, Bite-Block and Chin Rest Less than 1.7 mm Al Exposure Time and Accuracy High Speed Mode Panoramic: 5.5 s Pedodontic: 4.8 s TMJ Quadruple: 3.9 s... -
Page 49: Image Quality
Image Quality Line Pair Resolution 2.5 LP/mm Low Contrast Resolution Diameter 2.0 mm X-Ray Dose Data The Veraview IC5 uses auto exposure to deliver the optimum X-ray dose for the patient. The following image information is recorded for each exposure. ▪ Dose-Area-Product (DAP) (mGy * cm ▪ Tube voltage average (kV) ▪ Tube current average (mA) Refer to the application’s software manual as the displayed image information differs according to the applica- tion software. The Dose-Area-Product (DAP) (mGy * cm ) may not be displayed depending on the application software. The displayed Dose-Area-Product refers to the tube voltage (kV)/current (mA) for each exposure. The Dose area product displayed is the multiplication product of the air kerma end and the size of the radiation field. These values are typical values and are not the measured Dose area products for each X-ray exposure. The air kerma is calculated by divided the Dose area product by the X-ray field size of W: 6 mm x H: 143 mm. The accuracy of the air kerma and the Dose area product do not exceed +/- 50%. The dosemeter to check and maintain the accuracy of the Dose area product indications shall be calibrated at the appropriate energy. - Page 50 Everybody who connects additional equipment to the signal input part or signal output part configures a medi- cal system, and is therefore responsible that the system complies with the requirements of IEC 60601-1. If in doubt, consult the nearest J. MORITA OFFICE, its representative or its dealer for help. * Some of the following devices may cause some technical problems with the Veraview IC5. Ask your near- est J. MORITA OFFICE for proper selection of equipment and connections. The following devices may not be located in the X-ray protection area (see page 4) or the patient vicinity except the Hub if the Hub is conformed with IEC60950-1 and enclosure leakage current is conformed with IEC 60601-1. * The patient vicinity is the area where intentional or unintentional contact can occur between a patient or a patient’s attendant and the above devices, or between a patient or a patient’s attendant and other persons touch-...
- Page 51 Manufacturer: Bay Networks Type: Bay Stack 350T Storage Device Patient data can be saved safely. MO or CD-R disk drive is recommended. Standard: IEC60950-1 if it is used in non-patient vicinity EMD regulation Related UL standard (addition to U.S.A.) Related C-UL standard (addition to Canada) Local regulations Other equipment connected to PC Standard: IEC60950-1 if it is used in non-patient vicinity EMD regulation Related UL standard (addition to U.S.A.) Related C-UL standard (addition to Canada) Local regulations Application Software Application software for image processing or data base is provided by J. MORITA. It shall be used with above Windows base computer specifications. It conforms to 93/42/EEC (in EU), IEC62304 and 21 CFR (in U.S.A.), Medical device regulations (in Canada). If another application software is used, it must conform to the above regulations and standards, and must match the Dixel driver from J. MORITA MFG. CORP. Ask your nearest J. MORITA OFFICE for the appropriate interface.
-
Page 52: Environmental Data
Original Language English Disposal The package should be recycled. Metal parts of the equipment are disposed as scrap metal. Synthetic materi- als, electrical components, and printed circuit boards are disposed as electrical scrap. Material must be disposed according to the relevant national legal regulations. Consult specialized disposal companies for this purpose. Please inquire of the local city/community administrations concerning local disposal companies. This symbol indicates that the waste of electrical and electronic equipment must not be disposed as unsorted municipal waste and must be collected separately. Contact your local dealer or J. MORITA OFFICE for details. -
Page 53: Symbols And Markings
Symbols and Markings * Some symbols may not be used. Laser Radiation Focal Spot (dimple) (EX-1) Emergency Stop Main Switch | : On O: Off (EX-1) X-ray Tube Head Assembly Label Type B Applied Part Rating Label (EX-1) Certification / Identification Label X-ray Emission Switch (EX-1) (EX-1) - Page 54 Package This way up Keep away from rain Fragile Temperature limitation Humidity limitation Atmospheric pressure limitation Attention, consult accompany documents Do not reuse Prescription Device CAUTION: Federal law restricts this device to sale by or on the order of a dentist and a licensed healthcare practitioner.
- Page 55 Indicated Items on the Rating Label and X-ray Tube Head Assembly Label * For details, refer to “Technical Specifications” (p. 44). * Some symbols described on the previous page may be included. Rating Label Model: Model of X-ray system Type: Type Input: Rated input voltage, frequency, and power in operation Standby: Input power in standby Duty Cycle: Duty cycle of X-ray system 2D barcode at bottom right: Label code X-ray Tube Head Assembly Label MODEL: Model of tube housing assembly HEAD NO.: Serial number of tube housing assembly DATE OF MFG.: Date of manufacture TOTAL FILTRATION: Min. inherent filtration RATING: Rated output of tube housing assembly TUBE MODEL: Model of X-ray tube TUBE ANODE NO.: Serial number of X-ray tube...
-
Page 56: Tube Housing Assembly Heating Curve
Tube Housing Assembly Heating Curve 120 150 180 210 240 270 300 330 360 (min) Tube Housing Assembly Cooling Curve 120 150 180 210 240 270 300 330 360 (min)... -
Page 57: Tube Rating Chart
Tube Rating Chart Maximum Rating Charts (Absolute maximum rating charts) Focus Spot : 0.5 mm EXPOSURE TIME [s] Anode Thermal Characteristics COOLING HEATING TIME [s]... -
Page 58: Relationship Of Focal Spot, X-Ray Beam And Image Receptor
Relationship of Focal Spot, X-ray Beam and Image Receptor Focal Spot Reference Axis Image Receptor Tolerances on the reference axis: ±1 400 to 421 (Magnification 1.3 to 1.234) Image Layer Unit: mm... -
Page 59: Electromagnetic Disturbances (Emd)
• The use environment of this device is the Professional healthcare facility environment. • This device needs special precautions regarding EMD and needs to be installed and put into service accord- ing to the EMD information provided in the ACCOMPANYING DOCUMENTS. • Use of parts other than those accompanied or specified by J. MORITA MFG. CORP. could result in increased electromagnetic emissions or decreased electromagnetic immunity of this device and result in improper operation. - Page 60 Guidance and Manufacturer’s Declaration – Electromagnetic Immunity This device is intended for use in the electromagnetic environment specified below. The customer or the user of this device should assure that it is used in such an environment. Electromagnetic Envi- Immunity Test IEC 60601 Test Level Compliance Level ronment – Guidance Electrostatic discharge ±8 kV contact ±2 kV, ±4 kV, ±6 kV, ±8 Floors should be wood,...
-
Page 61: Guidance And Manufacturer's Declaration - Electromagnetic Immunity
Guidance and Manufacturer’s Declaration – Electromagnetic Immunity This device is intended for use in the electromagnetic environment specified below. The customer or the user of this device should assure that it is used in such an environment. Electromagnetic Environment Immunity Test IEC 60601 Test Level Compliance Level – Guidance Conducted RF Portable and mobile RF communi- cations equipment should be used IEC 61000-4-6 / amateur radio... -
Page 62: Essential Performance
Essential Performance • No X-ray irradiation without active operation of the emission button. • X-ray termination with release of the emission button. • No unexpected movement of the equipment. NOTE: If the essential performance is lost or degraded due to electromagnetic disturbance, unexpected movement would be initiated without any active of operation, or X-ray termination would not be done by releasing the Emission switch, or X-ray would be irradiated without an active operation of the Emission switch.
Need help?
Do you have a question about the Veraview IC5 HD and is the answer not in the manual?
Questions and answers
The Image Layer Dial on our IC5 HD button is stuck, Pan was in installed 2 months ago.
To fix a stuck Image Layer Dial on the Morita Veraview IC5 HD, move the bite block slightly toward the center of the patient frame before pressing the image-layer dial. This prevents the positioning mechanism from jamming when the bite block is at the front or end of the frame.
This answer is automatically generated