
Subscribe to Our Youtube Channel
Related Manuals for Htek UC912


Summary of Contents for Htek UC912
- Page 1 Notices Information Htek IP Phones UC912 User Manual Version 2.0.4.4.29 Mar. 2018...
-
Page 2: Notices Information
Nanjing Hanlong Technology CO., LTD. When this document is made available on www.htek.com , Nanjing Hanlong Technology Co., LTD. gives its right to download and print copies of this content only for private use as a user manual. -
Page 3: Cleaning
Notices Information Cleaning To clean the device, use an anti-static cloth. Please avoid cleaning liquids as they might damage the surface or internal electronics of the phone. FCC Statement 1. This device complies with Part 15 of the FCC Rules. Operation is subject to the following two conditions: (1) This device may not cause harmful interference. -
Page 4: Summary Of Changes
This section describes the changes to this user manual for each release and user manual version. Change for Release x.0.4.4.27,Manual version x.0.4.4.27 Major updates have occurred to the following sections: UC912 supports 4 accounts Change for Release x.0.4.0.10,Manual version x.0.4.0.10 Major updates have occurred to the following sections: Label Scroll Change for Release x.0.4.0,Manual version x.0.4.0... -
Page 5: Change For Release X.0.3.93,Manual Version X.0.3.93
Summary of changes Change for Release x.0.3.93,Manual version x.0.3.93 Major updates have occurred to the following sections: Check-Syn With Authenticate Call Back Change for Release x.0.3.88,Manual version x.0.3.88 Major updates have occurred to the following sections: Detect IP Conflict Change for Release x.0.3.72,Manual version x.0.3.72 Major updates have occurred to the following sections: ... -
Page 6: Table Of Contents
Table of Content Table of Content Notices Information ......................2 Copyright........................2 Safety Instructions ....................2 WEEE Warning ......................2 Cleaning ........................3 FCC Statement......................3 Summary of changes....................... 4 Change for Release x.0.4.4.27,Manual version x.0.4.4.27 ........4 Change for Release x.0.4.0.10,Manual version x.0.4.0.10 ........4 Change for Release x.0.4.0,Manual version x.0.4.0 .......... - Page 7 Table of Content Line Key Function Overview ................... 26 Basic Features Configuration ..................29 General Settings..................... 29 Web Login ....................... 29 Administrator Password................... 30 Language ......................31 Screen Saver ....................31 Gray Level....................... 33 Time and Date ....................33 LED Status Setting ..................38 Key as Send ....................
- Page 8 Table of Content Other features settings ....................67 Action URL ......................67 Softkey Layout......................68 Programmable Key....................69 Basic Call Features ....................... 70 Place a Call ......................70 End a Call ......................71 Receive a Call ......................72 Incoming Call Show Mode ..................72 Auto Answer ......................
- Page 9 Table of Content Hold ........................106 Group Listening ....................107 DND ........................107 Redial........................108 SMS ........................108 Send SMS ..................... 108 Set SMS Line Key ..................109 Record ......................... 110 URL Record ......................111 Paging........................111 Shared Line......................112 Public Hold ......................114 Private Hold......................
-
Page 10: Getting Started
Getting Started Getting Started Packing List The package contains the following parts, please check if all the items are not missed: 1. The phone device 2. The footstand 3. Handset... - Page 11 Getting Started 4. Headset cord 5. Power adapter 6. Ethernet cable 7. Quick installation reference...
-
Page 12: Phone Installation
Getting Started Phone Installation 1. Attach the Foot stand 2. Connect the Handset and optional Headset... -
Page 13: Connect The Network And Power
Getting Started 3. Connect the Network and Power Initialization After your phone has been powered up, the system boots up and performs the following steps: Automatic Phone Initialization The phone finishes the initialization process by loading the saved configuration. The phone LCD screen will display "Booting"... -
Page 14: Status
DNS… )Account (e.g., register status of accounts) To view the phone status via Phone interface : 1. Press Menu →Status →Information 2. Press Menu →Status →Network 3. Press Menu →Status →Network→IPV4 4. Press Menu →Status →Network→IPV6 5. Press Menu →Status →Accounts (UC912 support four accounts). -
Page 15: Registration
Getting Started To view the phone status via Web interface: 1. Login webpage (For How to login, please refer to Login) 2. View the information of Version, Account and Network. Registration To register via Phone interface : Press Menu→ Settings→ Advanced setting (default password: admin)→ Accounts. Select the desired account Select Enable for Account active Select the desired profile of the account. - Page 16 Getting Started Press Save to save the configuration. Note: If there is a port of sip server, you need to press “1” on the keypad, then you will find the “:”. Additional Information: When the current input method is ABC/abc/2ab, Pressing “1”, you will find “, .
- Page 17 Getting Started Click to save the configuration. Click Account→ Basic. Select Yes for Account Active. Select the desired Profile. Fill the SIP User ID, Authenticate ID, Authenticate Password and other account information. Click to save the configuration. Note: 1. All fields with must be filled.
-
Page 18: Idle Screen
Getting Started Idle Screen Name Description It shows the phone’s time & date. For Date& time setting, see 1. Date & Time Time&Date 2. Notice It shows the phone features status, More see Icon Preview This area shows the four line key labels. Line keys are also can be used as other function keys. -
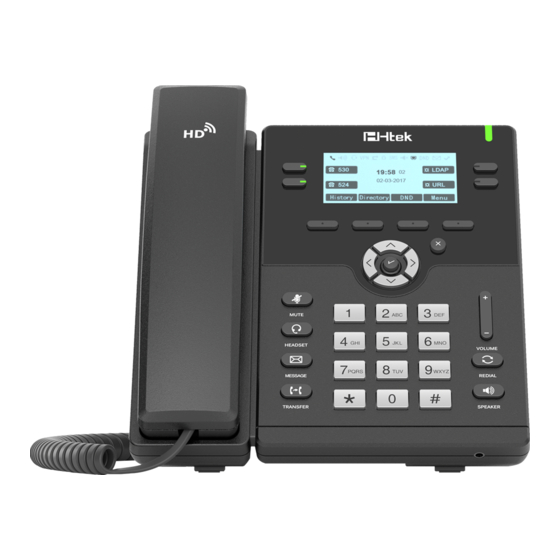
Page 19: Getting Familiar With Your Phone
Getting Familiar with Your Phone Getting Familiar with Your Phone Hardware Components Preview Item Description To Presentation all information about the date& time, LCD screen accounts, soft keys, messages, calls and other some information. Power Indicator LED To indicate the power status The phone supported up to 2 accounts Line keys 1. - Page 20 Getting Familiar with Your Phone shown on the screen. 1. To return to idle screen. 2. To cancel the information or call on the screen. 1. To mute the voice during the call (green light). Mute key 2. To un-mute the call. To be configured as different function as: 1.
-
Page 21: Icon Preview
Getting Familiar with Your Phone 37. Group Call Park 38. CallPark Retrieve 39. Pull Call 40. Shared Line The LED lights status when set as Shared line: Stay green: Idle Stay red: Busy Blinked green: Ring Back Blinked red: A call incoming Steady orange: During a call Blinked orange: Public Hold Blinked green: Private Hold... -
Page 22: Led Instruction
Getting Familiar with Your Phone Network Registered succeed Unregistered Speakerphone mode Handset mode Headset mode Mute Forward Do Not Disturb SRTP Received calls Dialed Calls Missed calls Forward calls LED Instruction This part mainly instructs the LED status. The Power LED Status describe on the premise that the LED setting all set as Yes. -
Page 23: Power Indicator Led
Getting Familiar with Your Phone Power Indicator LED LED Status Description Blinked green Ringing or have missed call Steady Green Idle status(Power on) Powered off. Line LED: (Line Key set as Line) LED Status Description Steady Green Hold Steady Green Off hook or during a conversation. -
Page 24: Other Key Led
Getting Familiar with Your Phone a member of the SCA group in off-hook Stay green status Other member of the SCA group’s led Stay red status when a member of the SCA group in off-hook status a member of the SCA group in Private Blinked green every 500ms hold status. -
Page 25: User Interface
Getting Familiar with Your Phone User Interface There are two ways to customize specific configurations on your IP phone: The user interface on the IP phone The user interface in a web browser on your PC The hardware components keypad and LCD screen constitute the phone user interface, which allows the user to execute all call operation tasks and basic configuration changes directly on the phone. -
Page 26: Line Key Function Overview
Getting Familiar with Your Phone Headset Screensaver User Mode Gray Level Font Size Accounts Network Advanced Setting Phone Setting Auto Provision Factory Function System Restart Others Device Reboot Pcap Feature Line Key Function Overview Line Speed Dial BLF List Voice Mail Direct Pickup Group Pickup Call Park... - Page 27 Getting Familiar with Your Phone Prefix Local Group XML Group XML Browser LDAP Network Directories Conference Forward Transfer Hold Redial Call Return Record URL Record Paging Group Listening Public Hold...
- Page 28 Getting Familiar with Your Phone Private Hold Hot Desking Zero Touch Network Group Multicast Paging Group Call Park CallPark Retrieve Pull Call Shared Line Broadsoft Group...
-
Page 29: Basic Features Configuration
Basic Features Configuration Basic Features Configuration This part will mainly introduce the basic configuration as the Time, Language, and Volume… General Settings Web Login 1. Get the IP address: Press Menu →Status→ Information 2. Input the IP Address in the web browser. 3. -
Page 30: Administrator Password
Basic Features Configuration Note: The PC and phone should be in the same segment. When register the accounts in web and the server port is not “5060”, then “SIP Server” should be set as “SIP Server ’s IP address: server port.”, for example, “192.168.0.122: 5090”. -
Page 31: Language
Basic Features Configuration Note: When you use the web interface: user name: admin password: admin(default) Language The default Phone interface language is English. To change the language via Phone interface Press Menu → Settings → Basic Setting → Language. Press or Save soft key to save the configuration. - Page 32 Basic Features Configuration Press or press Switch soft key to Choose the Time-out as 1 min or 2/5/10/30 minute, then press the Save button. Enter the Screensaver Type to choose one of the type: Logo only, Time & Logo. Press or Save soft key to save the selected configuration.
-
Page 33: Gray Level
Basic Features Configuration Click Setting→ Preference. Choose the Time-out as 1 min or 2/5/10/30 minute. Enter the desired value in the Text Logo field. Click SaveSet to save the configuration. To wake up screen saver via Web interface: 1. Click Setting → Preference 2. - Page 34 Basic Features Configuration Press , or Info/Switch soft key to change the Time zone. Fill the NTP server1, NTP Server2, and Daylight Saving. Press or Save soft key to save the configuration. To configure time and date manually via Phone interface Press Menu →...
- Page 35 Basic Features Configuration To change the Time Zone and Date Display Format via Web interface Setting → Date &Time Select the necessary one. Press to save the configuration.
- Page 36 Basic Features Configuration To change the SIP Date Override Time via Web interface Setting → Date &Time→ SIP Date Override Time Select Yes or No for SIP Date Override Time . Click to save the configuration. To change the Account via Web interface Setting →...
- Page 37 Basic Features Configuration To change the Daylight Saving Time via Web interface Setting → Date &Time→ Daylight Saving Time Select Disable or Enable or Auto for Daylight Saving Time. Click to save the configuration.
-
Page 38: Led Status Setting
Basic Features Configuration Note: If the IP Phone cannot obtain the time and date from the Simple Network Time Protocol (SNTP) server, please contact your system administrator for more information. Daylight Saving Time Daylight Saving Time (DST) is the practice of temporary advancing clocks during the summertime so that evenings have more daylight and mornings have less. -
Page 39: Network Setting
Save soft key to save the configuration. Network Setting Htek IP Phone supports IPv4、 IPv6、 IPv4&IPv6.They have three mode of Network: DHCP, Static, and PPPoE. The default mode is DHCP, it will obtain IP address and other information automatically. - Page 40 Basic Features Configuration To configure IPv4 via Web interface: 1. Click Network→ Basic→ Internet Port 2. Select IPv4 for Internet Port 3. Click for the setting. To configure DHCP via Phone interface : 1. Press Menu→ Settings→ Advanced Setting (password: admin) → Network→ WAN Port→...
- Page 41 Basic Features Configuration To configure PPPoE via Phone interface : 1. Press Menu→ Settings→ Advanced Setting (password: admin) → Network→ WAN Port → PPPoE mode. 2. Enter the User ID and password 3. Click Save and restart the phone. To configure Network via Web interface : 1.
-
Page 42: Ipv6
Basic Features Configuration IPv6 If you set IP Mode to IPv6,IP phone will use IPv6 address. IPv4 has two network modes: DHCP, Static To configure IPv6 via Phone interface : 1. Press Menu→ Settings→ Advanced Setting (password: admin) → Network→ WAN Port →... -
Page 43: Ipv4&Ipv6
Basic Features Configuration Click Save and restart the phone. To configure Network via Web interface : 1. Click Network→ Basic→ IPv6 setting 2. Select the desired Type: DHCP, Static 3. Fill required fields. 4. Click the SaveSet and restart the phone. IPv4&IPv6 If you set IP Mode to IPv4&IPv6,IP phone will support both IPv4 and IPv6 address. -
Page 44: Pc Port
Basic Features Configuration Press Menu→ Settings→ Advanced Setting (password: admin) → Network→ WAN Port → IP Port Mode. Press to change the IP Port Mode.. Press or Save soft key to save the configuration. To configure IPv4&IPv6 via Web interface: 1. - Page 45 Basic Features Configuration 1. Press Menu→ Settings→ Advanced Setting (password: admin) → Network→ PC Port → Router mode. 2. Enter the IP, Netmask and DHCP server 3. Click Save and restart the phone. To configure Bridge via Web interface : 1.
-
Page 46: Contact Settings
Basic Features Configuration Contact Settings This section provides the operating instructions for managing contacts. The topics include: Local Directory Remote Phonebook LDAP Search Contact Local Directory In the directory, you can add or delete your friends, business partner or anyone others’ phone No. - Page 47 Basic Features Configuration Enter the necessary information as Name, Phone number… Press Save soft key or to add the contacts successfully. To add contacts from History via Phone interface Press History soft key or press Menu →History→ Local History Press to select the targeted one.
- Page 48 Basic Features Configuration B: To add contacts into blacklist To add blacklist manually via Phone interface Press Menu → DIR → BlackList Press Group soft key. Press Add soft key. Enter the Name and select the Ring Tone. Press Save soft key or to add the Group successfully.
- Page 49 Basic Features Configuration Press to select the targeted one. Press Option soft key → Add to Blacklist Edit the necessary information as Name, Phone number… Press Save soft key or to add successfully. To import or export the contact list You can manage your phone’s local directory via phone or web user interface.
-
Page 50: Remote Phonebook
Press Directory→ Left Button→ Left Button, and then you can see the item you set, press enter you will find the detail. For More detail, please refer to: Remote Phonebook www.htek.com Note: Every remote contact only support 1000 contacts. LDAP Phonebook... - Page 51 Basic Features Configuration To configure LDAP via Web interface : 1. Login Web interface and click Directory→ LDAP 2. Fill the LDAP Name Filter: This parameter specifies the name attributes for LDAP searching. The “%” symbol in the filter stands for the entering string used as the prefix of the filter condition.
-
Page 52: Search Contact
When press the LDAP Key the LCD will display as following: For More detail, please refer to LDAP Notes www.htek.com Search Contact You can search contact in all contacts, local contacts, remote contacts and LDAP contact. To search contact in all contacts: 1. -
Page 53: Call History Settings
Basic Features Configuration LCD within 5 seconds. To search contact in Local contacts: 1. Click the Directory soft key on Idle interface. 2. Click the button and select the Local contacts list. 3. Click the More soft key, then you can see the Search soft key 4. - Page 54 Basic Features Configuration 1. Press Menu→ Features→ History Setting 2. Press or Info/Switch soft key to enable History record. 3. Press Save soft key to save the configuration. To check the call history via Phone interface : Press the History soft key. The LCD screen displays All Calls list. Press Right or Left Key to switch among All Calls, Missed Calls, Received Calls, Dialed Calls and Forwarded Calls.
- Page 55 Basic Features Configuration 3. Press the Option soft key, and then select Delete All from the prompt list. 4. Press the OK soft key. 5. Press the OK soft key to confirm the deleting or the Cancel soft key to cancel. To check the call history via Web interface : 1.
-
Page 56: Audio Settings
Basic Features Configuration To Dial a call from Call History via Phone interface : 1. Press History soft key or press Menu → History → Local History 2. Press to select the targeted one. 3. Press the Send soft key, or , or , or the corresponding line key. - Page 57 Basic Features Configuration Press or Save soft key to save the configuration. To adjust the Ring Tone Type via Web interface Setting → Preference →Ring Tone Select the wanted one Click to save the configuration. To configure Distinctive Ring Tone via Phone interface Press Directory Select the target contact Press Detail soft key to edit the contact.
-
Page 58: Volume
Basic Features Configuration Volume You can adjust the volume for the phone by the volume keys: To adjust the Ring tone volume via Phone interface Option 1: Press on the idle page Option 2: Press during the call is ringing. -
Page 59: Voice Mail Tone
Basic Features Configuration To adjust the handset volume via Phone interface Press during a call in handset mode. To adjust the headset volume via Phone interface Press during a call in headset mode. To adjust the speaker Volume via Phone interface Press during a call in speaker mode. -
Page 60: Play Hold Tone Delay
Basic Features Configuration Play Hold Tone Delay When you hold the phone. How many seconds to play beep? Click the Setting Preference Set Enable or Disable for Play Hold Tone Delay. Click for the setting. System Settings Dial Plan Dial plan is a string of characters that governs the way this phone processes the inputs received from your phone keypad. -
Page 61: Dial-Now Timeout
Note: Illegal input will fall back to default: {[x*]+}. For More, please refer to dial plan www.htek.com Dial-Now Timeout Dial-Now Timeout means that when you entry the number which matching with dial plan, it will dial out automatically after some time when you stop enter the number. -
Page 62: No Key Entry Timeout
Basic Features Configuration Fill the blank of Dial-Now Timeout: for example 5(seconds).(0 means dial out immediately). Click the button to save the configuration No Key Entry Timeout No Key Entry Timeout means that when you entry the number, it will dial out automat ically after some time when you stop enter the number. -
Page 63: Label Scroll
Basic Features Configuration Label Scroll When setting function keys, you need to set the label of the function keys. If the words are too long to show on the label, you can use this function to make labels scroll. Another approach is to set the labels to long label mode. -
Page 64: Auto Logout Time
Basic Features Configuration Auto Logout Time Set the Web login timeout Click the Setting → Preference Set number 1~5000 min for Auto Logout Time. Click for the setting. Reboot in Talking This function is to allow reboot during the calls or not Click the Setting ... -
Page 65: Keypad Lock
Basic Features Configuration Click for the setting. Keypad Lock To enable Keypad Lock via Phone interface 1. Press Menu--Settings--Advanced Setting--Phone Setting--Lock 2. Press key or Info or Switch to change choose lock type: All Keys, Menu Key, Function Key, Lock & Answer 3. -
Page 66: Suppress Dtmf Display
Basic Features Configuration To Disable Keypad Lock via Web interface 1. Click Web interface Setting → Features 2. To choose Disable for the Phone Lock. 3. To click SaveSet to save the configuration. Suppress DTMF Display In order to ensure safety in Call process, you can choose whether to hide DTMF Click the Setting →... -
Page 67: Other Features Settings
To configure action url via Web interface : 1. Click Setting→ Action URL 2. Filled the needed value in the necessary blank. 3. Click to save the setting. Click Action URL for more how to use, or check on www.htek.com... -
Page 68: Softkey Layout
Other features settings Softkey Layout This feature mainly defines which shown on the soft key in some status. For example, what the soft key displays when dialing, or talking. To configure Soft key via Web interface : Click Setting→ Softkey Layout Select Enable for Custom Softkey Select Call States. -
Page 69: Programmable Key
Other features settings Note: 1. When there more than 5 items in the Enable field, the last soft key will display More, and last two item will show in the next page soft key, you can check by press more. Programmable Key For the default keys as Soft keys, Navigation keys and so on, you can define them as some specific feature, and it works only on the idle page. -
Page 70: Basic Call Features
Basic Call Features Basic Call Features Place a Call There are three ways to dialing a call: Handset, Headset and Hands-free speakerphone. To place a call by Handset 1. Pick up the handset, or press a line key and dial the necessary number. 2. -
Page 71: End A Call
Basic Call Features 3. Press or press the Send soft key, then the call is sending. To place a call by call history or Directory 1. Press the History/ DIR soft key (On the idle page) or Menu → History /Directory 2. -
Page 72: Receive A Call
Basic Call Features To end a call under hands-free speakerphone Mode Press the End Call soft key or press , or press Note: During the conference, to end the call is same as mentioned above. Receive a Call There are three ways to receive a call when the phone is ringing: To receive a call by handset Pick up the handset and now the conversation is built. -
Page 73: Auto Answer
Basic Call Features 1. name and number of the contacts 2. name and number of the incoming call and the account which is connecting To set incoming call show mode via Web interface : 1. Click Setting→ Preference 2. Select the desire mode for the incoming call show mode 3. -
Page 74: Call Hold
Basic Call Features To choose No for the Auto Answer. To click SaveSet to save the configuration. Call Hold When use hold feature, the Hold icon will show on the display. To make a call on hold during three modes: To hold a call under handset mode: 1. - Page 75 Basic Call Features Blind Transfer When you use this feature, you can transfer Press Transfer soft key during the conversation, the call is on hold now. Enter the number that transfers to. Press Transfer soft key , and now the blind transfer completed. Attended Transfer When you use this feature, you can 1.
- Page 76 Basic Call Features 2. Press the Transfer soft key during the conversation, the call is on hold now. 3. Press BLF key then realize blind, attended and Semi-Attended Transfer. (Webpage--Setting--Features--Transfer Settings) Hold transfer on hook: Setting → Features → Transfer Setting: Hold Transfer On Hook: ON. A place a call to B, B answer, A press the hold soft key and place a call to C, A cancel the call when C is ringing or answering, then C and B in the same call and the transfer is successful.
-
Page 77: Call Conference
Basic Call Features 2. Select Transfer Mode via DSS key: New Call 3. Select the desired Line Key and select Transfer in the Type. 4. Enter the phone number in the Value field. Note: if the person that wanted to be spoken to do not want to answer the call, then the person that answered the coming call could use this function. -
Page 78: Call Forward
Basic Call Features A press Conference soft key, then A, B and C are now in a conference.(and now this is 3-way conference) A press the Conference soft key, the current 3-way conference is placed on hold. A enter the number of D and then press Send soft key or D answer the call. - Page 79 Basic Call Features With this feature, all incoming calls will forward immediately to configured number. Press Menu → Features → Call Forward →Always Forward. Press or press Info/Switch soft key to select the enable choice Enter the Forward To number. Press or Save soft key to save the configuration.
- Page 80 Basic Call Features Enter the Forward To number and After Ring Times. Press or Save soft key to save the configuration. When the Forward feature is enabled, the Forward Icon will display on Top of the LCD. To configure Forward via Web interface Setting →...
-
Page 81: Call Return
Basic Call Features Click Off for the Always/Busy/No Answer Click to save the configuration To configure dynamic forward Forward an incoming call during the ringing. When the phone is ringing, press FWD soft key. Enter the forward number or select the desired number from Directory soft key (Precondition: local directory has one or more contacts). -
Page 82: Call Back
Basic Call Features Click Function keys → Line Key. Select the desired Line Key and select Call Return in the Type. Click the button to save the configuration. Call Back When this option is set, if the phone you call is busy and does not set call waiting or voice mail, your LCD screen will prompt for call-back, as shown in figure If you press the callback, the phone will dial the Callback phone number. -
Page 83: Hide Caller Id
Basic Call Features 1. Click Setting → Tones 2. Change the Tone Time as you want (for example 3s) Hide Caller ID Just enable the unknown/hidden caller feature, by enabling Anonymous call feature thereby the receiver won’t be able to know who is calling them. To configure anonymous call Press Menu →Features →Anonymous Call →Account ID 1 Press... -
Page 84: Reject Anonymous
Basic Call Features Press or press Info/Switch soft key to select the disable choice in Anonymous Call filed. Press or Save soft key to save the configuration. Reject Anonymous If you do not want to be disturb by anonymous calls, you can set the reject anonymous call features, so you will not hear the unknown calls To configure rejecting anonymous call Press Menu →Features →Anonymous Call →Account ID 1... -
Page 85: Dnd
Basic Call Features To mute the call during a call (including a conference call) Press the Mute key , then the Mute key glows green, and the LCD display Mute Icon. To disable the mute function, press again. When you use the DND feature, the phone is to reject all incoming calls automatically and you can see the DND icon shown on the Top of the LCD on idle page. -
Page 86: Auto Redial
Basic Call Features Delete the hotline number and save the configuration, then now the Hotline auto dial is cancelled. Auto Redial When this option is set, if the phone you call is busy and does not set call waiting or voice mail, your LCD screen will prompt for Auto Redial, as shown in figure. -
Page 87: Function Keys Features Settings
Function Keys Features Settings Function Keys Features Settings Line It works same as Line keys. To configure Line Feature via Web interface 1. Click Function keys → Line Key. 2. Select the wanted Key and set as Line. 3. Select the Account. 4. -
Page 88: Blf
Function Keys Features Settings 4. Press or Save soft key to save the configuration Then the selected Line Key will work as Speed Dial. To configure Speed Dial feature via Web interface Click Function keys → Line Key. Select the wanted Line Key and set as Speed Dial. Enter the desired phone number in the Value field. - Page 89 Function Keys Features Settings Select the targeted Line Key. Press or press Switch soft key to select the BLF in the Type field. Enter the targeted Value Number. Press to select the Account ID. Enter the Pickup Code. Press or Save soft key to save the configuration To configure a BLF key by web Click Function keys →...
-
Page 90: Blf List
Function Keys Features Settings BLF List To configure BLF List via Web interface : 1. Login and click Account→Basic 2. Fill the Eventlist BLF URL and click to save the configuration. 3. To configure BLF List Keys 3.1 Click→ Function Keys→ Line Key 3.2 Select the BLF List in the Type Field. -
Page 91: Voice Message
Function Keys Features Settings For more information, please check BLF list Note www.htek.com web. Voice Message To configure the Voice mail feature via Phone interface Press Menu →Messages →Voice Mail →Set Voice Mail. Enter the Account NO.1/2/3/4/5/6 Press or Save soft key to save the configuration To configure Voice Mail Line Key via Web interface : 1. - Page 92 Function Keys Features Settings Select the targeted Line Key. Press key to select the Voice mail in the Type field. Enter the Value. Press key to select the Account ID. Press or Save soft key to save the configuration To leave a voice mail: You can leave a voice mail when the receiver is busy or its inconvenient for them to answer the call.
-
Page 93: Direct Pickup
Function Keys Features Settings Direct Pickup With this feature, you can pick up the set line when it ringing. To configure Direct Pickup feature via Phone interface Press Menu →Features →Function Keys →Line Keys as Function Keys → Line Key2(for example) Press key to select the PickUP in the Type field. -
Page 94: Group Pickup
Function Keys Features Settings Group Pickup With this feature, you can pick up the specified group that you want incoming calls. To configure the Group Pickup via Phone interface Press Menu →Features →Function Keys →Line Keys as Function Keys → Line Key2(for example) Press or press Switch soft key to select the Group in the Type field. -
Page 95: Call Park
Function Keys Features Settings Call Park With this feature, you can put a call on hold and continue the conversation from another phone. To configure the Call Park via Phone interface Press Menu →Features →Function Keys →Line Keys as Function Keys → Line Key2(for example) Press or press Switch soft key to select the Call Park type. -
Page 96: Intercom
Function Keys Features Settings For More information for Call Park, please see: Call park note www.htek.com/ Intercom When use the intercom feature, you can quickly get access connect to the configured one. To configure intercom feature via Phone interface Press Menu →Features →Function Keys →Line Keys as Function Keys → Line... -
Page 97: Intercom Barge
Function Keys Features Settings If you want to achieve the intercom feature, you must enable the “Allow Auto Answer By Call-Info” 1. Click Profile 2. Select the desired profile from the pull-down list of Profile in the Profile field. 3. Click Advanced 4. -
Page 98: Dtmf
Function Keys Features Settings DTMF When the key is configured as DTMF key, you are allowed to send out the desired DTMF number during the conversation. To use this feature, you should sure that the DTMF Tone is on. To configure the DTMF via Web interface 1. -
Page 99: Prefix
Function Keys Features Settings Prefix If the key is configured as Prefix key, you can set the number prefix (e.g. Before the number plus 9), then you don't input 9, press the key and 9 will display on the LCD interface. -
Page 100: Local Group
Function Keys Features Settings Local Group When use the Local Group feature, press the key and enter the local Contacts interface quickly. To configure the Local Group via Phone interface 1. Press Menu →Features →Function Keys →Line Keys as Function Keys → Line Key2(for example) 2. -
Page 101: Xml Group
Function Keys Features Settings XML Group When use the XML Group feature, press the key and enter the Remote Contacts interface quickly. To configure the XML Group via Phone interface 1. Press Menu →Features →Function Keys →Line Keys as Function Keys → Line Key2(for example) 2. -
Page 102: Ldap
Function Keys Features Settings LDAP When use the LDAP feature, you can get the LDAP Phonebook directly. To configure the LDAP via Phone interface 1. Press Menu →Features →Function Keys →Line Keys as Function Keys → Line Key2(for example) 2. Press key to select the LDAP in the Type field. -
Page 103: Broadsoft Group
Function Keys Features Settings search, etc. To configure the XML Browser via Phone interface 1. Press Menu →Features →Function Keys →Line Keys as Function Keys → Line Key2(for example) 2. Press key to select the XML Browser in the Type field. 3. -
Page 104: Conference
Conference The Htek IP Phone supports up to 5-way conference. You are allowed to configure the programmable key to be used as a conference key. This key works same as To configure the Conference via Phone interface 1. -
Page 105: Forward
Function Keys Features Settings Forward If the key is configured as Forward key, press this key under the idle status, the IP phone will turn to the Always Forward interface and you can set the Forward to number, then when there is any call to the number will be forwarded to the set number automatically. To configure the Forward via Phone interface 1. -
Page 106: Hold
Function Keys Features Settings 2. Press key to select the Transfer in the Type field. 3. Enter the Number to transfer to 4. Press or Save soft key to save the configuration To configure Transfer via Web interface 1. Click Function keys →Line Key. 2. -
Page 107: Group Listening
Function Keys Features Settings 3. Click the button to save the configuration. Group Listening With this feature, when you have an active call, you can listen using Handset and Free-speaker, but only can use the handset to speak. To configure the Group listening via Phone interface 1. -
Page 108: Redial
Function Keys Features Settings 3. Press or Save soft key to save the configuration To configure DND via Web interface 1. Click Function keys →Line Key. 2. Select the desired Key and select DND in the Type. 3. Click the button to save the configuration. -
Page 109: Set Sms Line Key
Function Keys Features Settings 1. Click Setting→ SMS 2. Select the Account(from which account the SMS sent) 3. Enter the target number 4. Input the content of SMS, and click Send. To send SMS via Phone interface : 1. Click Menu→ Messages→ Text Message→ Set SMS 2. -
Page 110: Record
Function Keys Features Settings 3. Press or Save soft key to save the configuration To configure SMS via Web interface 1. Click Function keys →Line Key. 2. Select the desired Key and select SMS in the Type. 3. Click the button to save the configuration. -
Page 111: Url Record
Function Keys Features Settings Note: Please contact the system administrator whether support this feature or not. URL Record The phone sends HTTP URL request to trigger a recording. Contact your system administrator for the predefined URL. To configure the URL record via Phone interface 1. -
Page 112: Shared Line
Shared Line Htek IP Phone supports “Share Call Appearance” by Broadsoft and XCast standard. This feature allows members of the SCA group to shared SIP lines and provides status monitoring (idle, active, progressing, hold) of the shared line. When there is an incoming... - Page 113 Function Keys Features Settings This feature is very useful in the boss and secretary scenario. For example, the secretary can share the boss' extension number on her phone. When there is an incoming call to the extension number of the boss, both the phones of the boss and the secretary will ring simultaneously.
-
Page 114: Public Hold
Function Keys Features Settings Public Hold The key can be configured as a public hold key. During a conversation, all members belonging to that particular SLA group can use this key to hold or resume a call. To configure the Public hold via Phone interface 1. -
Page 115: Hot Desking
Function Keys Features Settings 2. Press key to select the Private Hold in the Type field. 3. Press or Save soft key to save the configuration To configure private hold via Web interface 1. Click Function keys →Line Key. 2. Select the desired Key and select Private Hold in the Type. 3. -
Page 116: Acd
The ACD feature on the Htek IP Phone allows the ACD system to distribute calls from large volumes of incoming calls to the registered IP phone users. To use this... -
Page 117: Zero Touch
Function Keys Features Settings To configure the ACD via Phone interface Press Menu →Features →Function Keys →Line Keys as Function Keys → Line Key2(for example) Press or press key to select the ACD in the Type field. Enter the label in the Label field. Select the desired account in the Account ID field. -
Page 118: Multicast Paging
Function Keys Features Settings Press or Save soft key to save the configuration To configure the zero touch via Web interface : 1. Click Function keys →Line Key. 2. Select the desired Key and select Zero Touch in the Type. 3. -
Page 119: Sending Rtp Stream
Function Keys Features Settings Sending RTP Stream To configure a multicast paging key via Phone interface Press Menu →Features →line or Line Key →Line Key2(e.g.) Press or Switch key to select the Multicast Paging in the Type field. Enter the multicast IP address and port number (e.g., 224.5.6.20:2000) in the Value field. - Page 120 Function Keys Features Settings of an incoming multicast paging call is lower than that of the active call, it will be ignored automatically. If Disabled is selected from the pull-down list of Paging Barge, the voice call in progress will take precedence over all incoming multicast paging calls. Valid values in the Paging Barge field: ...
-
Page 121: Upgrade
Upgrade Note: The priorities of listening to multicasting addresses can be predefined: 1 being the highest priority, 10 with the lowest in priority order. Both the multicast paging sender and receiver ’s phones play a warning tone when establishing a multicast paging call. -
Page 122: Pcap Feature
Upgrade 1. Click Management → Upgrade 2. Click and then confirm the setting. Pcap Feature To use pcap via Web interface : 1. Click Management→ Tools 2. Click Start and then operation the phone 3. When finish the operation, click Stop and then click Export. 4. -
Page 123: System Log
“Upgrade Mode” field needs to be set to HTTP, respectively. “Firmware Server Path” needs to be set to a valid URL of a HTTP server, server name can be in either FQDN or IP address format. Here are examples of some valid URL. e.g. firmware.mycompany.com:5688/Htek e.g. www.mycompany.com:5688/fm/Htek e.g. 218.2.83.110 Instructions for firmware upgrade via HTTP: (1) End users can choose to download the free HTTP server from http://httpd.apache.org/... - Page 124 IP Phone. If the configured firmware server is found and a new code image is available, the UC912 will attempt to retrieve the new image files by downloading them into the UC912’s SDRAM. During this stage, the UC912’s LEDs will blink fastly until the checking/downloading process is completed.
-
Page 125: Configuration File
LAN. It is recommended to conduct firmware upgrade in a controlled LAN environment if possible. For users who do not have a local firmware upgrade server. Htek’s latest firmware is available at → Support→ http://www.htek.com Document & Firmware. - Page 126 Upgrade To Restore a configuration file: 1. Click Management → Configuration →Configure File 2. Select the xxx.bin or xxx.xml file, and then Click the , then IP Phone will reboot.
-
Page 127: Troubleshooting
Troubleshooting Troubleshooting Why is the phone LCD screen blank? Ensure your phone is properly plugged into a functional AC outlet. Ensure that the phone isn’t plugged into a plug controlled by a switch that is off. If the phone is plugged into a power strip, try plugging it directly into a wall outlet instead. -
Page 128: How To Download Xml Configuration
Troubleshooting How to download XML Configuration? Click Management→ Configuration→ How to Import Trusted CA certificate? Click Management→ Trusted CA... -
Page 129: How To Import Server Ca Certificate
Troubleshooting How to Import Server CA certificate? Click Management→ Server CA How to use Vlan? For Vlan information, please click VLAN Note... -
Page 130: How To Use Lldp
4. LLDP Feature on Htek IP Phones 5. Supported TLVS of IP Phones 6. Configuring LLDP Feature 7. DHCP VLAN 8. Open the DHCP VLAN on the Htek IP Phones 9. VLAN under Bridge Mode 10. VLAN underNAT Mode How to Set LCD and Web GUI? ... -
Page 131: How To Use Auto Provision Phonebook
Troubleshooting How to Use Auto Provision Phonebook? Click About AP Phonebook All Documents Click Documents Guide, you can get all tech files.
Need help?
Do you have a question about the UC912 and is the answer not in the manual?
Questions and answers