Table of Contents
Advertisement
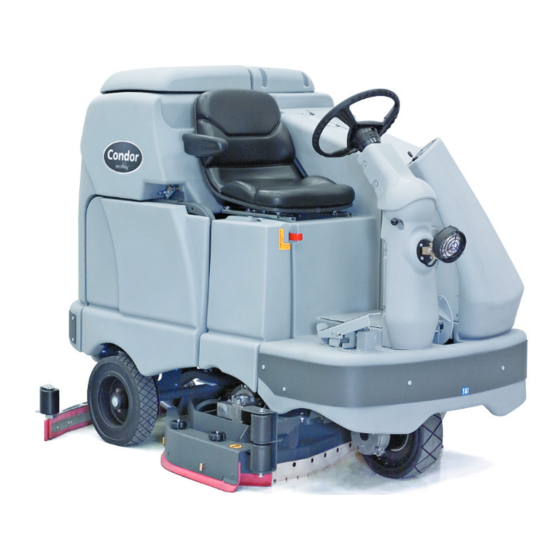
BR 1100S, BR 1300S
Models:
56413006(BR 1100S), 56413007(BR 1100S C / w/sweep system), 56413889(OBS / BR 1100S C / w/o sweep system)
56413010(BR 1300S), 56413011(BR 1300S C / w/sweep system), 56413890(OBS / BR 1300S C / w/o sweep system)
56413785(BR 1100S EDS), 56413781(BR 1100S C EDS / w/sweep system), 56413897(OBS / BR 1100S C EDS / w/o sweep system)
56413782(BR 1300S EDS), 56413783(BR 1300S C EDS / w/sweep system), 56413898(OBS / BR 1300S C EDS / w/o sweep system)
11/08 revised 2/10
FORM NO. 56043122
Printed in USA
Service Manual
Advertisement
Table of Contents
Troubleshooting

Related Manuals for Nilfisk-Advance BR 1100S


Summary of Contents for Nilfisk-Advance BR 1100S
-
Page 1: Service Manual
56413010(BR 1300S), 56413011(BR 1300S C / w/sweep system), 56413890(OBS / BR 1300S C / w/o sweep system) 56413785(BR 1100S EDS), 56413781(BR 1100S C EDS / w/sweep system), 56413897(OBS / BR 1100S C EDS / w/o sweep system) 56413782(BR 1300S EDS), 56413783(BR 1300S C EDS / w/sweep system), 56413898(OBS / BR 1300S C EDS / w/o sweep system) 11/08 revised 2/10 FORM NO. -
Page 2: Table Of Contents
DRIVE PEDAL NEUTRAL ADJUSTMENT & PEDAL REPLACEMENT ....................48 REAR WHEEL SYSTEM ..................................49-51 REAR WHEEL & BRAKE CALIPER REMOVAL ............................49 BRAKE CABLE REPLACEMENT ................................50 BRAKE CABLE ADJUSTMENT ................................50 BRAKE CALIPER PAD WEAR ADJUSTMENT ............................50 2 - FORM NO. 56043122 - BR 1100S, 1300S... - Page 3 DETERGENT (EDS) SYSTEM PLUMBING SCHEMATIC ........................80 DETERGENT (EDS) SYSTEM PREPARATION AND USE ........................81 Note: All references to right, left, front, or rear in this manual are as seen from the operator’s stand-point. FORM NO. 56043122 - BR 1100S, 1300S - 1...
-
Page 4: Introduction
56041628 (Danish, Norwegian, Swedish, Finnish) 56041629 (German, French, Dutch, Russian) 56041630 (Spanish, Portuguese, Italian, Greek) 56041631 (Estonian, Latvian, Lithuanian, Slovenian) 56041632 (Slovakian, Czech, Polish, Hungarian) 56041654 (Turkish, English) • Curtis Programmer Manual Number 56043101 2 - FORM NO. 56043122 - BR 1100S, 1300S... -
Page 5: Cautions And Warnings
Do not use on surfaces having a gradient exceeding that marked on the machine. • All doors and covers are to be positioned as indicated in the instruction manual before using the machine. SAVE THESE INSTRUCTIONS FORM NO. 56043122 - BR 1100S, 1300S - 3... -
Page 6: Specifications & Maintenance
*Net Weight: Standard machine without options, empty solution and recovery tanks, without removable scrub brushes and no batteries installed. **Gross Weight: Standard machine without options, full solution tank and empty recovery tank, with removable scrub brushes and 450 AH batteries. ***Listings for watts are maximum values. revised 2/10 4 - FORM NO. 56043122 - BR 1100S, 1300S... - Page 7 SPECIFICATIONS FORM NO. 56043122 - BR 1100S, 1300S - 5...
-
Page 8: After Use
Squeegee mount angle adjustment knob threads Once a month, apply light machine oil to lubricate the (BB): • Squeegee tool end wheels • Recovery Tank release latch • Brake Pedal (parking brake) linkage 6 - FORM NO. 56043122 - BR 1100S, 1300S... - Page 9 FIGURE 1 FORM NO. 56043122 - BR 1100S, 1300S - 7...
- Page 10 THIS PAGE INTENTIONALLY BLANK 8 - FORM NO. 56043122 - BR 1100S, 1300S...
-
Page 11: Pm Checklist
Clean Float Recovery Tank Cover Gasket C D L Recovery Tank Drain Hose & Cap Flush Squeegee Pick-Up Tool & Hose Back flush Page 1 of 2 Copyright 2005Nilfisk-Advance. 11/17/2005 revised 11/08 FORM NO. 56043122 - BR 1100S, 1300S - 9... - Page 12 W worn out leaks WORK COMPLETED BY: ACKNOWLEDGED BY: Service Technician Signature Date Customer Signature Date Page 2 of 2 Copyright 2005Nilfisk-Advance. 11/17/2005 revised 11/08 10 - FORM NO. 56043122 - BR 1100S, 1300S...
-
Page 13: Know Your Machine
Solution Shut-Off Valve Drive Pedal, Directional/Speed Hopper (cylindrical models only) Drive and Steer Wheel Emergency Stop Switch / Battery Disconnect Scrub Deck Rear Wheel Battery Compartment (under recovery tank) Recovery Tank Shut-Off Float FORM NO. 56043122 - BR 1100S, 1300S - 11... - Page 14 Recovery Tank Drain Hose Machine Battery Connector Control Panel Squeegee Tilt Adjust Knob Operator Seat Adjustment Lever Control Circuit Breaker Auxiliary Circuit Breaker Brush Motor Circuit Breaker Side Access Panel Squeegee Height Adjust Knob 12 - FORM NO. 56043122 - BR 1100S, 1300S...
- Page 15 Side Broom OFF Switch (cylindrical models w/side brooms) Scrub Speed Switch Ø.4 Regular Heavy Extreme Regular Heavy Extreme Scrub Scrub Scrub Scrub Scrub Scrub (press 1 time) (press 2 times) (press 3 times) FORM NO. 56043122 - BR 1100S, 1300S - 13...
- Page 16 OFF. Note: When operating in the wand mode and the vacuum switch is pressed the vacuum will turn off in 5-6 seconds (time delay). 14 - FORM NO. 56043122 - BR 1100S, 1300S...
-
Page 17: Know Your Machine
• This indicator will be OFF when the reduced scrub speed is enabled. Traction Control Indicator (B): • This indicator will be blue when the traction control mode is enabled. • This indicator will be OFF when the traction control mode is disabled. FORM NO. 56043122 - BR 1100S, 1300S - 15... -
Page 18: Solution System
The operator will then notice on the dash panel that its solution indicator light is fl ashing ON & OFF. Note: The machine will continue to function, the fl ashing indicator is just a low level reminder. FIGURE 1.1 16 - FORM NO. 56043122 - BR 1100S, 1300S... -
Page 19: Troubleshooting Guide
1.00 GPM 1.50 GPM 2.50 GPM BR 1300S Disk 1.00 GPM 1.50 GPM 2.00 GPM 2.25 GPM 2.50 GPM BR 1300S Cylindrical .84 GPM 1.00 GPM 1.50 GPM 2.00 GPM 2.50 GPM FORM NO. 56043122 - BR 1100S, 1300S - 17... -
Page 20: Solenoid Valve Removal
See Figure 1.4. Remove the (4) (O) Screws and disassemble the valve (be careful not to lose any internal parts). Thoroughly wash dirt from block (P) and diaphragm (Q). After reassembling, test the solenoid valve for proper operation. FIGURE 1.4 18 - FORM NO. 56043122 - BR 1100S, 1300S... -
Page 21: Scrub System
M2 actuator motor to raise or lower the scrub deck. This process is on-going in maintaining the operator’s selected scrub motor current load setting to sustain the desired brush working pressure. FORM NO. 56043122 - BR 1100S, 1300S - 19... -
Page 22: Scrub Brush System Troubleshooting
Guide in the Electrical System of this manual for specifi c fault descriptions and service repair actions. FIGURE 2.1 YEL/BLU (Partial) J1-19 CONTACTOR, LEFT BRUSH J1-16 CONTACTOR, CENTER BRUSH J1-17 CONTACTOR, RIGHT BRUSH BLK 6-1 CONTACTOR, RIGHT BRUSH CONTACTOR, CENTER BRUSH CONTACTOR, LEFT BRUSH 20 - FORM NO. 56043122 - BR 1100S, 1300S... -
Page 23: Scrub Brush Deck Removal (Disc)
Carefully slide the complete deck assembly out from underneath the machine from its left side. Note: Observe the position of the disconnected lift actuator housing and swing it to the rear to clear its mount bracket pocket. FIGURE 2.2 FORM NO. 56043122 - BR 1100S, 1300S - 21... -
Page 24: Scrub Brush Motor/Gearbox Removal (Disc)
4 edges are nicked, torn or worn beyond their ability to be adjusted. Reinstall the skirt housing assemblies onto the machine and adjust the blade for proper contact to the fl oor when the brush deck is placed in the scrub position. 22 - FORM NO. 56043122 - BR 1100S, 1300S... -
Page 25: Side Skirt Height Adjustment
NOTE: Make small adjustments to obtain good blade wiping. Do not lower the blades too much to where they fold over excessively and cause unneeded blade wear. DISK CYLINDRICAL FIGURE 2.4 FORM NO. 56043122 - BR 1100S, 1300S - 23... -
Page 26: Scrub Brush Deck Lift Actuator Removal (Disc & Cylindrical)
Service Tip: Shown in the “Electrical System” is the actuator power cord adapter P.N. 56407502 and instruction for use. This tool can be used to help position (extend or retract) the lift actuator housing for ease in installation of the bottom mounting (clevis) pin. FIGURE 2.5 24 - FORM NO. 56043122 - BR 1100S, 1300S... -
Page 27: Scrub Brush Deck Removal (Cylindrical)
Carefully slide the complete deck assembly out from underneath the machine from either side. Note: Observe the position of the disconnected lift actuator housing and swing it to the rear to clear its mount bracket pocket. FIGURE 2.6 FORM NO. 56043122 - BR 1100S, 1300S - 25... -
Page 28: Scrub Brush Belt Replacement (Cylindrical)
Then recheck for the 1/8” defl ection and make any additional adjustment to assure the proper belt performance and belt/bearing life. Reinstall the belt guard, side skirt and test the scrub system for proper operation. FIGURE 2.7 26 - FORM NO. 56043122 - BR 1100S, 1300S... -
Page 29: Scrub Brush Motor Replacement (Cylindrical)
Follow the above steps in reverse order with the exception that the drive belt tension must be reduced to allow the installation of the (4) motor mount Bolts (Q). Then see the Scrub Brush Belt Replacement (Cylindrical) section in this manual and follow its instructions to replace or re-tension the belt. FIGURE 2.8 FORM NO. 56043122 - BR 1100S, 1300S - 27... -
Page 30: Scrub Brush System Maintenance (Cylindrical)
Remove both the scrub brushes and rotate, turn end for end (weekly). See Scrub Brush Removal and Installation (Cyl) section. Inspect the scrub brush bristles for wear, the brushes should be replaced when the bristle length is 1 inch (26 mm) or less (monthly). FIGURE 2.9 28 - FORM NO. 56043122 - BR 1100S, 1300S... -
Page 31: Install The Brushes (Cylindrical)
Loosen the Black Knobs (CC) on top of the Idler Assemblies (DD) until they drop down far enough to disengage from the Notches (EE) and remove. Slide the brush into the housing, lift slightly, push and turn until it seats. Re-install the Idler Assemblies (DD) and Skirt Assemblies (BB). FIGURE 2.10 FORM NO. 56043122 - BR 1100S, 1300S - 29... -
Page 32: Side Broom System
(lowers) the side brooms in all three scrub pressures modes. Note 1: The side brooms will only run when the scrub system is turned ON and the machine is in motion (not in neutral). Note 2: Reference the “Know Your Machine” section in this manual for more detailed operation and instructions in using the side broom sweep system. FIGURE 3.1 30 - FORM NO. 56043122 - BR 1100S, 1300S... -
Page 33: Side Broom Lift Actuator Motor Replacement
Remove the hardware items (H & I) quantity (4) of each that fasten the Gear Motor Assembly (J) to the side broom bracket Weldment (K). Assemble in reverse order and test for proper working operation of the side broom motor. FIGURE 3.2 FORM NO. 56043122 - BR 1100S, 1300S - 31... -
Page 34: Recovery System
The dash panel will then display the recovery tank full indicator icon to alert the operator that the tank needs to be drained. Note: See the “Know Your Machine” section in this manual for an illustration of the full indicator icon. FIGURE 4.1 32 - FORM NO. 56043122 - BR 1100S, 1300S... -
Page 35: Vacuum/Recovery System Maintenance Checklist
To re-install the tank align each side of the Tank Bracket (O) with the chassis pins one at a time and grip the opening of the tank cover at the rear and quickly lift up to set (engage) the tank to its upright position. Follow in reverse the above steps to complete its installation. FORM NO. 56043122 - BR 1100S, 1300S - 33... - Page 36 4 - RECOVERY SYSTEM FIGURE 4.2 34 - FORM NO. 56043122 - BR 1100S, 1300S...
-
Page 37: Squeegee System
Moving the drive pedal back to the neutral/forward position opens the A1 throttle reverse output and the A2 control board loses its input voltage signal. The A2 board connector output reverses the polarity and lowers the tool back onto the fl oor. FIGURE 5.1 (Partial) FORM NO. 56043122 - BR 1100S, 1300S - 35... -
Page 38: Squeegee Lift Actuator Replacement
(parallel) to the top of the squeegee tool. Note: The Right and Left caster wheels must be adjusted equally to maintain level and even blade pressure. 36 - FORM NO. 56043122 - BR 1100S, 1300S... - Page 39 SQUEEGEE SYSTEM - 5 FIGURE 5.2 FORM NO. 56043122 - BR 1100S, 1300S - 37...
-
Page 40: Wheel Drive System
8 7 6 5 4 3 2 1 AUXILIARY THROTTLE MAIN FAULT MOTION CONTROL CONTACTOR DRIVER WIPER DRIVER POT LOW POT HIGH AUXILIARY DIRECTION DRIVER Used (11 Pins) Not Used (5 Pins) 38 - FORM NO. 56043122 - BR 1100S, 1300S... - Page 41 WHEEL DRIVE SYSTEM - 6 FIGURE 6.1 COIL MAIN CONTACTOR SWITCH, CIRCUIT BREAKER, 3 AMP (Partial) FORM NO. 56043122 - BR 1100S, 1300S - 39...
-
Page 42: Low Current Controller A1 Pin Key Detail
• Hourmeter/status display shows an error 03 fault code. • Speed controller has sensed an operation error code fault. (see the Status LED Fault Codes (TABLE 1) in the Electrical System) * = See Curtis Speed Control Troubleshooting Section. 40 - FORM NO. 56043122 - BR 1100S, 1300S... -
Page 43: Steering Chain Removal And Tensioning
Inspect the chain for looseness and binding, re-tension the chain to 3/16”-1/4” (4.7 – 6.4mm) defl ection by following the above adjustment instructions. Keep all of the steer chain links oiled to prevent excessive wear and binding. FIGURE 6.2 FORM NO. 56043122 - BR 1100S, 1300S - 41... -
Page 44: Front Drive Tire Removal
To re-assemble clean the tire rim and drive drum and apply a small amount of Anti Seize to the back side of the rim and torque all screws to 24-26ft/lbs, (32-35 Nm). FIGURE 6.3 TORQUE SPECIFICATIONS Screw Size Torque value 5/16-24 24-26 ft/lbs. (32-35 Nm) 1/4-28 10 ft/lbs. (13 Nm) 42 - FORM NO. 56043122 - BR 1100S, 1300S... -
Page 45: Electric Drive Motor Removal
1 inch (25.4 mm) in length if less than 3/8 inch (10 mm) length replace. Each brush has a wire end secured to the brush ring with a small hex screw (use a 5/16” socket to remove screw). FIGURE 6.4 FORM NO. 56043122 - BR 1100S, 1300S - 43... -
Page 46: Steering Spindle And Wheel Drive Assembly Removal
Also see the drive wheel motor removal steps in this manual section. Re-assemble in reverse order and tighten the castle nut (S) to eliminate any bearing play and then back off the nut enough to install a new cotter pin. 44 - FORM NO. 56043122 - BR 1100S, 1300S... - Page 47 WHEEL DRIVE SYSTEM - 6 FIGURE 6.5 FORM NO. 56043122 - BR 1100S, 1300S - 45...
-
Page 48: Potentiometer Removal And Testing
5, 6 & 7 (wire colors VIO/BLK, BRN/RED and WHT/BLK). The controller can be easily accessed by removing the electrical panel door located in the operator’s compartment. FIGURE 6.6 46 - FORM NO. 56043122 - BR 1100S, 1300S... -
Page 49: Potentiometer Installation And Adjustment
This will insure that the throttle is centered on neutral and there is 100% throttle when the pedal is fully depressed in the forward direction. A Curtis programmer can be used to check that there is 100% throttle in forward. FIGURE 6.7 Voltmeter COIL MAIN CONTACTOR revised 6/06 FORM NO. 56043122 - BR 1100S, 1300S - 47... -
Page 50: Drive Pedal Neutral Adjustment & Pedal Replacement
Service Tip: Also confi rm the Hourmeter/Status Display (K) is free of the error code 03 (drive system fault). If error 03 is shown the throttle is not set properly for the potentiometer and or drive pedal neutral position. Check both again and readjust. FIGURE 6.8 Right Side View Front View 48 - FORM NO. 56043122 - BR 1100S, 1300S... -
Page 51: Rear Wheel System
Special Service Note: Apply a small amount of Loctite 242 (blue) thread sealant to the wheel hub Screw (F) to prevent loosening of the screw. Also use an 11/16 inch wrench to install or remove the retainer wheel screw. FIGURE 7.1 FORM NO. 56043122 - BR 1100S, 1300S - 49... -
Page 52: Brake Cable Replacement
To adjust loosen the large outer Lock Nut (Q) then turn the inner caliper Adjustment Screw (R) in to compensate for pad wear. Note: Do not over-adjust to the point that the pad drags excessively against the brake rotor. After making the adjustment, the machine should push easily when the brake pedal is not engaged. FIGURE 7.2 50 - FORM NO. 56043122 - BR 1100S, 1300S... -
Page 53: Rear Wheel System
REAR WHEEL SYSTEM - 7 FIGURE 7.3 FORM NO. 56043122 - BR 1100S, 1300S - 51... -
Page 54: Electrical System
Coat the terminals with spray-on battery terminal coating (available at most auto parts stores). Put one of the black rubber boots over each of the terminals and connect the Battery Pack Connector (20). 52 - FORM NO. 56043122 - BR 1100S, 1300S... -
Page 55: Specific Wet Cell Battery Information
34.4-35.5 2 vertical indicator bars 33.9-34.4 33.9-34.4 Condition Indicator 1 vertical indicator bars 32.2-33.9 33.3-33.9 Located on Display Panel 0 vertical indicator bars 30.9-32.2 32.8-33.3 Low Voltage Cut Out <30.9 <32.8 FORM NO. 56043122 - BR 1100S, 1300S - 53... -
Page 56: Charging Wet Batteries
Tighten the vent caps. Wash the tops of the batteries with a solution of baking soda and water (2 tablespoons of baking soda to 1 liter of water). 54 - FORM NO. 56043122 - BR 1100S, 1300S... -
Page 57: Battery Maintenance Wet Cell Batteries
If the batteries in the machine are more than 1 year old, it’s usually best to replace the whole set, rather than replacing just one battery. APPROXIMATE STATE OF CHARGE 1.265 Initial Charged Full Charge 100% 1.265 1.225 1.190 1.155 Discharged 1.120 FORM NO. 56043122 - BR 1100S, 1300S - 55... -
Page 58: Actuator Drive Nut Adjustment
Service Tip Note: Use the above power cord adapter to help position the drive nut (in or out) for ease in actuator motor installations. FIGURE 8.3 FIGURE 8.4 revised 9/07 56 - FORM NO. 56043122 - BR 1100S, 1300S... - Page 59 Service Tip: See Figure 8.5. Note the correct orientation of the Spring Housing (E) when installing the complete motor assembly and also run the spring housing assembly to the IN (retracted) position for machine installation. FORM NO. 56043122 - BR 1100S, 1300S - 57...
-
Page 60: Curtis Controller
The text used above in the descriptions of the Curtis programmer usage is that used for the original (older) model 1307. The manual 56043101 can be referenced for the correct usage terminology for the new model programmer 1311. 58 - FORM NO. 56043122 - BR 1100S, 1300S... - Page 61 ELECTRICAL SYSTEM - 8 FIGURE 8.7 Fault Ø.4 Indicator FORM NO. 56043122 - BR 1100S, 1300S - 59...
- Page 62 This can be cleared by returning the operator’s drive pedal to neutral and cycling the key switch OFF and ON. 60 - FORM NO. 56043122 - BR 1100S, 1300S...
-
Page 63: Installation Checkout For The Curtis Speed Controller
However, it is recommended that the controller exterior be cleaned periodically, and if a handheld programmer is available, this periodic cleaning provides a good opportunity to check the controller’s diagnostic history fi le. FORM NO. 56043122 - BR 1100S, 1300S - 61... -
Page 64: Functional Overview Of Main Control Board
On all models the error will display as a mechanical wrench symbol followed by a two-digit code. 03 would be a drive system fault. EX: 29 would be an open vacuum motor. FIGURE 8.8 62 - FORM NO. 56043122 - BR 1100S, 1300S... -
Page 65: Main Controller Error Codes
3. Check the current draw Current load 3.2 Amps or over will and compare specifi cation data to the left if motor shows high Amp draw replace. cause code 13 pump motor overload. FORM NO. 56043122 - BR 1100S, 1300S - 63... - Page 66 (Wht/Grn & Blu/Brn) or defective motor M3. 3. Check for 36 Volts at the actuator motor if 0 Volts replace the main control board A2. revised 7/09 64 - FORM NO. 56043122 - BR 1100S, 1300S...
-
Page 67: Main Controller Error Codes
• A short circuit is a parallel path of very low resistance, often caused accidentally. • With low resistance there is an excessive amount of current. • The excessive current will either melt the wires or open a fusible link. FORM NO. 56043122 - BR 1100S, 1300S - 65... -
Page 68: Main Controller Diagnostic Service Test Mode
FIGURE 8.9 AD Wheel Drive Transport Mode Status AE Battery Display Status AF Solution Tank Low Level Status Side Broom OFF/UP Switch (only used on cylindrical models w/side brooms) Scrub Speed Switch 66 - FORM NO. 56043122 - BR 1100S, 1300S... - Page 69 Off - Brush motor output is off and there is no brush motor current sensed. Steady Blue - Brush motor output is on and there is normal brush motor current sensed. FORM NO. 56043122 - BR 1100S, 1300S - 67...
- Page 70 fl ow through the actuator. It will fl ash blue if no actuator current fl ow is sensed (actuator at limit, open circuit, open output driver). The horn switch has no effect in this state. 68 - FORM NO. 56043122 - BR 1100S, 1300S...
- Page 71 This switch is used to toggle the running state of the side broom motors. Pressing and releasing this switch will alternately turn the side broom motors on and off. The LED indicator provides the following status information: – Side broom motors output is off. – Side broom motors output is on. Steady Blue FORM NO. 56043122 - BR 1100S, 1300S - 69...
-
Page 72: Main Control Programming Options
To save the setting, press the scrub off switch. The display will show the key switch icon asking the user to reset the machine. The new setting will be saved and will remain in effect until it is changed again. Turn the key off to exit. 70 - FORM NO. 56043122 - BR 1100S, 1300S... - Page 73 To save the setting, press the scrub off switch. The display will show the key switch icon asking the user to reset the machine. Turn the key switch to the off position and the new setting will be saved. This setting will remain in effect until it is changed again. FORM NO. 56043122 - BR 1100S, 1300S - 71...
- Page 74 BR 1300S Cylindrical .84 GPM 1.00 GPM 1.50 GPM 2.00 GPM 2.50 GPM DETERGENT SETTINGS (TABLE 4) Normal detergent setting 10% less than normal detergent setting 10% more than normal detergent setting 72 - FORM NO. 56043122 - BR 1100S, 1300S...
- Page 75 Pressing scrub off switch will save the new setting and display the key switch icon. Then turn the key switch to the off position, the new settings will remain in effect until it is changed again. FORM NO. 56043122 - BR 1100S, 1300S - 73...
- Page 76 NOTE: Program to the desired ratio needed when not using a detergent container (cartridge) that uses the magnetic slider. Also when the magnetic slider is not used the #8 default setting (1:256) will be automatically selected. 74 - FORM NO. 56043122 - BR 1100S, 1300S...
- Page 77 FACTORY DEFAULT: ENABLE The BR 1100S series is equipped with a feature that will automatically shut off the vacuum and scrub systems and display a recovery tank full icon on the control panel display when the recovery tank becomes full. If problems are encountered with the vacuum shutoff feature, such as the vacuum shutting off even when the recovery tank is not full, this feature can be turned off.
- Page 78 The purge system will start (run) both the detergent and solution pumps for 20 seconds. Both switch indicator lights will fl ash ON/OFF once a second. The display will show the key switch icon when the purge is fi nished. revised 7/09 76 - FORM NO. 56043122 - BR 1100S, 1300S...
-
Page 79: Electrical Component Location
Pump, Accessory (optional) Pump, Chemical Metering (EDS ™ Potentiometer, 5K Ohm (Throttle) Resistor Assy (Deck Type Selection) Switch, Key Switch, Seat Switch, Battery Interlock (optional)* Switch, Solution Empty *Used with battery roll-out option. FORM NO. 56043122 - BR 1100S, BR 1300S- 77... -
Page 80: Wiring Diagram
(LEFT MOTOR ON 2 MOTOR DECKS) MOTOR, CENTER BRUSH MOTOR, CENTER BRUSH BLU/YEL CONTACTOR, LEFT BRUSH CONTACTOR, LEFT BRUSH (ON 3 MOTOR DECKS) (ON 3 MOTOR DECKS) MOTOR, LEFT BRUSH MOTOR, LEFT BRUSH 78 - FORM NO. 56043122 - BR 1100S, BR 1300S... -
Page 81: Wiring Schematic
NOTE: WHEN BATTERY ROLL OUT OPTION PUMP, SOLUTION CONTROL PUMP, SOLUTION CONTROL POT. GROUND POT. GROUND IS USED, X9 CONNECTS TO X10, AND X51 IS (OPTIONAL) (OPTIONAL) POT. 5K OHM POT. 5K OHM NOT USED. FORM NO. 56043122 - BR 1100S, BR 1300S- 79... -
Page 82: Detergent (Eds) System
Shut Off Valve Inline Solution Filter Solution Pump Detergent Tank Detergent Pump Drain Hose Drain Plug Solution Solenoid Valve Reducer Tee Y Barb, Fitting Solution Manifold (Disc Models) Coupler Barb 80 - FORM NO. 56043122 - BR 1100S, BR 1300S... -
Page 83: Detergent (Eds) System Preparation And Use
Check the wire connections at the detergent pumps for correct wiring polarity and corrosion free and tight connections. With the system activated touch the pumps to feel them pulsate when operating. revised 7/09 FORM NO. 56043122 - BR 1100S, BR 1300S- 81... - Page 84 Nilfi sk-Advance A/S Sognevej 25 DK-2605 Brøndby Denmark Tel: +45 43 23 81 00 Fax: +45 43 43 77 00 www.nilfi sk-advance.com...
Need help?
Do you have a question about the BR 1100S and is the answer not in the manual?
Questions and answers