Table of Contents
Advertisement
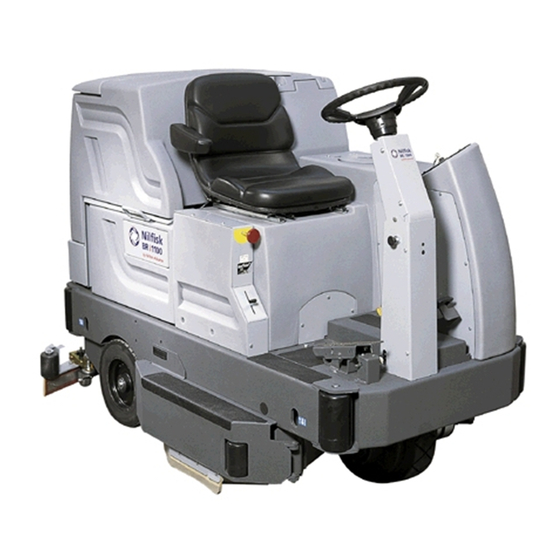
Hydro-Retriever
Hydro-Retriever
BR 1100, 1100C, 1100C-XL
SERVICE MANUAL
Advance MODELS 56410000 (disc), 56410350 (cyl.),
56410001 (2042), 56410500 (cyl. rollout),
56410501 (disc rollout), 56410502 (2042 rollout)
Nilfisk MODELS 56410002 (disc), 56410351 (cyl.),
56410425 (1100C-XL)
3800
™
2042
™
1/01 revised 2/05 Form Number 56043058
Advertisement
Table of Contents
Troubleshooting

Related Manuals for Nilfisk-Advance Hydro-Retriever 3800


Summary of Contents for Nilfisk-Advance Hydro-Retriever 3800
- Page 1 Hydro-Retriever 3800 ™ Hydro-Retriever 2042 ™ BR 1100, 1100C, 1100C-XL SERVICE MANUAL Advance MODELS 56410000 (disc), 56410350 (cyl.), 56410001 (2042), 56410500 (cyl. rollout), 56410501 (disc rollout), 56410502 (2042 rollout) Nilfisk MODELS 56410002 (disc), 56410351 (cyl.), 56410425 (1100C-XL) 1/01 revised 2/05 Form Number 56043058...
-
Page 2: Table Of Contents
TABLE OF CONTENTS GENERAL INFORMATION ..............................2 SAFETY INSTRUCTIONS ..............................3 SPECIFICATIONS & MAINTENANCE ..........................4-6 PM CHECKLIST ................................7-8 KNOW YOUR MACHINE ............................... 9-13 SOLUTION SYSTEM ..............................14-17 FUNCTIONAL OVERVIEW .............................. 14 TROUBLESHOOTING ..............................15 SOLUTION SYSTEM MAINTENANCE ..........................15 SOLUTION SOLENOID REMOVAL .......................... - Page 3 TABLE OF CONTENTS REAR WHEEL SYSTEM .............................. 49-51 BRAKE SHOE ASSEMBLY INSPECTION ........................49 REMOVAL OF BRAKE ASSEMBLY ..........................49 INSTALLATION OF BRAKE SHOE ASSEMBLY ......................50 BRAKE CABLE ADJUSTMENT ............................51 BRAKE CABLE REMOVAL .............................. 51 ELECTRICAL SYSTEM ..............................52-83 BATTERIES / CHARGERS ............................
-
Page 4: General Information
Repairs, when required, should be performed by your Authorized Nilfisk-Advance Service Center, who employs factory trained service personnel, and maintains an inventory of Nilfisk-Advance original replacement parts and accessories. Call the NILFISK-ADVANCE DEALER named below for repair parts or service. Please specify the Model and Serial Number when discussing your machine. -
Page 5: Safety Instructions
This machine is not suitable for picking up hazardous dust. • Do not use scarifier discs and grinding stones. Nilfisk-Advance will not be held responsible for any damage to floor surfaces caused by scarifiers or grinding stones (can also cause damage to the brush drive system). -
Page 6: Specifications & Maintenance
SPECIFICATIONS 3800 / BR 1100 ‘disc’ 3800 / BR 1100 ‘cyl.’ 2042 / BR 1100C-XL General Specifications English (Metric) Machine Length 73.5 in. (186.7 cm) 73.5 in. (186.7 cm) 82 in. (208 cm) Machine Length (with squeegee) 74.25 in. (189 cm) 74.25 in. - Page 7 SPECIFICATIONS 47.5“ (121 cm) 44.8“ 51“ (114 cm) (130 cm) 3800/BR 1100 FRONT VIEW 2042/BR 1100C-XL FRONT VIEW 55.8“ (142 cm) 74.25“ (189 cm) 82.8“ (210 cm) 2042/BR 1100C-XL only SIDE VIEW revised 7/02 FORM NO. 56043058 Hydro-Retriever™ 3800 / 2042 / BR 1100 - 5...
-
Page 8: Maintenance Schedule
Note: See the individual machine system sections for maintenance information. * Cylindrical models only. ** Have Nilfisk-Advance: Check vacuum motor carbon brushes (Qty 2) once a year or after 300 operating hours. Check brush motor carbon brushes (Qty 4) once a year or after 500 operating hours. -
Page 9: Pm Checklist
L M W Recovery Tank Drain Hose & Cap C D L Squeegee Pick-Up Hose Back flush C D L Page 1 of 2 Copyright 2001 Nilfisk-Advance. 4/18/01 revised 10/01 FORM NO. 56043058 Hydro-Retriever™ 3800 / 2042 / BR 1100 - 7... - Page 10 ACKNOWLEDGED BY: Service Technician Signature Date Customer Signature Date COMMENTS: ___________________________________________________________________________ ___________________________________________________________________________ ___________________________________________________________________________ ___________________________________________________________________________ ___________________________________________________________________________ ___________________________________________________________________________ ___________________________________________________________________________ ___________________________________________________________________________ Page 2 of 2 Copyright 2001 Nilfisk-Advance. 4/18/01 8 - FORM NO. 56043058 Hydro-Retriever™ 3800 / 2042 / BR 1100 revised 10/01...
-
Page 11: Know Your Machine
KNOW YOUR MACHINE Recovery Tank Covers Emergency Stop Switch / Battery Disconnect Solution Tank Fill Cover Scrub Brush Deck and Side Skirts Operator Seat w/Safety Switch Rear Wheel Solution Tank Drain Hose Battery Compartment Steering Wheel Adj. Tilt Knob Recovery Tank Shutoff Float Brake Pedal &... - Page 12 KNOW YOUR MACHINE CONTROL PANEL Main Power Indicator Solution System Fault Indicator Scrub Off Button Normal Scrub Button Heavy Scrub Button Solution System Indicator Vacuum Button Solution Button Battery Condition Indicator Hourmeter/Status Display Master On/Off Key Switch Scrub Mode Off Indicator Normal Scrub Mode Indicator Heavy Scrub Mode Indicator Vacuum System Indicator...
-
Page 13: Functional Description Of Control Buttons
KNOW YOUR MACHINE FUNCTIONAL DESCRIPTION OF CONTROL BUTTONS: The controls were designed with one touch operation in mind. For single pass scrubbing the user can simply press one button and all systems on the machine will be ready to go. For most single-pass scrubbing operations, the operator should only need to use the first three buttons on the control panel. -
Page 14: Description Of Indicators On The Control Panel
KNOW YOUR MACHINE DESCRIPTION OF INDICATORS ON THE CONTROL PANEL: In general, the following guidelines apply to the control panel indicators: A steady red indicator means that the function is inhibited for some reason. For example, if the scrub system is off and the operator is not on the seat, the scrub system indicator will be red indicating that the system cannot be turned on until the operator is on the seat. -
Page 15: Know Your Machine
KNOW YOUR MACHINE DESCRIPTION OF INDICATORS ON THE CONTROL PANEL: (CONTINUED) Main Power Indicator (23): • This indicator will be GREEN when the key switch is ON. • This indicator will flash RED if there is a system fault that requires turning the Master ON/OFF Key Switch (33) off to reset. •... -
Page 16: Solution System
SOLUTION SYSTEM FUNCTIONAL OVERVIEW The plastic (polyethylene) molded main body structure fulfills three (design) functional uses. They are the platform for the operator’s seat, mount location cavity for the electrical panel and as the storage tank for the machine’s scrubbing solution. The solution tank fill capacity is 53 gallons (200 L). -
Page 17: Troubleshooting
SOLUTION SYSTEM FIGURE 2 YEL/BLK RED/BRN ORN/GRN GRN/WHT ORN/GRN ORN /GRN RED/BRN RED/WHT BRN /WHT GRN/WHT RED/WHT BRN/WHT TROUBLESHOOTING GUIDE Problem Possible Cause Inadequate or no solution flow No solution in the tank Main solution flow control valve lever is in the off position Clogged solution filter, valves, hoses &... -
Page 18: Solution Solenoid Removal
SOLUTION SYSTEM SOLUTION SOLENOID REMOVAL FIGURE 3 Drain the solution tank or put the flow control lever in the full OFF position to prevent solution loss. With the operator seated turn on the key switch then press FRONT the normal scrub button to lower the scrub deck to the floor. Note: Don’t turn the key switch off until disconnecting the battery pack (push emergency disconnect knob (12)). -
Page 19: Solution Flow Control Valve Removal
SOLUTION SYSTEM SOLUTION FLOW CONTROL VALVE REMOVAL Drain the solution tank using the drain hose. Open the right side scrub brush access door then remove the skirt assembly (2 knobs) to access the valve. See Figure 5. Loosen the (2) (I) Hose Clamps and pry off the inlet & outlet solution hoses from the valve’s barbed fittings. Remove the Retainer Ring (J) from the solution control rod and separate from the valve handle. -
Page 20: Scrub Brush System
SCRUB BRUSH SYSTEM FUNCTIONAL OVERVIEW • Disc Brush System Overview See Figure 3. The machines Hydro-Retriever ™ 3800 and BR 1100 (model #’s 56411000 & 56411002) use the disc type scrub system. A single 3HP 36V DC permanent magnet motor is connected at both ends with (2) 90-degree gearboxes that drive the two 20" disc (rotary) brushes. •... -
Page 21: Troubleshooting
SCRUB BRUSH SYSTEM SCRUB BRUSH SYSTEM TROUBLESHOOTING On all models (disc & cylindrical) the scrub system’s major electrical components are monitored by the main controller (A3) to detect any system function failures (error codes). The system components covered are the brush motor(s) (M2 & M11), brush solenoid (K3) and brush lift actuator motor (M1). -
Page 22: Scrub Brush Deck Removal (D)
SCRUB BRUSH SYSTEM SCRUB BRUSH DECK REMOVAL (DISC) Open both the left and right side brush housing doors. Then remove both splash skirts and scrub brushes. Place wood blocking (2 by 4) under both brush drive discs and lower the deck to the floor by pressing the normal scrub panel button. After brush deck is in the lowered position don’t turn the key switch off until disconnecting the battery pack (push in the emergency disconnect (12)). -
Page 23: Scrub Brush Motor Removal (D)
Note: Apply a small amount of grease or “Never Seize” to the gear box output shaft when reinstalling the drive Hub(s) (L). Note: The gearbox output shaft rotates the brush holders in the opposite direction of other Nilfisk-Advance auto scrubbers (see below). FRONT FRONT revised 10/01 FORM NO. -
Page 24: Scrub Brush Gearbox Replacement (D)
SCRUB BRUSH SYSTEM SCRUB BRUSH GEAR BOX REPLACEMENT If the need to replace a disc scrub drive gearbox should arise, please follow the re-assembly instructions below. Installing the shaft keys-See Figure 4 Install (1) Shaft Key (U) into each end of motor shaft, you may need to use a hammer to complete this operation. Applying Never Seize Starting with the back-end of the motor. - Page 25 SCRUB BRUSH SYSTEM Leads at 12:00 FIGURE 4 Commutator End Back-End Apply Never Seize Shafts facing LEFT VIEW FIGURE 5 Motor terminals must be on the right hand side of the machine, pointing towards the front of the machine. FRONT revised 12/02 FORM NO.
-
Page 26: Scrub Brush Side Skirt Replacement (D)
SCRUB BRUSH SYSTEM SCRUB BRUSH SIDE SKIRT REPLACEMENT (DISC) See Figure 6. Loosen the (4) side skirt Retainer Knobs (AB) (2 per side) and pull the Skirt Assemblies (AC) off from the scrub deck. Remove all the hardware that holds both the (short and long) blades and retainers to the skirt housing. Each of the (2) long blades has 4 working edges and the (2) short blades have 2. -
Page 27: Scrub Brush Lift Actuator Removal (D & C)
SCRUB BRUSH SYSTEM SCRUB BRUSH LIFT ACTUATOR REMOVAL (DISC & CYLINDRICAL) Note: All new replacement actuator motors are not shipped with the lift nut pre-adjusted for any machine model applications. If possible lower the scrub deck with the scrub brushes installed. Don’t turn the key switch off until disconnecting the battery pack by using the emergency disconnect (12). -
Page 28: 3800 / 2042 Scrub Brush Deck Assembly Removal (C)
SCRUB BRUSH SYSTEM SCRUB BRUSH DECK ASSEMBLY REMOVAL (CYLINDRICAL) Lower the scrub deck with the cylindrical brushes installed. Note: Don’t turn the key switch off until disconnecting the battery pack by pushing in the emergency disconnect knob (12). This procedure is done to prevent the scrub deck from automatically raising itself when the key is turned off. -
Page 29: Scrub Brush Deck Leveling Adjustment (C)
SCRUB BRUSH SYSTEM SCRUB BRUSH DECK LEVELING ADJUSTMENT (CYLINDRICAL) See Figure 9. On a level floor surface put the scrub deck in the raised (stored) position and measure the distance from the floor to the bottom edge of the scrub deck at all Four Corners as shown. The four measurements should be approximately 2-1/2 inches (64 mm). -
Page 30: Scrub Brush Motor(S) Removal (C)
SCRUB BRUSH SYSTEM SCRUB BRUSH MOTOR(S) REMOVAL (CYLINDRICAL) See Figure 10. First open both the left and right side brush housing doors, and then remove the Hairpin (N) from both the scrub deck skirt assemblies and swing them open. Next remove the Belt Guards (O) (4 screws per side). With an operator in the driver’s seat with the key switch ON and the normal scrub function selected press the drive pedal to start the scrub brushes and observe which brush motor needs to be removed. -
Page 31: Scrub Brush Removal And Installation (C)
SCRUB BRUSH SYSTEM FIGURE 11 Brush Left Motor Right Motor FRONT – Belt – Belt – Brush SCRUB BRUSH REMOVAL AND INSTALLATION (CYLINDRICAL) Make sure the key switch is off and disconnect the battery pack before servicing. To access the brushes, swing open both the side skirt assemblies. See Figure 10. Note: The skirts are held in place by Hairpins (N) on each side, remove the pins and swing the skirt assemblies out of the way. -
Page 32: Side Broom System (2042 / Br 1100C-Xl)
SIDE BROOM SYSTEM (2042 / BR 1100C-XL) GENERAL FUNCTIONAL OVERVIEW Side Broom System 2042 / BR 1100C-XL The models 2042 & BR 1100C-XL only are equipped with two (left & right) 20-inch front corner mounted rotary sweeping brooms. Light sweepable debris can easily be directed into the two main cylindrical scrub brushes and collected in a removable debris tray. -
Page 33: 2042 / Br 1100C-Xl Sweep Frame Assembly Removal
SIDE BROOM SYSTEM (2042 / BR 1100C-XL) 2042 / BR 1100C-XL SWEEP FRAME ASSEMBLY REMOVAL Lower the side brooms to the floor, then shut off machine power by pushing in the emergency quick disconnect knob (12). From underneath front of machine unplug the side broom system wire harness connector. Also cut and remove any tie straps securing harness to chassis. -
Page 34: Side Broom Motor(S) Removal
SIDE BROOM SYSTEM (2042 / BR 1100C-XL) SIDE BROOM MOTOR(S) REMOVAL Have the side brooms in the up (stored) position, then shut off machine power by pushing in the emergency quick disconnect knob (12). See Figure 1. Next remove the Corner Bumper Roller (N) from the machine side requiring the broom motor repair. See Figure 3. -
Page 35: Recovery System
RECOVERY SYSTEM FUNCTIONAL OVERVIEW Vacuum / Recovery System General Dirt and water are lifted off the floor into the recovery tank by airflow, created by a 3-Stage 36V vacuum motor. The wastewater and air enter the vacuum system at the squeegee tool, through small openings (notches) located in the front squeegee blade. The small openings are the entrance points for the water and air, and help speed up the airflow producing the suction to lift the wastewater off of the floor. -
Page 36: Vacuum / Recovery System Service Maintenance Checklist
RECOVERY SYSTEM VACUUM / RECOVERY SYSTEM SERVICE MAINTENANCE CHECKLIST Whenever there is a vacuum problem, it’s best to check over the entire system. Use the checklist below as a guide, to thoroughly check the vacuum system. Clean built-up dirt from the inside of the squeegee tool. Replace the squeegee blades if they are nicked or torn. -
Page 37: Recovery System
RECOVERY SYSTEM FIGURE 2 Squeegee FRONT revised 12/02 FORM NO. 56043058 Hydro-Retriever™ 3800 / 2042 / BR 1100 - 35... -
Page 38: Squeegee System
SQUEEGEE SYSTEM SQUEEGEE SYSTEM LIFT MOTOR OVERVIEW The squeegee pickup tool is raised and lowered by a 36V actuator motor assembly mounted horizontally in the left rear of the chassis underneath the recovery tank. The main control board assembly A3 regulates (manages) the machine’s squeegee tool system input and output operating functions. - Page 39 SQUEEGEE SYSTEM FIGURE 2 FRONT revised 12/02 FORM NO. 56043058 Hydro-Retriever™ 3800 / 2042 / BR 1100 - 37...
-
Page 40: Squeegee Maintenance / Adjustment
SQUEEGEE SYSTEM SQUEEGEE MAINTENANCE If the squeegee leaves narrow streaks of water, the blades may be dirty or damaged. Remove the squeegee, rinse it under warm water and inspect the blades. Reverse or replace the blades if they are cut, torn, wavy or worn. To Reverse or Replace the Rear Squeegee Wiping Blade... -
Page 41: Squeegee System
SQUEEGEE SYSTEM FIGURE 3 FRONT FIGURE 4 revised 12/02 FORM NO. 56043058 Hydro-Retriever™ 3800 / 2042 / BR 1100 - 39... -
Page 42: Wheel Drive System
WHEEL DRIVE SYSTEM GENERAL FUNCTIONAL OVERVIEW A 2.7 HP separately excited (field & armature) 36V DC motor/gear/wheel unit (M6) is used to propel the machine. A Curtis model 1243 PMC solid state speed controller (A1) regulates (outputs) the variable speed Fwd/Rev wheel drive motor functions. The controller unit is located to the left of the operator seat, behind the electrical access panel. - Page 43 WHEEL DRIVE SYSTEM FIGURE 1 YEL/BLK ORN/GRN GRN/WHT RED/BRN GRN/WHT ORN/GRN ORN/GRN RED/BRN RED/WHT BRN/WHT To M2 or (M2 & M11) BLK/WHT BLK/WHT GRN/WHT GRN/WHT WHT/BRN BRN/WHT BLU/RED GRN/WHT FRONT revised 12/02 FORM NO. 56043058 Hydro-Retriever™ 3800 / 2042 / BR 1100 - 41...
-
Page 44: Wheel Drive Troubleshooting Guide
WHEEL DRIVE SYSTEM Low Current controller A1 Pin Key Detail Pin # Wire Color Controller Pin Description & Function Open not used Red/Wht Fault 1: Controller fault output to operator control panel LED status display. Open not used Blu/Red Main Contactor Driver: Battery (-) output to main contactor K1. Open not used Throttle Control: 0-5V electronic throttle motor speed input. -
Page 45: Steering Chain Adjustment
WHEEL DRIVE SYSTEM STEERING CHAIN ADJUSTMENT The steering chain should be adjusted so that there is about 1/4" (6 mm) total deflection with moderate pressure applied at point (A) shown in Figure 2. Loosen the bolt and lock nut on the chain idler sprocket then move the idler sprocket in the slot to adjust chain tension and retighten. STEERING CHAIN REMOVAL See Figure 2. -
Page 46: Steering Spindle And Wheel Drive Assembly Removal
WHEEL DRIVE SYSTEM STEERING SPINDLE AND WHEEL DRIVE ASSEMBLY REMOVAL WARNING! Turn the main power key switch (33) to the OFF position and disconnect the battery pack by pushing in the emergency disconnect knob (12). Next set machine parking brake (6) and block both rear wheels so machine can’t roll. See Figure 3. - Page 47 WHEEL DRIVE SYSTEM FIGURE 4 FRONT Steer Plate Spindle Weldment Drive Wheel Motor Mount revised 12/02 FORM NO. 56043058 Hydro-Retriever™ 3800 / 2042 / BR 1100 - 45...
-
Page 48: Gear Housing Removal
WHEEL DRIVE SYSTEM GEAR HOUSING REMOVAL Follow steps 1-7 of the Steering Spindle and Wheel Drive Assembly Removal section. Follow steps 1-2 & 4 in the Drive Tire Removal section. See Figure 6. Remove the (8) (K) socket headed cap screws (M8x30 mm) from the Motor Flange (L) (use a 6 mm hex socket wrench). Service Tip: Before disassembling punch witness marks into both gear housing and motor mount flanges to reference when re-assembling. - Page 49 WHEEL DRIVE SYSTEM FIGURE 6 FRONT Note position of TORQUE SPECIFICATIONS fill hole to check oil level and fill. Screw Size Torque M10x 35 59 Ft/lb (80Nm) M8x30 29.5 Ft/lb (40Nm) M10x30 59 Ft/lb (80Nm) M5x20 7.4 Ft/lb (10Nm) revised 12/02 FORM NO.
-
Page 50: Wheel Drive System
WHEEL DRIVE SYSTEM REMOVAL OF THE CARBON BRUSH END-BELL HOUSING Important Service Note: The motor end-bell housing has (4) small cap screws on the housing end; these fasteners are not for securing the end- bell to the field housing. Do not remove, their purpose is to fix the brush ring to the end bell casting. Read instructions below to remove the brush end-bell from the motor housing. -
Page 51: Rear Wheel System
REAR WHEEL SYSTEM BRAKE SHOE ASSEMBLY INSPECTION WARNING! Never work under machine without safety stands or blocking to support the machine. See Figure 1. Place wheel chokes on the opposite wheel to be serviced then loosen the hub retainer Bolt (A). Open the brush skirt-housing door and position a jack on the frame rail and lift machine 1- 2 inches off the floor and secure with blocking or safety stand. -
Page 52: Installation Of Brake Shoe Assembly
REAR WHEEL SYSTEM INSTALLATION OF BRAKE SHOE ASSEMBLY See Figure 1. Start with the Brake Arm (D) attached to the Brake Equalizer Bar (J). Next install the Brake Shoe Assembly (H) and rear wheel hub assembly onto the axle shaft. See Figure 2A. -
Page 53: Brake Cable Adjustment
REAR WHEEL SYSTEM BRAKE CABLE ADJUSTMENT Block rear wheels then disconnect main battery cables (POS. & NEG.) and remove the battery box. Note: Use optional battery box lifting straps PN 56409067 to help lift the complete box without removing the batteries. See Figure 3. -
Page 54: Electrical System
Electrical components in this machine can be severely damaged if the batteries are not installed and connected properly. Batteries should be installed by Nilfisk-Advance or by a qualified electrician. Remove the batteries from their shipping crate and carefully inspect them for cracks or other damage. If damage is evident, contact the carrier that delivered them or the battery manufacturer to file a damage claim. -
Page 55: Charging The Batteries
ELECTRICAL SYSTEM DESCRIPTION OF THE BATTERY CONDITION INDICATORS The Battery Condition Indicator (17) will give an indication of the state of charge of the batteries. The battery condition indicator will retain the state-of-charge even if the key has been turned off. The state-of-charge indication is reset to full charge when the batteries have been recharged. It is also possible to choose between two different low voltage thresholds depending on whether maintenance free or standard batteries are being used (have qualified service engineer perform this selection*). -
Page 56: Actuator Drive Nut Adjustment
ELECTRICAL SYSTEM ACTUATOR DRIVE NUT ADJUSTMENT This manual section explains the steps for adjusting the drive nut settings for the machine’s two lift actuator motors. Reference the chart below to find the IN & OUT dimensional specification for the specific actuator motor needing adjustment. Part # Actuator Motor Drive Nut IN Position... - Page 57 ELECTRICAL SYSTEM Instructions for Scrub Brush Lift Actuator Drive Nut Adjustment FIGURE 4 See Figures 4 & 5. On a new scrub lift actuator motor remove (spin-off) the Drive Nut (A) and install the short compression Spring (C) onto the actuator (lead screw) shaft first.
-
Page 58: Curtis Speed Control
ELECTRICAL SYSTEM CURTIS CONTROLLER DIAGNOSTICS Diagnostics Method A: Uses the machine’s control panel LED status display. FUNCTION OF THE SPEED CONTROLLER STATUS LIGHT AND DISPLAY The Curtis 1243 speed control will output a fault code if there is a problem associated with the speed control and wheel drive system. See Figure 6. - Page 59 ELECTRICAL SYSTEM STATUS LED FAULT CODES (TABLE 1) STATUS LIGHT EXPLANATION POSSIBLE CAUSE CODE DISPLAY No power or defective controller Solid On Controller or microprocessor fault Current sensor error 1. Controller defective. O OO Hardware failsafe error 1. Controller defective. O OOO M- fault or motor output short 1.
-
Page 60: Installation Checkout For Controller
ELECTRICAL SYSTEM INSTALLATION CHECKOUT FOR THE CURTIS SPEED CONTROLLER SAFETY! The 1243 controller is inherently a high power device. When working around any battery powered vehicle, proper safety precautions should be taken. These include, but are not limited to: proper training, wearing eye protection, avoiding loose clothing and jewelry, and using insulated wrenches. -
Page 61: Programmer Operation
ELECTRICAL SYSTEM PROGRAMMER OPERATION The optional universal Curtis PMC handheld programmer / PART NUMBER 56409441 (Figure 7) allows you to program, test, and diagnose Curtis PMC 1243 controllers. The programmer is powered by the host 1243 controller, via a modular connector located in the front of the controller. FIGURE 7 A 4-line LCD display is presented in this... - Page 62 ELECTRICAL SYSTEM PROGRAMMER OPERATION (CONTINUED) The programmer is operated via an 8-key keypad. Three keys select operating modes (Program, Test, Diagnostics), two scroll the display up and down, and two change the values of selected parameters. The eighth key, the MORE INFO key, is used to display further information about selected items within any of the three standard modes.
- Page 63 ELECTRICAL SYSTEM PROGRAMMER OPERATION (CONTINUED) The two CHANGE VALUE arrow keys are used to increase or decrease the value of a selected menu item. Like the SCROLL DISPLAY arrow keys, the CHANGE VALUE arrow keys can be pressed repeatedly or be held down. The longer a key is held, the faster the parameter changes.
- Page 64 ELECTRICAL SYSTEM OPERATING MODES (CONTINUED) The MORE INFO key, when used in the Program mode, displays a bar graph along with the minimum and maximum values possible for the selected parameter. Parameters can be changed either from the main Program Menu or after the MORE INFO key has been pressed and the additional information is being displayed.
- Page 65 ELECTRICAL SYSTEM OPERATING MODES (CONTINUED) DIAGNOSTICS MODE In the Diagnostics mode, accessed by pressing the DIAGNOSTICS key, currently active faults detected by the controller are displayed. The MORE INFO key, when used in the Diagnostics mode, causes additional information to be displayed about the selected item. The following is not a menu as such, but a list of possible messages you may see displayed when the programmer is operating in either of the Diagnostics modes.
- Page 66 ELECTRICAL SYSTEM OPERATING MODES (CONTINUED) SPECIAL PROGRAM MODE The Special Program mode allows you to perform a variety of tasks, most of which are self-explanatory. Through the Special Program Menu, you can revert to earlier settings, save controller settings into the programmer memory, load the controller settings from the programmer into a controller, clear the controller’s diagnostic history, adjust the contrast of the programmer’s LCD display, select the language to be displayed by the programmer, and display basic information (model number, etc.) about the controller and the programmer.
- Page 67 ELECTRICAL SYSTEM OPERATING MODES (CONTINUED) SPECIAL DIAGNOSTICS MODE In the Special Diagnostics mode, the controller’s diagnostic history file is displayed. This file includes a list of all faults observed and recorded by the controller since the history was last cleared. (Note: The maximum and minimum temperatures recorded by the controller are included in the Test Menu).
-
Page 68: Main Control Board Functional Overview
ELECTRICAL SYSTEM FUNCTIONAL OVERVIEW OF MAIN CONTROL BOARD The primary function of the main control board is to position the scrubbing brush(s) with respect to the floor surface using a lift actuator motor to maintain the correct brush pressure and current draw of the brush motor. When the normal scrub or heavy scrub switch is depressed this will lower the scrub deck to the operating position and by activating the foot pedal start the brush motor. - Page 69 ELECTRICAL SYSTEM MAIN CONTROLLER ERROR CODES (CONTINUED) Error Code Fault Description Troubleshooting Action Err07 Scrub motor overload Check for binding in rotation of brushes or improper brush lift actuator operation. 2. Check the negative supply cable at the brush motor for a wiring problem or improper modifications (this is a special cable and must be replaced with the original OEM PN 56410113).
- Page 70 ELECTRICAL SYSTEM MAIN CONTROLLER ERROR CODES (CONTINUED) Error Code Fault Description Troubleshooting Action Err29 Vacuum contactor coil overload 1. Check for correct wiring. 2. Check coil resistance if below 183 ohms replace solenoid. Err30 Vacuum contactor coil severe overload 1. Same as error code 29. 2. Check for a short circuit in wiring or solenoid coil.
- Page 71 ELECTRICAL SYSTEM ADDITIONAL ERROR CODE TROUBLESHOOTING INFORMATION When entering the main controller error fault recall mode and a fault Err01 or Err02 has been detected, the service person may see a second set of error codes. Refer to the chart below that shows the additional fault error codes by machine system. These secondary codes give information on a specific failure that is internal on the control board circuit.
-
Page 72: Main Controller Diagnostic Service Test Modes
ELECTRICAL SYSTEM SERVICE TEST MODE: To assist in the troubleshooting and servicing of the electrical system and related components on the 3800 / BR 1100 / 2042 and BR 1100C-XL scrubbers, a special test mode which allows independent control of the various outputs and monitoring of the various inputs has been incorporated. To enter the service test mode perform the following steps: Turn the master on/off key switch to the off position. - Page 73 ELECTRICAL SYSTEM SERVICE TEST MODE (CONTINUED) Input Indicators: See Figure 10 for button locations. Battery status red indicator (43): Speed control status signal. This is an output from the speed control to the main control unit that indicates the status of the speed control. Normally this indicator will blink every 5 seconds when the key is on.
- Page 74 ELECTRICAL SYSTEM SERVICE TEST MODE (CONTINUED) Normal Scrub Switch (26): This switch is used to control the output to the pad/brush lift actuator. Pressing and releasing this switch will cycle the actuator output through 4 states. These are: 1 - output off, direction = up 2 - output on, direction = down 3 - output off, direction = down 4 - output on, direction = up...
- Page 75 ELECTRICAL SYSTEM SERVICE TEST MODE (CONTINUED) Vacuum Switch (29): This switch is used to toggle the state of the vacuum motor. Pressing and releasing this switch will alternately turn the vacuum motor on and off. The indicator (37) provides the following status information: Off - Vacuum output is off and there is no current flow through the contactor coil and no vacuum motor current sensed.
-
Page 76: Main Control Board Special Program Options
ELECTRICAL SYSTEM MAIN CONTROL BOARD SPECIAL PROGRAM OPTIONS Scrub mode description: On the 3800 / BR 1100 / 2042 and BR 1100C-XL, both the normal and heavy scrub modes are independently programmable to have user adjustable or fixed scrub pressure settings. If the adjustable option is selected (factory default), the operator will be able to vary the amount of scrub pressure while operating the machine. - Page 77 ELECTRICAL SYSTEM SPECIAL PROGRAM OPTIONS (CONTINUED) To program the heavy scrub mode for user adjustable scrub pressure perform the following steps: Turn the master key switch off. Press and hold the heavy scrub button. Turn the master key switch on while continuing to hold the heavy scrub button until the status display shows “PA * “, where * is a number from 2 to 12.
- Page 78 ELECTRICAL SYSTEM SPECIAL PROGRAM OPTIONS (CONTINUED) CURRENT DRAW OF SCRUB BRUSH MOTORS (TABLE 2) 36V* 3 HP 29.5 38.5 47.5 56.5 65.5 Amps Amps Amps Amps Amps Amps Amps Amps Amps Amps Amps Amps (Disc) (2) 1 HP (Cyl.) Amps Amps Amps Amps...
- Page 79 ELECTRICAL SYSTEM SPECIAL PROGRAM OPTIONS (CONTINUED) Enabling Or Disabling The Vacuum Automatic Shutoff Option: FACTORY DEFAULT: ON The 3800 / BR 1100 / 2042 and BR 1100C-XL is equipped with a feature that will automatically shut off the vacuum and scrub systems and display “FULL”...
- Page 80 ELECTRICAL SYSTEM SPECIAL PROGRAM OPTIONS (CONTINUED) Brush Type Selection: FACTORY DEFAULT: cyl (cylindrical), disc (disc) The 3800 / BR 1100 can be equipped with two different scrub deck options. One uses cylindrical scrub brushes and the other uses standard disc type scrub brushes.
-
Page 81: Electrical Component Location
ELECTRICAL SYSTEM COMPONENT LOCATION Item Description Speed Control Throttle Control Main Control Display Control Fuse 250 Amp Circuit Breaker 10 Amp Circuit Breaker 80 Amp Horn Contactor (Main) Contactor (Vac Motor) Contactor (Brush Motor) Solenoid Valve Actuator Motor (Brush Lift) Actuator Motor (Squeegee Lift) Scrub Brush Motor (Disc) Vacuum Motor... -
Page 82: Wiring Diagram / Schematic 3800 / Br 1100
ELECTRICAL SYSTEM WIRING DIAGRAM / SCHEMATIC Hydro-Retriever 3800 / BR 1100 ™ Hydro-Retriever ™ 3800C / BR 1100C YEL/BLK RED/BRN ORN/GRN GRN/WHT GRN/WHT ORN/BLK ORN/BLK ORN/GRN Item Description ORN/GRN RED/BRN Speed Controller (see Detail A Throttle Control (Electronic Throttle) for membrane switch Main Control (Control Assembly) connections) - Page 83 ELECTRICAL SYSTEM Headlight Battery Roll Out only WIRING DIAGRAM / SCHEMATIC Main (Optional) MAIN CONTROL BOARD Seat Switch Hydro-Retriever 3800 / BR 1100 ™ Switch Hydro-Retriever ™ 3800C / BR 1100C Fuse 2 Amp Seat Switch GRN 5A-B GRN 5B-B GRN 5C-B GRN/WHT 59D-B GRN 5D-B...
-
Page 84: Wiring Diagram / Schematic 2042 / Br 1100C-Xl
ELECTRICAL SYSTEM WIRING DIAGRAM / SCHEMATIC Hydro-Retriever 2042 / BR 1100C-XL ™ YEL/BLK RED/BRN ORN/GRN GRN/WHT GRN/WHT ORN/BLK ORN/BLK ORN/GRN ORN/GRN RED/BRN Item Description ( SEE DETAIL A FOR MEMBRANE SWITCH Speed Controller CONNECTIONS) Throttle Control (Electronic Throttle) Main Control (Control Assembly) Display Control (Display Panel Assembly) 36Vdc Battery Diode... - Page 85 ELECTRICAL SYSTEM WIRING DIAGRAM / SCHEMATIC Headlight Battery Roll Out only Main (Optional) Hydro-Retriever 2042 / BR 1100C-XL MAIN CONTROL BOARD ™ Seat Switch Switch Fuse 2 Amp Seat Switch GRN 5A-B GRN 5B-B GRN 5C-B GRN/WHT 59D-B GRN 5D-B GRN 5D-A GRA 8A-A BLK/WHT 09A-B...
- Page 86 Austria (Sales Sub) Holland (Sales Sub) Nilfi sk-Advance GmbH Phone: +43 Nilfi sk-Advance B.V. Phone: +31 Voralberger Allee 46 1616 58 30 22 Camerastraat 9 (2e verdieping) 36 546 07 00 A-1230 Wien Fax: +43 1322 BB Almere Fax: +31 info@nilfi...
- Page 87 Sweden (Prod.) Hong Kong (Sales Sub) Nilfi sk-Advance A/S Phone: +46 Nilfi sk-Advance Ltd. Phone: +852 Åmål Branch 5321 7500 2001 HK Worsted Mills Ind’l Bldg., 2427 5951 Strömsbergsgatan Fax: +46 31-39 Wo Tong Tsui St. Fax: +852 Box 127 5321 7595 Kwai Chung, Hong Kong 2487 5828...
- Page 88 © 2005 Printed in USA...
- Page 89 56409569 LIFT SLING KIT For Advance Hydro-Retriever™ 3800 / Nilfisk BR 1000, BR 1100 CONTENTS OF KIT ITEM REF. NO. DESCRIPTION 56040521 Instruction Sheet 56409571 Lift Bar 56015656 Decal, Warning Lifting 56409570 Cable 56491726 Bushing 56002168 1/2 Flat Washer 56003022 1/2-13 x 1-1/4 Loc Bolt Refer to Figure 2 when ordering replacement parts.
- Page 90 Note: Use a crane or hoist rated for at least 3,000 lbs (1,350 kg) when lifting. The lift sling has a maximum capacity of 2,800 lbs (1,270 kg). Make sure that no one is present on or below the machine while lifting. Lift, swing and lower slowly.
- Page 91 56407236 HEADLIGHT KIT Advance Hydro-Retriever™ 3200 / Hydro-Retriever™ 3800 (model 56410000) Nilfisk BR 850 / BR 1100 CONTENTS OF KIT ITEM PART NO. DESCRIPTION 56040637 Instruction Sheet 56409239 Headlight 56409557 Headlight Guard 56003179 Scr, Hex Thd To Hd M8-1.25 x 20mm 56003389 Nut, Hex Nyl Loc M8-1.25 56321540...
- Page 92 Plug Wire Assembly (4) into this connector. Reconnect the batteries and test the Back-Up Alarm by driving the machine in reverse. © 2000 Printed in USA, Nilfisk-Advance, Inc. 8/00 Form No. 56040723...
- Page 93 The RED and RED/GRN wires should be connected to the other 15Amp circuit breaker which is the dust control breaker. Re-install the Panel (B). FRONT © 2001 Printed in USA, Nilfisk-Advance, Inc. 8/00 revised 6/01 Form No. 56040724 (page 1 of 13)
- Page 94 To save the new setting, turn the master on/off key switch to the off position. The new setting will be saved and will remain in effect until it is changed again. © 2001 Printed in USA, Nilfisk-Advance, Inc. 8/00 revised 6/01 Form No. 56040724 (page 2 of 13)
- Page 95 Re-test the broom to make sure the polished strip is an even width its entire length (repeat step 16 if necessary and re-test after each adjustment). FIGURE 4 Left Side of Pre-sweep Assembly © 2001 Printed in USA, Nilfisk-Advance, Inc. 8/00 revised 6/01 Form No. 56040724 (page 3 of 13)
-
Page 96: Side Broom
Bristles in this area should 11 o’clock position be touching the floor 3 o’clock position Side Broom Top View of Right Front Corner of Pre-sweep Assembly © 2001 Printed in USA, Nilfisk-Advance, Inc. 8/00 revised 6/01 Form No. 56040724 (page 4 of 13) - Page 97 FRONT 24 7 24 25 © 2001 Printed in USA, Nilfisk-Advance, Inc. 8/00 revised 6/01 Form No. 56040724 (page 5 of 13)
- Page 98 Note #2: The Presweep Cart Assembly is used to sit the Presweep Assembly on for storage and moving to and from the machine. © 2001 Printed in USA, Nilfisk-Advance, Inc. 8/00 revised 6/01 Form No. 56040724 (page 6 of 13)
- Page 99 FRONT 8/00 revised 8/01 Form No. 56040724 (page 7 of 13)
- Page 100 3/8-16 Thin Nyl Loc Nut 56009087 1/4-20 Jam Nut 56002047 1/4-20 x 1-1/4 Screw 56001821 1/4-20 x 7/8 Screw 56002768 #10-24 Nyl Loc Nut © 2001 Printed in USA, Nilfisk-Advance, Inc. 8/00 revised 6/01 Form No. 56040724 (page 8 of 13)
- Page 101 FRONT © 2001 Printed in USA, Nilfisk-Advance, Inc. 8/00 revised 6/01 Form No. 56040724 (page 9 of 13)
- Page 102 Side Broom Mount 56409712 RFI Filter 56002802 Nut, Hex Nyl Loc 8-32 56003007 Scr, Hex Hd 8-32 x .50 * = Item Not Shown © 2001 Printed in USA, Nilfisk-Advance, Inc. 8/00 revised 6/01 Form No. 56040724 (page 10 of 13)
- Page 103 FRONT © 2001 Printed in USA, Nilfisk-Advance, Inc. 8/00 revised 6/01 Form No. 56040724 (page 11 of 13)
- Page 104 Circuit Breaker, 15Amp NOTE 56459367 Boot, Reset NOTE * = Item Not Shown NOTE: These 2 items are installed on the rider scrubber itself during installation. © 2001 Printed in USA, Nilfisk-Advance, Inc. 8/00 revised 6/01 Form No. 56040724 (page 12 of 13)
- Page 105 Εναρµονισµενα προτυπα: EN 60 335-2-72 8.1.2000 . Gerhard Botha, Senior Vice President, Manufacturing Nilfisk-Advance, Inc. Nilfisk-Advance A/S 14600 21st Avenue North Sognevej 25 Plymouth, MN 55447 USA DK-2605 Brøndby, Denmark ©Nilfisk-Advance Incorporated, 11/98 .pas 8/00 revised 6/01 Form No. 56040724 (page 13 of 13)
- Page 106 Install the Overhead Guard Weldment (3) using Screws (2) and Washers (1). IMPORTANT! Use only the hardware provided in the kit! Hardware strength is a factor in product safety. © 2000 Printed in USA, Nilfisk-Advance, Inc. 8/00 Form No. 56040726...
- Page 107 Slide the Wands (6) down into the tubular holders and wrap Hose (4) around the brackets as shown. Install the Coupler (3) and Squeegee Tool (2) onto the end of the Wand Tube (6) as shown. © 2000 Printed in USA, Nilfisk-Advance, Inc. 7/00 Form No. 56040727...
- Page 108 Test for proper operation (lower squeegee and run vacuum system to make sure both vac motors are running / seat switch and key switch must be ON and drive pedal must be off of neutral position). © 2001 Printed in USA, Nilfisk-Advance, Inc. (page 1 of 2)
- Page 109 FIGURE 2 PARTS CALLOUTS FIGURE 1 Item Ref. No. Description 56001862 Scr, Hex Hd 5/16-18 x .50 56002098 Wsh, Flt SAE 1/4 56003168 Scr, Hex M6-1.0 x 50mm 56003169 Scr, Hex M6-1.0 x 60mm 56003403 Nut, Hex Nyl Loc M6-1.00 56262163 Hose 56329145...
- Page 110 Next to the squeegee lift actuator at the rear of the machine there is a bundle of wire connectors. Find the wire connector which has (1) RED wire and (1) BLK wire connected to it and remove the protective plug. Plug Cord Assembly (1) into this connector. FIGURE 1 © 2000 Printed in USA, Nilfisk-Advance, Inc. 10/00 Form No. 56040729 (page 1)
- Page 111 See Figure 2. Tip the recovery tank back forward and remove the Left Rear Recovery Tank Cover (B). The Strainer (C) for the Extended Scrub Kit is shipped loose and needs to be installed prior to installing the assembly on the machine. It only needs to be hand tightened onto the elbow.
- Page 112 FRONT 10/00 Form No. 56040729 (page 3)
- Page 113 EXTENDED SCRUB KIT Item Ref. No. Description 56002005 Scr, Pan Phil 6-32 x .62 56002830 Nut, Hex Nyl Loc 6-32 56002836 Nut, Hex Nyl Loc SS 10-24 56002896 Scr, Pan Phil SS 10-24 x .62 56002898 Scr, Pan Phil SS 10-24 x1.00 56002900 Scr, Pan Phil SS 10-24 x .50 56002916...
- Page 114 See Figure 1. Bolt Beacon Assembly (1) to the top of the recovery tank as shown using the (2) Screws (2). Make sure the Notch (A) in the Beacon Pedestal is facing toward the FRONT of the machine and the wires are routed through this notch. FIGURE 1 © 2000 Printed in USA, Nilfisk-Advance, Inc. (page 1) 8/00 Form No. 56040730...
- Page 115 See Figure 2. Empty the recovery tank and tip back as shown. Route Cord Assembly (3) along-side the Vacuum Hose (B) in the front of the recovery tank and plug it into the Beacon Assembly Connector (C). Bring Cord Assembly (3) out through the same opening at the bottom of the recovery tank mount weldment that the vacuum hoses are routed through.
Need help?
Do you have a question about the Hydro-Retriever 3800 and is the answer not in the manual?
Questions and answers