Advertisement
Table of Contents
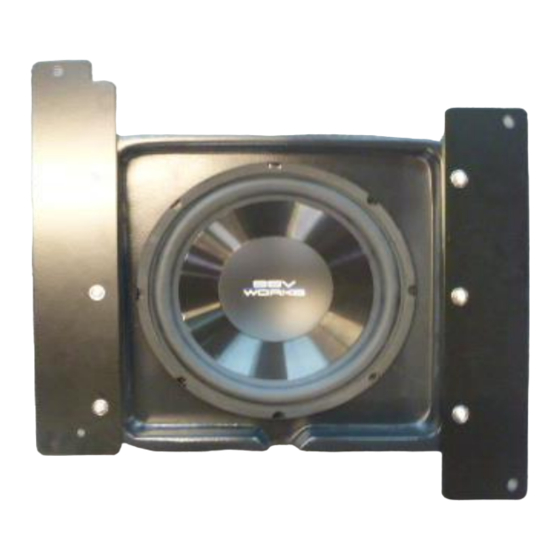
WP-RG3S10 - Ranger XP Powered Sub Box
Tools Needed For Installation
Drill with 1/4" Drill Bit
Phillips Screwdriver / Cordless drill
T-25 Torx Wrench
Wire Crimpers / Strippers
Installation Instructions:
This enclosure will mount under the passenger seat, replacing the under seat storage compartment of the Ranger XP900, if
you have a Ranger XP900 crew it can mount under either the front or the rear passenger seat area.
First you will need to remove the factory under seat storage compartment
on the passenger side, and remove the 3 Torx bolts as shown
Using the 6 M6x1.0 screws and washers provided, attach the 2 brackets
as shown
You can now place the enclosure in position under the seat and re-install
the factory Torx Bolts, use the included "self-tapping" screw for the final
hole location on the lower left bracket. Plug the input connector to the amp
out connector from the overhead unit.
Advertisement
Table of Contents

Related Manuals for SSV Works WP-RG3S10


Summary of Contents for SSV Works WP-RG3S10
- Page 1 WP-RG3S10 - Ranger XP Powered Sub Box Tools Needed For Installation Drill with 1/4" Drill Bit Phillips Screwdriver / Cordless drill T-25 Torx Wrench Wire Crimpers / Strippers Installation Instructions: This enclosure will mount under the passenger seat, replacing the under seat storage compartment of the Ranger XP900, if you have a Ranger XP900 crew it can mount under either the front or the rear passenger seat area.
- Page 2 13) Crimp the supplied ring terminal to the BLACK wire and attach to the battery " -" terminal Your connections are now complete, refer to the user guide for proper use of the system. CORPORATE: SSV WORKS, 201 N Rice Ave, Unit A, Oxnard, CA 93030 Phone: 1-818-991-1778 Web: www.SSVworks.com...
Need help?
Do you have a question about the WP-RG3S10 and is the answer not in the manual?
Questions and answers