Lexmark MB2442adwe User Manual
Hide thumbs Also See for MB2442adwe:
Table of Contents

Advertisement

MB2442, MB2546, MX421, MX521,
MX522, XM1242, XM1246
User's Guide
April 2018
www.lexmark.com
Machine type(s):
7017
Model(s):
476, 478, 496, 636, 676, 678, 679

Advertisement

Table of Contents

Troubleshooting

loading
Need help?

Need help?

Do you have a question about the MB2442adwe and is the answer not in the manual?

Questions and answers

Subscribe to Our Youtube Channel

Summary of Contents for Lexmark MB2442adwe

  • Page 1 MB2442, MB2546, MX421, MX521, MX522, XM1242, XM1246 User's Guide April 2018 www.lexmark.com Machine type(s): 7017 Model(s): 476, 478, 496, 636, 676, 678, 679...
  • Page 2: Table Of Contents

    Contents Contents Safety information..................7 Conventions................................7 Product statements..............................7 Learning about the printer................. 10 Finding information about the printer......................10 Selecting a location for the printer......................... 11 Printer configurations............................13 Attaching cables..............................14 Using the control panel............................ 15 Understanding the status of the power button and indicator light............15 Setting up and using the home screen applications......16 Using the home screen.............................16 Customizing the home screen........................
  • Page 3 Contents Loading paper and specialty media............25 Setting the size and type of the specialty media..................25 Configuring Universal paper settings......................25 Loading trays..............................25 Loading the multipurpose feeder........................27 Linking trays................................28 Paper support....................29 Supported paper sizes.............................29 Supported paper types............................. 31 Supported paper weights..........................32 Printing......................33 Printing from a computer..........................33 Printing from a mobile device........................
  • Page 4 Contents Configuring e‑mail settings..........................42 Sending an e-mail..............................42 Creating an e-mail shortcut..........................43 Faxing......................44 Setting up the printer to fax..........................44 Sending a fax..............................50 Scheduling a fax..............................51 Creating a fax destination shortcut........................51 Changing the fax resolution..........................51 Adjusting the fax darkness..........................51 Viewing a fax log..............................
  • Page 5 Contents Printing the Menu Settings Page......................... 135 Securing the printer..................136 Locating the security slot..........................136 Erasing printer memory..........................136 Erasing printer hard disk memory....................... 136 Configuring printer hard disk encryption....................137 Restoring factory default settings........................ 137 Statement of Volatility............................. 137 Maintaining the printer................139 Networking................................
  • Page 6 Contents Faxing problems.............................. 210 Scanning problems............................213 Contacting customer support........................217 Upgrading and migrating.................218 Hardware................................218 Software................................232 Firmware................................233 Notices....................... 235 Index......................252...
  • Page 7: Safety Information

    CAUTION—POTENTIAL INJURY: Only a Lexmark Inline Surge Protector that is properly connected between the printer and the power cord provided with the printer may be used with this product. The use of non-Lexmark surge protection devices may result in a risk of fire, property damage, or poor printer performance.
  • Page 8 Make sure that there is adequate clearance around the printer. CAUTION—TIPPING HAZARD: Installing one or more options on your printer or MFP may require a caster base, furniture, or other feature to prevent instability causing possible injury. For more information on supported configurations, see www.lexmark.com/multifunctionprinters.
  • Page 9 Safety information CAUTION—TIPPING HAZARD: To reduce the risk of equipment instability, load each tray separately. Keep all other trays closed until needed. CAUTION—HOT SURFACE: The inside of the printer might be hot. To reduce the risk of injury from a hot component, allow the surface to cool before touching it.
  • Page 10: Learning About The Printer

    Finding information about the printer What are you looking for? Find it here Initial setup instructions: See the setup documentation that came with the printer or go to http://support.lexmark.com. • Connecting the printer • Installing the printer software More setup and instructions for using the printer: Information Center—Go to...
  • Page 11: Selecting A Location For The Printer

    Learning about the printer What are you looking for? Find it here The latest supplemental information, updates, and customer Go to http://support.lexmark.com. support: Note: Select your country or region, and then • Documentation select your product to view the appropriate support site.
  • Page 12 Learning about the printer • Make sure that airflow in the room meets the latest revision of the ASHRAE 62 standard or the CEN Technical Committee 156 standard. • Provide a flat, sturdy, and stable surface. • Keep the printer: –...
  • Page 13: 
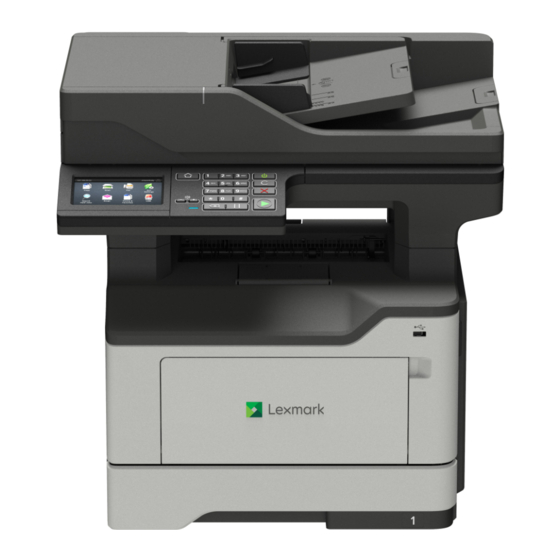
Printer Configurations

    CAUTION—TIPPING HAZARD: Installing one or more options on your printer or MFP may require a caster base, furniture, or other feature to prevent instability causing possible injury. For more information on supported configurations, see www.lexmark.com/multifunctionprinters. CAUTION—TIPPING HAZARD: To reduce the risk of equipment instability, load each tray separately.
  • Page 14: Attaching Cables

    Learning about the printer Attaching cables CAUTION—SHOCK HAZARD: To avoid the risk of electrical shock, do not set up this product or make any electrical or cabling connections, such as the power cord, fax feature, or telephone, during a lightning storm. CAUTION—POTENTIAL INJURY: To avoid the risk of fire or electrical shock, connect the power cord to an appropriately rated and properly grounded electrical outlet that is near the product and easily accessible.
  • Page 15: Using The Control Panel

    Learning about the printer Using the control panel Use the Display • View the printer messages and supply status. • Set up and operate the printer. Home button Go to the home screen. Numeric keypad Enter numbers or symbols in an input field. Power button Turn on or turn off the printer.
  • Page 16: Setting Up And Using The Home Screen Applications

    Setting up and using the home screen applications Setting up and using the home screen applications Note: These applications are supported only in some printer models. Using the home screen Note: Your home screen may vary depending on your home screen customization settings, administrative setup, and active embedded solutions.
  • Page 17: Customizing The Home Screen

    Setting up and using the home screen applications Customizing the home screen Open a web browser, and then type the printer IP address in the address field. Notes: • View the printer IP address on the printer home screen. The IP address appears as four sets of numbers separated by periods, such as 123.123.123.123.
  • Page 18: Using Display Customization

    Setting up and using the home screen applications Using Display Customization Before using the application, make sure to do the following: • Access the Embedded Web Server, and then configure the application. • Enable and configure Slideshow Settings and Wallpaper Settings. Changing the wallpaper image From the home screen, touch Change Wallpaper.
  • Page 19: Setting Up Scan Center

    Setting up and using the home screen applications • If you are using a proxy server, then temporarily disable it to load the Web page correctly. Click Apps > QR Code Generator > Configure. Do either of the following: • Select a default QR code value.
  • Page 20: Managing Bookmarks

    Touch Create, and then take note of the authorization code. Note: The authorization code is valid only for 24 hours. Open a web browser, and then go to https://lexmark.cloud-connect.co. Click Next, and then accept the Terms of Use. Enter the authorization code, and then click Connect.
  • Page 21: Managing Contacts

    Setting up and using the home screen applications Note: The application supports the following file types: PDF, JPEG, TIFF, and HTML-based web pages. Other file types such as DOCX and XLXS are supported in some printer models. Click Save. Note: To manage bookmarks, click Bookmark Setup. Creating folders Open a web browser, and then type the printer IP address in the address field.
  • Page 22 Setting up and using the home screen applications Notes: • View the printer IP address on the printer home screen. The IP address appears as four sets of numbers separated by periods, such as 123.123.123.123. • If you are using a proxy server, then temporarily disable it to load the web page correctly. Click Address Book.
  • Page 23: Setting Up And Using The Accessibility Features

    Setting up and using the accessibility features Note: For more information on the accessibility features of your printer model, see the Accessibility Guide at http://support.lexmark.com. Enabling Magnification mode From the control panel, press and hold the 5 key until you hear a voice message.
  • Page 24: Adjusting The Voice Guidance Speech Rate

    Setting up and using the accessibility features Gesture Function Access parts of the zoomed image that are beyond the limits of the screen. Note: This gesture requires the use of two fingers to drag across a zoomed image. Swipe up then left Exit an application and return to the home screen.
  • Page 25: Loading Paper And Specialty Media

    Loading paper and specialty media Loading paper and specialty media Setting the size and type of the specialty media The trays automatically detect the size of plain paper. For specialty media like labels, card stock, or envelopes, do the following: From the home screen, navigate to: Settings >...
  • Page 26 Loading paper and specialty media Adjust the paper guides to match the size of the paper that you are loading. Flex, fan, and align the paper edges before loading. Load the paper stack with the printable side facedown, and then make sure that the side guides fit snugly against the paper.
  • Page 27: Loading The Multipurpose Feeder

    Loading paper and specialty media Loading the multipurpose feeder Open the multipurpose feeder. Adjust the guide to match the size of the paper that you are loading. Flex, fan, and align the paper edges before loading. Load paper with the printable side faceup. Notes: •...
  • Page 28: Linking Trays

    Loading paper and specialty media • Load envelopes with the flap facedown on the left side. • Load European envelopes with the flap facedown and entering the printer first. Warning—Potential Damage: Do not use envelopes with stamps, clasps, snaps, windows, coated linings, or self‑stick adhesives.
  • Page 29: Paper Support

    Paper support Paper support Supported paper sizes Paper size Tray Multipurpose Two‑sided Scanner Scanner glass glass feeder printing (MB2422, (MB2546, MX421, MX521, XM1242) MX522, XM1246) 210 x 297 mm (8.3 x 11.7 in.) 210 x 148 mm (5.8 x 8.3 in.) A5 LEF 148 x 210 mm (5.8 x 8.3 in.)
  • Page 30 Paper support Paper size Tray Multipurpose Two‑sided Scanner Scanner glass glass feeder printing (MB2422, (MB2546, MX421, MX521, XM1242) MX522, XM1246) Executive 184 x 267 mm (7.3 x 10.5 in.) Letter 216 x 279 mm (8.5 x 11 in.) Legal 216 x 356 mm (8.5 x 14 in.) Folio 216 x 330 mm...
  • Page 31: Supported Paper Types

    Paper support Paper size Tray Multipurpose Two‑sided Scanner Scanner glass glass feeder printing (MB2422, (MB2546, MX421, MX521, XM1242) MX522, XM1246) B5 Envelope 176 x 250 mm (6.9 x 9.8 in.) Other Envelope 76.2 x 127 mm to 216 x 356 mm ( 3 x 5 in.
  • Page 32: Supported Paper Weights

    Paper support Paper type Tray Multipurpose Two‑sided Scanner glass feeder printing Rough/Cotton Envelope Rough envelope One‑sided paper labels designed for laser printers are supported for occasional use. It is recommended to print 20 or fewer pages of paper labels per month. Vinyl, pharmacy, and two‑sided labels are not supported. Bond and Heavy Paper are supported in two‑sided printing up to 90‑g/m (24‑lb) paper weight.
  • Page 33: Printing

    Printing from a mobile device using Lexmark Mobile Print Lexmark Mobile Print allows you to send documents and images directly to a supported Lexmark printer. Open the document, and then send or share the document to Lexmark Mobile Print. Note: Some third‑party applications may not support the send or share feature. For more information, see the documentation that came with the application.
  • Page 34: Printing From A Flash Drive

    Printing Printing from a mobile device using AirPrint AirPrint is a mobile printing solution that allows you to print directly from Apple devices to an AirPrint‑certified printer. Note: This application is supported only in some Apple devices. From the home screen of your mobile device, launch a compatible application. Select an item to print, and then tap the share icon.
  • Page 35: Supported Flash Drives And File Types

    Printing Supported flash drives and file types Flash drives • Lexar JumpDrive S70 (16GB and 32GB) • SanDisk Cruzer (16GB and 32GB) • PNY Attache (16GB and 32GB) Notes: – The printer supports high‑speed USB flash drives with full‑speed standard. –...
  • Page 36: Configuring Confidential Jobs

    Printing Configuring confidential jobs From the control panel, navigate to: Settings > Security > Confidential Print Setup For non‑touch‑screen printer models, press to navigate through the settings. In some printer models, access the setting from the Embedded Web Server. Configure the settings. Max Invalid PIN Set the number of times an invalid PIN can be entered.
  • Page 37: Printing From A Cloud Connector Profile

    Printing From the printer home screen, release the print job. • For confidential print jobs, navigate to: Held jobs > select your user name > Confidential > enter the PIN > select the print job > configure the settings > Print •...
  • Page 38: Canceling A Print Job

    Printing Canceling a print job From the printer control panel From the home screen, touch Job Queue. Note: You can also access this setting by touching the top section of the home screen. Select the job to cancel. From the computer Depending on the operating system, do either of the following: •...
  • Page 39: Copying

    Copying Copying Making a copy Load an original document into the ADF tray or on the scanner glass. Note: To avoid a cropped image, make sure that the original document and the output have the same paper size. From the control panel, specify the number of copies. If necessary, adjust the other settings.
  • Page 40: Reducing Or Enlarging Copies

    Copying Adjust the settings. Copy the document. Reducing or enlarging copies Load an original document into the ADF tray or on the scanner glass. From the control panel, navigate to: Copy > Settings > Scale > specify a scale value Note: Changing the size of the original document or output after setting Scale restores the scale value to Auto.
  • Page 41 Copying Notes: • View the printer IP address on the home screen. The IP address appears as four sets of numbers separated by periods, such as 123.123.123.123. • If you are using a proxy server, then temporarily disable it to load the web page correctly. Click Shortcuts >...
  • Page 42: E-Mailing

    E-mailing E-mailing Setting up the e‑mail function From the home screen, touch Settings > Device > Preferences > Run Initial Setup. Turn off the printer, wait for about 10 seconds, and then turn it back on. From the Before You Begin screen, select Change the Settings and Continue with the Wizard. From the Fax/Email Server Setup screen, enter the needed information.
  • Page 43: Creating An E-Mail Shortcut

    E-mailing Creating an e-mail shortcut Note: You may need administrative rights to create a shortcut. Open a web browser, and then type the printer IP address in the address field. Notes: • View the printer IP address on the home screen. The IP address appears as four sets of numbers separated by periods, such as 123.123.123.123.
  • Page 44: Faxing

    Faxing Faxing Setting up the printer to fax Notes: • The following connection methods are applicable only in some countries or regions. • During the initial printer setup, clear the fax function check box and any other function you plan to set up later, and then select Continue.
  • Page 45 Faxing Setting up fax using a standard telephone line CAUTION—SHOCK HAZARD: To avoid the risk of electrical shock, do not set up this product or make any electrical or cabling connections, such as the power cord, fax feature, or telephone, during a lightning storm.
  • Page 46 Faxing Setup 2: Printer is sharing the line with an answering machine Note: If you subscribe to a distinctive ring service, then make sure that you set the correct ring pattern for the printer. Otherwise, the printer does not receive faxes even if you have set it to receive faxes automatically.
  • Page 47 There may be an adapter plug installed in the telephone port of the printer. Do not remove the adapter plug from the telephone port of the printer if you are connecting to a serial or cascaded telephone system. Part name Part number Lexmark adapter plug 40X8519...
  • Page 48 Faxing Connecting the printer to a non‑RJ11 wall jack Connect one end of the telephone cable to the line port of the printer. Connect the other end of the cable to the RJ11 adapter, and then connect the adapter to the wall jack. If you want to connect another device with a non‑RJ11 connector to the same wall jack, then connect it directly to the telephone adapter.
  • Page 49: Connecting To A Distinctive Ring Service

    Faxing Connecting the printer to a wall jack in Germany The German wall jack has two kinds of ports. The N ports are for fax machines, modems, and answering machines. The F port is for telephones. Connect the printer to any of the N ports. Connect one end of the telephone cable to the line port of the printer.
  • Page 50: Sending A Fax

    Faxing Setting the fax date and time From the home screen, touch Settings > Device > Preferences > Date and Time > Configure. Configure the settings. Configuring daylight saving time From the home screen, touch Settings > Device > Preferences > Date and Time > Configure. In the Time Zone menu, select Custom.
  • Page 51: Scheduling A Fax

    Faxing Scheduling a fax Load the original document into the ADF tray or on the scanner glass. From the home screen, navigate to: Fax > enter the fax number > Send Time Configure the date and time to send the fax. If necessary, configure other fax settings.
  • Page 52: Blocking Junk Faxes

    Faxing Notes: • View the printer IP address on the printer home screen. The IP address appears as four sets of numbers separated by periods, such as 123.123.123.123. • If you are using a proxy server, then temporarily disable it to load the Web page correctly. Click Settings >...
  • Page 53: Scanning

    Scanning Scanning Scanning to an FTP server Load the original document into the ADF tray or on the scanner glass. From the home screen, touch FTP, and then enter the needed information. If necessary, configure other FTP settings. Send the FTP job. Creating an FTP shortcut Note: You may need administrative rights to create a shortcut.
  • Page 54: Scanning To A Flash Drive

    Scanning Scanning to a flash drive Load an original document into the ADF tray or on the scanner glass. Insert the flash drive. Touch Scan to USB and adjust the settings if necessary. Note: If the USB Drive screen does not appear, then touch USB Drive on the home screen. Scan the document.
  • Page 55: Sending Scanned Documents To A Computer

    Scanning Sending scanned documents to a computer Load an original document into the ADF tray or on the scanner glass. From the home screen, touch Scan Profiles > Scan To Computer. Select the scan profile where you want to save the document.
  • Page 56: Understanding The Printer Menus

    • Remote Operator Panel Restore Factory Defaults • • Notifications Maintenance • • Power Management Visible Home Screen Icons • • Information Sent to Lexmark About This Printer Print • • Layout • • Setup PostScript • • Quality •...
  • Page 57: Device

    Understanding the printer menus Help • • Print All Guides Information Guide • • Connection Guide Media Guide • • Copy Guide Mono Quality Guide • • E‑mail Guide Moving Guide • • Fax Guide Print Quality Guide • • FTP Guide Supplies Guide Troubleshooting...
  • Page 58 Understanding the printer menus Menu item Description Date and Time Configure the settings for Network Time Protocol (NTP). Network Time Protocol Notes: Enable NTP [On*] • Enable Authentication appears only in some printer NTP Server models. Enable Authentication • When Enable Authentication is set to MD5 key, Key ID and Password appear.
  • Page 59 Understanding the printer menus Remote Operator Panel Menu item Description External VNC Connection Connect an external Virtual Network Computing (VNC) client to the remote control panel. Don’t Allow* Allow Authentication Type Set the authentication type when accessing the VNC client server.
  • Page 60 Understanding the printer menus Menu item Description Error Prevention Let the printer to continue processing or printing a job automatically after clearing certain attendance conditions. Auto Continue Disabled 5–255 (5*) Error Prevention Set the printer to restart when an error occurs. Auto Reboot Auto Reboot Reboot when idle...
  • Page 61: Power Management

    Understanding the printer menus Menu item Description Jam Content Recovery Specify how to restart a scan job after resolving a paper jam. Scanner Jam Recovery Job level Page level* Note: An asterisk (*) next to a value indicates the factory default setting. Power Management Menu item Description...
  • Page 62 Information Sent to Lexmark Menu item Description Information Sent to Lexmark Send printer usage and performance information to Lexmark. Note: Information Send Time and User Information ‑ Level appear Save Supplies and Page Usage (Anonymous) only when you select any of the settings in Information Sent to Lexmark, except None of the Above.
  • Page 63: Restore Factory Defaults

    Understanding the printer menus Menu item Description Enable Voice Guidance When Enable Voice Guidance when a headphone is attached to the printer. Headphone Is Attached Off* Speak Passwords/PINs Set the printer to read out loud passwords or personal identification numbers. Off* Note: This menu item appears only when a headphone or a speaker is attached to the printer.
  • Page 64 Understanding the printer menus Menu item Description USB Configuration Set whether the USB device driver enumerates as a USB Simple device (single interface) or as a USB Composite device USB Scan to Local (multiple interfaces). USB Configuration Set the USB port to run at full speed and disable its high‑speed capabilities.
  • Page 65 Understanding the printer menus Menu item Description Supply Usage And Counters Reset the supply page counter or view the total printed pages. Clear Supply Usage History Reset Black Cartridge Counter Reset Black Imaging Unit Counter Reset Maintenance Counter Printer Emulations Set the printer to recognize and use the PPDS data stream.
  • Page 66 Understanding the printer menus Menu item Description Device Operations Set the memory allocation for storing copy jobs. Minimum Copy Memory Note: The values appear only if the amount of installed 20MB* DRAM is at least twice the amount of the value. 30MB 50MB 80MB...
  • Page 67 Understanding the printer menus Menu item Description Scanner Configuration Determine the byte order of a TIFF‑formatted scan output. Tiff Byte Order CPU Endianness* Little Endian Big Endian Scanner Configuration Set the RowsPerStrip tag value of a TIFF‑formatted scan output. Exact Tiff Rows Per Strip Note: An asterisk (*) next to a value indicates the factory default setting.
  • Page 68: Print

    Understanding the printer menus About this Printer Menu item Description Asset Tag Show the serial number of the printer. Printer’s Location Identify the printer location. Maximum length is 63 characters. Contact Personalize the printer name. Maximum length is 63 characters. Export Configuration File to USB Export configuration files to a flash drive.
  • Page 69 Understanding the printer menus Menu item Description Pages per Side Print multiple page images on one side of a sheet of paper. Off* 2 pages per side 3 pages per side 4 pages per side 6 pages per side 9 pages per side 12 pages per side 16 pages per side Pages per Side Ordering...
  • Page 70 Understanding the printer menus Menu item Description Job Hold Timeout Set the time in seconds that the printer waits for user intervention before it holds jobs that require unavailable resources and continues to print other 0–255 (30*) jobs in the print queue. Note: This menu item appears only when a printer hard disk is installed.
  • Page 71: Job Accounting

    Understanding the printer menus Menu item Description Halftone Enhance the printed output to have smoother lines with sharper edges. Normal* Detail Brightness Adjust the brightness of the printed output. ‑6 to 6 (0*) Contrast Adjust the contrast of the printed output. 0 to 5 (0*) Gray Correction Adjust the contrast enhancement applied to images.
  • Page 72 Understanding the printer menus Menu item Description Log Action at Near Full Specify how the printer responds when the hard disk is nearly full. None* Note: The value defined in Log Near Full Level determines when this action E‑mail Current Log is triggered.
  • Page 73 Understanding the printer menus Menu item Description Scale to Fit Scale the page content to fit the selected paper size. Off* Annotations Specify whether to print annotations in the PDF. Do Not Print* Print Note: An asterisk (*) next to a value indicates the factory default setting. PostScript Menu item Description...
  • Page 74 Understanding the printer menus Menu item Description Font Source Choose the source which contains the default font selection. Resident* Notes: Disk • Flash and Disk appear only in some printer models. Download • For Flash and Disk to appear, make sure that they are not read‑ or Flash write‑protected.
  • Page 75 Understanding the printer menus Menu item Description Auto LF after CR Set the printer to perform a line feed after a carriage return control command. Off* Tray Renumber Configure the printer to work with print drivers or applications that use different source assignments for the paper source.
  • Page 76 Understanding the printer menus Menu item Description Orientation Set the page orientation for HTML documents. Portrait* Landscape Margin Size Set the page margin for HTML documents. 8–255 mm (19*) Backgrounds Print background information or graphics for HTML documents. Do Not Print Print* Note: An asterisk (*) next to a value indicates the factory default setting.
  • Page 77: Paper

    Understanding the printer menus Paper Tray Configuration Menu item Description Default Source Set the paper source for all print jobs. Tray [x] (1*) Note: Multipurpose Feeder appears only when Configure MP is set to Multipurpose Feeder Cassette. Manual Paper Manual Envelope Paper Size/Type Specify the paper size or paper type loaded in each paper source.
  • Page 78: Universal Setup

    Understanding the printer menus Media Configuration Universal Setup Menu item Description Units of Measure Specify the unit of measurement for the universal paper. Inches Note: Inches is the U.S. factory default setting. Millimeters is the Millimeters international factory default setting. Portrait Width Set the portrait width of the universal paper.
  • Page 79: Copy

    Understanding the printer menus Media Types Menu item Description Plain Specify the texture and weight of the paper loaded. Card Stock Select from the following options: Transparency Paper Texture Recycled Smooth Labels Normal* Bond Rough Envelope Paper Weight Rough Envelope Light Letterhead Normal*...
  • Page 80 Understanding the printer menus Menu item Description Sides Specify the scanning behavior based on the original document. 1 sided to 1 sided* 1 sided to 2 sided 2 sided to 1 sided 2 sided to 2 sided Separator Sheets Specify whether to insert blank separator sheets when printing. None* Between Copies Between Jobs...
  • Page 81 Understanding the printer menus Menu item Description Header/Footer Apply a header or footer on the printed output. Top left Top middle Top right Bottom left Bottom middle Bottom right Overlay Specify the overlay text printed on each page of the copy job. Confidential Copy Draft...
  • Page 82 Understanding the printer menus Menu item Description Background Removal Adjust the amount of background visible on a scanned image. Background Detection Level Auto Center Align the content at the center of the page. Off* Mirror Image Create a mirror image of the original document. Off* Negative Image Create a negative image of the original document.
  • Page 83: Fax

    Understanding the printer menus Fax Mode Menu item Description Fax Mode Select a fax mode. Analog* Fax Server Disabled Note: An asterisk (*) next to a value indicates the factory default setting. Analog Fax Setup General Fax Settings Menu item Description Fax Name Identify your fax machine.
  • Page 84: Fax Send Settings

    Understanding the printer menus Menu item Description Caller ID Show the telephone number of the person sending the fax. Alternate Fax Number Masking Specify the format for masking an outgoing fax number. Off* From Left From Right Digits to Mask Specify the number of digits to mask in an outgoing fax number.
  • Page 85 Understanding the printer menus Menu item Description Orientation Specify the orientation of the original document. Portrait* Landscape Sides Specify the page orientation of text and graphics when scanning a two‑sided document. Off* Long Edge Short Edge Content Type Improve the output result based on the content of the original document. Text* Text/Photo Photo...
  • Page 86 Understanding the printer menus Menu item Description Color Dropout Specify which color to drop during scanning, and adjust the dropout setting for that color. None* Green Blue Default Red Threshold 0–255 (128*) Default Green Threshold 0–255 (128*) Default Blue Threshold 0–255 (128*) Contrast Set the contrast of the output.
  • Page 87 Understanding the printer menus Admin Controls Menu item Description Automatic Redial Adjust the number of redial attempts based on the activity levels of recipient fax machines. 0–9 (5*) Redial Frequency Increase the time between redial attempts to increase the chance of sending fax successfully.
  • Page 88: Fax Receive Settings

    Understanding the printer menus Menu item Description Confirm Fax Number Ask the user to confirm the fax number. Off* Dial Prefix Set a dialing prefix. Dialing Prefix Rules Establish a dialing prefix rule. Prefix Rule [x] Note: An asterisk (*) next to a value indicates the factory default setting. Fax Receive Settings Menu item Description...
  • Page 89 Understanding the printer menus Menu item Description Fax Footer Time Stamp Print the time stamp at the bottom of each page from a received fax. Receive* Print Holding Faxes Hold received faxes from printing until they are released. Held Fax Mode Off* Always On Manual...
  • Page 90 Understanding the printer menus Menu item Description Manual Answer Code Manually enter a code on the telephone number pad to begin receiving fax. 0–9 (9*) Notes: • This menu item appears only when the printer shares a line with a telephone.
  • Page 91 Understanding the printer menus Fax Cover Page Menu item Description Fax Cover Page Configure the settings for the fax cover page. Off by Default* On by Default Never Use Always Use Include To field Off* Include From field Off* From Include Message Field Off* Message:...
  • Page 92 Understanding the printer menus Menu item Description Log Paper Source Specify the paper source for printing logs. Tray [x] (1*) Multipurpose Feeder Logs Display Identify the sender by remote fax name or fax number. Remote Fax Name* Dialed Number Enable Job Log View a summary of all fax jobs.
  • Page 93 Understanding the printer menus Menu item Description Reply Address Specify a reply address for sending fax. Subject Specify the fax subject and message. Message Enable analog receive Set the printer to receive analog faxes. Off* Note: An asterisk (*) next to a value indicates the factory default setting. Fax Server E‑mail Settings Menu item Description...
  • Page 94 Understanding the printer menus Menu item Description Device‑Initiated E‑mail Specify whether credentials are required for device‑initiated e‑mail. None* Use Device SMTP Credentials User‑Initiated E‑mail Specify whether credentials are required for user‑initiated e‑mail. None* Use Device SMTP Credentials Use Session User ID and Password Use Session E‑mail address and Password...
  • Page 95: E-Mail

    Understanding the printer menus Menu item Description Content Source Improve the output result based on the source of the original document. Black and White Laser Color Laser* Inkjet Photo/Film Magazine Newspaper Press Other Fax Resolution Set the fax resolution. Standard* Fine Super Fine Ultra Fine...
  • Page 96 Understanding the printer menus Menu item Description Secondary SMTP Gateway Type the server IP address or host name of your secondary or backup SMTP server. Secondary SMTP Gateway Port Enter the server port number of your secondary or backup SMTP server. 1–65535 (25*) SMTP Timeout Set the time before the printer times out if the SMTP server does not respond.
  • Page 97 Understanding the printer menus Menu item Description Device Userid Specify the user ID and password to connect to the SMTP server. Device Password Kerberos 5 REALM Specify the realm for the Kerberos 5 authentication protocol. NTLM Domain Specify the domain name for the NTLM security protocol. Disable "SMTP server not set Hide the “SMTP server not set up”...
  • Page 98 Understanding the printer menus Menu item Description PDF Settings Set the PDF format of the scanned image. PDF Version 1.5* Archival Version A‑1a* A‑1b Highly Compressed Off* Secure Off* Searchable Off* Archival (PDF/A) Off* Content Type Improve the output result based on the content of the original document. Text Text/Photo* Photo...
  • Page 99 Understanding the printer menus Menu item Description Resolution Set the resolution of the scanned image. 75 dpi 150 dpi* 200 dpi 300 dpi 400 dpi 600 dpi Darkness Adjust the darkness of the scanned image. -4 to 4 (0*) Orientation Specify the orientation of text and graphics on the page.
  • Page 100 Understanding the printer menus Menu item Description Auto Color Detect Set the amount of color that the printer detects from the original document. Color Sensitivity Note: This menu item appears only when Color is set to Auto. 1–9 (5*) Area Sensitivity 1–9 (5*) E‑mail Bit Depth 1 bit*...
  • Page 101 Understanding the printer menus Menu item Description Temperature Specify whether to generate a cooler or warmer output. ‑4 to 4 (0*) Blank Pages Specify whether to include blank pages. Blank Page Removal Blank Page Sensitivity Note: An asterisk (*) next to a value indicates the factory default setting. Admin Controls Menu item Description...
  • Page 102 Understanding the printer menus Menu item Description Transmission Log Print a log for successful e‑mail transmission. Print log* Do Not Print Log Print Only For Error Log Paper Source Specify the paper source for printing logs. Tray [x] (1*) Multipurpose Feeder Custom Job Scanning Turn on scanning of custom jobs by default.
  • Page 103: Ftp

    Understanding the printer menus FTP Defaults Menu item Description Format Specify the file format for the scanned image. PDF (.pdf)* Note: The menu items may vary depending on your printer model. TIFF (.tif) JPEG (.jpg) XPS (.xps) TXT (.txt) RTF (.rtf) DOCX (.docx) Global OCR Settings Configure the settings for optical character recognition (OCR).
  • Page 104 Understanding the printer menus Menu item Description Content Type Improve the output result based on the content of the original document. Text Text/Photo* Graphics Photo Content Source Improve the output result based on the source of the original document. Black and White Laser Color Laser* Inkjet Photo/Film...
  • Page 105 Understanding the printer menus Advanced Imaging Menu item Description Color Balance Adjust the color intensity during scanning. Cyan to Red -4 to 4 (0*) Magenta to Green -4 to 4 (0*) Yellow to Blue -4 to 4 (0*) Color Dropout Specify which color to drop during scanning, and adjust the dropout setting for that color.
  • Page 106 Understanding the printer menus Menu item Description Background Removal Adjust the amount of background visible on a scanned image. Background Detection Note: If you want to remove the background color from the original Content‑based* document, then set Background Detection to Content-based. If you want to remove image noise from a photo, then set Background Detection to Fixed.
  • Page 107: Usb Drive

    Understanding the printer menus Menu item Description TIFF Compression Set a compression option for TIFF files. LZW* JPEG Transmission Log Print a log for successful FTP scan transmission. Print Log* Do Not Print Log Print Only For Error Log Paper Source Specify the paper source for printing FTP logs.
  • Page 108 Understanding the printer menus Menu item Description PDF Settings Set the PDF format for the scanned image. PDF Version 1.5* Archival Version A‑1a* A‑1b Highly Compressed Off* Secure Off* Searchable Off* Archival (PDF/A) Off* Content Type Improve the output result based on the content of the original document. Text Text/Photo* Graphics...
  • Page 109 Understanding the printer menus Menu item Description Resolution Set the resolution of the scanned image. 75 dpi 150 dpi* 200 dpi 300 dpi 400 dpi 600 dpi Darkness Adjust the darkness of the scanned image. 1–9 (5*) Orientation Specify the orientation of text and graphics on the page. Portrait* Landscape Original Size...
  • Page 110 Understanding the printer menus Menu item Description Color Dropout Specify which color to drop during scanning, and adjust the dropout setting for that color. Color Dropout None* Green Blue Default Red Threshold 0–255 (128*) Default Green Threshold 0–255 (128*) Default Blue Threshold 0–255 (128*) Auto Color Detect Set the amount of color that the printer detects from the original document.
  • Page 111 Understanding the printer menus Menu item Description Negative Image Create a negative image of the original document. Off* Shadow Detail Adjust the amount of shadow detail visible on a scanned image. ‑4 to 4 (0*) Scan Edge to Edge Allow edge‑to‑edge scanning of the original document. Off* Sharpness Adjust the sharpness of a scanned image.
  • Page 112 Understanding the printer menus Flash Drive Print Menu item Description Number of Copies Set the number of copies. 1–9999 (1*) Paper Source Specify the paper source for the print job. Tray [x] (1*) Multipurpose Feeder Manual Paper Manual Envelope Collate Print multiple copies in a sequence.
  • Page 113: Network/Ports

    Understanding the printer menus Menu item Description Separator Sheets Specify whether to insert blank separator sheets when printing. Off* Between Copies Between Jobs Between Pages Separator Sheet Source Specify the paper source for the separator sheet. Tray [x] (1*) Note: For Multipurpose Feeder to appear, set Configure MP to Cassette from the Multipurpose Feeder Paper menu.
  • Page 114 Menu item Description Setup Using Mobile App Configure the Wi‑Fi connection using Lexmark Mobile Assistant. Setup On Printer Panel Configure the Wi‑Fi connection using the control panel. Choose Network Note: 802.1x - RADIUS can be configured only from the Embedded Add Wi‑Fi Network...
  • Page 115 Understanding the printer menus Menu item Description Wireless Security Mode Set the security mode for connecting the printer to Wi‑Fi devices. Disabled* Note: 802.1x - RADIUS can be configured only from the Embedded Web Server. WPA2/WPA-Personal WPA2-Personal 802.1x - RADIUS WEP Authentication Mode Set the type of Wireless Encryption Protocol (WEP) for the printer.
  • Page 116 Understanding the printer menus Menu item Description IPv6 Enable and configure IPv6 settings in the printer. Enable IPv6 Enable DHCPv6 Off* Stateless Address Autoconfiguration DNS Server Address Manually Assigned IPv6 Address Manually Assigned IPv6 Router Address Prefix All IPv6 Addresses All IPv6 Router Addresses Network Address View the network addresses.
  • Page 117 Understanding the printer menus Menu item Description IPv4 Enable Dynamic Host Configuration Protocol (DHCP). Enable DHCP Note: DHCP is a standard protocol that allows a server to dynamically distribute IP addressing and configuration information to clients. IPv4 Set the static IP address of your printer. Set Static IP Address IP Address Netmask...
  • Page 118 Understanding the printer menus Menu item Description Mac Binary PS Set the printer to process Macintosh binary PostScript print jobs. Auto* Notes: • On processes raw binary PostScript print jobs. • Off filters print jobs using the standard protocol. Energy Efficient Ethernet Reduce power consumption when the printer receives no data from the Ethernet network.
  • Page 119 Understanding the printer menus Menu item Description Enable mDNS Update multicast DNS settings. WINS Address Specify a server address for Windows Internet Name Service (WINS). Enable BOOTP Allow the BOOTP to assign a printer IP address. Off* Restricted Server List Specify an IP address for the TCP connections.
  • Page 120 Understanding the printer menus Menu item Description SNMP Versions 1 and 2c Configure Simple Network Management Protocol (SNMP) versions 1 and 2c to install print drivers and applications. Enabled Allow SNMP Set Enable PPM MIB SNMP Community SNMP Version 3 Configure SNMP version 3 to install and update printer security.
  • Page 121 Understanding the printer menus Menu item Description Base Configuration Set the IPSec base configuration. Default* Note: This menu item appears only when Enable IPSec is set to Compatibility Secure DH (Diffie‑Hellman) Group Proposal Set the IPSec encryption. modp2048 (14)* Note: This menu item appears only when Base Configuration is set modp3072 (15) to Compatibility.
  • Page 122 Understanding the printer menus 802.1x Note: This menu appears only in network printers or printers that are attached to print servers. Menu item Description Active Let the printer join networks that require authentication before allowing access. Off* Note: To configure the settings of this menu item, access the Embedded Web Server.
  • Page 123 Understanding the printer menus Menu item Description Enable FTP/TFTP Send files using FTP. Local Domains Specify domain names for HTTP and FTP servers. Note: This menu item appears only in some printer models. HTTP Proxy IP Address Configure the HTTP and FTP server settings. Note: These menu items appear only in some printer models.
  • Page 124: Google Cloud Print

    Understanding the printer menus Menu item Description PCL SmartSwitch Set the printer to switch to PCL emulation when a print job received through a USB port requires it, regardless of the default printer language. Note: If PCL SmartSwitch is off, then the printer does not examine incoming data and uses the default printer language specified in the Setup menu.
  • Page 125 Understanding the printer menus Menu item Description Options Save the scanned output into image files. Always Print As Image Off* Note: An asterisk (*) next to a value indicates the factory default setting. Wi‑Fi Direct Note: This menu appears only when a direct Wi‑Fi network is the active network. Menu item Description SSID...
  • Page 126: Security

    Understanding the printer menus Security Login Methods Manage Permissions Menu item Description Function Access Control access to the printer functions. Access Address Book in Apps Modify Address Book Manage Shortcuts Create Profiles Manage Bookmarks Flash Drive Print Flash Drive Scan Copy Function Color Dropout E‑mail Function...
  • Page 127 Understanding the printer menus Menu item Description Apps Control access to printer applications. New Apps Slideshow Change Wallpaper Screen Saver Card Copy Scan Center Scan Center Custom 1 Scan Center Custom 2 Scan Center Custom 3 Scan Center Custom 4 Scan Center Custom 5 Scan Center Custom 6 Scan Center Custom 7...
  • Page 128 Understanding the printer menus Menu item Description Add User Create local accounts to manage access to the printer functions. User Name/Password User Name Password User Name/Password Accounts Add User User Name Accounts Add User Password Accounts Add User PIN Accounts Add User Schedule USB Devices Menu item...
  • Page 129 Understanding the printer menus Menu item Description Remote Syslog Facility Specify a facility code that the printer uses when sending log events to a remote 0 ‑ Kernel Messages server. 1 ‑ User‑Level Messages 2 ‑ Mail System 3 ‑ System Daemons 4 ‑...
  • Page 130 Understanding the printer menus Menu item Description E‑mail Log Cleared Alert Send e‑mail notification to the administrator when a log entry is deleted. Off* E‑mail Log Wrapped Alert Send e‑mail notification to the administrator when the log becomes full and begins to overwrite the oldest entries.
  • Page 131 Understanding the printer menus Login Restrictions Menu item Description Login failures Specify the number of failed login attempts before the user gets locked out. 1–10 (3*) Failure time frame Specify the time frame between failed login attempts before the user gets locked out. 1–60 minutes (5*) Lockout time Specify the lockout duration.
  • Page 132: Disk Encryption

    Understanding the printer menus Menu item Description Reserve Job Expiration Set the expiration time that the printer stores print jobs for printing later. Off* 1 Hour 4 Hours 24 Hours 1 Week Require All Jobs to be Held Set the printer to hold all print jobs. Off* Keep duplicate documents Set the printer to print other documents with the same file name without overwriting...
  • Page 133 Understanding the printer menus Solutions LDAP Settings Follow LDAP Referrals Search the different servers in the domain for the logged-in user account. Off* LDAP Certificate Verification Enable verification of LDAP certificates. Mobile Services Management AirPrint Enable functions in the AirPrint software feature. Print Scan Miscellaneous...
  • Page 134: Reports

    Understanding the printer menus Reports Menu Settings Page Menu item Description Menu Settings Page Print a report that contains the printer preferences, settings, and configurations. Device Menu item Description Device Information Print a report that contains information about the printer. Device Statistics Print a report about printer usage and supply status.
  • Page 135: Help

    Understanding the printer menus Network Menu item Description Network Setup Page Print a page that shows the configured network and wireless settings on the printer. Note: This menu item appears only in network printers or printers connected to print servers. Help Menu item Description...
  • Page 136: Securing The Printer

    Securing the printer Securing the printer Locating the security slot The printer is equipped with a security lock feature. Attach a security lock compatible with most laptop computers in the location shown to secure the printer in place. Erasing printer memory To erase volatile memory or buffered data in your printer, turn off the printer.
  • Page 137: Configuring Printer Hard Disk Encryption

    Securing the printer Configuring printer hard disk encryption From the home screen, touch Settings > Security > Disk Encryption > Start Encryption. Note: Enabling disk encryption erases the contents of the hard disk. If necessary, back up important data from the printer before starting the encryption. Follow the instructions on the display.
  • Page 138 Securing the printer Disposing of a printer hard disk • Degaussing—Flushes the hard disk with a magnetic field that erases stored data • Crushing—Physically compresses the hard disk to break component parts and render them unreadable • Milling—Physically shreds the hard disk into small metal bits Note: To guarantee that all data are completely erased, destroy physically each hard disk where data is stored.
  • Page 139: Maintaining The Printer

    Maintaining the printer Maintaining the printer Warning—Potential Damage: Failure to maintain optimum printer performance, or to replace parts and supplies, may cause damage to your printer. Networking Connecting the printer to a Wi‑Fi network From the printer control panel, navigate to: Settings >...
  • Page 140: Setting Up Serial Printing (Windows Only)

    Maintaining the printer Access the WPS settings. For more information, see the documentation that came with your access point. Enter the eight‑digit PIN, and then save the changes. Deactivating the Wi‑Fi network From the printer control panel, navigate to: Settings > Network/Ports > Network Overview > Active Adapter > Standard Networking For non-touch-screen printer models, press to navigate through the settings.
  • Page 141: Cleaning Printer Parts

    Maintaining the printer Open the printer properties, and then select the COM port from the list. Set the COM port parameters in Device Manager. Notes: • Serial printing reduces printing speed. • Make sure that the serial cable is connected to the serial port on your printer. Cleaning printer parts Cleaning the printer CAUTION—SHOCK HAZARD: To avoid the risk of electrical shock when cleaning the exterior of the...
  • Page 142: Cleaning The Scanner

    Maintaining the printer Cleaning the scanner Open the scanner cover. Using a damp, soft, lint-free cloth, wipe the following areas: • ADF glass...
  • Page 143 Maintaining the printer • ADF glass pad • Scanner glass • Scanner glass pad Close the scanner cover.
  • Page 144 Maintaining the printer Open the ADF cover. Using a damp, soft, lint-free cloth, wipe the following areas: • ADF glass pad in the ADF cover • ADF glass in the ADF cover Close the ADF cover.
  • Page 145: Ordering Parts And Supplies

    Using genuine Lexmark parts and supplies Your Lexmark printer is designed to function best with genuine Lexmark parts and supplies. Use of third-party supplies or parts may affect the performance, reliability, or life of the printer and its imaging components. It can also affect warranty coverage.
  • Page 146 1, 2 cartridge This toner cartridge is supported only in MX521, and MX522 printer models. This cartridge is available only for contract‑managed printers. For more information, contact your Lexmark representative or system administrator. MX421, MX521, and MX522 regular toner cartridge...
  • Page 147: Ordering An Imaging Unit

    Regular imaging unit 56F0ZA0 Corporate Return Program imaging unit* 56F0Z0E * This imaging unit is available only for contract‑managed printers. For more information, contact your Lexmark representative or system administrator. Ordering a maintenance kit Match the maintenance kit to the printer voltage.
  • Page 148 Maintaining the printer Notes: • Using certain types of paper may require more frequent replacement of the maintenance kit. • The maintenance kit includes a fuser, MPF pick roller and separator pad, pick tires, separator roller assembly, and transfer roller. These parts may be individually ordered and replaced if necessary. Item Part number 200K maintenance kit, 100 V...
  • Page 149: Replacing Parts And Supplies

    Maintaining the printer Replacing parts and supplies Replacing the toner cartridge Open door A. Remove the used toner cartridge.
  • Page 150 Maintaining the printer Unpack the new toner cartridge, and then shake it three times to redistribute the toner. Insert the new toner cartridge. Note: Use the arrows inside the printer as guides. Close door A.
  • Page 151: Replacing The Imaging Unit

    Maintaining the printer Replacing the imaging unit Open door A. Remove the toner cartridge. Remove the used imaging unit.
  • Page 152 Maintaining the printer Unpack the new imaging unit, and then shake it three times to redistribute the toner. Warning—Potential Damage: Do not expose the imaging unit to direct light for more than 10 minutes. Extended exposure to light may cause print quality problems. Warning—Potential Damage: Do not touch the photoconductor drum.
  • Page 153 Maintaining the printer Close door A. Replacing the pick tires Turn off the printer. Unplug the power cord from the electrical outlet, and then from the printer. Remove the tray.
  • Page 154 Maintaining the printer Remove the used pick tires one after the other. Unpack the new pick tires.
  • Page 155 Maintaining the printer Insert the new pick tires. Insert the tray. Connect the power cord to the printer, and then to the electrical outlet. CAUTION—POTENTIAL INJURY: To avoid the risk of fire or electrical shock, connect the power cord to an appropriately rated and properly grounded electrical outlet that is near the product and easily accessible.
  • Page 156 Maintaining the printer...
  • Page 157 Maintaining the printer Remove the tray insert, and then flip the tray base. Remove the used pick roller assembly. Unpack the new pick roller assembly.
  • Page 158 Maintaining the printer Insert the new pick roller assembly. Flip the tray base, and then insert the tray insert.
  • Page 159: Moving The Printer

    Maintaining the printer Align the printer with the optional tray, and then lower the printer until it clicks into place. Connect the power cord to the printer, and then to the electrical outlet. CAUTION—POTENTIAL INJURY: To avoid the risk of fire or electrical shock, connect the power cord to an appropriately rated and properly grounded electrical outlet that is near the product and easily accessible.
  • Page 160: Saving Energy And Paper

    Make sure that there is adequate clearance around the printer. Note: Damage to the printer caused by improper moving is not covered by the printer warranty. Shipping the printer For shipping instructions, go to http://support.lexmark.com or contact customer support. Saving energy and paper Configuring the power save mode settings Eco‑Mode...
  • Page 161: Recycling

    The foam used in Lexmark packaging is recyclable where foam recycling facilities exist. Facilities may not exist in your area. When you return a cartridge to Lexmark, you can reuse the box that the cartridge came in. Lexmark recycles the box.
  • Page 162: Clearing Jams

    Clearing jams Clearing jams Avoiding jams Load paper properly • Make sure that the paper lies flat in the tray. Correct loading of paper Incorrect loading of paper • Do not load or remove a tray while the printer is printing. •...
  • Page 163: Identifying Jam Locations

    Clearing jams • Flex, fan, and align the paper edges before loading. • Do not use paper that has been cut or trimmed by hand. • Do not mix paper sizes, weights, or types in the same tray. • Make sure that the paper size and type are set correctly on the computer or printer control panel. •...
  • Page 164: Paper Jam In Door A

    Clearing jams Paper jam in door A Remove the tray. Open door A.
  • Page 165 Clearing jams Remove the toner cartridge. Remove the imaging unit. Warning—Potential Damage: Do not expose the imaging unit to direct light for more than 10 minutes. Extended exposure to light may cause print quality problems. Warning—Potential Damage: Do not touch the photoconductor drum. Doing so may affect the quality of future print jobs.
  • Page 166 Clearing jams Remove the jammed paper. CAUTION—HOT SURFACE: The inside of the printer might be hot. To reduce the risk of injury from a hot component, allow the surface to cool before touching it. Note: Make sure that all paper fragments are removed.
  • Page 167 Clearing jams Insert the imaging unit. Note: Use the arrows inside the printer as guides.
  • Page 168: Paper Jam In The Rear Door

    Clearing jams Insert the toner cartridge. Note: Use the arrows inside the printer as guides. Close door A. Insert the tray. Paper jam in the rear door Open the rear door. CAUTION—HOT SURFACE: The inside of the printer might be hot. To reduce the risk of injury from a hot component, allow the surface to cool before touching it.
  • Page 169: Paper Jam In The Standard Bin

    Clearing jams Close the rear door. Paper jam in the standard bin Remove the jammed paper. Note: Make sure that all paper fragments are removed.
  • Page 170: Paper Jam In The Duplex Unit

    Clearing jams Paper jam in the duplex unit Remove the tray. Remove the jammed paper. Note: Make sure that all paper fragments are removed. Insert the tray.
  • Page 171: Paper Jam In Trays

    Clearing jams Paper jam in trays Remove the tray. Remove the jammed paper. Note: Make sure that all paper fragments are removed. Insert the tray. Paper jam in the multipurpose feeder Remove paper from the multipurpose feeder. Remove the jammed paper. Note: Make sure that all paper fragments are removed.
  • Page 172: Paper Jam In The Automatic Document Feeder

    Clearing jams Flex, fan, and align the paper edges before loading. Reload paper, and then adjust the paper guide. Paper jam in the automatic document feeder Remove all original documents from the ADF tray. Open the ADF cover. Remove the jammed paper. Note: Make sure that all paper fragments are removed.
  • Page 173 Clearing jams Close the ADF cover.
  • Page 174: Troubleshooting

    Troubleshooting Troubleshooting Network connection problems Cannot open Embedded Web Server Action Step 1 Go to step 2. Turn on the printer. Check if the printer is on. Is the printer on? Step 2 Go to step 3. Type the correct printer IP address in Make sure that the printer IP address is correct.
  • Page 175: Enabling The Usb Port

    Troubleshooting Action Step 6 Go to step 7. Contact your administrator. Check if the web proxy servers are disabled. Are the web proxy servers disabled? Step 7 The problem is Contact customer solved. support. Access the Embedded Web Server. Did the Embedded Web Server open? Unable to read flash drive Action Step 1...
  • Page 176: Hardware Options Problems

    Troubleshooting Checking the printer connectivity From the home screen, touch Settings > Reports > Network > Network Setup Page. Check the first section of the network setup page, and confirm that the status is connected. If the status is not connected, then the LAN drop may be inactive, or the network cable may be malfunctioning.
  • Page 177: Internal Solutions Port Does Not Operate Correctly

    Troubleshooting Action Step 4 The problem is Contact customer solved. support. Check if the internal option is available in the print driver. Note: If necessary, manually add the internal option in the print driver to make it available for print jobs. For more information, see “Adding available options in the print driver”...
  • Page 178: Issues With Supplies

    Troubleshooting Not enough free space in flash memory for resources Try one or more of the following: • From the printer control panel, select Continue to clear the message and continue printing. • Delete fonts, macros, and other data stored in the flash memory. •...
  • Page 179: Paper Feed Problems

    The printer has detected a non‑Lexmark supply or part installed in the printer. Your Lexmark printer is designed to function best with genuine Lexmark supplies and parts. Use of third- party supplies or parts may affect the performance, reliability, or life of the printer and its imaging components.
  • Page 180: Tray Linking Does Not Work

    Troubleshooting Collated printing does not work Action Step 1 The problem is Go to step 2. solved. From the printer control panel, navigate to: Settings > Print > Layout > Collate For non-touch-screen printer models, press to navigate through the settings. Set Collate to On.
  • Page 181: Paper Frequently Jams

    Troubleshooting Action Step 3 The problem is Contact customer solved. support. Make sure that Tray Linking is set to Automatic. For more information, see “Linking trays” on page Print the document. Do the trays link correctly? Paper frequently jams Action Step 1 Go to step 2.
  • Page 182: Printing Problems

    Action Step 1 Go to step 2. The problem is solved. Check if the printer is using a genuine and supported Lexmark toner cartridge. Note: If the cartridge is not supported, then install a supported one. Print the document. Is the printer printing blank or white pages?
  • Page 183 Troubleshooting Action Step 2 Go to step 3. The problem is solved. Remove any packing material that is left on the imaging unit. Remove the toner cartridge, and then remove the imaging unit. Warning—Potential Damage: Do not expose the imaging unit to direct light for more than 10 minutes.
  • Page 184 Action Step 1 Go to step 2. The problem is solved. Check if the printer is using a genuine and supported Lexmark toner cartridge. Note: If the cartridge is not supported, then install a supported one. Print the document. Is the print dark? Step 2 Go to step 3.
  • Page 185 Action Step 1 Go to step 2. The problem is solved. Check if the printer is using a genuine and supported Lexmark toner cartridge. Note: If the cartridge is not supported, then install a supported one. Print the document. Are fine lines not printed correctly?
  • Page 186 Action Step 1 Go to step 2. The problem is solved. Check if the printer is using a genuine and supported Lexmark toner cartridge. Note: If the cartridge is not supported, then install a supported one. Print the document. Is the paper folded or wrinkled? Step 2 Go to step 3.
  • Page 187: Gray Background

    Does gray background appear on prints? Step 2 Go to step 3. The problem is solved. Check if the printer is using a genuine and supported Lexmark toner cartridge. Note: If the toner cartridge is not supported, then install a supported one. Print the document.
  • Page 188 Troubleshooting Action Step 3 Go to step 4. The problem is solved. Depending on your operating system, specify the paper type from the Printing Preferences or Print dialog. Notes: • Make sure that the setting matches the paper loaded. • You can also change the setting from the printer control panel.
  • Page 189 Settings > Troubleshooting > Print Quality Test Pages. For non‑touch‑screen printer models, press navigate through the settings. Action Contact customer The problem is Check if the printer is using a genuine and supported Lexmark support. solved. toner cartridge. Note: If the cartridge is not supported, then install a supported one.
  • Page 190 Action Step 1 Go to step 2. The problem is solved. Check if the printer is using a genuine and supported Lexmark toner cartridge. Note: If the cartridge is not supported, then install a supported one. Print the document. Is the print light? Step 2 Go to step 3.
  • Page 191 Troubleshooting Action Step 5 Go to step 6. The problem is solved. Remove the toner cartridge, and then remove the imaging unit. Warning—Potential Damage: Do not expose the imaging unit to direct light for more than 10 minutes. Extended exposure to light can cause print quality problems.
  • Page 192 Action Step 1 Go to step 2. The problem is solved. Check if the printer is using a genuine and supported Lexmark toner cartridge. Note: If the toner cartridge is not supported, then install a supported one. Print the document.
  • Page 193: Paper Curl

    Action Step 1 Go to step 2. The problem is solved. Check if the printer is using a genuine and supported Lexmark toner cartridge. Note: If the cartridge is not supported, then install a supported one. Print the document. Is the paper curled? Step 2 Go to step 3.
  • Page 194 Troubleshooting Action Step 3 Go to step 4. The problem is solved. Depending on your operating system, specify the paper size and paper type from the Printing Preferences or Print dialog. Notes: • Make sure that the settings match the paper loaded. •...
  • Page 195: Repeating Defects

    Troubleshooting Action Step 1 Go to step 2. The problem is solved. Adjust the guides in the tray to the correct position for the paper loaded. Print the document. Is the print crooked or skewed? Step 2 Go to step 3. The problem is solved.
  • Page 196 Action Step 1 Go to step 2. The problem is solved. Check if the printer is using a genuine and supported Lexmark toner cartridge. Note: If the toner cartridge is not supported, then install a supported one. Print the document.
  • Page 197 Troubleshooting Action Step 3 Go to step 4. The problem is solved. Remove the imaging unit. Warning—Potential Damage: Do not expose the imaging unit to direct light for more than 10 minutes. Extended exposure to light may cause print quality problems. Warning—Potential Damage: Do not touch the photoconductor drum under the imaging unit.
  • Page 198 Action Step 1 Go to step 2. The problem is solved. Check if the printer is using a genuine and supported Lexmark toner cartridge. Note: If the toner cartridge is not supported, then install a supported one. Print the document.
  • Page 199 Action Step 1 Go to step 2. The problem is solved. Check if the printer is using a genuine and supported Lexmark toner cartridge. Note: If the toner cartridge is not supported, then install a supported one. Print the document.
  • Page 200 Action Step 1 Go to step 2. The problem is solved. Check if the printer is using a genuine and supported Lexmark toner cartridge. Note: If the toner cartridge is not supported, then install a supported one. Print the document.
  • Page 201 Do vertical dark lines or streaks appear on prints? Step 3 Go to step 4. The problem is solved. Check if the printer is using a genuine and supported Lexmark toner cartridge. Note: If the toner cartridge is not supported, then install a supported one. Print the document.
  • Page 202 Troubleshooting Action Step 4 Go to step 5. The problem is solved. Remove, and then insert the imaging unit. Warning—Potential Damage: Do not expose the imaging unit to direct light for more than 10 minutes. Extended exposure to light can cause print quality problems. Warning—Potential Damage: Do not touch the photoconductor drum under the imaging unit.
  • Page 203 Contact customer The problem is support. solved. Check if the printer is using a genuine and supported Lexmark toner cartridge. Note: If the toner cartridge is not supported, then install a supported one. Print the document. Do vertical dark streaks with missing images appear on prints? Vertical light bands Note: Before solving the problem, print the Print Quality Test Pages.
  • Page 204: Vertical White Lines

    Troubleshooting Action Contact customer The problem is Check if the printer is using a genuine and supported Lexmark support. solved. toner cartridge. Note: If the cartridge is not supported, then install a supported one. Print the document. Do vertical light bands appear on prints? Vertical white lines Note: Before solving the problem, print the Print Quality Test Pages.
  • Page 205 Troubleshooting Confidential and other held documents do not print Action Step 1 The problem is Go to step 2. solved. From the control panel, check if the documents appear in the Held Jobs list. Note: If the documents are not listed, then print the documents using the Print and Hold options.
  • Page 206 Troubleshooting Slow printing Action Step 1 Go to step 2. The problem is solved. Make sure that the printer is not in Eco‑Mode and Quiet Mode. Print the document. Is the printer still printing slow? Step 2 Go to step 3. The problem is solved.
  • Page 207: Print Jobs Do Not Print

    Troubleshooting Action Step 6 Go to step 7. The problem is solved. Make sure that the printer is not overheating. Notes: • Allow the printer to cool down after a very long print job. • Observe the recommended ambient temperature for the printer.
  • Page 208: Adjusting Toner Darkness

    Troubleshooting Action Step 4 The problem is Go to step 5. solved. Turn off the printer, wait for about 10 seconds, and then turn on the printer. Print the document. Is the document printed? Step 5 The problem is Contact customer solved.
  • Page 209: Job Prints From The Wrong Tray Or On The Wrong Paper

    Troubleshooting Action Step 4 Press the power Go to step 5. button to wake the Check if the printer is in sleep or hibernate mode. printer. Is the printer in sleep or hibernate mode? Step 5 Go to step 6. Make sure to match the following: Check if the cables connecting the printer and the computer are...
  • Page 210: Faxing Problems

    Troubleshooting Action Step 2 The problem is Go to step 3. solved. Depending on your operating system, specify the paper size and paper type from the Printing Preferences or Print dialog. Note: You can also change the settings on the printer control panel.
  • Page 211 Troubleshooting Action Step 3 Go to step 5. Go to step 4. Check for a dial tone. • Call the fax number to check if it is working properly. • If you are using the On Hook Dial feature, then turn up the volume to check if you hear a dial tone.
  • Page 212: Can Receive But Not Send Faxes

    Troubleshooting Action Step 7 The problem is Contact customer solved. support. Scan the original document one page at a time. Dial the fax number. Scan the document. Can you send or receive a fax? Can receive but not send faxes Action Step 1 The problem is...
  • Page 213: Scanning Problems

    Troubleshooting Poor fax print quality Action Step 1 The problem is Go to step 2. solved. Enhance the print quality. From the home screen, touch Settings > Print > Quality. Adjust the settings. Is the fax print quality satisfactory? Step 2 The problem is Go to step 3.
  • Page 214: Poor Copy Quality

    Troubleshooting Partial copies of document or photo Action Step 1 The problem is Go to step 2. solved. Make sure that the document or photo is loaded facedown on the upper left corner of the scanner glass. Copy the document or photo. Is the document or photo copied correctly? Step 2 The problem is...
  • Page 215 Troubleshooting Action Step 1 Go to step 2. The problem is solved. Open the scanner cover. Using a damp, soft, lint‑free cloth, wipe the ADF glass and the white underside of the ADF cover. Close the scanner cover. Do vertical streaks still appear on scanned documents? Step 2 Contact customer...
  • Page 216: Scanning Takes Too Long Or Freezes The Computer

    Troubleshooting Scanner does not close Action Remove obstructions that keep the scanner unit open. The problem is Contact customer solved. support. Did the scanner unit close correctly? Scanning takes too long or freezes the computer Action Close all applications that are interfering with the scan. Contact customer The problem is...
  • Page 217: Contacting Customer Support

    Technical support via telephone is also available. In the U.S. or Canada, call 1-800-539-6275. For other countries or regions, go to http://support.lexmark.com.
  • Page 218: Upgrading And Migrating

    Upgrading and migrating Upgrading and migrating Hardware Available internal options • Flash memory • Font cards • Firmware cards – Forms and Bar Code – IPDS – PRESCRIBE • Internal solutions port – RS-232C Serial Interface Card – Parallel 1284-B Interface Card –...
  • Page 219: Installing A Memory Card

    Upgrading and migrating Close the access cover. Connect the power cord to the printer, and then to the electrical outlet. Turn on the printer. Installing a memory card CAUTION—SHOCK HAZARD: To avoid the risk of electrical shock, if you are accessing the controller board or installing optional hardware or memory devices sometime after setting up the printer, then turn the printer off, and unplug the power cord from the electrical outlet before continuing.
  • Page 220 Upgrading and migrating Warning—Potential Damage: Controller board electronic components are easily damaged by static electricity. Touch a metal surface on the printer before touching any controller board components or connectors. Unpack the memory card. Warning—Potential Damage: Do not touch the connection points along the edge of the card. Insert the memory card until it clicks into place.
  • Page 221: Installing An Optional Card

    Upgrading and migrating Close the controller board access cover. Connect the power cord to the printer, and then to the electrical outlet. CAUTION—POTENTIAL INJURY: To avoid the risk of fire or electrical shock, connect the power cord to an appropriately rated and properly grounded electrical outlet that is near the product and easily accessible.
  • Page 222 Upgrading and migrating Unpack the optional card. Warning—Potential Damage: Do not touch the connection points along the edge of the card.
  • Page 223: Installing A Printer Hard Disk

    Upgrading and migrating Push the card firmly into place. Note: The entire length of the connector on the card must touch and be flush against the controller board. Warning—Potential Damage: Improper installation of the card may cause damage to the card and the controller board.
  • Page 224 Upgrading and migrating Warning—Potential Damage: Controller board electronic components are easily damaged by static electricity. Touch a metal surface on the printer before touching any controller board components or connectors. Unpack the hard disk. Attach the hard disk to the controller board. Warning—Potential Damage: Do not touch or press the center of the hard disk.
  • Page 225: Installing An Internal Solutions Port

    Upgrading and migrating Attach the hard disk interface cable to the controller board. Close the access cover. Connect the power cord to the printer, and then to the electrical outlet. CAUTION—POTENTIAL INJURY: To avoid the risk of fire or electrical shock, connect the power cord to an appropriately rated and properly grounded electrical outlet that is near the product and easily accessible.
  • Page 226 Upgrading and migrating Mounting bracket Thumbscrews Housing Interface cable Install the ISP into its housing. Secure the ISP in place and attach the ISP extended cable.
  • Page 227 Upgrading and migrating Open, and then remove the controller board access cover. Warning—Potential Damage: Controller board electronic components are easily damaged by static electricity. Touch a metal surface on the printer before touching any controller board electronic components or connectors. Attach the ISP kit to the printer.
  • Page 228 Upgrading and migrating If a printer hard disk is installed, then remove the hard disk before installing the ISP. Unplug the hard disk interface cable from the controller board.
  • Page 229 Upgrading and migrating Connect the ISP extended cable to the ISP connector.
  • Page 230 Upgrading and migrating Install the hard disk.
  • Page 231: Installing Optional Trays

    Upgrading and migrating Close the access cover. Connect the power cord to the printer, and then to the electrical outlet. CAUTION—POTENTIAL INJURY: To avoid the risk of fire or electrical shock, connect the power cord to an appropriately rated and properly grounded electrical outlet that is near the product and easily accessible.
  • Page 232: Software

    Obtain a copy of the software installer package. • From the software CD that came with your printer. • Go to http://support.lexmark.com, and then select your printer and operating system. Run the installer, and then follow the instructions on the computer screen.
  • Page 233: Firmware

    Upgrading and migrating For Macintosh users, add the printer. Note: Obtain the printer IP address from the TCP/IP section in the Network/Ports menu. Adding available options in the print driver For Windows users Open the printers folder. Select the printer you want to update, and then do either of the following: •...
  • Page 234 Updating firmware Some applications require a minimum device firmware level to operate correctly. For more information on updating the device firmware, contact your Lexmark representative. From the Embedded Web Server, click Settings > Device > Update Firmware. Browse to locate the required flash file.
  • Page 235: Notices

    The following paragraph does not apply to any country where such provisions are inconsistent with local law: LEXMARK INTERNATIONAL, INC., PROVIDES THIS PUBLICATION “AS IS” WITHOUT WARRANTY OF ANY KIND, EITHER EXPRESS OR IMPLIED, INCLUDING, BUT NOT LIMITED TO, THE IMPLIED WARRANTIES OF MERCHANTABILITY OR FITNESS FOR A PARTICULAR PURPOSE.
  • Page 236: Noise Emission Levels

    Notices Trademarks Lexmark, the Lexmark logo, and MarkNet are trademarks or registered trademarks of Lexmark International, Inc. in the United States and/or other countries. Google Cloud Print and Google Chrome are trademarks of Google Inc. Macintosh, the Mac logo, and Safari are trademarks of Apple Inc.
  • Page 237 The WEEE logo signifies specific recycling programs and procedures for electronic products in countries of the European Union. We encourage the recycling of our products. If you have further questions about recycling options, visit the Lexmark Web site at www.lexmark.com for your local sales office phone number.
  • Page 238: Energy Star

    Notices ENERGY STAR Any Lexmark product bearing the ENERGY STAR emblem on the product or on a start-up screen is certified to comply with Environmental Protection Agency (EPA) ENERGY STAR requirements as configured when shipped by Lexmark. Temperature information Ambient operating temperature 10 to 32.2°C (50 to 90°F)
  • Page 239: Power Consumption

    Notices DANGER - Rayonnements laser invisibles lors du retrait des cartouches et du déverrouillage des loquets. Eviter toute exposition au rayon laser. VAARA - Näkymätöntä lasersäteilyä on varottava, kun värikasetit on poistettu ja lukitus on auki. Vältä lasersäteelle altistumista. GEFAHR - Unsichtbare Laserstrahlung beim Herausnehmen von Druckkassetten und offener Sicherheitssperre. Laserstrahl meiden.
  • Page 240 The power consumption levels listed in the previous table represent time-averaged measurements. Instantaneous power draws may be substantially higher than the average. Values are subject to change. See www.lexmark.com for current values. Sleep Mode This product is designed with an energy-saving mode called Sleep Mode. The Sleep Mode saves energy by lowering power consumption during extended periods of inactivity.
  • Page 241 If this happens, the telephone company will provide advance notice in order for you to make necessary modifications to maintain uninterrupted service. If you experience trouble with this equipment, for repair or warranty information, contact Lexmark International, Inc. at www.lexmark.com...
  • Page 242: Notice To Users Of The Canadian Telephone Network

    Notices The Telephone Consumer Protection Act of 1991 makes it unlawful for any person to use a computer or other electronic device, including fax machines, to send any message unless said message clearly contains in a margin at the top or bottom of each transmitted page or on the first page of the transmission, the date and time it is sent and an identification of the business or other entity, or other individual sending the message, and the telephone number of the sending machine or such business, other entity, or individual.
  • Page 243: Using This Product In Switzerland

    LEX-M14-002 A11-0160001JP Using this product in Switzerland This product requires a Swiss billing tone filter (Lexmark part number 80D1877) to be installed on any line which receives metering pulses in Switzerland. Utilisation de ce produit en Suisse Cet appareil nécessite l’utilisation d’un filtre de tonalité de facturation suisse (nº de référence Lexmark : 80D1877) devant être installé...
  • Page 244: Regulatory Notices For Wireless Products

    Notices Uso del prodotto in Svizzera Questo prodotto richiede un filtro toni Billing svizzero, (codice Lexmark 80D1877) da installare su tutte le linee che ricevono impulsi remoti in Svizzera. Regulatory notices for wireless products This section contains regulatory information that applies only to wireless models.
  • Page 245 Member States relating to radio equipment. The manufacturer of this product is: Lexmark International, Inc., 740 West New Circle Road, Lexington, KY, 40550 USA. The authorized representative is: Lexmark International Technology Hungária Kft., 8 Lechner Ödön fasor, Millennium Tower III, 1095 Budapest HUNGARY.
  • Page 246 Note: To assure compliance with FCC regulations on electromagnetic interference for a Class A computing device, use a properly shielded and grounded cable such as Lexmark part number 1021231 for parallel attach or 1021294 for USB attach. Use of a substitute cable not properly shielded and grounded may result in a violation of FCC regulations.
  • Page 247 The manufacturer of this product is: Lexmark International, Inc., 740 West New Circle Road, Lexington, KY, 40550 USA. The authorized representative is: Lexmark International Technology Hungária Kft., 8 Lechner Ödön fasor, Millennium Tower III, 1095 Budapest HUNGARY.
  • Page 248 Note: To assure compliance with FCC regulations on electromagnetic interference for a Class B computing device, use a properly shielded and grounded cable such as Lexmark part number 1021231 for parallel attach or 1021294 for USB attach. Use of a substitute cable not properly shielded and grounded may result in a violation of FCC regulations.
  • Page 249 —Is manufactured from new parts, or new and serviceable used parts, which perform like new parts —Is, during normal use, free from defects in material and workmanship If this product does not function as warranted during the warranty period, contact a Remarketer or Lexmark for repair or replacement (at Lexmark's option).
  • Page 250 As part of your warranty service and/or replacement, Lexmark may update the firmware in your printer to the latest version. Firmware updates may modify printer settings and cause counterfeit and/or unauthorized products, supplies, parts, materials (such as toners and inks), software, or interfaces to stop working.
  • Page 251 Notices Lexmark's liability for actual damages from any cause whatsoever will be limited to the amount you paid for the product that caused the damages. This limitation of liability will not apply to claims by you for bodily injury or damage to real property or tangible personal property for which Lexmark is legally liable.
  • Page 252: Index

    Index Index Card Copy copy troubleshooting setting up 17 partial copies of documents or About this Printer menu 68 changing the printer port settings photos 214 accessing the controller poor copy quality 214 after installing ISP 140 board 218 changing the wallpaper 18 scanner does not respond 216 activating Voice Guidance 23 checking the status of parts and...
  • Page 253 Index deleting groups 22 editing 22 Device Quotas fax log setting up 19 viewing 51 directory list hardware options fax port 14 printing 37 trays 231 fax resolution Display Customization hardware options, adding changing 51 using 18 print driver 233 fax setup distinctive ring service, fax held jobs 36...
  • Page 254 HTML 75 Visible Home Screen Icons 67 using 24 HTTP/FTP Settings 122 Wireless 114 Image 76 mobile device Information Sent to Lexmark 62 printing from 33, 34 letterhead IPSec 120 Mopria Print Service copying on 39 Job Accounting 71 using 33...
  • Page 255 fine lines are not printed Defective flash detected 177 document feeder 172 correctly 185 Non‑Lexmark supply 179 paper jam in the duplex unit 170 folded or wrinkled paper 186 Not enough free space in flash paper jam in the multipurpose...
  • Page 256 216 conserving 161 recycling scanning takes too long 216 supplies status Lexmark packaging 161 vertical dark streaks on output checking 145 Lexmark products 161 when scanning from the supply notifications toner cartridges 161 ADF 214 configuring 148...
  • Page 257 182 enabling 175 crooked or skewed print 194 using dark print 183 genuine Lexmark parts 145 fine lines are not printed genuine Lexmark supplies 145 correctly 185 using Customer Support 18 folded or wrinkled paper 186...

Table of Contents