Table of Contents
Advertisement
Advertisement
Table of Contents

Related Manuals for Max Bepop CPM-200G


Summary of Contents for Max Bepop CPM-200G
- Page 1 CPM-200 OPERATION MANUAL ● Read this manual before operation. ● Keep this manual in a safe place. ● It is prohibited to reproduce part or all of the manual without our permission. ● The information in the manual is subject to change without prior notice. IL22610(00/02)
-
Page 3: Table Of Contents
Contents Be Sure to Read These Introduction …………………………………………………………………………………………………………… 3 Conventions Used in This Manual ………………………………………………………………………………… 3 Precautions for Use ………………………………………………………………………………………………… 4 Disclaimers …………………………………………………………………………………………………………… 4 Product Specifications ……………………………………………………………………………………………… 5 Before Use Package Contents …………………………………………………………………………………………………… 6 Component Names …………………………………………………………………………………………………… 6 Main Key Functions ………………………………………………………………………………………………… 6 Machine Preparation Loading the Tape ……………………………………………………………………………………………………… 7 Inserting the Refillable Ribbon Cartridge …………………………………………………………………………... -
Page 4: Be Sure To Read These
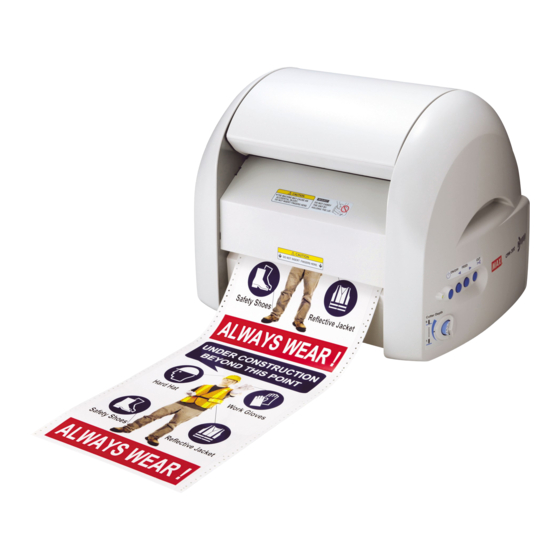
Be Sure to Read These Introduction Thank you for purchasing the CPM-200. The CPM-200 is a 200 mm width signs and labels creating machine that enables anyone to easily create displays, such as signboards and guide displays, and colorful, high quality labels. To maximize service life of the product, please use the CPM-200 in accordance with operation manual. -
Page 5: Precautions For Use
Disclaimers MAX will not be held responsible for any damages that occur as a result of not following the instructions in this manual, damages and lost profits resulting from not being able to use the machine (malfunction), or any relevant secondary damages. -
Page 6: Product Specifications
Printing density 300dpi 1.0”/sec. (25mm/sec.) Printing speed 0.001”/step (0.025mm/step) Resolution Cutter section 4.7”/sec. max (120mm/sec. max) (axial direction) Cutting speed Maximum output range 8” × 78.7” (200 × 2,000mm) USB2.0 Interface LAN 100baseTX Temperature 50 - 80°F(10 - 27°C) (77°F(25°C) recommended for... -
Page 7: Before Use
Before Use Package Contents Open the package and confirm that all of the following items are included. (2) Power Cord (5) Squeegee (1) CPM-200 (3) Cutting Tool (Blade) (4) W eeding Tool (1 pc.) (9) O peration Manual (8) P C Software (6) B lade Holder (7) B lade Holder (Attached upon... -
Page 8: Machine Preparation
Machine Preparation Loading the Tape Align the holes in the tape with the right and Pull up the opening/closing lever to open the door left sprocket pins. cover. Sprocket Pins Door Cover Ensure that the sprocket pins are inserted in the sprocket holes in the tape and that the tape is Opening/Closing Lever loaded straight on the roller. -
Page 9: Inserting The Refillable Ribbon Cartridge
Inserting the Refillable Ribbon Cartridge Fit the Hinges of the refillable ribbon cartridge into Pull up the opening/closing lever to open the door cover. the slots in the back of the door cover. Ensure that the ribbon gear color matches the colour printed on the CPM-200. Door Cover Orange Green... -
Page 10: Replacing The Ribbon Refill
Replacing the Ribbon Refill Open the door cover. Hold the refillable ribbon Prepare the new ribbon refill. cartridge catch and pull it forward. Transparent Frame Catch Take Up Core Retaining Tape Take Up Core Turn the cartridge downward and then pull it out. Insert two gears (one orange, one green) into the take up core on the transparent frame side. - Page 11 Remove the retaining tape. Firmly close the cartridge cover until a “click” sound is heard. Retaining Tape Click Click Insert the remaining gears (one orange, one green) If the cover does not close into the other take up core. Ensure the flat edges are face up.
-
Page 12: Installing (Replacing) The Cutting Tool (Blade)
Installing (Replacing) the Cutting Tool (Blade) Check that the power is turned off, and pull up the Prepare a new cutting tool (blade) and remove opening/closing lever to open the door cover. its protective cap. Door Cover Blade Edge of the Blade Protective Cap Insert/drop the blade into the blade holder and tighten the blade holder cap. -
Page 13: Adjusting The Cutting Pressure
Adjusting the Cutting Pressure Cutting depth is adjusted by changing the blade pressure (cutting pressure). The blade may cut too much or fail to cut depending on the type of material, temperature, and so on. Therefore, we recommend advance testing and adjustment of the cutting pressure. An appropriate cutting pressure leaves a slight trace on the release liner. -
Page 14: Connecting The Cable And Turning On The Power
Connecting the Cable and Turning On the Power Connect the power cord to the power connector. Connect the CPM-200 to the PC with the (Load the tape, refillable ribbon cartridge, and connection cable. blade in advance.) Press the power button to turn the power on. A green lamp will illuminate. Insert the power plug into an electrical outlet. -
Page 15: Bepoppc Ex Software Installation
1. Max Company Limited in Japan owns the copyright to this software. 2. It is prohibited to use or reproduce part or all of this software and manual without the prior consent of Max. 3. This software and manual are only allowed to be used under the end user licensing agreement for this product. -
Page 16: Bepoppc Ex Printer Driver Installation
BepopPC EX Printer Driver Installation Close all active applications and software before Read the License Agreement. After understanding beginning installation. and agreeing to the Terms and Conditions, please click “Next”. Place the attached CD-ROM into the driver. Click “continue” in the “User account settings” window. * USB Installation To install the printer driver please observe the following procedure, not observing the procedure... - Page 17 Check that the program folder is “BepopPC EX”, Check the box next to, “Installs the printer driver and then select “Next”. right away” and click “Finish”. Click the “Install” button. Select CPM-200 from the “List of models”, and click “Next”. The installation process will begin.
- Page 18 [Messages displayed during installation procedure] * The following messages will be displayed during the installation process. This product has passed our company’s strict quality control standards, and despite the messages this software can be used without problems. When the message is displayed, please click “Install”, “Install this driver software anyway”, or “Continue Anyway”. * The following messages have been shortened for explanation purposes. * The content and order of the messages may change depending on the computer and operating environment.
- Page 19 [USB Cable Driver Installation] Select “USB Cable” and click on the “Next>” button. Select “Yes, restarts immediately” and click “Finish”. * Printer must be used with a USB connection after this * If other programs were not closed before the installation, select “No” and restart the computer after closing other installation.
- Page 20 [LAN Cable Driver Installation] Select “LAN cable” and click “Next”. Set the Port Name and IP Address on the computer. After inputting the Port Name and IP Address on the computer, click “OK”. * Ask your network administrator about the correct IP Address. * The IP Address should include the first 9 digits of the computer you are using(3 digits for first three boxes).
-
Page 21: Cpm-200 Ip Address Settings
CPM-200 IP Address Settings It is possible to connect the CPM-200 to a wireless Local Area Network(LAN). IP Address Settings for the printer must be changed when using a LAN connection. Cautions for connecting to a Local Area Network Consult with your network administrator before performing a LAN installation on your computer. ● DHCP retrieval and SNMP management are not supported. - Page 22 Setting the Printer IP Address * To set the Printer IP Address the printer must be connected to the computer via a USB port. Insert install CD-ROM into the computer. Enter the IP Address and click “Register”. By clicking the “Finish” button the settings procedure is complete.
-
Page 23: First Let's Give It A Try
First let’s give it a try! Make a sign layout. This will explain how to make a sign using CPM-200. Let’s try to make the multi-color sign below: black black General Flow Start your BepopPC EX software Insert a color symbol Input text data Input a cutting line Print (and cut!) ☆ When trying to make a sign to an exact measurement, reverse the order of steps Start the BepopPC EX software Please open the BepopPC EX Software In the event that you are using multiple Bepop systems, the “Tape Settings”... - Page 24 Insert Symbols Insert Letters mark to open the “Insert Color Click on the icon to open a text box. Click and Click on the Symbol” dialog box. drag to create the text box border. Under the group 07 Rules and Regulations, select the “P003 No Fires”...
- Page 25 Insert a Cut-line In the cut-bar, choose the rounded rectangle shape. The CPM-200 status monitor automatically opens. Select the black ribbon, and click print. Drag the cut-shape to fit your sign size. After the print stops, the machine will rewind the tape. Open the cover and exchange the Black Ribbon with a Red Ribbon.
-
Page 26: Check The Remaining Sheet Length
Check the remaining sheet length. It is possible to check the remaining sheet length in your CPM-200 by using the status Monitor. It is convenient to use it to check the remaining sheet About the Status Monitor length before printing. During the printing process, it is possible to check the current condition of your printer and consumables. -
Page 27: Adjusting The Print Tempurature
Adjusting the print tempurature It is possible to change the printing tempurature. In the event that the printed areas become speckled, wrinkled, or small letters are having trouble printing, change the printing tempurature in the print properties. In the BepopPC EX menu bar, select File → Print. Adjust the Print Temperature bar 1 increment at a time, and click the okay button. -
Page 28: Making A Cutting Layout, And Cutting A Sign
Making a cutting layout, and cutting a sign The CPM-200 can also freely cut signs. This section will cover the operations and procudure using BepopPC EX software. ③ Select the icon to draw a cut-shape around the Plug in your CPM-200 and open the BepopPC EX software. letters, this will improve the weeding process. -
Page 29: How To Apply Cut Letter Designs
How to apply cut letter designs Preperation (weeding) Press the application sheet firmly against the surface When your CPM-200 has finished cutting letters, use of the design. If the design is difficult to transfer, the following instructions to prepare your letters for press the back of the sheet as well. transfer. - Page 30 Applying cut-letters to a surface Please be careful of the following three things: allignment, air bubbles, and material stretching (stretched materials do not regain shape). Depending on the size of the letters, dry application or wet application should be used appropriately. (Big letters use wet application) Dry Aplication Method(Less than 50cm/6 in) Application sheet While the design is attached to the paper backing,...
- Page 31 Wet Application Method(More than 50cm/6in) Soap solution Mix 1-2 tablespoons of a mild houshold soap into 4 Spray bottle liters of water. Fill a spray bottle with the soap solution. With the paper backing still applied, align the design Tape Application sheet and mark the alignment with tape. Heavilly spray the application surface and design(after removing backing) with the soap Application sheet...
-
Page 32: Uninstall Method How To Uninstall "Bepoppc Ex
Click on the “Setup of the BepopPC EX” button. When finished click on the “Finish” button. Click “Yes”. Computers using Windows 7/Vista will display the following message.) * Max custom fonts will also be deleted when software is uninstalled. BepopPC EX Software Installation... -
Page 33: Printer Uninstall
* Be sure to restart the computer after the uninstall is complete. How to use Bepop Membership You can enjoy the following free services on the member site home page http://www.max-ltd.co.jp/int/bepopregi/ ● Software upgrades ● Symbol downloads ● Application introductions ● And much more! * These services are free after you register your machine. -
Page 34: Trouble Shooting
Pg. 7 A tape feed error is going on. Please insert a Max Brand tape that is ends with a N. Insert a tape role with enough length to print the The remaining tape length is not enough to detect Pg. - Page 35 Error Printer LED Error Message Solution Reference Code Status ー The printer is now in operation. Please print after the printer is finished. Green After canceling the print using the status monitor, The temperature of the printer head is higher than ー...
- Page 36 Other errors/trouble shooting Problem Necessary Check Solution Files made by computer administrators can only be resaved by administrators. If you are not an Log in as an administrator, or save the file with a Cannot save a new draft administrator, you can only resave files that you different name.
- Page 37 Refer to “BepopPC EX Printer driver install” on page 15. ■ Cannot uninstall or install the printer driver. (There is a remaining printing job) Start → Printers and devices → Max CPM-200 (double click on the icon). If there is a document printing, select “printer” → “Errase all documents”. Retry the uninstall.
- Page 38 Open the serveice window: Start → (Control Pannel) → Performance and Maintanance → Administrative While looking at the same service window from step Tools → Service. , check that MAX CPM-200 Option UI Manager exists. * (Control Pannel) may or may not be displayed depending on the software version.
- Page 40 17.01 Vol.3...
Need help?
Do you have a question about the Bepop CPM-200G and is the answer not in the manual?
Questions and answers