TDK-Lambda GENESYS User Manual
Usb interface
Hide thumbs
Also See for GENESYS:
- User manual (113 pages) ,
- Technical manual (64 pages) ,
- Manual (44 pages)
Table of Contents

Related Manuals for TDK-Lambda GENESYS


Summary of Contents for TDK-Lambda GENESYS
- Page 1 USER MANUAL FOR USB Interface GENESYS™ POWER SUPPLIES Document: 83-033-800 Rev A TDK-Lambda Americas Inc. High Power Division 405 Essex Road, Neptune, NJ 07753 Tel: (732) 922-9300 Fax: (732) 922-9334 Web: www.us.TDK-Lambda.com/HP...
-
Page 3: Table Of Contents
2.5. Software Support........................4 2.6. USB Command Set ........................4 2.7. Linking Genesys™ USB To Other Genesys™ Supplies............5 2.8. USB Command Speed ......................5 3. Required Equipment ......................6 4. Grounding and Safety ......................6 5. Install USB Drivers for a Virtual COM Port ................7 5.1. -
Page 4: Warranty
WARRANTY The warranty for the power supply, as described in the Genesys™ User Manual, also applies to the USB option that is installed in the power supply. SAFETY The safety requirements and warnings for the power supply, as described in the Genesys™ User Manual, also applies to the USB option that is installed in the power supply. -
Page 5: General Information
User Manual for the Genesys™ product line. Although communicating through the USB can be as simple as typing commands into a terminal program (example: Windows HyperTerminal), TDK-Lambda also provides a variety of drivers, example programs and support for the USB. -
Page 6: Specifications
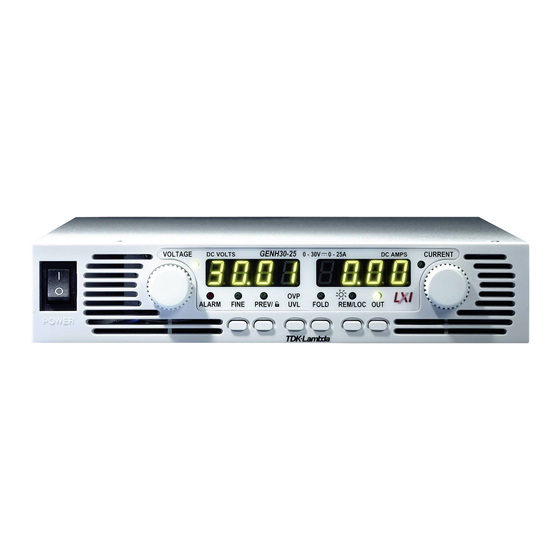
• Disable USB. Allows RS-232 and RS-485 with daisy chaining. • All other rear panel features are the same as the standard Genesys™ power supply. 2.3. Front Panel Specifications • On power-up, when USB is enabled, front panel shows “USb” for three seconds. -
Page 7: Linking Genesys™ Usb To Other Genesys™ Supplies
Up to 30 supplies may be linked from one USB ‘master’ to RS-485 ‘slaves’. • The RS-485 ‘slaves’ may be standard Genesys™. No extra cost for linking. • The USB option cannot be combined with the IEMD, LAN or Isolated Analog options. -
Page 8: Required Equipment
3. Required Equipment To remotely control a Genesys™ power supply through the USB, the following items are required: a. Computer with USB port, or a USB hub to expand the number of ports. b. Genesys™ power supply with the USB interface option. -
Page 9: Install Usb Drivers For A Virtual Com Port
5. Install USB Drivers for a Virtual COM Port To control your Genesys™ power supply through the USB port, it is a simple solution to install it as a Virtual COM Port (VCP). This gives you the same utilities, libraries and support as is given to your computer’s legacy serial port (i.e. -
Page 10: Communicating Using A Virtual Com Port
The below example is specific to the Windows operating system. Customers with other O.S. can find equivalent methods. 7.1. Setup the Power Supply a. Before turning the Genesys™ AC power on, set the rear panel 2-pole switch to enable the USB. It is sufficient to slide either of the two poles to DOWN. NOTE The Genesys™... -
Page 11: Find The Assigned Com Port
7.2. Find the Assigned COM Port When the Genesys™ USB power supply drivers are installed and the device is detected, the drivers dynamically assign a COM port to the connection. Since your computer may have a number of serial ports, finding the one assigned to the Genesys™ USB can be a challenge. -
Page 12: Open The Assigned Com Port
7.4. Open the Assigned COM Port In your terminal communication, select the COM port that was assigned to the Genesys™ USB: 7.5. Setup the COM Port The following pictures show how the HyperTerminal program is setup. Any other communication program must use similar settings. -
Page 13: Get The Power Supply Address
7.6. Get the Power Supply Address Every Genesys™ power supply has a serial COMM port address which is a number from 0 to 30. In order to open communication to a power supply, the addressing command “ADDR nn” must be sent. -
Page 14: Start Typing Commands
The command set is described in detail in the Genesys™ User Manual. A sample remote programming session is shown below. The power supply is set to deliver up to 5.0 volts and 100 amps. -
Page 15: Linking Multiple Supplies
8.1. Communication Daisy-Chain One Genesys™ with USB can be used to control a whole chain of supplies by using the J3-IN and J3-OUT connectors with RS-485 linking cables. Each power supply must be set with a different serial address. Communication to each supply is done by sending the addressing command “ADR nn”... - Page 16 This page left intentionally blank. 83-033-800 Rev A...
Need help?
Do you have a question about the GENESYS and is the answer not in the manual?
Questions and answers