
Related Manuals for Kaba Mas CDX-09


Summary of Contents for Kaba Mas CDX-09
- Page 1 CDX-09 INSTALLATION & OPERATING INSTRUCTIONS Please read all instructions carefully before putting your CDX-09 into operation.
-
Page 2: Table Of Contents
LIFE SAFETY OPERATION ................. 2 CDX-09 INSTALLATION ...............3 BASIC TOOLS NEEDED ................3 INSTALLATION KIT CONTENTS..............4 CDX-09 PARTS FOR INSTALLATION ............5 STRIKE INSTALLATION ................6 TEMPLATE ....................6 DEAD BOLT INSTALLATION ............... 6 EXTERIOR MOUNTING PLATE INSTALLATION ......... 6 DIAL RING INSTALLATION ................. -
Page 3: Introduction
NTRODUCTION The combination door unit can be added to the X-09 lock to form the CDX-09. This adaptation allows you to have access control on any door. PLEASE READ ALL INSTRUCTIONS CAREFULLY BEFORE ATTEMPTING TO INSTALL AND OPERATE YOUR CDX-09 LOCK ASSEMBLY. -
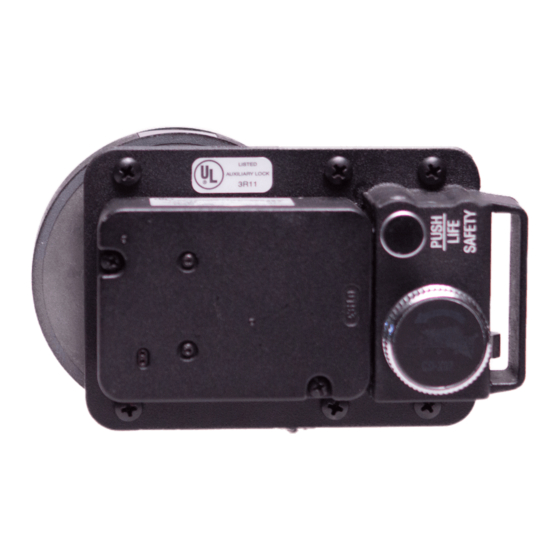
Page 4: To Open From Inside
TO OPEN THE CDX-09 FROM THE INSIDE Turn the release knob to the left (counterclockwise) to withdraw the dead bolt. Note: When closing the CDX-09, the dead bolt will not extend until the release bolt hits the door strike as the door closes. -
Page 5: Cdx-09 Installation
CDX-09 I NSTALLATION NSTRUCTIONS Please read all instructions carefully before you install and use your CDX-09 Lock Assembly. This will help you avoid unnecessary costs and concerns resulting from improper installation. BASIC TOOLS NEEDED Medium Phillip’s screwdriver (#1/#2). Standard hacksaw (32 teeth/inch). -
Page 6: Installation Kit Contents
5. Dial ring attaching locknuts, #8-32 (2). (Packaged with exterior mounting plate - used with Drill Resistant mounting plate) 6. Rubber vise clamp 7. CDX-09 to door mounting screws, pan head #10 x 1.25, Type AB (2) 8. Lubricant. 9. Gage, dial hub locating 10. -
Page 7: Cdx-09 Parts For Installation
CDX-09 PARTS FOR INSTALLATION CDX-09 Dead bolt lock assembly CDX-09 Base hardplate Dial hub assembly Strike Kit (1 of 4 Types: 1, 2, 3 or 9; Strike #9 is shown in photo with screws) Spindle Dial ring assembly Dial assembly... -
Page 8: Strike Installation
10. Place the outer tube over the cable and onto the tube retainer on the back of the lock case with the fl ared end toward the lock case. 11. Place the 3.5 X 5 x 1/8 inch hardplate against the back of the CDX-09 base. -
Page 9: Dial Ring Installation
12. Feed the cable and outer tube through the 1/2" hole in the door while positioning the CDX-09 and hardplate against the door. Insert the two (2) #10 screws nearest the strike opening to attach the CDX-09 and hardplate to the door. - Page 10 The information in this manual is subject to change without notice and does not represent a commitment on the part of Kaba Mas. Kaba Mas shall not be liable for technical errors or omissions contained herein; nor for incidental or consequential damages resulting from the furnishing, performance or use of this material.
Need help?
Do you have a question about the CDX-09 and is the answer not in the manual?
Questions and answers