Table of Contents
Advertisement
Advertisement
Table of Contents

Subscribe to Our Youtube Channel
Related Manuals for Kaba Mas X-09 1F


Summary of Contents for Kaba Mas X-09 1F
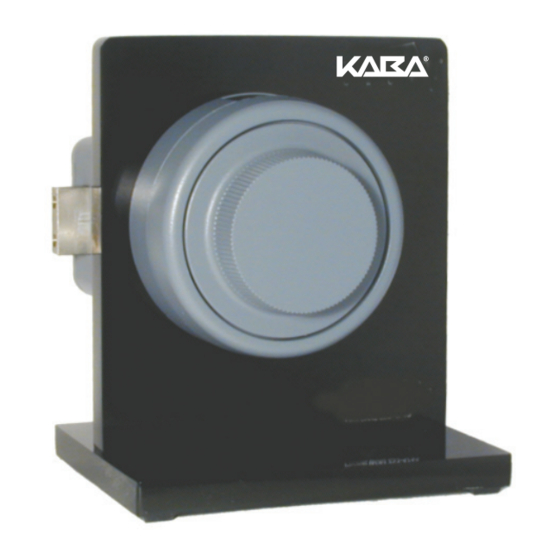
- Page 1 INSTALLATION INSTRUCTIONS X-09 Type 1F HIGH SECURITY ELECTRONIC LOCK...
-
Page 2: Table Of Contents
ABLE OF ONTENTS ................1 NTRODUCTION Basic Tools and Materials Needed ........... 1 Lock Parts for Installation ..............1 Installation Kit Contents ..............2 Template ................... 3 Preparation for New Installation of the Lock ........4 ................5 NSTALLATION Preliminary Lock Installation ............. 5 Cutting the Tubes ................ -
Page 3: Introduction
NTRODUCTION Please read all instructions before you install and use your Model X-09 lock. This will help you avoid unnecessary costs and concerns resulting from improper installation. BASIC TOOLS AND MATERIALS NEEDED 1. Small Phillips head screwdriver (#0) 2. Medium Phillips head screwdriver (#1/#2) 3. -
Page 4: Installation Kit Contents
INSTALLATION KIT CONTENTS Figure 2 - X-09 Installation Kit 1. Rubber Vise Clamp 2. Saw Blade (52 teeth/inch) 3. Saw Handle 4. Tube Deburr Stone 5. Outer Tube 6. Inner Tube 7. Dial Ring Mounting Screws (2) 8. Lock Case Mounting Screws (4) 9. -
Page 5: Template
TEMPLATE A template is provided as an aid for locating, drilling, and tapping the lock case and dial ring mounting screw holes relative to the spindle hole. Since the lock is designed to fi t most industry standard container lock mounting screw hole patterns, the need to use this template should be minimal. -
Page 6: Preparation For New Installation Of The Lock
PREPARATION FOR NEW INSTALLATION OF THE LOCK 1. Use the template to establish the exact relative locations of all of the necessary mounting holes for the lock case and the dial ring, when necessary. 2. The lock case mounting screws require drilled and tapped 1/4-20 screw holes. 3. -
Page 7: Installation
NSTALLATION PRELIMINARY LOCK INSTALLATION WARNING: The electronics in the X-09 are susceptible to damage from Electro Static Discharge (ESD). Make sure you are properly grounded before removing the lock cover and be careful to avoid touching the connectors on the card. 1. -
Page 8: Cutting The Tubes
5. Loosely attach the lock case assembly to the container wall with two of the four mounting screws, placing them diagonally across from each other. 6. Tighten the lock case mounting screws to hold the lock case in place. (See Figure 6.) CUTTING THE TUBES Figure 6 - Tighten Mounting Screws... -
Page 9: Installation Of The Lock
6. The inside and outside of the tubes must be deburred after cutting. Use the stone which is provided for this purpose. Make sure there are no sharp edges on either tube inside and outside so as not to damage the cables. -
Page 10: Installation Of The Dial Ring
INSTALLATION OF THE DIAL RING 1. Remove the two screws from the dial ring assembly cover and remove the cover. Note: Make sure the tubes are projecting through the container as shown in Figure 10. If not, the tubes are not seated properly in the lock or they were not cut to the proper length. -
Page 11: Installation Of Generator Cable And Cable Guides
Figure 14 - LCD and ZIF connectors INSTALLATION OF GENERATOR CABLE AND CABLE GUIDES 1. Place the generator cable into the dial ring housing recess containing a post used for positioning the cable. (See diagrams in Appendix B.) The hole in the cable must be positioned over the post on the dial ring, and the fi... -
Page 12: Installation Of The Dial Ring Cover
6. Depending on the thickness of the container, additional cable guides may be necessary to ensure the cables are suffi ciently restrained. Some possible locations are shown in Figure 16. Install additional guides as needed, and route the LCD and generator cables through them to ensure that the cables do not get routed through the “KEEP CLEAR”... - Page 13 Figure 19 - Proper Position Figure 18 - Wrong Position 3. Slide the spindle through the cam and reinsert the drive cam assembly into the lock case and the dial ring cover until the spindle nut is snug against the cam Spindle Nut and the cam is seated against the lock Lock...
-
Page 14: Installation Of The Dial Hub And Dial
INSTALLATION OF THE DIAL HUB AND DIAL 1. Apply lubricant to the hub bearing surface. 2. While holding the drive cam and spindle in their proper positions in the lock case assembly inside the container, push the dial hub assembly onto the spindle. 3. - Page 15 7. Apply lubricant to the retaining ring on the dial hub assembly and position the retaining ring so that an equal amount of it is consistently exposed around the hub. Also, apply grease from the lubricant tube to the entire ramp area just inside the back of the dial and also to the inner surface of the 5-sided formed clutch spring within the dial.
-
Page 16: Attach Back Cover Assembly For Testing
ATTACH BACK COVER ASSEMBLY FOR TESTING 1. Install the back cover assembly with the two mounting screws in order to test the operation of the lock. Do not install the cover lock pin at this time. Caution: Take care to align the connectors and the baffl e to the hole in the cover. -
Page 17: Installation Completion Checklist
INSTALLATION COMPLETION CHECKLIST 1. Does the dial turn freely without scraping or binding? 2. Have all screws been securely tightened? 3. Operate the lock using the preset factory combination of 50-25-50. See the following section: OPEN AND CLOSE THE X-09. OPEN AND CLOSE THE X-09 ( FACTORY COMBINATION CW=Clockwise;... -
Page 18: Appendix Atube Retainer Positions
APPENDIX A TUBE RETAINER POSITIONS The tube retainer must be positioned so the cables come through the notch in the retainer. NOTCH... -
Page 19: Appendix Bcable Routing Diagrams
APPENDIX B CABLE ROUTING DIAGRAMS Refer to the following table and diagrams for suggested cable routing paths to avoid pinching or rubbing of cables. Choose the diagram that most closely represents the thickness of the container door with which you are working. Ensure that the cables are routed so that they do not get pinched by the generator. -
Page 20: Appendix Csmall Spindle Hole Installation
APPENDIX C SMALL SPINDLE HOLE INSTALLATION FUNCTION OF THE INNER AND OUTER TUBES The tubes of the X-09 protect the cables from mechanical abrasion. The inner tube is positioned between the cables and the spindle while the outer tube is positioned between the cables and the holes through the hardplate and container skin. - Page 21 Insert the tube to be cut into the rubber vise clamp (provided). Then fi rmly clamp the rubber vise clamp in a vise. Use the saw to cut the tube where marked. Be careful to keep the cut as straight as possible. Keep in mind that the saw only cuts when pushing.
- Page 22 17. Place the fl ared end of the outer tube over the cables and inner tube, and seat it against the face of the container. 18. Continue with the installation of the lock by returning to the X-09 Installation Instructions and proceeding to the section entitled “INSTALLATION OF THE DIAL RING”...
- Page 23 OTES...
- Page 24 Notice: The information in this manual is subject to change without notice and does not represent a commitment on the part of Kaba Mas. Kaba Mas shall not be liable for technical or editorial errors or omissions contained herein; nor for incidental or consequential damages resulting from the furnishing, performance or use of this material.
Need help?
Do you have a question about the X-09 1F and is the answer not in the manual?
Questions and answers