
Related Manuals for Hach NITRATAX plus sc


Summary of Contents for Hach NITRATAX plus sc
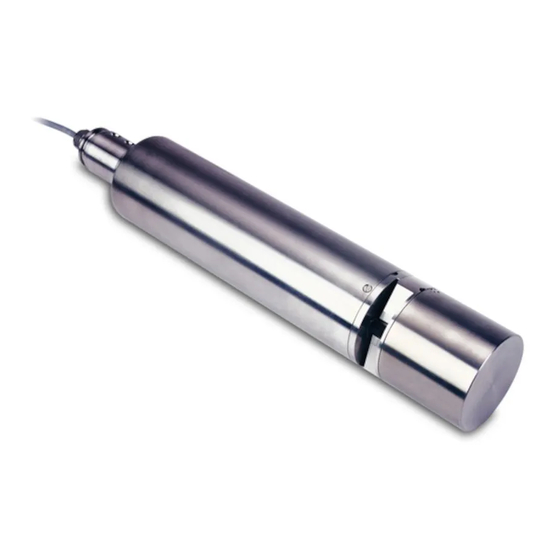
- Page 1 DOC023.52.03211 NITRATAX sc USER MANUAL 11/2014, Edition 6A © HACH Company, 2007–2012, 2014 All rights reserved. Printed in Germany. sd/sk...
-
Page 3: Table Of Contents
Table of Contents Section 1 Specifications ........................3 Section 2 General Information ......................7 2.1 Safety information ........................7 2.1.1 Use of hazard information....................7 2.1.2 Precautionary labels ......................7 2.2 Product overview ......................... 8 2.3 Theory of operation........................9 Section 3 Installation ........................ - Page 4 Table of Contents...
-
Page 5: Section 1 Specifications
Section 1 Specifications Specifications are subject to change without notice. Component NITRATAX plus sc NITRATAX eco sc NITRATAX clear sc NITRATAX sc tank sensor Measuring technique UV absorption measurement, reagent-free Measuring method Patented 2-beam method 1 mm (0.04 in.), 2 mm Measuring path 1 mm (0.04 in.) -
Page 6: Specifications
Specifications Component NITRATAX plus sc NITRATAX eco sc NITRATAX clear sc NITRATAX sc sensor material Sensor Sensor enclosure Stainless steel 1.4571 Stainless steel 1.4581 Wiper axle Stainless steel 1.4104 Stainless steel 1.4571 Cable gland Stainless steel 1.4305 Profile carrier 1 mm/2 mm Stainless steel 1.4310... - Page 7 Specifications Figure 1 Sensor dimensions NITRATAX plus sc Wiper profile 1 and 2 mm (0.04 in. and 0.08 in.) NITRATAX clear sc Wiper profile 5 mm (0.20 in.) NITRATAX eco sc...
- Page 8 Specifications...
-
Page 9: Section 2 General Information
Section 2 General Information 2.1 Safety information Please read this entire manual before unpacking, setting up or operating this equipment. Pay attention to all danger and caution statements. Failure to do so could result in serious injury to the operator or damage to the equipment. Make sure that the protection provided by this equipment is not impaired, do not use or install this equipment in any manner other than that specified in this manual. -
Page 10: Product Overview
Note: The flow-through units of the high precision NITRATAX plus sc and the NITRATAX clear sc sensors are used wherever direct measurement in the medium is not possible for structural reasons, or the medium load makes it necessary to measure a filtered sample (very high TS content, sewage treatment plant inlet, waste dump leachate, etc.). -
Page 11: Theory Of Operation
General Information 2.3 Theory of operation Nitrate dissolved in water absorbs UV light with wavelengths below 250 nm. This inherent absorption by nitrate makes it possible to photometrically determine the nitrate concentration without reagents by using a sensor positioned directly in the medium. As the measuring principle (Figure 3) is based on the evaluation of (invisible) UV light, the color... - Page 12 General Information...
-
Page 13: Section 3 Installation
Minimum distance of 100 mm (3.94 in.) to the ground Sensor bracket NITRATAX plus sc: 468–472 mm (18.4–19.6 in.) NITRATAX eco sc: 466 mm (18.3 in.) NITRATAX sc sensor NITRATAX clear sc: 462 mm (18.1 in.) -
Page 14: Unpack The Sensor
Installation 3.2 Unpack the sensor Remove the sensor from the shipping container and inspect the sensor for damage. Verify that all items listed in Figure 5 are included. If any items are missing or damaged, contact the manufacturer or distributor. Figure 5 Items supplied NITRATAX sc sensor with cable 1 wiper set (5 pieces) for 1 or 2 mm (0.04 in. - Page 15 Installation 2. Insert the connector in the socket and hand-tighten the union nut. Note: The middle connection of a sc1000 controller is solely reserved for the display module. Note: Optional cables may be purchased to extend the sensor cable length (see Section 8 on page 31).
- Page 16 Installation...
-
Page 17: Section 4 System Start Up
Section 4 System Start Up 4.1 Power the instrument 1. Plug the sensor into the controller. 2. Supply power to the controller. 3. When the controller is switched on for the first time, a menu for selecting the language opens automatically. Select the required language. 4. - Page 18 System Start Up...
-
Page 19: Section 5 Operation
Section 5 Operation 5.1 Use of an sc controller Before using the sensor in combination with an sc controller, refer to the controller user manual for navigation information. 5.2 Sensor setup When a sensor is installed for the first time, the serial number of the sensor is displayed as the sensor name. -
Page 20: Sensor Diagnostics Menu
5.4 Sensor diagnostics menu SELECT SENSOR STATUS>SELECT SENSOR (if more than one sensor is attached) Displays all actual error messages: ERROR LIST MOIST, R < M, DEXT < 0.0, W. POS. UNKNOWN, W. BLOCKED, FLASH FAILURE, R TOO HIGH, REPLACE SHAFT SEAL, SENSOR MISSING Displays all actual error messages: WARNING LIST EM TOO HIGH, CONC. - Page 21 Operation 5.5 Sensor setup menu (continued) Counter for customer service settings: 0–1000 days (180 days are recommended) TEST/MAINT Check the service contract and enter the defined value (number of days). 0 = Service deactivated The instrument resets the settings to the default configuration. PARAMETER: eco: NO -N;...
-
Page 22: Sensor Calibration
Operation 5.5 Sensor setup menu (continued) Overview of TOTAL TIME, PROFILE, CAL CHECK, SERVICE, SEALS, SHAFTSEAL, MOTOR and FLASH TOTAL TIME: Counter PROFILE: Counter 50000–0-negative number Note: Negative if passed. Negative numbers create warning messages. CAL CHECK: Counter xdays–0 - negative number Note: Negative if passed. - Page 23 Operation 5. Close the hole of the back of the measuring path of 2 and 5 mm sensors with a sticky tape that filled water cannot flow out. 6. Select OFFSET ADJUST and confirm. 7. Confirm the displayed OUTPUT MODE information. 8.
-
Page 24: Adjusting Turbidity Compensation
Operation 5.6.1 Adjusting turbidity compensation 1. Take a sample of activated sludge at the measuring location after the first half of the aeration phase. Immediately after sampling approximately 100 mL, filter the sample using a folded filter. 2. Similar to a standard solution, pour the filtrate into the measuring path of the sensor. As an alternative, the measured value can also be determined by a laboratory measurement (for NO N and NO... -
Page 25: Section 6 Maintenance
Section 6 Maintenance C A U T I O N Pinch Hazard. Only qualified personnel should conduct the tasks described in this section of the manual. Proper maintenance of the measuring windows in the sensor is critical for accurate measurements. The measuring windows should be checked monthly for soiling and the wiper profile checked for wear. -
Page 26: Clean The Measuring Path
Maintenance 6.2 Clean the measuring path D A N G E R Potential danger with contact with chemical/biological substances. Working with chemical samples, standards and reagents can be dangerous. Make yourself familiar with the necessary safety procedures and the correct handling of the chemicals before use and read and follow all relevant safety data sheets. -
Page 27: Change The Wiper Profile
Maintenance 6.3 Change the wiper profile C A U T I O N Obey the locally applicable accident prevention regulations. Wear protective gloves where necessary during the change of the wiper rubber. Refer to Figure 8 and the following steps to change the wiper profile. Note: First remove the sensor out of the flow-through unit until the wiper can be extended without resistance. -
Page 28: Check The Calibration
Maintenance Figure 8 Changing wiper profile Retaining strap Wiper profile Cap bottom Locking the wiper and cap in place 6.4 Check the calibration The NITRATAX sc program supports comparative measurements as part of Analytical Quality Assurance (AQA) using a command that automatically sets the factor to "1" and the offset to "0"... - Page 29 Maintenance Figure 9 Check the calibration (tank version) NITRATAX sc Pipette with standard solution...
- Page 30 Maintenance...
-
Page 31: Section 7 Troubleshooting
Section 7 Troubleshooting 7.1 Error messages When the sensor is experiencing an error condition, the sensor reading on the measurement screen will flash and the relays an analog outputs associated with this sensor will be held. Errors are defined in Table From the Main Menu, select SENSOR STATUS and confirm to determine the cause of the fault. - Page 32 Troubleshooting...
-
Page 33: Section 8 Replacement Parts And Accessories
Extension pipe 1.0 m (3.28 ft) LZY714.99.00040 Second fastening point (with retaining clamp) LZY714.99.03000 Flow-through unit for NITRATAX plus sc (2 mm/0.08 in.) LZX869 Flow-through unit for NITRATAX plus sc (5 mm/0.20 in.) LZX867 Flow-through unit for NITRATAX clear sc (5 mm/0.20 in.) -
Page 34: Replacement Parts And Accessories
Replacement Parts and Accessories 8.3 Wearing parts Description Catalog Number Wiper profile (1 mm/0.04 in.) (5 pieces) LZX148 Wiper profile (2 mm/0.08 in.) (5 pieces) LZX012 Wiper profile (5 mm/0.20 in.) (5 pieces) LZX117... -
Page 35: Section 9 Contact Information
HACH Company Repair Service in the Repair Service in Canada: Repair Service in World Headquarters United States: Latin America, the Hach Sales & Service Caribbean, the Far East, P.O. Box 389 HACH Company Canada Ltd. Indian Subcontinent, Africa, Loveland, Colorado... -
Page 36: Contact Information
Contact Information HACH LANGE D.O.O. ΗΑCH LANGE E.Π.Ε. HACH LANGE D.O.O. HACH LANGE MAROC SARLAU Fajfarjeva 15 Αυλίδος 27 Ivana Severa bb SI-1230 Domžale GR-115 27 Αθήνα HR-42 000 Varaždin Villa 14 – Rue 2 Casa Tel. +386 (0)59 051 000 Τηλ. -
Page 37: Section 10 Warranty And Liability
Section 10 Warranty and liability The manufacturer warrants that the product supplied is free of material and manufacturing defects and undertakes the obligation to repair or replace any defective parts at zero cost. The warranty period for instruments is 24 months. If a service contract is taken out within 6 months of purchase, the warranty period is extended to 60 months. - Page 38 Warranty and liability...
- Page 39 Appendix A Modbus Register Information Table 3 Sensor Modbus Registers Group Name Register # Data Type Length Description measurement 40001 Float diplayed measurement value unit 40003 Unsigned Integer unit : mg/l = 0 : g/l = 1 parameter 40004 Unsigned Integer parameter Measure interval 40005...
- Page 40 Modbus Register Information Table 3 Sensor Modbus Registers (continued) cal_L2 40077 Float cal. point 2 cal_L3 40079 Float cal. point 3 cal_mes 40081 Float m - calibration cal_ref 40083 Float r - calibration cal_intensity_mes 40085 Float intensity m - calibration cal_intensity_ref 40087 Float...
-
Page 41: Index
Index Accessories .............. 31 Pin assignment ............13 Calibration ..............20 Sensor Check up ............26 Calibration ............20 Diagnostics menu ........... 18 Cleaning overview ............8 Measuring path ..........24 Sensor setup ............17 Specifications ............. 3 Data logging ............. 17 Dimensions ............ - Page 42 Index...
Need help?
Do you have a question about the NITRATAX plus sc and is the answer not in the manual?
Questions and answers