Advertisement
Quick Links
Advertisement

Related Manuals for FLIR C346ZC252


Summary of Contents for FLIR C346ZC252
- Page 1 On-Screen Display Guide C346ZC252 1080p MPX PTZ Camera...
- Page 3 On-Screen Display Guide C346ZC252 1080p MPX PTZ Camera #LX400097; r.45718/45804; en-US...
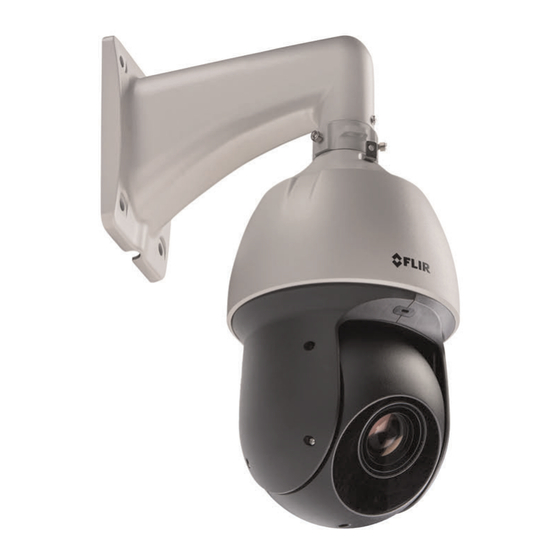
- Page 4 Thank you for purchasing this product. FLIR Systems, Inc. is committed to providing our customers with a high quality, reliable security solution. This manual refers to the following models: C346ZC252 For the latest online manual, downloads and product updates, and to learn about our complete line of accessory products, please visit our website at: www.flir.com/security/pro...
-
Page 5: Using The On-Screen Display
Using the On-Screen Display (OSD) Menu for C346ZC252 You can configure the camera’s advanced settings on a FLIR MPX DVR using the OSD menu. Use the OSD menu to correct imperfections in the camera image as well as config- ure automated PTZ functions like preset locations, patterns, and tours. - Page 6 Using the On-Screen Display (OSD) Menu for C346ZC252 System Settings — Menu Structure: SYSTEM INFORMATION ADDR Displays the camera address. Displays the camera baud rate. PARITY Displays the communication parity. VERSION Displays the PTZ firmware version. CAM VER Displays the camera firmware version.
- Page 7 Using the On-Screen Display (OSD) Menu for C346ZC252 1.1.2 Address (ADDR) Information NOTE The information in this section is for service purposes only. The address information menu lets you choose how the camera address is determined. The camera address is how standard definition DVRs identify PTZ cameras. Under ADDR...
- Page 8 Using the On-Screen Display (OSD) Menu for C346ZC252 1.1.5 Camera System Restart Restarts the camera system. The camera powers off and then resumes normal function. NOTE Restarting the camera system does not affect OSD menu settings. To restart the camera module: 1.
- Page 9 Using the On-Screen Display (OSD) Menu for C346ZC252 1.3 Camera Settings Use the camera settings menu to adjust the camera image. Camera Settings — Menu Structure: WB SETTING WB MODE • AUTO • • INDOOR • OUTDOOR • NA LAMP •...
- Page 10 Using the On-Screen Display (OSD) Menu for C346ZC252 FOCUS FOCUS • AUTO SETTING MODE • MANUAL • SEMIAUTO FOCUS • 10CM LIMIT • • • • • AUTO • SENSITIVITY • • HIGH IMAGE 1–100 ADJUST BRIGHT- 1–100 NESS 1–100...
- Page 11 Using the On-Screen Display (OSD) Menu for C346ZC252 1.3.1 White Balance Settings The white balance setting menu is used to correct color appearance in the camera image. To configure white balance settings: 1. Use the on-screen arrow keys to navigate to CAMERA SETTING and click Enter.
- Page 12 Using the On-Screen Display (OSD) Menu for C346ZC252 To configure the camera’s exposure mode: 1. Use the on-screen arrow keys to navigate to CAMERA SETTING and click Enter. 2. Select EXPOSURE SETTING and click Enter. 3. Under AE MODE, click the left / right arrow keys to select one of the following exposure modes: •...
- Page 13 Using the On-Screen Display (OSD) Menu for C346ZC252 1.3.4 Bright Light Compensation (BLC) Turning on Bright Light Compensation (BLC) tones down highlighted areas of the image to create clearer, more detailed renderings of darker objects in the foreground. To enable BLC: 1.
- Page 14 Using the On-Screen Display (OSD) Menu for C346ZC252 1.3.6 High Light Reduction (HLR) Turn High Light Reduction (HLR) on or off. Turning HLR on darkens extremely bright cam- era images to ensure a clear camera image. To enable HLR: 1. Use the on-screen arrow keys to navigate to CAMERA SETTING and click Enter.
- Page 15 Using the On-Screen Display (OSD) Menu for C346ZC252 To enable digital WDR: 1. Use the on-screen arrow keys to navigate to CAMERA SETTING and click Enter. 2. Select EXPOSURE SETTING and click Enter. 3. Select NEXT PAGE and click Enter.
- Page 16 Using the On-Screen Display (OSD) Menu for C346ZC252 To configure focus settings: 1. Use the on-screen arrow keys to navigate to CAMERA SETTING and click Enter. 2. Select FOCUS SETTING and click Enter. 3. Under FOCUS MODE, click the left / right arrow keys to select one of the following options: •...
- Page 17 Using the On-Screen Display (OSD) Menu for C346ZC252 5. Under SATURATION, click the left / right arrow keys to select a saturation value for the camera image (1–100). 6. Under CHROMA SUPPRESS, click the left / right arrow keys to select a chroma sup- pression value for the camera image (1–4).
- Page 18 Using the On-Screen Display (OSD) Menu for C346ZC252 1.3.15 Digital Zoom The camera uses 25x optical zoom to capture a subsection of the camera image in great detail. If you want to zoom in even closer, the camera also features 16x digital zoom. By default, digital zoom is turned off.
- Page 19 Using the On-Screen Display (OSD) Menu for C346ZC252 3. Under PICTURE MODE, click the left / right arrow keys to select the resolution and frame rate for the live video stream. North American users should select one of the pic- ture modes listed under NTSC, while European users should use one of the PAL pic- ture modes.
- Page 20 Using the On-Screen Display (OSD) Menu for C346ZC252 Function Settings — Menu Structure: 1–300 PRESET PRESET NO TITLE PRESET1–PRESET300 SETTING Set the camera’s current position for the selected preset. CALL The camera automatically moves to the position of the currently selected preset.
- Page 21 Using the On-Screen Display (OSD) Menu for C346ZC252 AUTO RUN TASK NO 1–8 TIME TASK ON / OFF TASK SETTING WEEK • ALLWEEK • MON. • TUES. • WED. • THURS. • FRI. • SAT. • SUN. START TIME Specify when the task starts (24 hour time format).
- Page 22 Using the On-Screen Display (OSD) Menu for C346ZC252 NEXT PAGE PTZ SPEED 1–3 SET ZERO Sets the camera’s current position as the horizontal benchmark position. POWER UP POWER UP • AUTO • SCAN • PRESET • PATTERN • TOUR •...
- Page 23 Using the On-Screen Display (OSD) Menu for C346ZC252 To add presets: 1. Before entering the OSD menu, move the PTZ camera to the location where you would like to add a preset location, then launch the OSD menu. 2. Use the on-screen arrow keys to navigate to FUNCTION SETTING and click Enter.
- Page 24 Using the On-Screen Display (OSD) Menu for C346ZC252 1.4.3 Auto Scan An auto scan automatically cycles between a left and right point. You can set up to 5 auto- scan cycles. To add auto-scan cycles: 1. Before entering the OSD menu, move the PTZ camera to the starting position for the auto-scan cycle you want to setup, then launch the OSD menu.
- Page 25 Using the On-Screen Display (OSD) Menu for C346ZC252 2. Select TOUR and click Enter. 3. Under TOUR NO, click the left / right arrow keys to select a number for the tour. 4. Select SETTING and click Enter. 5. Configure the following: •...
- Page 26 Using the On-Screen Display (OSD) Menu for C346ZC252 To add a pattern: 1. Launch the OSD menu. Use the on-screen arrow keys to navigate to FUNCTION SET- TING and click Enter. 2. Select PATTERN and click Enter. 3. Under PATTERN NO, click the left / right arrow keys to select a number for the pattern.
- Page 27 Using the On-Screen Display (OSD) Menu for C346ZC252 6. Under PARAMETER, select the number for the chosen idle action. For example, set- ting an IDLE TIME of 5MIN, an IDLE ACTION of TOUR, and a PARAMETER of 1 will make the camera perform TOUR 1 after the camera is left idle for 5 minutes.
- Page 28 Using the On-Screen Display (OSD) Menu for C346ZC252 3. Select PRIVACY MASKING and click Enter. 4. Under PRIVACY NO, use the left / right arrows to set a number for the privacy mask. 5. Select SETTING and click Enter. 6. Under RESIZE, use the left / right arrows to select one of the four arrow symbols: •...
- Page 29 Using the On-Screen Display (OSD) Menu for C346ZC252 To configure power up settings: 1. Launch the OSD menu. Use the on-screen arrow keys to navigate to FUNCTION SET- TING and click Enter. 2. Select NEXT PAGE and click Enter. 3. Under POWER UP, use the left / right arrows to set the camera’s function upon startup: •...
- Page 30 Using the On-Screen Display (OSD) Menu for C346ZC252 To set PTZ auto stop: 1. Launch the OSD menu. Use the on-screen arrow keys to navigate to FUNCTION SET- TING and click Enter. 2. Select NEXT PAGE and click Enter. 3. Under PTZ AUTO STOP, use the left / right arrows to set a time limit for continuous PTZ functions(5S - 30S) or select OFF to impose no limit.
- Page 31 Using the On-Screen Display (OSD) Menu for C346ZC252 5. Under CONTACT, choose the alarm signal mode of your alarm device. If the alarm contacts are normally open and the alarm should be triggered when the contacts close, select N/O. If the alarm contacts are normally closed and the alarm should be triggered when the contacts open, select N/C.
- Page 32 C346ZC252 OSD Menu Default Values 2.1 System Settings Menu SETTING DEFAULT VALUE 1–H SYSTEM SETTING → SYSTEM INFORMATION→ ADDR SYSTEM SETTING → ADDR INFORMATION → ADDR TYPE HARD SYSTEM SETTING → LANGUAGE ENGLISH SYSTEM SETTING → VIDEO OUTPUT 2.2 Display Settings Menu...
- Page 33 C346ZC252 OSD Menu Default Values SETTING DEFAULT VALUE CAMERA SETTING → IMAGE ADJUST → HUE CAMERA SETTING → IMAGE ADJUST → BRIGHTNESS CAMERA SETTING → IMAGE ADJUST → SATURATION CAMERA SETTING → IMAGE ADJUST → CHROMA SUPPRESS CAMERA SETTING → IMAGE ADJUST → GAMMA CAMERA SETTING →...
- Page 34 C346ZC252 OSD Menu Default Values 2.5 Alarm Settings Menu SETTING DEFAULT VALUE ALARM SETTING → ALARM NO ALARM SETTING → ACTION NONE ALARM SETTING → PARAMETER NONE ALARM SETTING → CONTACT ALARM SETTING → RELAY OUT ALARM SETTING → RESET DELAY 2.6 IR Light Settings Menu...
- Page 36 © 2017, FLIR Systems, Inc. All rights reserved worldwide. Names and marks appearing herein are either registered trademarks or trademarks of FLIR Systems and/or its subsidiaries. All other trademarks, trade names or company names referenced herein are used for identification only and are the property of their respective owners.
Need help?
Do you have a question about the C346ZC252 and is the answer not in the manual?
Questions and answers