Summary of Contents for Hyd-Mech M-16A PLC 500 E600
Page 1
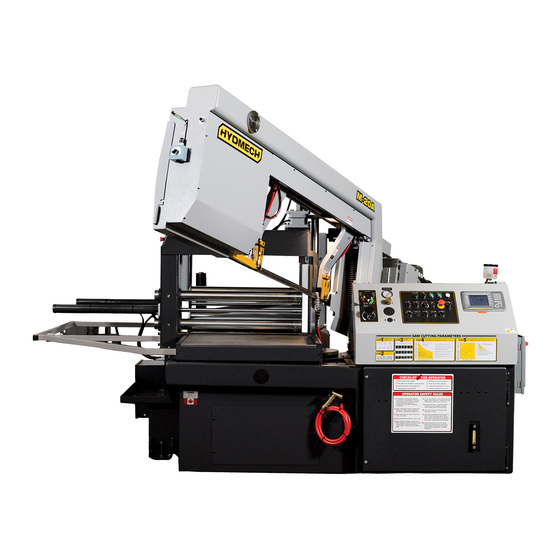
M-16A & M-20A PLC 500 E600 & PLC 100 E200 2003 Revision C 393060 December 2003 Effective T0503338 THANK YOU, On behalf of everyone at HYD . MECH, I would like to thank and congratulate you on your decision to purchase a HYD .
SECTION 0 - SAFETY INSTRUCTIONS SUMMARY All persons operating this machine must have read and understood all of the following sections of this Manual: Section 0 SAFETY Section 2 OPERATING INSTRUCTIONS However, as a memory aid, the following is a summary of the Safety Section. Put Safety First Mandatory Information –...
SECTION 0, SAFETY INSTRUCTIONS FOREWORD Put Safety First! This Safety Section contains important information to help you work safely with your machine and describes the dangers inherent in our machines. Some of these dangers are obvious, while others are less evident. It really is important to PUT SAFETY FIRST.
Signatures Everyone involved in operation of this machine must sign below to confirm that: I have read and understood all parts of Section 0 – Safety, and Section 2 – Operating Instructions. Name Date Signature Everyone involved in the installation, inspection, maintenance, and repair of this machine must sign below to confirm that: I have read and understood all parts of this Operation and Maintenance Manual.
Page 10
Manual. Hyd-Mech Group cannot accept any liability for personal injury or property damage due to operator errors or non-compliance with the Safety and Operating Instructions contained in this Manual.
Responsibilities of the owner Organization of work This Operation and Maintenance Manual must always be kept near the machine so that it is accessible to all concerned. The general, statutory and other legal regulations on accident prevention and environmental protection must also be observed, in addition to the Manual material.
Condition of Machine and Workplace Ensure that the machine and its safety equipment is kept in good working order. Ensure that the work area is well lit, and protected from the elements, such as rain, snow, abrasive dust, and extremes of temperature. Ensure that the machine is installed with sufficient clearance around it for the safe loading and unloading of work pieces.
Page 13
Clothing, jewellery, protective equipment Personnel operating or working on the machine must not wear un-restrained long hair, loose- fitting clothes and dangling jewellery. When operating or working on the machine, always wear suitable, officially tested personal pro- tective equipment such as safety glasses and safety boots and any other equipment required by plant regulations.
Page 14
On Hyd-Mech machines the Master Disconnect Switch will be of one of three types: • Rotary switch mounted in electrical control cabinet door and inter-locked with door • Lever switch mounted in separate box mounted on the machine • Supply disconnect switch supplied by user at installation and usually wall-mounted within sight of the machine, depending upon local regulations.
SECTION 1 INSTALLATION Upon delivery of your new M-16/20 bandsaw, it is imperative that a thorough inspection be undertaken to check for any damage that could have been sustained during shipping. Special attention should be paid to the electrical and hydraulic systems to check for damaged cords, hoses and fluid leaks.
FOUNDATION, LEVELLING AND ANCHORING Machine location should be carefully selected. A flat concrete floor area should be chosen. It should have enough free space surrounding the machine to enable free access for safe operation and maintenance. The machine should be leveled in both directions, i.e. along and across its in-feed conveyor especially when machine is to be inserted into a larger conveyor system.
BLADE TENSION CHECK When the machine is first started, the head must be swung to the 45 position so the blade position can be checked. Open the door at the idler end of the head and see that the blade has not moved off of the wheel.
ON/OFF SWITCH SHOW IN “OFF” POSITION SAFETY LOCKOUT HOLE GROUND Disconnect Box Main Power Connections CUTTING FLUID The M16/20 uses a pump and reservoir to circulate the necessary cutting fluid to the blade for maximum blade life. Your saw blade supplier will be able to provide information on the cutting fluid products that are available for your needs.
HEAD HEIGHT CHECK The head height is carefully checked at the factory prior to shipping and should not change, however there may be a pos- sibility that either through lifting or when the machine is in transit, the position changes slightly. This should be checked at the time of installation.
SECTION 2, OPERATION INSTRUCTIONS This section has been prepared to give the operator the ability to set up the saw for most cutting situations. The saw is equipped with variable blade speed control and hydraulic feed control, as well as an extensive door chart to guide the operator to the correct setting of these controls.
THE CONTROL CONSOLE START-UP The M-16A and M-20A control console has been designed to simplify the operation of the saw, to give the operator the ability to stop any function at any time, and to be able to control all the functions remotely. We cannot overstress the im- portance of familiarizing yourself with the controls of the M-16A and M-20A prior to starting the machine.
Page 23
HYDRAULIC START - To start the hydraulic system, the switches for the head and both vises must be in the “NEUTRAL” position. The “HYDRAULIC START” button must be depressed and held in momentarily until the PLC display be- comes active. CYCLE START / PAUSE - This button starts the cutting cycles and will stay illuminated white until the cycles are completed.
GUIDE ARM - This switch controls the position of the idler (left) guide arm. WORK LAMP - This switch has two positions, OFF and ON. LASER GUIDE - This option switch has two positions, OFF and ON. PANEL SWITCHES SPECIFIC TO PLC 100, E200 INTERFACE HEAD SWING 90°...
CONTROL SYSTEM, MITSUBISHI PLC 500 OPERATION OVERVIEW The PLC is a programmable logic controller which allows the operator to run the machine in both manual and automatic modes. In manual mode, all functions can be operated by using a combination of selector switches on the control console and the PLC function buttons.
PLC CONTROL DESCRIPTION ACTIVATING THE PLC The PLC control will become active when all selector switches are in the neutral position and the HYDRAULIC START button is depressed and “held in” momentarily. If the head is not in the 90 position, the display will prompt you to “SWING THE HEAD TO 90 DEGREES”, press and hold the 90 key until the display returns to “MANUAL MODE”.
FUNCTION BUTTON DESCRIPTION On the dual function buttons, if a green indicator light is illuminated, it means that the function printed in green on the top of the button is enabled. A red light indicates the function printed in red at the bottom of that button is enabled. MANUAL MODE (Green light) •...
Page 28
AUTO MODE • Energizes CYCLE START button. MANUAL MODE No function MANUAL MODE • After entering an angle value, pressing F2 will cause the screen to read “TO INTIATE MOVEMENT TO XX.X DEGREES PRESS CYCLE START”. Upon pressing “CYCLE START” the head will swing to the programmed angle. AUTO MODE Used to scroll up through job information.
ONE CUT MODE In MAN mode, switching the front vise to closed position changes the PLC to “One Cut Mode “ to cut one piece at a de- sired length. To accomplish this, follow the procedure below. 1. In “MAN MODE” position the head for the required angle by using the 90 or 30 function keys.
AUTOMATIC OPERATION To enter AUTO MODE, the front vise switch must be in the closed position. When the AUTO/MAN button is pressed, the red indicator above it will come on, the screen will change to the PICK LIST display as shown on the following page and be ready for editing or starting a new job.
Page 31
PICK LIST SCREEN Before switching to AUTO MODE, position both the material for a trim cut as well as the head up limit switch so that no damage is caused by the shuttle moving the material into the blade (see “ONE CUT MODE”). 1.
NOTES: 1. The CYCLE START button is used to PAUSE a job in progress. When a job is PAUSED the PICK LIST will appear and the operator can make eventual alterations to the job values which will take place on the next piece to be cut or to edit a new job.
PLC CONTROL SYSTEM E200 NOTE: This instruction manual is applicable to the M-16A and M-20A equipped with a MITSUBISHI PLC manufactured after and including the following serial numbers: Machine Model Serial # M-16A S0801197 M-20A T0801245 + T0801250, T0801252 OPERATION OVERVIEW The PLC is a programmable logic controller, which allows the operator to run the machine in both manual and automatic modes.
ACTIVATING THE INTERFACE Position the head, fixed vise, and shuttle vise switches to the NEUTRAL (center) positions. If any of these switches are not in the NEUTRAL position, the hydraulics will not start. The PLC control will become active when the HYDRAULIC START button is depressed and “held in”...
SINGLE PART CYCLE OPERATION In MAN mode, the PLC allows the operator to initiate a “Single Part Cycle “ to cut one piece at a desired length. To accom- plish this, follow the procedure below. 1. A trim cut should be made before initiating the “Single Part Cycle “ operation. 2.
JOB DISPLAY WINDOW Job Number Required Quantity Length Cut Quantity PROCEDURE FOR EDITING OR STARTING A NEW JOB IN AUTO MODE 1. In AUTO mode, key in a job number from 0 to 99 and press If the job number has previously been pro- grammed, the REQUIRED QUANTITY (RQ), LENGTH (LTH) and QUANTITY (CT) will be displayed.
Page 37
NOTE: Before entering “AUTO MODE” and working with a “QUEUE”, follow the same procedures outlined on the previous page for “AUTOMATIC OPERATION” with regards to setting up for an initial trim cut. WORKING WITH A QUEUE The purpose of a QUEUE is to allow the operator to run several jobs (max of 5) in series if they are of the same material and shape.
KERF CORRECTION for ANGLE CUTTING When making mitered cuts and depending on the accuracy of the part length required, the part length must be set lon- ger than the desired length by an amount called the “KERF CORRECTION”. This is due to the fact that the PLC will not account for a difference in the kerf value (width of material removed by the blade) at various angles other than 90 .
HYDRAULIC FEED CONTROL The Hydraulic Feed Control is located to the left of the control panel. These controls allow control of Feed Force Limit and Feed Rate. Feed Force Knob Used to set Feed Force Limit (counterclockwise rotation to increase and clockwise rotation to decrease). Fast Approach Lever Depress for fast head descent.
Page 40
CHART EXAMPLE #1 We will use the parameters chart to set up the saw for cutting 8” (200mm) Diameter #1045 Carbon Steel. STEP 1, DETERMINE EFFECTIVE MATERIAL WIDTH - W (inches) or (mm) Effective material width, W (in.) for most common shapes of materials, is the wid- est solid part of the material to be in contact with blade during cutting.
Page 41
The following table gives examples of the optimum blade speeds for different materials. MATERIALS OPTIMUM BLADE SPEED ft/min m/min 5” (125mm) Dia Solid Carbon Steel 12” (300mm) I-Beam 4” x 4”(100 x 100mm) Rec Tube, 1/4” (6mm) Wall 4”(100) 400 Stainless Steel 2”...
Page 42
STEP 3, DETERMINE OPTIMUM BLADE PITCH - TEETH PER INCH (T.P.I.) Selecting a blade with proper tooth pitch is important in order to achieve optimal cutting rates and good blade life. For cutting narrow or thin wall structural materials a fine blade with many teeth per inch (T.P.I.) is recommended.
Page 43
Feed Rate, continued If the saw is fitted with a blade coarser than optimum (e.g: 1.4/2.5 TPI) we can still use the graph, but we go to the 1.4/2.5 curve. As a result we find that the FEED RATE is decreased to 1.3 in/min (133mm/min) for this blade. If however, the ma- chine is fitted with a finer than optimum blade (e.g.
COOLANT FLOW A generous flow of coolant should be applied in order to increase production and blade life. The machine is provided with a switch on the control panel as well as two independently controlled coolant spouts. One is on the adjustable guide arm, this one should always flood the blade with coolant.
SECTION 3, MAINTENANCE AND TROUBLE SHOOTING Switch off before beginning work. • The emergency switch, which is used to turn the hydraulics off, should not be the only means of shutting the power off before cleaning or performing maintenance to the machine. The main power disconnect should be switched off and locked.
BLADE CHANGING We cannot overstress the safety precautions which should be followed during this operation. Safety glasses, gloves as well as a long sleeve shirt should be worn. The hydraulics should be off at all times when the operator has his / her hands in contact with the blade.
BLADE TRACKING First, inspect the blade wheels for wear or damage and repair as required. Blade tracking adjustment should always begin at the wheel where the tracking is farthest out of specification. Using the instructions below, adjust the worst wheel, jog the blade and recheck both wheels.
BLADE GUIDE ADJUSTMENT At the bottom of the guide arms are the carbide blade guide assemblies, the photo shows the carbide locking handle. These assemblies will need to be adjusted occasionally as the carbide pads become worn. To adjust properly, follow this simple procedure.
LUBRICATION The design of the M-16, M-20 was intended to minimize maintenance, although periodically certain moving parts need lubrication. We recommend that this periodic lubrication be done once a month using any general purpose grease at the points indicated below. Horizontal pivot.
HYDRAULIC MAINTENANCE There are only FIVE items of routine maintenance associated with the hydraulic system. 1. OIL FILTER - Ten micron filtration of the hydraulic oil is provided by a spin on type filter mounted on the tank re- turn line. The element should be changed after the first 50 Hours of operation and then every 500 working hours. Suitable replacement elements are: CANFLO RSE-30-10...
Page 51
TROUBLESHOOTING Most problems which may occur have relatively simply solutions which appear in this section. If the solution is not found here, contact the Hyd·Mech Distributor from whom you purchased your bandsaw. They have trained field service person- nel who will be able to rectify the problem. PROBLEM PROBABLE CAUSE SOLUTION...
Page 52
Saw starts but will not On machines so equipped, Reload with stock. Hold the hydraulic run after Start button has the out-of-stock limit switch start button and open vises far enough been released has been tripped to deactivate the limit switch Saw starts but no hydrau- If blade wheels run clock Stop immediately;...
Page 53
To view the parameters: Start the machine and, in manual mode, enter the parameter screen by pressing the PARAMETER key (F16). Type the password which can be obtained from HYD-MECH and press ENTER. Press parameter key again and the parameter screen will appear.
Page 54
MITSUBISHI PLC 500 PARAMETER SCREEN (V18APC SHOWN) MTL INFEED: LEFT L ANG CLB “ENTER” LTH CLB “ENTER” TTL L MEAS ANG: 45.52 ACT LTH: 40.150 R ANG CLB “ENTER” STROKE: 39.900 TTL R MEAS ANG: 45.36 LNG TRG: .006 ANG TRG WD: 0.06 ACC DIST: .250...
the way to the back. It will close, the front vise will open, and the shuttle vise will move slowly all the way to the front. The front vise will clamp, the head will move forward for a cut and then retract. On M16/20A: The head will move down for a trim cut then move back up.
On V18APC: The head will swing slowly to 45 L, and then will come forward for a cut. It will retract, then swing slowly to 45 R, come forward for a cut, and then retract. At this point the procedure is complete. NOTE: If doing this procedure using material to scribe and calculate new value, a scribe cut at 90 will have to be made before starting the procedure.
Page 57
Parameter Definitions MTL INFEED MATERIAL INFEED Tells PLC which side of the machine material in-feed is on. (V18A ONLY ACT LTH ACTUAL LENGTH Value determined by, and entered after, performing the Length Calibration Procedure. PLC uses this value to calcu- late its length encoder resolution and Stroke parameter.
Page 58
ANG TRG WD ANGLE TARGET WINDOW Allowable + / - tolerance from programmed angle. ANG DEC ANGLE DECELLERATION Distance in degrees the head will move in slow speed on ap- proaching target angle. BP RADIUS On M16/20 The distance in inches from the front side of the blade to the pivot point of the head.
PLC 500 TROUBLESHOOTING Examples PROBLEM #1, PLC is not measuring lengths. POSSIBLE CAUSES 1. Encoder - pinion gear loose on encoder shaft - bad encoder 2. Encoder Cable - bad connection at encoder or PLC - open or shorted wire 3.
Page 60
CONSISTENT INACCURACY: (Make sure blade kerf value is correct) • Change “Actual Pos.” parameter to 1. This will make the PLC show actual shuttle travel in AUTO With no material in the machine: • Program JOB 1 for 2 pieces of 5” length, JOB 2 for 2 pieces of 10” length, and JOB 3 for 2 pieces of a length as one shuttle will allow.
PROGRAMMABLE LOGIC CONTROL, (E200, 2100 v1.0) NOTE: The PLC is equipped with a lithium battery to keep the program stored while the power is shut down. The battery will need to be replaced every 3 to 5 years, depending on usage. A visual warning will be displayed on the interface when the battery drains to a certain level.
Page 62
ACTUAL LTH Actual Length Value. Value entered after performing length calibration procedure (described later in this section). PLC uses this value to calculate its length encoder resolution and stroke parameter. Note: If Calibration Procedure is activated and not completed, or activated and a value not entered for ACT LTH, this value will reset to 00.000 and the PLC will not be able to count/display lengths.
QUEUE The queue allows the operator to run several jobs (max 5) in series. If “REPEAT” is selected the above series will be executed the selected number of times. CONV SYNCH SPEED Conveyor synchronization speed. (for optional driven conveyors only) Adjusting this parameter, the conveyor speed could be synchronized with shuttle speed in automatic mode and in manual mode, set to tandem operation.
Page 64
pinion gear is securely fastened to the encoder shaft and that it can rotate along the rack as the shuttle moves. If all mechanical components are functioning correctly then the encoder is defective. If all tests check positive, the problem is in the PLC unit. PROBLEM # 2, for automatic models with a shuttle.
INCONSISTENT INACCURACY 1. With the machine in MANUAL mode, move the shuttle all the way forward and clear (zero) the length display. Move the shuttle in reverse, in slow speed, all the way to the end of it’s travel. Return the shuttle forward to the home position, also in slow.
i.e. Programmed length = 1.00” Measured length = .999” -0.001” short = 12.00” = 11.988” -0.012” short = 60.00” = 59.940” -0.060” short Existing parameter “LTH CONST”=0.001256 11.988 divided by 12.00 x 0.001256 = 0.001255 The new parameter “LTH CONST” would be 0.001255. This value should be entered as the new “LTH CONST” parameter and test cuts repeated.
and HUP L/S deactivates. 7. After the cut is completed HDN input should light, HDN output should go out, the HUP output should light and the head should move up. When the head reaches it’s up limit, HUP input should come on, RHD output off and the cycle repeats with the next length being clamped on by the shuttle, front vise opening and the length being brought forward to home position.
DIAGNOSIS: 1. Check for LED light on the sensor - light on indicates prox. sensor power connections are correct and sensor is activated. Problem could be with the sensor, signal wire to the PLC or with the PLC. With blade running, proximi- ty LED should pulse.
CALIBRATION PROCEDURE FOR MITSUBISHI PLC with 2100 series software Length calibration may be achieved in two ways: by inputting “ACTUAL LTH” (actual length) or “LTH CONST” (length constant) parameter. To determine “Actual LTH” value, the “LTH CLB” (length calibration) procedure must be executed. In manual mode, position a piece of material, which is longer than the shuttle full stroke length (i.e.S20A=29.00”) and close the front VISE.
Page 71
Example; Cut length of 11.998”, Programmed length of 12”, Existing “LTH CONST” parameter of 0.001256. 11.988 ÷ 12.000 X 0.001256 = 0.001255 The new “LTH CONST” value of 0.001255 should be entered as the “LTH CONST” parameter and test cuts repeated. Adjust the parameter again if necessary.
3 to 5 years, depending on usage. A visual warning will be displayed on the inter- face when the battery drains to a certain level. Batteries can be purchased through your Hyd-Mech Distributor. 2. If the machine is equipped with an inverter, do not turn disconnect on for 3 three minutes after disconnect has been shut off.
Page 74
ELECTRICAL COMPONENTS Coolant pump. Head encoder (locat- ed behind a cover). Out of Stock Limit Switch. Proximity sensor, located behind idler wheel cover. Shuttle Encoder (located on Hirschman connectors, direc- the idler side of shuttle under a tional control valve solenoids and cover).
Page 75
90 Degree Limit Switch (inside Limit Switch Trip Pin attached hydraulic compartment). to the head. Head Up and Down Limit Switch Digital Angle Display Encoder.
Page 143
M16A/M20A E200 COMPONENT LIST: NO OPTIONS ECN:W00-0078 ITEM # DESCRIPTION UNIT K-M16A-PLC-71-00 Kit, Electrical Components, Generic 1.00 K-M16A-PLC-711-00 Kit, Base Components, Generic 1.00 370120 Cable, 25 D Pin / 8 Pin Mini Din, M16/20 1.00 372650 Switch, Selector, 3 Position, Spring Return to Center, ZB2BD5 1.00 372625 Switch, Selector, Standard lever, Black, 2 Position Maintained, 22mm...
Page 144
371285 Fuse, Fast Acting, Glass, 1/4 x 1 1/4, 2 Amp, 1.00 371190 Fuse Block, 12 mm 16-6 Awg, 15A 5.00 371070 End Clamp, Used with 35 x 7.5 din rail 2.00 372335 Rail, Din 35 x 7, 5 Slotted 2M 12.00 371290 Fuse, Time Delay, Glass, 1/4 x 1 1/4, 3 Amp,...
Page 145
373135 Wire, 16 Awg / 26, TEW, Black 246.00 373140 Wire, 16 Awg / 26, TEW, Dark Blue 975.00 373170 Wire, 16 Awg / 26, TEW, Green-Yellow Striped 156.00 373125 Wire, 12 Awg / 19, T90, Black 128.00 370410 Connector, Black Ferrule 80.00 392375 Label, Self Laminating Vinyl, 0.5 in.
Page 146
M16-712-01B Wrapper, Panel, Bottom 1.00 CHRM RD 1.125 Chrome, 1.125 in. 22.00 M16-712-02A Sheet, Wall, Side, Bottom Panel 1.00 M16-712-03 Hinge, Control Panel 1.00 HR RD 0.75 Round, Hot Rolled, 0.75 in. 2.00 M16-713-00A Weldment, Panel, Control 1.00 M16-713-01B Wrapper, Panel, Control 1.00 M16-713-02 Plate, Hinge, Control Panel...
SECTION 5, HYDRAULIC The M-16, M-20 hydraulic system does not require any special work on a new machine before its start up. The hydraulic tank is filled with Texaco Rando HD46 hydraulic oil and all machine functions have been tested at the factory to ensure proper operation upon initial start-up.
M-16 GUIDE ARM ASSEMBLY COMPONENT LIST ITEM M-16 PART NUMBER DESCRIPTION M16-3-01B GUIDE ARM BAR A1-.5X1 SOCKET HEAD CAP SCREW M16-47-01A DRIVE GUIDE ARM M16-4-01 GUIDE ARM INSERT M16-4-03 GUIDE ARM HANDLE M16-4-07 THREADED ROD M16-4-08 THREADED ROD COVER 1993 1 3/8 BALL KNOB, 1/2NC CRB-125-22-00 CARBIDE PAD, FRONT...
M-20 GUIDE ARM ASSEMBLY COMPONENT LIST ITEM M-20 PART NUMBER DESCRIPTION M20-3-01B GUIDE ARM BAR A1-.5X1 SOCKET HEAD CAP SCREW M20-47-01A DRIVE GUIDE ARM M16-4-01 GUIDE ARM INSERT M16-4-03 GUIDE ARM HANDLE M16-4-07 THREADED ROD M16-4-08 THREADED ROD COVER 1993 1 3/8 BALL KNOB, 1/2NC CRB-150-22-00 CARBIDE PAD, FRONT...
HYDRAULIC TANK ASSEMBLY ITEM M-16 & 20 PART NUMBER DESCRIPTION M16-611-00 POWER PACK WELDMENT S22A-61-01 OIL TANK LID B1-.312x.75 HEX HEAD CAP SCREW SES-3-40-S-80 FILLER CAP & BREATHER, 50micron T1-.19x.5 TRUSS HEAD MACHINE SCREW TFS-100-0-P SUCTION STRAINER 01HP-4 PIPE PLUG (drain) SNA2B LEVEL &...
CONVEYOR ASSEMBLY COMPONENT LIST ITEM QTY M-16 & 20 PART NUMBER DESCRIPTION M20-21-00B VISE / CONVEYOR WELDMENT M20-2-07B FRONT SHAFT CARRIER B1-.5x2.5 HEX HEAD CAP SCREW .5LOC LOCK WASHER S1-.5x2C SOCKET SET SCREW, CUP POINT M16-2-10A SHAFT M20-2-06C REAR SHAFT CARRIER A1-.5x1.5 SOCKET HEAD CAP SCREW .625x1.5PO...
DATUM VISE JAW ASSEMBLY ITEM M-16 & 20 PART NUMBER DESCRIPTION M20-54-00 DATUM LINE JAW WELDMENT M16-5-02 ECCENTRIC SHAFT CM10 5/8” ROD END .625HXNUT HEX NUT M16-5-06 DATUM MOUNTING PIN SH-0-75-PA 3/4” EXTERNAL RETAINING RING M16-53-00 YOKE WELDMENT S1-.25x.25 SOCKET SET SCREW, CUP POINT M16-5-09 .5HXNUT HEX NUT...
HYDRAULIC CHIP AUGER ASSEMBLY ITEM M-16 & 20 PART NUMBER DESCRIPTION TB0195FS100AAAB HYDRAULIC MOTOR 2503-10-4 O RING ADAPTOR, M STRT/FNPT 2103-4-4 90 deg ELBOW, MNPT/MJIC S1-.312x.25C SOCKET SET SCREW, CUP POINT F1-.375x1 FLAT SOCKET HEAD CAP SCREW M16-0101-00 CHIP AUGER 6.16...
DOOR AND COVER ASSEMBLIES Blade Guard: Idler Side Cover: M16-3-09B M16-3-07B M20-3-09D M20-3-07B Thumb Screw: Parameters Label: 1/4-20 x .75 S20-9-25 Idler Door: M16-33-00A M20-33-00 The head must be raised or swung to open Cover: Encoder Cover: M16-5-10 M16-56-00A Blade Cover: M16-3-12 Drive Door: M16-32-00C...
DIRECT DRIVE ASSEMBLY ITEM M-20 PART NUMBER DESCRIPTION 213T 10HP, 1800RPM, SPECIFY VOLTAGE HM5DD-RM CANIMEX GEAR BOX (shim kit HM5-SK) B1-.5x1.25 HEX HEAD CAP SCREW .5LOC LOCK WASHER W22-44-01 DRIVE WHEEL M20-3-13A DRIVE WHEEL CAP A1-.5x1.5 SOCKET HEAD CAP SCREW S2-.5x1 SOCKET SET SCREW, FLAT POINT M20LOC...
SECTION 7, OPTIONS BUNDLING ASSEMBLY For customers who cut bundles, a bundling vise is available. For “P” model machines, only one bundling assembly is re- quired for the single vise, an “A” model is shown below. When cutting a number of pieces at once, the vertical clamp holds the bundle down firmly to prevent cutting errors due to material slippage or vibration.
Page 208
BUNDLING ASSEMBLY Shuttle Vise Only Mounted inside top of shuttle frame. Shuttle Vise Only Front Vise Only...
BUNDLING ASSEMBLY COMPONENT LIST ITEM M-16 & 20 PART NUMBER DESCRIPTION M20-23-01A BUNDLING SHAFT (FRONT VISE) A1-.5x1.5 SOCKET HEAD CAP SCREW M20-52-01A BUNDLING SHAFT (SHUTTLE VISE) M16-52-05 MOUNTING BKT F1-.625x2 FLAT SOCKET HEAD CAP SCREW A1-.375x1 SOCKET HEAD CAP SCREW M16-521-00A BUNDLING TOP HOLDER B1-.5x1.5...
VERTICAL ROLLER ASSEMBLY ITEM M-16 & 20 PART NUMBER DESCRIPTION M20-251-00 MOUNTING BRACKET WELDMENT M16-253-00 SHAFT WELDMENT .5x1.5 ROLL PIN M16-252-00 VERTICAL TUBE SH-0150-PA 1 1/2” EXTERNAL RETAINING RING M16-25-01 MOUNTING BRACKET .5LOC LOCK WASHER B1-.5x1.5 HEX HEAD CAP SCREW F1-.5x2.5 FLAT SOCKET HEAD CAP SCREW...
Page 211
VARIABLE VISE PRESSURE This option is useful when the material being cut is soft or is a structrual and may be distorted by the full vise pressure. Variable Vise Pressure and Gauge OUT OF STOCK SWITCH For customers who plan to cut in the automatic cycle with limited supervision, an Out of Stock Limit Switch is available.
CUT LINE LASER SIGHT This laser is used to show where the blade will fall on the material to be cut. This is done with a red laser beam which is approximately .030” wide that can be placed on either the infeed or out feed side of the blade. This is particularly useful when cutting angles on structural materials.
MIST BLADE LUBRICATION SYSTEM This option supplies a regulated amount of lubrication to the blade. The system is operating whenever the hydraulic sys- tem is on. To activate the mist system, connect the air supply and disconnect to deactivate the system. The amount of lubrication can be adjusted with the dial below the oil tank.
WARRANTY Hyd-Mech Group Limited warrants each new M-16/20 bandsaw to be free from failure resulting from defective mate- rial and workmanship under proper use and service for a period of two years following the date of shipment to the user.
Need help?
Do you have a question about the M-16A PLC 500 E600 and is the answer not in the manual?
Questions and answers
WHAT IS THE PART NUMBER FOR CARBIDE GUIDES FOR THE M-16A BAND SAW