
Related Manuals for Korg C-900


Summary of Contents for Korg C-900
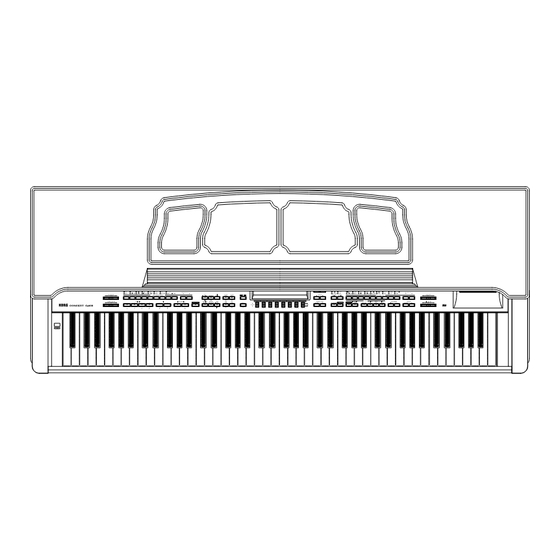
- Page 1 KORG DIGITAL PIANO GENERAL Owner’s Manual INSTRUMENT Please read this manual first Synthesis System...
-
Page 2: Important Safety Instructions
Introduction IMPORTANT SAFETY INSTRUCTIONS WARNING — When using electric products, basic precautions should always be followed, including the following. 1. Read all the instructions before using the product. 8. This product may be equipped with a polarized line plug (one blade wider than the other). This is a 2. - Page 3 Unauthorized changes or modification to this system can void the user’s authority to operate this equipment. Back-up Battery The C-900 uses a back-up battery to prevent memory loss when the power is turned off. If the display shows “Lo”, the battery should be replaced. Consult the nearest Korg Service Center or dealer.
-
Page 4: Table Of Contents
Keyboard lock ............25 4. Recording your own playing on the C-900 ......26 Saving your recorded performance . - Page 5 Connection to an Apple Macintosh via the AG-002B ..... .63 Korg MIDI Driver installation and setup ....... .64 1.
-
Page 6: Introduction
48 types of effects. In addition to a Piano mode that allows the C-900 to be used in the same way as a con- ventional electronic piano, the C-900 also provides an Arrangement Play function that lets you automatically add a sophisticated musical accompaniment simply by specify- ing easily fingered chords. -
Page 7: Controls And Basic Operation
4. POWER switch ☞p.8 For details on floppy disk handling, refer to “Floppy disks” beginning on p.9. This switch turns the power of the C-900 on and off. 12. Mic input jack (located on the bottom of the instrument) 5. -
Page 8: Operating Panel
The number of stars following the name of each key switch indicates the level of familiarity with the C-900 required for its use. ★ These keys are used for basic operations. In order to use the C-900 as a conventional electronic piano, it is necessary to understand how these keys work. - Page 9 Use these keys to modify the speed (tempo) of the These keys are used to switch between the four metronome, automatic accompaniment, or auto- major operating modes of the C-900. For piano matic playback. These are also used to increase/ playing or automatic accompaniment, use decrease numerical values, or to select alternatives.
-
Page 10: Rear Panel
MIDI messages from other devices. MIDI erator module, cassette recorder, or CD player can OUT transmits MIDI messages to other devices. be input to the C-900, and heard through the ☞ p.61 “8. MIDI Applications” C-900’s built-in speakers, headphones, or an audio 6. -
Page 11: Before You Use The C-900
“Precautions,” and “Warnings” located in the beginning of this manual. Preparations Check the included items Make sure that you have each of the following items included with the C-900. • “Owner’s Manual” (this book) • “Reference Guide” • Floppy disk CFD-01P......... This contains sounds and five types of automatic accompaniment data for the C-900. -
Page 12: Assembling The Stand
1. Controls and basic operation 3. During assembly, be sure to place the back Assembling the stand of the stand on a flat floor surface etc. as shown in the following diagram. Align the left side panel and the right side panel to the pedal box , and use the four long screws Caution... - Page 13 1. Controls and basic operation 6. Attach the keyboard unit. Check after assembly Place the keyboard unit so that the screw holes on the Are any parts left over? bottom of the keyboard unit are aligned with the screw holes on the stand. If any parts are left over, refer to the diagrams to see where they should go.
-
Page 14: Preparing For Play
Do not open or close the key cover of the C-900 when a floppy disk is protruding part way from the disk drive. 3. Turn on the power. -
Page 15: Floppy Disks
The disk CFD-01P contains automatic accompaniment data and voice program data. The information on these disks can be read by the floppy disk drive of the C-900. You can also use commercially available blank disks to store your own performances (including the automatic accompaniment) as data. -
Page 16: Floppy Disk Write Protect Slider
2. Floppy disks Floppy disk write protect slider Floppy disks have a small window called a “write protect hole,” which helps prevent accidental erasure or rewriting of the data. In order to prevent erasure of the data on a disk, move the tab downward after saving, to the “write prohibit”... -
Page 17: Getting Acquainted With The C-900
The actual displays will depend on what you did in the previous step. If things don’t work as you If you get lost in the displays and the C-900 does not work as you expect, press the expect EXIT key located to the immediate left of the LCD. -
Page 18: Play The Keyboard Of The C-900
Take time to fully enjoy the sounds of the C-900 before proceeding to the next step. 1. Enter Piano mode If the ARR PLAY LED is red, the C-900 is in Arrangement Play mode. -
Page 19: Selecting A Different Sound
Name KB1: Be01 Glocken =120 METRO 4/4 The sounds of the C-900 are organized into 18 program groups. The PROGRAM SELECT keys select sounds from within each group. 2. Play the keyboard once again. You will hear a different sound. -
Page 20: Splitting The Keyboard In Two
3. Getting acquainted with the C-900 Splitting the keyboard in two The C-900 lets you split the keyboard at any note, so that the low range (left hand) and high range (right hand) can be used separately. This lets you play different sounds in the left and right hands. -
Page 21: Making It Easier To Play Or Sing
When you wish to play a song that is too high or too low for a vocalist’s range or other instruments, you can simply change the pitch of the C-900 to play the song in a differ- ent key using the same fingering. - Page 22 ----- UPPER The pitch of the C-900 is now four semitones lower. Now you can use the chords of figure (ii) to produce the pitches of figure (i). Example 2) Suppose that this song is too low to sing comfortably, and you would like to sing it at a pitch three semitones higher.
- Page 23 UPPER 2. Press the TRANSPOSE +1 key two more times. SPLIT:C4 XPOSE:+3 ----- UPPER The pitch of the C-900 is now three semitones higher. Now you can use the chords of figure (iii) to produce the pitches of figure (iv).
-
Page 24: Listening To The C-900'S Automatic Playback
C-900 →3. Press one of the ARRANGEMENT GROUP keys, the PROGRAM GROUP keys, or the START/STOP key. The C-900 will begin playing a demo song, and the START/STOP LED will blink. For details on the demo songs, refer to p.101 of the Reference Guide. -
Page 25: Song Play
3. Getting acquainted with the C-900 Song Play The C-900 is able to load Standard MIDI File (SMF) format song data directly from a floppy disk and play it back conveniently. 1. Enter Song Play mode. If the SONG PLAY LED is lit, the C-900 is in Song Play mode. -
Page 26: Connect A Mic And Sing
3. Getting acquainted with the C-900 Connect a mic and sing By connecting a mic to the C-900 you can add vocals to the music. Try singing along with songs from the separately sold Korg SMF/GM library, or commercially available SMF/GM data. - Page 27 The following conditions may cause feedback (a squeal or whine). Make the appropriate adjustments. The characteristics of the mic. / The mic is aimed at the C-900. / The mic is too close to the C-900. / The mic volume or echo level is too high.
-
Page 28: Playing While Adding Automatic Accompaniment
1. Enter Arrangement Play mode. Enter Arrangement Play mode If the ARR PLAY LED is lit, the C-900 is in Arrangement Play mode. If you are not in Arrangement Play mode, press the ARR PLAY key located to the right side on the operating panel. - Page 29 You can use the ACC volume to adjust the overall volume of the entire accompani- ment. How does it sound? This example shows you how the C-900 can add an automatic accompaniment to your playing. 7. To stop the accompaniment, press the START/STOP key once again.
-
Page 30: Synchro Start
3. Getting acquainted with the C-900 Synchro start Instead of pressing the START/STOP key before you begin playing, this setting will make the arrangement begin playing at the moment that you touch the keyboard. 1. With arrangement play stopped, press the SYNCHRO START/STOP key located in the left side of the panel. -
Page 31: Keyboard Lock
3. Getting acquainted with the C-900 Keyboard lock ☞p.53 Prevent the tempo or sound The instrumental sounds and tempo used in arrangement play are set to the most from changing appropriate settings for each arrangement. This means that if you switch to a different arrangement while playing, the tempo and the sounds being played by the keyboard will also change to match the newly selected arrangement. -
Page 32: Recording Your Own Playing On The C-900
4. Recording your own playing on the C-900 Record your playing with tape The C-900 can record your playing (including the accompaniment) in a way similar to recorder-like operation using a tape recorder. Using the following procedure, try recording and playing back your own performance. -
Page 33: Saving Your Recorded Performance
Simply repeat the procedure from step 4 to re-record as many times as you wish. Saving your recorded performance If you now turn off the power of the C-900, the performance you just recorded in Back- ing Sequence mode will be lost. -
Page 34: Editing Your Performances
So first, let’s take a look at how the individual notes you played are kept in memory. 1. In Backing Sequence mode, record a performance into the C-900. ☞p.26 Of course, if the data you recorded in “4. Record your own playing on the C-900” is still in memory, you may use that performance. -
Page 35: You Can Input Notes One By One To Create Musical Data
3. Getting acquainted with the C-900 6. You can input notes one by one to create musical data Input notes one by one This section explains step recording: the process by which you can enter individual notes, specifying the pitch, length, and force of each one without recording from the keyboard. - Page 36 3. Getting acquainted with the C-900 6. Continue playing notes. Notice that each time you press and release the keyboard, the beat number advances by one. Although this will depend on the time signature of the arrangement that you selected, the time signature in this example is 4/4, meaning that each measure consists of four beats.
-
Page 37: Playing A Melody And Letting The C-900 Automatically Add An Accompaniment
5. Play a melody in the right hand range of the keyboard. For now, play only the white keys. The secret to helping the C-900 analyze your melody is to play short, precise notes. → Chords will automatically be assigned to the melody, and an automatic accom- paniment will play. - Page 38 3. Getting acquainted with the C-900...
-
Page 39: Basic Concepts Of The C-900
Look up the word “mode” in the dictionary, and it will tell you that it means “style” or “method.” In the context of the C-900, a mode is “a condition in which certain operations can be performed” or “a condition in which certain functions are active.” To simplify further, you might just think of a mode as a “condition.”... -
Page 40: What Is A Page
4. Basic concepts of the C-900 What is a Page? Each of the C-900’s modes (Arrangement Play, Backing Sequence, Song Play, Global) contain many functions. The functions in each mode are organized into a number of display screens which appear in the LCD. - Page 41 4. Basic concepts of the C-900 Open page 7 of Backing Sequence mode, SHIFT NOTE + KBTr 001 001 Sh=+00 and then press ARR PLAY key to return to Arrangement Play mode. Notice which page appears. 28:Exciter 01:Hall Just as it was before moving to Backing Sequence mode, page 7 is still selected.
-
Page 42: Styles/Arrangements/Programs
Backing tracks niment. What is a Program? Each of the instrumental sounds that can be played on the C-900 is referred to as a pro- Program gram. The C-900 contains 407 programs, organized into 18 groups (including 1 user group). -
Page 43: Operating The C-900 While Looking At The Display
5. Operating the C-900 while looking at the display As you have seen, the C-900 has a variety of keys arrayed across its operating panel that let you add various effects and modifications as you play. But in addition to the functions directly controlled by these keys, many more functions can be utilized by adjusting the various settings that appear in the LCD. -
Page 44: Adjusting "Loudness" Or "Speed
5. Operating the C-900 while looking at the display 2. Adjusting “loudness” or “speed” There will be times that you want to make adjustments to the numerical values that Selecting/setting values or items appear in the display, for example to make the drums a bit louder or to slow down the tempo of the automatic playback. -
Page 45: Interactive Composition
This accompaniment can be played at the same time that you are playing the melody on the keyboard. It is also possible to record the melody into the C-900 in Backing Sequence mode and add the accompaniment during playback. -
Page 46: Settings For The Interactive Composition Function
The tonic of the major key is shown to the left of the slash, and that of the minor key to the right. If this is set to AUTO, the C-900 will automatically determine the key. You can use this setting if you are not sure of the key. ☞p.41 “Automatic key detection”... -
Page 47: Adding Chords To The Melody That You Play
→ The display will show the chords that have been assigned by the Interactive Composition function. When using Realtime IC, the secret to helping the C-900 analyze your melody is to play short, clean notes. ● The keyboard range used by Interactive Composition The range of the keyboard used to play the analyzed melody will depend on the chord scanning setting. - Page 48 6. Interactive composition v) Play a melody in the right hand area of the keyboard. At this time, Chord Scanning and Interactive Composition will not operate. vi) When you finish playing, press the START/STOP key once again. Stop vii) Use the CURSOR √ √ √ √ or ® ® ® ® key to move the cursor in the display to the Key parameter.
- Page 49 When Backing Sequence IC is used, playing very quick notes may cause the C-900 to think that these notes were pressed accidentally, which will result in the melody not being analyzed correctly.
- Page 50 The Interactive Composition function can be used to assign chords to a musical per- formance that was previously recorded in Backing Sequence mode. i) In Backing Sequence mode, record a musical performance into the C-900. ii) Press the INTERACTIVE COMP. key located at the right on the operating panel, and then press the START/STOP key.
- Page 51 Interactive Composition works. Each song is a simple one, but you will see the way in which chords are assigned. The way that the C-900 analyses the melody will change depending on when you press and release the keys. Examples of parameter settings are given for each song, and you can try out various ways of playing with various settings, at tempo speeds that are comfortable for you.
- Page 52 6. Interactive composition Little Brown Jug Traditional Arrangement BALLROOM DANCE 1 Foxtrot 2 Major/Minor Chord Follow IC Type General 1, 2, 3 I’ve Been Working Traditional Arrangement POP 2 1 Motown Major/Minor Chord Follow IC Type Easy 1, 2 General 1, 2, 3...
-
Page 53: Functions, Operations And Terminology
The pages that follow contain alphabetically arranged explanations of the functions and basic terms that you will need to understand to take full advantage of the C-900. Each of the keys on the C-900’s operating panel is also explained in detail. -
Page 54: Arrangement Play Mode
The word “accompaniment” means something that ment Play mode. is “played along with” a musical part. Select this mode when you wish to play the C-900’s On the C-900, accompaniment refers to the instru- keyboard by itself, or to add automatic accompani- mental sounds other than drums, percussion and ment while you play. -
Page 55: Backing Sequence Mode
However, volume or mute settings can be made group of harmonically related notes. only when the realtime record/playback page (the In the context of the C-900, the word is used in this first page) is open. usual sense unless otherwise specified. - Page 56 C-900 musical data to and from floppy disk, to The cursor is the blinking horizontal line that specify the pitch or scale of the entire C-900, make appears below the item in the LCD that is selected settings for various basic functions, set the function for modification.
- Page 57 ARR.PLAY BACK.SEQ Sequence mode, the currently selected arrangement This refers to the last part of a song. On the C-900, will be displayed. After approximately 7 seconds each style has two endings; ENDING 1 and END- the previous display will reappear.
- Page 58 For some styles, a fill-in can also be used in place of ARR.PLAY BACK.SEQ an intro. When this key is pressed, the C-900 will analyze the melody you play on the keyboard, automatically determine chords, and play an automatic bass and 2. Step input accompaniment according to these chords.
- Page 59 KBD LOCK (keyboard lock) 1. In this manual, the switch buttons on the operating ARR.PLAY panel of the C-900 are referred to as keys; e.g., “the By pressing this key, you can keep the tempo and START/STOP key” or “a PROGRAM NUMBER keyboard sound of the current arrangement even key.”...
- Page 60 floppy disk into the C-900 memory is referred to as a process. “loading” data from a floppy disk.
-
Page 61: Piano Mode
PIANO MODE ARR.PLAY BACK.SEQ To jump to page displays 9–16, use the ARRANGE- Press this key when you wish to play the C-900 sim- MENT GROUP keys. ☞p.47 ply as a conventional electronic piano without using functions such as automatic accompaniment. -
Page 62: Song Play Mode
SCALE SOUND HOLD/ ® ® ® ® In general, the sequence of notes C-D-E-F-G-A-B-C 1. Sound hold is referred to as the scale, but on the C-900, you can ARR.PLAY BACK.SEQ set the Disk/Global mode parameter Scale to use If this key and the Chord Hold have both been... -
Page 63: Step Recording
☞Reference Guide p.21 or format 1. Also, backing sequence data that you In the Arrangement Play mode function Rename create on the C-900 can also be saved to disk as a Arrangement (☞Reference Guide p.9) and the Back- Standard MIDI File. - Page 64 BACK.SEQ SONG PLAY By pressing these keys, you can shift the pitch of the C-900’s keyboard or automatic playback in semi- TEMPO/VALUE (DOWN, UP) tone steps over a range of 11 semitones. The transpose settings can be viewed in the LCD.
- Page 65 BACK.SEQ KB1: Pf00 GrandPiano These keys let you select 4 variations to the styles of Volume=127 UPPER the C-900. While an arrangement is playing, pressing one of these keys to select a different variation will switch Volume value Volume Play/mute...
- Page 66 7. Functions, operations and terminology...
-
Page 67: Midi Applications
C-900 keyboard. If the sequencer’s echoing function is turned is sent via the MIDI interface’s MIDI OUT jack, and is on, and the C-900 Local Control parameter is also set to ON, two notes will be played by the C-900 tone generator for every one note received by the C-900 MIDI IN jack. -
Page 68: Using The C-900 To Control Other Midi Instruments
You can use Song Play mode to play GM sequences directly from the C-900 disk drive, as long as the sequences have been saved as format 0 Standard MIDI Files. You can also use the C-900 Song Play mode to play GM sequence data from an external sequencer. -
Page 69: Connections With A Computer
TO HOST connector of the C-900. IBM PC (Compatible) If a special cable is used to connect the C-900 to a com- puter, you can play the C-900 from the computer or record keyboard playing from the C-900 into the com-... -
Page 70: Korg Midi Driver Installation And Setup
Korg MIDI Driver installation and setup 1. Press the DISK/GLOBAL key to enter Disk/Global mode. 1. Installing the Korg MIDI Driver into 2. Use the PAGE +/– keys to access the Local/Clock/ Host BR display. Windows 95 3. Use the CURSOR √ √ √ √ /® ® ® ® keys to select Host BR. - Page 71 Click the [Advanced] tab located at the upper right. Click the [+] for [MIDI Devices] (the display will change to [–]), and click [KORG PC I/F MIDI Port]. Click the [Properties] button. The KORG PC I/F MIDI Port properties will be dis- played.
-
Page 72: Installing The Korg Midi Driver Into Windows 3.1
If this box is checked, malfunctions will occur. [MIDI Out Messages] allows you to select the types of message that will be transmitted to the C-900. When you finish making settings, click the [OK] In the driver list, select [Unlisted or updated driver] button. -
Page 73: Installing The Korg Midi Driver Into A Macintosh
C-900 is connected, and specify [1 MHz] . ply use the Apple MIDI Driver without the Korg Since the C-900 does not contain a KORG PC IF, do MIDI Driver. When using the Apple MIDI Driver, not select [KORG PCIF]. - Page 74 9. Connections with a computer Using PC Exchange to convert SMF data Most commercially available Standard MIDI File (SMF) song data is saved in MS-DOS format. You can use PC Exchange to make MS-DOS format SMF song files recognizable by the Macintosh. In the control panel, open PC Exchange.
-
Page 75: Specifications And Options
10. Specifications and options 10. Specifications and options Tone generation method synthesis (full digital processing) Tone generator 32 voice, 32 oscillator (single mode) 16 voice, 32 oscillator (double mode) Keyboard 88 note (velocity sensitive) Waveform memory 14 Mbytes of PCM ROM Effects Two stereo digital multi-effect systems, 48 effect types 128 GM programs and 1 GM drum program built into... - Page 76 . These products are w arranted by the K ORG distrib utor only in each country . Any KORG product not sold with a w arranty card or carrying a serial number disqualif ies the product sold from the manuf acturer’ s/distrib utor’ s warranty and liability .
Need help?
Do you have a question about the C-900 and is the answer not in the manual?
Questions and answers