Sign In
Upload
Download
Table of Contents
Contents
Add to my manuals
Delete from my manuals
Share
URL of this page:
HTML Link:
Bookmark this page
Add
Manual will be automatically added to "My Manuals"
Print this page
×
Bookmark added
×
Added to my manuals
Manuals
Brands
W&T Manuals
Server
Com-Server++
Manual
W&T Com-Server++ Manual
Com-server series
Hide thumbs
1
2
3
Table Of Contents
4
5
6
7
8
9
10
11
12
13
14
15
16
17
18
19
20
21
22
23
24
25
26
27
28
29
30
31
32
33
34
35
36
37
38
39
40
41
42
43
44
45
46
47
48
49
50
51
52
53
54
55
56
57
58
59
60
61
62
63
64
65
66
67
68
69
70
71
72
73
74
75
76
77
78
79
80
81
82
83
84
85
86
87
88
89
90
91
92
93
94
95
96
97
98
99
100
101
102
103
104
105
106
107
108
109
110
111
112
113
114
115
116
117
118
119
120
121
122
123
124
125
126
127
128
129
130
131
132
133
134
135
136
137
138
139
140
141
142
143
144
145
146
147
148
149
150
151
152
153
154
155
156
157
158
159
160
161
162
163
164
165
166
167
168
169
170
171
172
173
174
175
176
177
178
179
180
181
182
183
184
185
186
187
188
189
190
191
192
193
194
195
196
197
198
199
200
201
202
203
204
205
206
207
208
209
210
211
212
213
214
215
216
217
218
219
220
221
222
223
224
225
226
227
228
page
of
228
Go
/
228
Contents
Table of Contents
Bookmarks
Table of Contents
Table of Contents
Ethernet Interface
Application Examples
1 Quickstart
Flow Chart - Network Installation Using Wutility
Overview of Configuration Menu
Factory Defauls Settings
2 Assigning the IP Address
Configuring Network Parameters with Wutility
Assigning the IP Using DHCP Protocol
Manual Activation of DHCP
System Name
Lease Time
Reserved IP Addresses
Dynamic IP Addresses
Assigning the IP Using the ARP Command
Assigning the IP Using the Serial Port
IP Address Conflict Detect
3 Supply Voltage
Supply Voltage 58665
Power over Ethernet
External Supply
Supply Voltage 58662
4 Network Interface
Ethernet Interface
5 The Serial Combi-Port
Overview
Opening the Com-Server
Mode Selection
RS232 Mode (Factory Default)
RS422/485 Mode
Dip Switch Settings
6 LED Displays
LED Displays
7 Configuration Access to the Com-Server
Configuration Menu Structure
Configuration Via Telnet
Navigation Within the Telnet Menu
Configuration Via Browser - Web Based Management
Activating WBM with the Wutility-Tool
Activating WBM Via the Serial Interface
Activating WBM from the Configuration Menu
Starting and Navigating the WBM
8 The Basis Configuration of the Com-Server
Save Your Settings
Menu: INFO System
Menu: SETUP System
Menu: SETUP System R Setup TCP/IP
Menu: SETUP System R System Password
Menu: SETUP System R System Name
Menu: SETUP System R Logfile
Menu: SETUP System R Flash Update
Menu: SETUP System R Factory Defaults
Menu: SETUP System R Reset
Menü: SETUP System R Link Speed
Menu
9 Configuration of the Serial Port
The Serial Parameters (Menu: UART Setup)
Baud Rate, Data Bits, Stop Bits, Parity
The Handshake Modes
Receive Buffer (Inqueue)
FIFO Send/Rec (Only Com-Server 3X Isolated)
TCP-/UDP Port Numbers (Menu: TCP/IP Mode)
10 Packetizing Serial Datagrams
Packet Options
Startsequence/Endsequence
Startsequence + Lengthfield
Interpacket Delay
Fixed Packet Length
11 Mode TCP-Server
The Com-Server as TCP Server
Configuration of the Local Port Number
Optional Settings
12 Mode TCP Client
The Com-Server as TCP Client
TCP Client Mode with Fixed Destination System
TCP Client Mode with Serial Addressing
Optional Settings
Deactivating TCP Client Mode
Application: Client/Server Mode
13 Data Transfer Per UDP
Der Com-Server als UDP-Peer
Setting the Local UDP Port Number
UDP Clientmode with Fixed Destination System
UDP Client Mode Serial Addressing
Optional Settings
Deactivating UDP Mode
14 UDP Bus Mode
Function of UDP Bus Mode
Optional Settings
Deactivating UDP Mode
15 The Windows COM Port Redirector
Overview
Download & Installation of the W&T COM Redirector
Installation of the W&T COM Port Redirector
Uninstalling the W&T COM Port Redirector
Set up Virtual COM Ports
Optional Settings on the Com-Server
16 Box-To-Box Mode
Box-To-Box Application
Configuring Box-To-Box Mode
Optional Settings
Deactivating Box to Box Mode
17 Mode FTP-Server
The Com-Server as FTP Server
Activating FTP-Server Mode
Supported FTP Commands and Functiuons
Optional Settings
18 Mode FTP-Client
The Com-Server as FTP Client
Configuring the Destination Address Port no
FTP Client with Serial Protocol
Closing the FTP Connection
Deactivating FTP Client Mode
Application Examples
19 Mode Telnet Server
The Com-Server as Telnet Server
Activating Telnet-Server Mode
Optional Settings
20 Mode Telnet Client
The Com-Server as Telnet Client
Destination Address and Port Number
Optional Settings
Deactivating Telnet Client Mode
21 Mode SLIP-Router
SLIP Mode
Configuring the SLIP Mode
Optional Settings
Deactivating SLIP Router Mode
Application Example
Configuring the Com-Server Via SLIP
22 OPC Data Transfer
Overview
Download and Installation of the W&T OPC Server
Installation of the W&T OPC Server
Deinstallation of the OPC Server
Configuration of the OPC Server
Optional Settings on the Com-Server
Incorporating Com-Server into the OPC Server
Structuring the Serial Data
Serial OPC Variables
23 Mode Inqueuecopy
Inqueue Copy
Configuring Inqueuecopy
24 Status and Error Messages
Menu Setup Port X R Port State
25 Expanded Services of the Com-Server
The Control Port
The Control Structure
Reset Com-Server Port
Com-Server Reset
Up-/Downloading Configuration Data
Inventory Taking Per UDP/8513
SNMP Management
26 Firmware-Update of the Com-Server
Where Do I Get the Current Firmware
Network Firmware Update under Windows
Appendix
Used Ports and Network Security
Serial Assignment of the IP Address under Windows
Wutility - Inventory and Management Tool
Hardware-Reset to Factory Defaults
Technical Data and Formfactor 58665
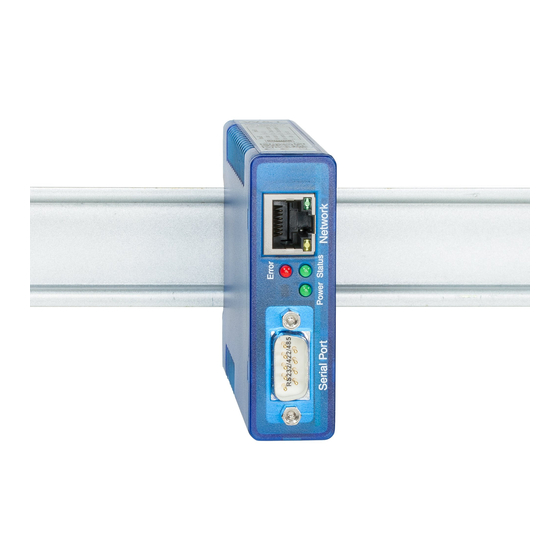
Front View
Technical Data and Formfactor 58662
Index
Advertisement
Quick Links
1
Flow Chart - Network Installation Using Wutility
2
Factory Defauls Settings
3
Configuring Network Parameters with Wutility
Download this manual
Manual
Com-Server++
Com-Server 3x Isolated
W&T
Release 2.08, November 2015
Typ
58665, 58662
Firmware 1.35 or higher
SN 2283238 or higher
Table of
Contents
Previous
Page
Next
Page
1
2
3
4
5
Advertisement
Table of Contents
Need help?
Do you have a question about the Com-Server++ and is the answer not in the manual?
Ask a question
Questions and answers
Related Manuals for W&T Com-Server++
Server W&T 53641 Manual
Usb-server (79 pages)
Server W&T 57630 Manual
Web-io series 12+12 digital (211 pages)
This manual is also suitable for:
Com-server 3x isolated
58665
58662
Table of Contents
Print
Rename the bookmark
Delete bookmark?
Delete from my manuals?
Login
Sign In
OR
Sign in with Facebook
Sign in with Google
Upload manual
Upload from disk
Upload from URL


Need help?
Do you have a question about the Com-Server++ and is the answer not in the manual?
Questions and answers