Table of Contents
Advertisement
Advertisement
Table of Contents

Related Manuals for zortrax Inventure


Summary of Contents for zortrax Inventure
- Page 1 3D Printer User Guide Inventure...
-
Page 2: Table Of Contents
Table of content Introduction Intended Use of the Zortrax Inventure General Safety Information Health and Safety at Work Electrical Safety Mechanical Safety Risk of Burns Warning and Safety Labels on Zortrax Devices Safe Storage and Transport Guidance Transport Instructions Electromagnetic Compatibility (EMC) -
Page 3: Introduction
Once the printing process is finished, it is necessary to insert a model into a special Zortrax DSS station in order to obtain a smooth model’ s surface that is free of any material residue. Zortrax 3D printers together with the Z-SUITE and dedicated materials guarantee achieving high quality prints. -
Page 4: General Safety Information
Due to the size and specificity, Zortrax devices are not intended for use by children under the age of 14 and by people with reduced manual, motor and psychomotor skills. The Manufactu- rer recommends providing assistance and guidance to people with disabilities and older adults who wish to operate Zortrax printers. -
Page 5: Health And Safety At Work
This may lead to serious injuries or damages. ©2017, Zortrax S.A. All rights reserved. All trade names, logos and trademarks mentioned in the following document are registered trademarks of Zortrax and are subject to legal protection. -
Page 6: Risk Of Burns
Risk of Burns There is a high risk of burns while operating Zortrax printers as the extruder heats up to extre- mely high temperatures. Do not touch the extruder with bare hands. Be extremely careful during maintenance and repair work of heated units. -
Page 7: Safe Storage And Transport Guidance
Safe Storage and Transport Guidance The Zortrax Inventure must be stored between 0 and 35⁰ C [32 and 95⁰ F]. The storage space should be free of moisture and other extreme conditions. Transport Instructions When stacking several devices on a pallet, follow the instructions provided on the packaging. -
Page 8: How Does The Zortrax Inventure Work
When the 3D printed object is ready, remove it carefully from the build tray, and then insert the print into the Zortrax DSS station so as to solve the support material in warm water. Thanks to this solution, mechanical removal of support structures is no longer needed. -
Page 9: What's In The Box
Nozzle Key & Screwdriver Set Nozzle Needles (flat head and Phillips head) ©2017, Zortrax S.A. All rights reserved. All trade names, logos and trademarks mentioned in the following document are registered trademarks of Zortrax and are subject to legal protection. -
Page 10: Main Components
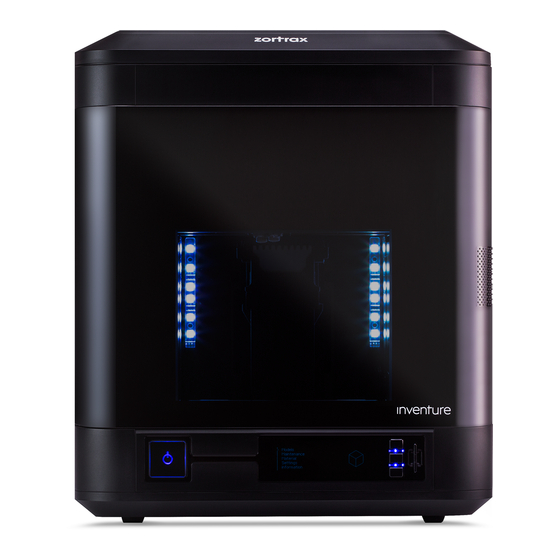
Main Components 1. front view ©2017, Zortrax S.A. All rights reserved. All trade names, logos and trademarks mentioned in the following document are registered trademarks of Zortrax and are subject to legal protection. - Page 11 2. right-side view 3. left-side view ©2017, Zortrax S.A. All rights reserved. All trade names, logos and trademarks mentioned in the following document are registered trademarks of Zortrax and are subject to legal protection.
- Page 12 4. back view ©2017, Zortrax S.A. All rights reserved. All trade names, logos and trademarks mentioned in the following document are registered trademarks of Zortrax and are subject to legal protection.
-
Page 13: Zortrax 3D Printing Technology Glossary
Both can be easily replaced. The model material cartridge is inserted on the left side of the Inventure, the support material one on the right side. The cartridges protect the materials from external conditions, such as moisture or direct sunlight. - Page 14 Zortrax DSS station and, within a few hours, the print will be free from those structures, even in hard-to-reach areas. There is no need to remove the support mechanically anymore.
- Page 15 Remember to update the Z-SUITE regularly – all updates are available here. ©2017, Zortrax S.A. All rights reserved. All trade names, logos and trademarks mentioned in the following document are registered trademarks of Zortrax and are subject to legal protection.
-
Page 16: First Use: Preparations
1. Open the box and remove the cushioning material. 2. Remove the boxes with accessories. ©2017, Zortrax S.A. All rights reserved. All trade names, logos and trademarks mentioned in the following document are registered trademarks of Zortrax and are subject to legal protection. - Page 17 3. Use the handles to take the printer out of the box. The handles are on both sides of the housing. 4. Remove the security foil. ©2017, Zortrax S.A. All rights reserved. All trade names, logos and trademarks mentioned in the following document are registered trademarks of Zortrax and are subject to legal protection.
- Page 18 6. Insert the build tray into the printer and set the safety locks in the vertical position. Close the front door. ©2017, Zortrax S.A. All rights reserved. All trade names, logos and trademarks mentioned in the following document are registered trademarks of Zortrax and are subject to legal protection.
- Page 19 9. From the menu choose “Material,” then “Model” and “Load the model material.” Follow the instructions provided on the display. ©2017, Zortrax S.A. All rights reserved. All trade names, logos and trademarks mentioned in the following document are registered trademarks of Zortrax and are subject to legal protection.
- Page 20 11. Insert the model material cartridge on the left side of the printer and turn the lock to CLOSE. Close the side door. ©2017, Zortrax S.A. All rights reserved. All trade names, logos and trademarks mentioned in the following document are registered trademarks of Zortrax and are subject to legal protection.
- Page 21 13. Open the right door by pressing the release buttons. ©2017, Zortrax S.A. All rights reserved. All trade names, logos and trademarks mentioned in the following document are registered trademarks of Zortrax and are subject to legal protection.
- Page 22 16. From the menu choose “Maintenance” and then “Nozzle Alignment Calibration.” Follow the instructions provided on the display. ©2017, Zortrax S.A. All rights reserved. All trade names, logos and trademarks mentioned in the following document are registered trademarks of Zortrax and are subject to legal protection.
-
Page 23: Z-Firmware Installation
Z-Firmware updates automatically. ©2017, Zortrax S.A. All rights reserved. All trade names, logos and trademarks mentioned in the following document are registered trademarks of Zortrax and are subject to legal protection. -
Page 24: Navigating Through The Zortrax Printer Menu
Move up the platform if you want to access the bottom plate in order to clean it. ©2017, Zortrax S.A. All rights reserved. All trade names, logos and trademarks mentioned in the following document are registered trademarks of Zortrax and are subject to legal protection. -
Page 25: Operational Modes Of Zortrax Inventure
Operational Modes of Zortrax Inventure The Zortrax Inventure indicates its current mode by the LED lights as well as informative and alert sounds. When the printer enters a given mode, the color of LED lights changes into a different one. Also, while changing to some modes, the device may emit a sound. - Page 26 White light signifies other modes: printing mode, platform leveling mode and stand-by mode. ©2017, Zortrax S.A. All rights reserved. All trade names, logos and trademarks mentioned in the following document are registered trademarks of Zortrax and are subject to legal protection.
-
Page 27: Material Loading
Insert the model material cartridge on the right side of the printer or the support material cartridge on the left side. ©2017, Zortrax S.A. All rights reserved. All trade names, logos and trademarks mentioned in the following document are registered trademarks of Zortrax and are subject to legal protection. - Page 28 When the material has been loaded, the printer is ready for work. ©2017, Zortrax S.A. All rights reserved. All trade names, logos and trademarks mentioned in the following document are registered trademarks of Zortrax and are subject to legal protection.
-
Page 29: Platform Leveling
Additionally, the display will show the calibra- tion results. ©2017, Zortrax S.A. All rights reserved. All trade names, logos and trademarks mentioned in the following document are registered trademarks of Zortrax and are subject to legal protection. - Page 30 ©2017, Zortrax S.A. All rights reserved. All trade names, logos and trademarks mentioned in the following document are registered trademarks of Zortrax and are subject to legal protection.
-
Page 31: Nozzle Alignment Calibration
1. From the menu select “Maintenance,” and “Nozzle Alignment Calibration.”The printer will start to heat up the extruder and then print two calibration models. ©2017, Zortrax S.A. All rights reserved. All trade names, logos and trademarks mentioned in the following document are registered trademarks of Zortrax and are subject to legal protection. - Page 32 2. Open the front door and turn the safety locks by 90˚. 3. Pull the tray towards you using the handle. ©2017, Zortrax S.A. All rights reserved. All trade names, logos and trademarks mentioned in the following document are registered trademarks of Zortrax and are subject to legal protection.
- Page 33 SELECT IT AND CARRY OUT THE NOZZLE ALIGNMENT CALIBRATION ONCE AGAIN. 5. Remove the prints from the build tray using a spatula. ©2017, Zortrax S.A. All rights reserved. All trade names, logos and trademarks mentioned in the following document are registered trademarks of Zortrax and are subject to legal protection.
- Page 34 6. Install the tray back in the printer. 7. Secure it with the locks. ©2017, Zortrax S.A. All rights reserved. All trade names, logos and trademarks mentioned in the following document are registered trademarks of Zortrax and are subject to legal protection.
-
Page 35: Z-Suite Installation
The following instructions show the correct procedure of removing the print from the platform. ©2017, Zortrax S.A. All rights reserved. All trade names, logos and trademarks mentioned in the following document are registered trademarks of Zortrax and are subject to legal protection. - Page 36 WARNING! WAIT ABOUT 10 MINUTES UNTIL THE CHAMBER AND THE PRINT COOL DOWN. 2. Open the front door. ©2017, Zortrax S.A. All rights reserved. All trade names, logos and trademarks mentioned in the following document are registered trademarks of Zortrax and are subject to legal protection.
- Page 37 3. Unfasten the safety locks securing the build tray. 4. Carefully remove the build tray from the printer. ©2017, Zortrax S.A. All rights reserved. All trade names, logos and trademarks mentioned in the following document are registered trademarks of Zortrax and are subject to legal protection.
- Page 38 WARNING! REMOVE THE PRINT VERY CAREFULLY. WEAR SAFETY GLOVES. 6. Put the build tray back in the printer. ©2017, Zortrax S.A. All rights reserved. All trade names, logos and trademarks mentioned in the following document are registered trademarks of Zortrax and are subject to legal protection.
- Page 39 7. Secure the build tray in the printer using safety locks. Set them in the vertical position. 8. Close the front door and plug the power cable in. ©2017, Zortrax S.A. All rights reserved. All trade names, logos and trademarks mentioned in the following document are registered trademarks of Zortrax and are subject to legal protection.
-
Page 40: Available Materials
Zortrax 3D printer, together with specific check points, necessary activities and their frequency. ©2017, Zortrax S.A. All rights reserved. All trade names, logos and trademarks mentioned in the following document are registered trademarks of Zortrax and are subject to legal protection. - Page 41 ©2017, Zortrax S.A. All rights reserved. All trade names, logos and trademarks mentioned in the following document are registered trademarks of Zortrax and are subject to legal protection.
- Page 42 See section: Nozzle Alignment A spatula calibration cleaning/ Calibration replacing the hotend ©2017, Zortrax S.A. All rights reserved. All trade names, logos and trademarks mentioned in the following document are registered trademarks of Zortrax and are subject to legal protection.
- Page 43 Platform leveling After each See section: Platform Leveling build tray replacement ©2017, Zortrax S.A. All rights reserved. All trade names, logos and trademarks mentioned in the following document are registered trademarks of Zortrax and are subject to legal protection.
-
Page 44: Support And Troubleshooting
The following list explains all error messages and provides potential causes and suggested solutions. ©2017, Zortrax S.A. All rights reserved. All trade names, logos and trademarks mentioned in the following document are registered trademarks of Zortrax and are subject to legal protection. - Page 45 Z-SUITE ©2017, Zortrax S.A. All rights reserved. All trade names, logos and trademarks mentioned in the following document are registered trademarks of Zortrax and are subject to legal protection.
- Page 46 ©2017, Zortrax S.A. All rights reserved. All trade names, logos and trademarks mentioned in the following document are registered trademarks of Zortrax and are subject to legal protection.
- Page 47 -Replace the extruder cable -Replace the extruder ©2017, Zortrax S.A. All rights reserved. All trade names, logos and trademarks mentioned in the following document are registered trademarks of Zortrax and are subject to legal protection.
- Page 48 #139 Extruder electrical failure Short circuit in the platform -Replace the platform cable cable detected ©2017, Zortrax S.A. All rights reserved. All trade names, logos and trademarks mentioned in the following document are registered trademarks of Zortrax and are subject to legal protection.
- Page 49 RFID tag of the -Contact your Reseller/Dis- model material cartridge tributor ©2017, Zortrax S.A. All rights reserved. All trade names, logos and trademarks mentioned in the following document are registered trademarks of Zortrax and are subject to legal protection.
- Page 50 RFID tag remains in the material duct -Contact your Reseller/Dis- tributor ©2017, Zortrax S.A. All rights reserved. All trade names, logos and trademarks mentioned in the following document are registered trademarks of Zortrax and are subject to legal protection.
- Page 51 The motherboard thermistor -Contact your Reseller/Dis- tributor failure is disconnected or has been damaged ©2017, Zortrax S.A. All rights reserved. All trade names, logos and trademarks mentioned in the following document are registered trademarks of Zortrax and are subject to legal protection.
- Page 52 More manuals and tips & tricks articles are available at our Support Center. www.zortrax.com ©2017, Zortrax S.A. All rights reserved. All trade names, logos and trademarks mentioned in the following document are registered trademarks of Zortrax and are subject to legal protection.
-
Page 53: Specifications
Dissolvable – printed with a diffe- Support Structures rent material than the model ©2017, Zortrax S.A. All rights reserved. All trade names, logos and trademarks mentioned in the following document are registered trademarks of Zortrax and are subject to legal protection. - Page 54 Supported Operating Systems Mac OS X / Windows 7 and newer versions ©2017, Zortrax S.A. All rights reserved. All trade names, logos and trademarks mentioned in the following document are registered trademarks of Zortrax and are subject to legal protection.
-
Page 55: Recycling
In case of questions and problems contact the Manufacturer through the support form: http://support.zortrax.com/support-form/. ©2017, Zortrax S.A. All rights reserved. All trade names, logos and trademarks mentioned in the following document are registered trademarks of Zortrax and are subject to legal protection. - Page 56 ©2017 Zortrax S.A. All rights reserved.
Need help?
Do you have a question about the Inventure and is the answer not in the manual?
Questions and answers