Table of Contents
Advertisement
Advertisement
Table of Contents

Subscribe to Our Youtube Channel
Related Manuals for Korg prologue


Summary of Contents for Korg prologue
- Page 2 Block Diagram ................4 Controls and Connections ............ 5 Front Panel Controls ..............5 Rear Panel Connections .............7 Turning the prologue On and Off ..........9 Playing Programs ..............11 Selecting and Playing a Program ..........11 Using the program sort function ..........12 Using the live set ...............
-
Page 3: Introduction
• Q uick Start Guide (included) • O wner’s Manual (what you’re reading) prologue Key Features • T he prologue is a keyboardist-oriented analog synthesizer featuring the best of Korg’s expertise. • R edesigned and refined analog circuitry. The prologue-16 and the prologue-8 pro- vide respectively 16 and 8 analog voices. -
Page 4: Block Diagram
RIGHT VOICE 6 LEFT VOICE 7 VOICE 8 RIGHT LEFT OUTPUT L DIGITAL L.F. COMP EFFECTS OUTPUT R * prologue-16 only RIGHT *prologue-16 only VOICE 9 VOICE 10 LEFT VOICE 11 VOICE 12 RIGHT LEFT VOICE 13 RIGHT VOICE 14... -
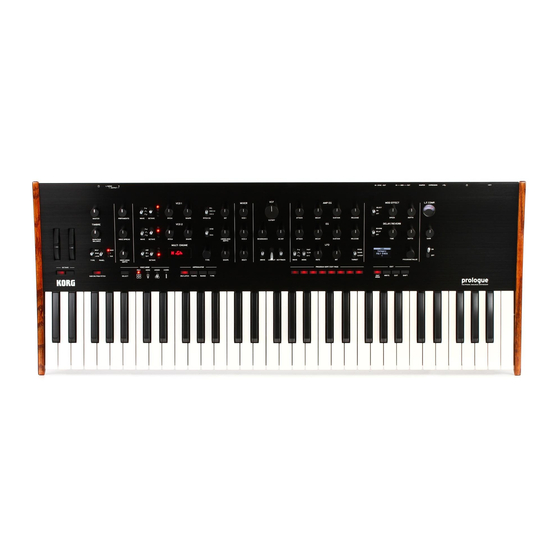
Page 5: Front Panel Controls
7. EFFECT section 4. MIXER section 6. EG/LFO section 1. MASTER controls 11. PROGRAM/VALUE knob 2. TIMBRE section 12. Display For the prologue-8, TIMBRE related parameters are 9. EDIT section available in program edit mode. 10. ARPEGGIATOR section prologue-8 MASTER controls... - Page 6 TYPE knob DEPTH knob SHAPE knob DELAY/REVERB MIXER section OFF/DELAY/REVERB switch VCO 1 knob TIME knob VCO 2 knob DEPTH knob MULTI knob L.F. COMP. section (prologue-16 only) FILTER section VU meter GAIN knob CUTOFF knob OFF/ON switch RESONANCE knob PROGRAM/VALUE knob EG INT knob DRIVE switch Display LOW CUT switch...
-
Page 7: Rear Panel Connections
Rear Panel Connections The illustration below shows a typical example of connections for the prologue. Connect your equipment according to the needs of your own system. Be sure that the power on all of your devices is turned off before you make connections. Leaving the power on when you make connections may cause malfunctions, or damage your speaker system and other components. - Page 8 MIDI IN/OUT connectors These connectors allow the prologue to exchange MIDI messages with an exter- nal MIDI device. Refer to “Using with other MIDI devices” (p.66) for details. SYNC IN/OUT jacks Use a stereo mini-cable to connect the prologue to the Korg volca series and other instruments. This is used to synchronize the steps of the prologue with the pulses sent from the audio out jack of connected devices, DAWs and so on. Refer to “Syncing to instruments with SYNC IN/OUT jacks” (p.64) for details.
-
Page 9: Turning The Prologue On And Off
Turning the prologue On Make sure that both the prologue and any external output devices such as powered monitor speakers are turned off, and turn the volume of all devices all the way down. Turn on the Power switch on the rear panel of the prologue. - Page 10 Power Off is enabled. The Auto Power Off can be disabled using the steps below. 2, 4 Press the EDIT MODE button. The prologue will enter the Edit Mode, and the display will look like the illustra- tion shown below. Turn the PROGRAM/VALUE knob, and select GLOBAL EDIT. GLOBAL EDIT can also be selected by pressing the EDIT MODE button. Press button 8 twice.
-
Page 11: Selecting And Playing A Program
Playing Programs Selecting and Playing a Program The prologue has 500 program locations of which 250 are preloaded with factory presets. The preset programs are assigned to the first 250 locations and are organized into sound categories for easy selection. The remaining locations contain the initial- ization program that can be used as a starting point when creating user programs. -
Page 12: Using The Program Sort Function
(p.20) for details. Using the program sort function Sorting and selecting programs The Korg prologue features a program sort function that lets you search for pro- grams in many different ways. Use this function to quickly find your favorite pro- grams from the multitude of programs available, using the method you like. In Play mode, press one of the PROGRAM SORT/EDIT PAGE buttons from 1 to 8. -
Page 13: Using The Live Set
Refer to “Using the live set” (p.13) for more details on the live set. Turn the PROGRAM/VALUE knob to select a program. Using the live set With the live set feature on the prologue, you can register programs to use on the PROGRAM SORT/EDIT PAGE buttons 1 through 8, and then use the program sort function to quickly recall them. There are four banks in the live set, from A to D. Registering programs to the live set Use the live set to register programs that you frequently use when performing live. - Page 14 Press a button for the program you wish to register, using PROGRAM SORT/ EDIT PAGE buttons 1–8. The existing program will be registered as a live set, and the message “Complete” will appear on the display. Deleting a program registered to the live set You can delete programs that have been registered to the live set. Using step 4 (p.13, “Registering programs to the live set”), hold down the but- ton (which will be lit) for the program you wish to delete, using PROGRAM SORT/EDIT PAGE buttons 1–8. The program registered to the button you have held down will be deleted, and the message “Cleared” will appear on the display. Recalling a program from the live set In Play mode, press PROGRAM SORT/EDIT PAGE button 8.
-
Page 15: Using The Arpeggiator
Using the arpeggiator The Korg prologue includes an arpeggiator function, which automatically plays pro- grams in patterns based on the keys you press. Performing with the arpeggiator In Play mode, press the ARPEGGIATOR ON/LATCH button. The arpeggiator will turn on, and the ON/LATCH button will light. Play the keyboard. The arpeggiator will operate using the key you pressed as a base note, while you are playing the keyboard. - Page 16 Setting the arpeggiator type This sets the arpeggiator type. Press the ARPEGGIATOR TYPE button to set the arpeggiator to one of the following types. Type Function Manual The arpeggio will play in the order you play the keys. Rise The arpeggio will play from lower notes to higher notes. Fall The arpeggio will play from higher notes to lower notes.
-
Page 17: Programs
Programs Program Architecture A program includes settings for sounds, effects, timbres, Voice mode and arpeggia- tor. (MASTER knob, pitch bend wheel, OCTAVE buttons, L.F. COMP. section and arpeggiator LATCH settings are not included in a program.) Try editing each related parameter, and enjoy the sounds of the prologue. prologue-16 Basic Parametres VCO 1 MULTI ENGINE AMP EG MOD EFFECT WAVE NOISE/VPM/USR ATTACK OFF/ON/SELECT* OCTAVE OCTAVE DECAY SPEED* PITCH TYPE SUSTAIN... -
Page 18: Creating Sounds
Use the knobs and switches on the front panel. Take a moment to consider the differences between the current Program and the sound you have in mind, and use the front panel controls to edit the necessary parameters. For details on how the pitch, sound, and volume change when using the knobs and switches, refer to “Basic Parameter Editing” (p.20). We recommend that you save the Program on the prologue after editing the sound. Any edits that you make will be lost if you turn off the power or recall a different Program. For details, refer to “Saving a Program” (p.19). -
Page 19: Saving A Program
Saving a Program We recommend that you save your Program on the prologue after editing the sound. Any edits that you make to the current program will be lost if you turn off the power or recall a different program before saving. Edit the program in Play mode. For details, refer to “Basic Parameter Editing” (p.20). Press the WRITE button; the prologue will enter the Write standby mode, and the WRITE button will blink. -
Page 20: Basic Parameter Editing
VOICE SPREAD knob (prologue-16 only) [0...127] This adjusts the amount of voice spread that is applied to achieve a stereo effect. The further the knob is turned to the right, the stronger the voice spread effect will be. This is set in “Voice Spread” (p.49) in PROGRAM EDIT mode on the prologue-8. VOICE MODE The prologue-16 features a 16-voice analog synthe- sizer engine, and the prologue-8 features a 8-voice analog synthesizer engine. The Voice mode func- tion can be used to combine these voices in different ways when playing. There are 4 different Voice modes. Use the SELECT button to switch between them. Turn the VOICE MODE DEPTH knob to control a... - Page 21 Action VOICE MODE DEPTH knob effect POLY Voice mode featuring 16 [POLY, DUO 0...1023] voices (for the prologue-16) or Turn the knob to the right to switch to 8 voices (for the prologue-8), DUO mode, which stacks two voices when for playing as a poly synth.
-
Page 22: Timbre Section
The timbre on the prologue-8 can be edited in PROGRAM EDIT mode (p.46, “But- ton 3 (TIMBRE)”). The methods of enabling sub-timbres and operating each parameter are different for the prologue-16 and the prologue-8. Refer to “About timbre” (p.39) for details for both instruments. SUB ON/PGM FETCH button (prologue-16 only) This enables the sub-timbre and allows you to use the program fetch function. See “Program fetch function” (p.41) for details on the program fetch function. Press this button to enable the sub-timbre, making the prologue play with two tim- bres (8 voices + 8 voices). The SUB ON/PGM FETCH button lights up at this time. Hold down the button to enter the program fetch function in FUNCTION mode. - Page 23 PANEL switch (prologue-16 only) [SUB, +, MAIN] Sets the timbre to edit. SUB: Edits the sub-timbre. + (MAIN+SUB): Edits both the main and sub-timbres. MAIN: Edits the main timbre. This is set in “Edit Timbre” (p.46) in PROGRAM EDIT mode on the prologue-8. Editing a timbre applies to the basic parameters on the front panel, as well...
-
Page 24: Vco 1/Vco 2/Multi Engine Section
VCO 1/VCO 2/MULTI ENGINE section VCO 1, VCO 2 VCO: Voltage Controlled Oscillators There are two voltage controlled analog oscillators for each voice on prologue. Oscillator Parameters include the settings for the oscillator pitch (OCTAVE, PITCH) and the waveform (WAVE, SHAPE). WAVE switch This sets the waveforms for Oscillators 1 and 2. - Page 25 SHAPE knob [0...1023] This knob will determine the final shape, complexity, or duty-cycle (Square) of the selected waveform. 1023 MODULATION A powerful oscillator sync, cross modulation, and ring modulation can be applied to the oscillators. PITCH EG switch [VCO 2, VCO 1+2, ALL] Select the oscillator and use the EG to modulate its pitch. VCO 2: Uses the EG to modulate the pitch of oscillator 2. VCO 1+2: Uses the EG to modulate the pitch of operators 1 and 2.
- Page 26 SYNC: With this type of modulation, the phase of Oscillator 2 is forcibly synchro- nized to the phase of Oscillator 1. This adds harmonic overtones to the frequency of Oscillator 2, making a complex waveform. VCO 1 Wave Sync VCO 2 Wave (original) VCO 2 Wave (output) CROSS MOD DEPTH knob [0...1023]...
- Page 27 NOISE Noise is used to create percussion instrument sounds, or sound effects such as surf. Select one of the four noise generators using the TYPE knob. Move the SHAPE knob to make changes in the sound. OCTAVE switch [2’, 4’, 8’, 16’] The key tracking effect can be adjusted on an octave-by-octave basis, only when “Decim” is selected with the TYPE knob. TYPE knob [High/Low/Peak/Decim] Select the noise generator to use. The noise generator name will be indicated on the MULTI ENGINE display. High: A high-pass filter will be used. Low: A low-pass filter will be used. Peak: A peak filter (bandpass filter) will be used. Decim: A Decimator will be used. SHAPE knob Set the noise generator parameter to make changes to the sound. The parameters differ depending on the noise generator that you select using the TYPE knob, with the following effects.
- Page 28 This engine is a VPM (Variable Phase Modulation) oscillator that was developed es- pecially for this instrument. The engine features a simple structure with one carrier and one modulator, but allows you to create a wide range of sounds. Sixteen oscillator types are available for this VPM oscillator. mod attack mod decay pitch...
- Page 29 You can upload your own oscillator programs to make sounds with a user oscillator on the prologue. Up to 16 user oscillators can be saved on this instrument. One factory-set default user oscillator is included with the prologue for demo purposes. See the “prologue user contents guide” (www.korg.com) for details. OCTAVE switch [2’, 4’, 8’, 16’] The pitch of the user oscillator can be set in octaves.
-
Page 30: Mixer Section
MIXER section Use this section to set the output levels of oscillator 1, 2 and the MULTI EN- GINE, and to adjust the balance. VCO 1 knob [0...1023] VCO 2 knob [0...1023] MULTI knob [0...1023] Sets the output levels of oscillator 1 and 2, and the MULTI ENGINE. -
Page 31: Filter Section
FILTER section VCF: Voltage Controlled Filter The low-pass filter shapes the tone by selectively filtering certain parts of the harmonic spectrum of the sound generated by the Oscil- lators and the Noise generator. CUTOFF knob [0...1023] This knob is used to set the cutoff frequency. Harmonic content above the cutoff frequency will be filtered out. Turning the knob to the left will lower the cutoff frequency, and turning the knob to the right will raise the cutoff frequency. If the CUTOFF value is set too low, the volume may be extremely low. RESONANCE knob [0...1023] Also known as Peak or Q, the RESONANCE control adds additional emphasis to the overtones occurring at the CUTOFF frequency, giving a distinctive character to the sound. Turning the knob to the right will increase the resonance effect. Low resonance value High resonance value The overtones that are emphasized will change depending on the cutoff frequency. For this reason, it’s good to adjust the CUTOFF knob while ad-... - Page 32 EG INT knob [-100%...0...+100%] The Envelope Generator (EG) can be used to control the CUTOFF, or Filter frequen- cy, over time using this EG INT (intensity) knob. To learn more about the EG settings (p.34, “EG”). With this knob in the center position (0%), no EG is applied to the Filter. Rotating the knob to the left of center increases the EG intensity, but with the po- larity of the EG inverted. Cuto Note o Note on...
-
Page 33: Eg/Lfo Section
EG/LFO section AMP EG VCA: Voltage Controlled Amplifier / EG: Envelope Generator AMP Envelope Generator provides a precise control signal that varies over time to modify the VCA level. Level Note on Note o Attack Level Sustain Level Time Attack Decay Release Time Time Time ATTACK knob [0...1023] The ATTACK specifies the time required for the EG to reach its maximum level once a new note is played. DECAY knob [0...1023] The DECAY specifies the time required for the EG to fall to the preset Sustain level... - Page 34 EG: Envelope Generator The EG controls the cutoff frequency of the filter and temporal change of other parameters. Modulation is applied to oscillators 1 and 2, the VCF and the LFO. The depth of the effect and other parameters are set using the PITCH EG INT knob (MODULATION), the EG INT knob (FILTER), the RATE knob (LFO), and the INT knob (LFO). Note on Note o Sustain Level Attack Decay Release Time Time Time Time ATTACK knob [0...1023] The ATTACK specifies the time required for the EG to reach its maximum level once a new note is played. DECAY knob [0...1023] The DECAY specifies the time required for the EG to fall to the preset Sustain level...
- Page 35 LFO: Low Frequency Oscillator The Low Frequency Oscillator creates a repeat- ing cyclical signal. You can choose one of three LFO waveforms. Depending on its target, the LFO can provide vibrato (PITCH); Tonal changes to the Oscillators (SHAPE); or Wah-Wah (CUTOFF) effects. WAVE switch The LFO can be set to a square wave ( ), a triangle wave ( ), or a sawtooth wave ( ). MODE switch [BPM, SLOW, FAST] Specifies the range of change and action for the LFO frequency. BPM: The LFO frequency synchronizes with the BPM of the arpeggiator. SLOW: The range of change for the LFO frequency will be from 0.05 Hz–28 Hz. FAST: The range of change for the LFO frequency will be from 0.5 Hz–2.8 kHz. RATE knob [0...1023 / 4, 2, 1, 0, 3/4...1/64] The rate knob adjusts the speed of the LFO.
-
Page 36: Effect Section
EFFECT section The prologue features high-definition digital effects. Select a modulation effect and a spatial effect (delay, reverb). The effects can be used in combination. The prologue-16 features, when the SUB ON/PGM FETCH button is pressed (the button will light) while the sub-timbre is enabled, the modulation effect as well as the delay and reverb can be turned on and off separately for the main and sub-tim- bres (p.51, "Button 8 (EFFECTS)"). MOD EFFECT OFF/ON/SELECT switch [OFF, ON, SELECT] This sets the modulation effect. OFF: Turns the modulation effect off. ON: Turns the modulation effect on. SELECT: Flipping the switch down will switch between modulation effects (CHO- RUS ENSEMBLE PHASER FLANGER USER CHORUS ...). Set the effect’s sub-type in PROGRAM EDIT mode for a wider variety of effects (p.51, “Button 8 (EFFECTS)”). Switch the OFF/ON/SELECT switch while holding down the SHIFT button to select the modulation ef- fect sub-type. For details on the sub-types, refer to “Effects list” (p.70). SPEED knob [0...1023] Changes the modulation effect speed to vary the sound. Turning the knob to the right will increase the speed. - Page 37 DELAY/REVERB OFF/DELAY/REVERB switch [OFF, DELAY, REVERB] This sets the spatial effect settings. OFF: Turns the spatial effect off. DELAY: Selects the delay. REVERB: Selects the reverb. Set the effect’s sub-type in PROGRAM EDIT mode for a wider variety of effects (p.51, “Button 8 (EFFECTS)”). For details on the sub-types, refer to “Effects list” (p.70). TIME knob [0...1023] This changes the amount of time the delay or reverb takes to disperse. Turning the knob to the right will make the delay or reverb time longer. DEPTH knob [0...1023] This sets the depth of the effect.
-
Page 38: L.f. Comp. Section (Prologue-16 Only)
L.F. COMP. section (prologue-16 only) The L.F. COMP. is an analog effector used to boost or compress the low- frequency band. This effect is placed last in the output series, providing a punchy sound. Note that this setting cannot be saved to a program. VU meter Refer to “How to use the L.F. COMP.” (p.38). GAIN knob This sets the intensity of the effect. Turning the knob to the right will decrease the compressor threshold and increase the gain. OFF/ON switch [OFF, ON] This sets whether the effect is on or off. OFF: Turns the L.F. COMP. off. ON: Turns the L.F. COMP. on. When the L.F. COMP. is on, the VU meter LED will light, and the needle will move to around the 0 db mark. -
Page 39: About Timbre
You can also use split, crossfade or layering when playing these timbres. The prologue-16 features 16 voices in single timbre mode, or 8+8 voices in double timbre mode. The prologue-8 features 8 voices in single timbre mode, or 4+4 voices in double tim- bre mode. Enabling the sub-timbre Use one of the methods below to enable the sub-timbre (double timbre mode). - Page 40 Setting the timbre parameters You can also use split, crossfade or layering when playing two timbres, as well as adjust their volume balance. prologue-16 Use the knobs and switches on the front panel to set the timbre parameters. Adjust the volume balance between the main timbre and the sub-timbre using the MAIN/SUB BALANCE knob. For details, refer to “MAIN/SUB BALANCE knob (prologue-16 only)” (p.22). Use the TYPE switch to set the timbre performance type (layer, crossfade or split). For details, refer to “TYPE switch (prologue-16 only)” (p.22).
- Page 41 Use the program fetch function to copy the sound of a program to the sub-timbre of the currently selected program. This function is especially convenient for combining sounds and hearing how they sound together. prologue-16 Hold down the SUB ON/PGM FETCH button. The prologue will enter the PROGRAM FETCH settings in FUNCTION mode, and the current program will be shown in the display.
- Page 42 Turn the PROGRAM/VALUE knob to display the main or sub-timbre of other programs, and select the sound to copy. The word “PREV” will display to the right side of the program number in the display, so that you can confirm the sound. The main timbre is displayed as “M” at bottom right, and the sub-timbre is dis- played as “S” at bottom right. Check the sounds by playing the keyboard. Initialization programs cannot be selected. To cancel the program fetch function, press the EXIT button. Press the WRITE button. The sound you selected will be copied to the sub-timbre of the program, and the display will indicate the message “Complete”.
-
Page 43: Edit Mode
Edit Mode Although nearly all of the prologue’s main parameters can be edited using the knobs and switches on the panel, other detailed parameters are accessed using the Edit mode. There are three sub-modes within the Edit mode: PROGRAM EDIT mode, FUNC- TION mode, and GLOBAL EDIT mode. How to enter the Edit mode 1, 2 Press the EDIT MODE button. - Page 44 Press the PROGRAM SORT/EDIT PAGE buttons 1–8. The prologue will enter the respective Edit page, and the parameter names will be indicated on the display. Switch to a different page by pressing the same button in succession. For details on each parameter, refer to “PROGRAM EDIT mode” (p.45), “FUNCTION mode” (p.52) and “GLOBAL EDIT mode” (p.54). After you have configured the parameters in PROGRAM EDIT mode and/or FUNCTION mode, press the WRITE button to save your changes.
-
Page 45: Program Edit Mode
PROGRAM EDIT mode Button 1 Button 2 Button 3 Button 4 Button 5 Button 6 Button 7 Button 8 SORT PROGRAM TIMBRE PEDAL & MODULATION OTHER MULTI EFFECTS NAME WHEEL SETTINGS ENGINE Category PROGRAM Sub Timbre M.Wheel LFO Target Arpeggiator Parameter 1 Mod Effect NAME... - Page 46 Button 3 (TIMBRE) This configures the timbre settings. Sub Timbre [Off, On] Sets whether the sub-timbre is enabled or disabled. Edit Timbre [Main, Main+Sub, Sub] This selects the timbre to edit. Main: Edits the main timbre. Main+Sub: Edits both the main and sub-timbres. Sub: Edits the sub-timbre. Editing a timbre applies to the basic parameters on the front panel, as well as all detailed parameters in PROGRAM EDIT mode.
- Page 47 Button 4 (PEDAL & WHEEL) This button is for settings related to the expression pedal, modulation wheel and pitch bend wheel. M.Wheel Assign [BALANCE...GATE TIME] This sets the parameters that are assigned to the modulation wheel. M.Wheel Range [-100%...+100%] Sets how much the assigned parameter will change when using the modulation wheel. E.Pedal Assign [OFF, VOLUME...RV/DY DEPT] This sets the parameters that are assigned to the expression pedal connected to this...
- Page 48 Button 5 (MODULATION) Configures the modulation settings. LFO Target OSC [All, VCO1+2, VCO2, Multi] This selects the oscillator that modulation will be applied to. All: Modulation is applied to operators 1 and 2, as well as the MULTI ENGINE. VCO1+2: Modulation is applied to operators 1 and 2. VCO2: Modulation is applied to operator 2.
- Page 49 Button 6 (OTHER SETTINGS) Arpeggiator [Main+Sub, Main, Sub] Sets the timbre(s) that will be played by the arpeggiator. When this is set to “Main+Sub”, both timbres will sound. When this is set to “Main”, the arpeggiator will play only the main timbre; and when this is set to “Sub”, only the sub-timbre will sound. Multi Routing [Pre VCF, Post VCF] This sets whether the MULTI ENGINE is mixed prior to the signal reaching the VCF,...
- Page 50 Noise Depth (Parameter 2) [-100%...+100%] Adjusts the depth of the noise modulation. Shape Mod Int (Parameter 3) [-100%...+100%] Adjusts the depth of the internal EG effect. Mod Attack (Parameter 4) [-100%...+100%] Adjusts the attack time of the internal EG. Mod Decay (Parameter 5) [-100%...+100%] Adjusts the decay time for the internal EG. Mod Key Track (Parameter 6) [-100%...+100%] Adjusts the depth of the modulator effect from keyboard tracking. The higher the sound frequency, the less noticeable the effect becomes. When the user oscillator is selected See the “prologue user contents guide” (www.korg.com) for details.
- Page 51 Button 8 (EFFECTS) This button is used to configure the effects. Mod Effect Sub Type This sets the modulation effect type and the sub-type. Push the OFF/ON/SELECT switch up to SELECT, and select the effect type. Turn the PROGRAM/VALUE knob to select the sub-type. For details on the effect types and sub types, refer to "Effects list" (p.70). Delay/Reverb Sub Type This sets the delay or reverb effect type and the sub-type. Use the OFF/DELAY/REVERB switch to select the effect type. Turn the PROGRAM/VALUE knob to select the sub-type. For details on the effect types and sub types, refer to “Effects list” (p.70). Mod Effect [Main+Sub, Main, Sub] This sets the timbre(s) to which the modulation effect will be applied. Main+Sub: Modulation effect will be applied to both main and sub-timbres. Main: Modulation effect will be applied to the main timbre. Sub: Modulation effect will be applied to the sub-timbre. Delay/Reverb [Main+Sub, Main, Sub] This sets the timbre(s) to which delay or reverb will be applied. Main+Sub: Delay or reverb will be applied to both the main and sub-timbres.
-
Page 52: Function Mode
FUNCTION mode Button 1 Button 2 Button 7 Button 8 INITIALIZE PROGRAM FETCH DUMP ALL DUMP Init Program Program Fetch Program Dump All Dump (USB) Init Main Timbre All Dump (MIDI) Init Sub Timbre Button 1 (INITIALIZE) This button initializes the current Program. Turn the PROGRAM/VALUE knob until “Press WRITE” is indicated in the display. The WRITE button will blink. Press the WRITE button to initialize the Program. The display will indicate the message “Initialized”. - Page 53 Button 7 (DUMP) Program Dump Transmits the SysEx data for the currently selected program to another prologue, MIDI data filer, computer or other compatible device that is connected to this instru- ment. Turn the PROGRAM/VALUE knob until “Press WRITE” is indicated in the display. The WRITE button will blink. Press the WRITE button to send a SysEx Program dump from the prologue’s MIDI OUT and USB B connector. The display will indicate the message “Program Dump”. Button 8 (ALL DUMP) This button transmits the programs, live set and global SysEx data of this instrument to another prologue, MIDI data filer, computer or other compatible device that is connected. All Dump (USB) Turn the PROGRAM/VALUE knob until “Press WRITE” is indicated in the display. The WRITE button will blink. Press the WRITE button to transmit the MIDI data dump via the USB B connector. The display will indicate the message “Transmitting”. The data will take about 10 seconds to transmit.
-
Page 54: Global Edit Mode
Button 1 (GLOBAL 1) These functions control the tuning and transposition of the prologue. Master Tune [-50 Cent...+50 Cent] This adjusts the overall tuning of the entire prologue in one-cent units (semitone = 100 cents), over a range of ±50 cents. 0: A4 is equal to 440 Hz. Transpose [-12 Note...+12 Note]... - Page 55 These functions relate to performance aspects of the prologue—knob operation, ve- locity curves, local settings, and more. Local SW [Off, On] The local connection makes a link between the prologue keyboard the soundgen- erating circuitry. Normally, this link is On. However, if you are using the prologue with an external sequencer or sequencing software, you will want to set the local connection to Off to eliminate the double-triggering of notes caused by MIDI echo.
- Page 56 Type 1 This curve requires you to play strongly in order to produce an effect. Type 2, 3 Type 4 This is a typical curve. Type 5 Type 6 This curve produces an effect without requiring you to play very strongly. Type 7 This curve produces a fairly steady effect with little change for medium-strength playing. Type 8 This curve produces a fairly steady effect with little change for medium-strength playing (a flatter curve than 7). Const 127 All notes will sound at maximum velocity. Curve types 7 and 8 produce little change for medium-strength playing, and are suitable when keyboard velocity is not required, or when you want to play each note at the same velocity. However, these curves will produce a great deal of change...
- Page 57 If the parameter value does not change In some cases, the parameter value may not change, even when you turn the knob from left to right. This means that the knob mode is set to “Catch”. In this case, the actual value of the parameter you’re editing (the value shown in the display) will not change unless it matches the position of the knob.
- Page 58 In order to achieve synchronization with other units, the polarity of the SYNC IN jack may need to be changed. Rise: The prologue will sync to the pulse as it rises to its crest (the highest point) of the waveform. Fall: The prologue will sync to the pulse as it falls to its trough (the lowest point) of the waveform.
- Page 59 The same channel cannot be selected for both “MIDI Global Ch” and “MIDI Sub CC Ch”. MIDI Sub CC Ch [1..16] This MIDI channel is used to transmit and receive control change messages for the sub-timbre. Set the device to which the prologue is connected and the prologue to the same MIDI channel. The same channel cannot be selected for both “MIDI Global Ch” and “MIDI Sub CC Ch”. Clock Source [Auto (USB), Auto (MIDI), Internal] Many features of the prologue can be sync’d to the tempo or BPM. This parameter allows you to specify whether the clock source is internal, or an external MIDI Clock Source.
- Page 60 Selects whether MIDI control change messages will be transmitted. MIDI Tx Pitch Bend [Off, On] Selects whether MIDI pitch bend messages will be transmitted. Button 7 (GLOBAL 7) These parameters relate to the prologue’s display, and what information is seen there. Parameter Disp [Normal, All] Normal: Only major information such as operating the pitch-related knobs or switching the OUTPUT ROUTING switch will be displayed.
- Page 61 Button 8 (GLOBAL 8) These parameters relate to the prologue’s display and power settings. Brightness [1...10] Adjusts the display brightness. Continuous use of the prologue while the brightness is set to a high value will have an adverse effect on the overall life of the display. Auto Power Off [Off, On] Using the Auto Power Off feature, the prologue can be set to automatically turn off after approximately four hours have elapsed without any operation of the knobs, switches, or keyboard, and without any input.
-
Page 62: Restoring The Factory Settings
As you continue to play the prologue for a while right after you’ve turned it on, the pitch and tone may gradually drift. If the pitch drift becomes noticeable, use the steps below to tune the instrument. This will manually bring the prologue back into tune. Press the EXIT button while holding down the SHIFT button. -
Page 63: Shortcuts Using The Shift Button
Press the WRITE button. The display will indicate the message “Are you sure?”. Turn the PROGRAM/VALUE knob to select “Yes”, and press the WRITE but- ton. The factory-set default data will be reloaded, and the prologue will be restored to its factory default state. Press the EXIT button, or select “No” using the PROGRAM/VALUE knob and press the WRITE button to cancel the operation. Never turn off the prologue while data is being loaded. Shortcuts using the SHIFT button When in Play mode, you can hold down the SHIFT button and press other buttons at the same time for direct access to various convenient functions. -
Page 64: Using With Other Devices
Connection using the SYNC IN and OUT jacks When controlling an external device from the prologue In order to synchronize other devices such as the volca to the prologue, use a mini cable to connect the SYNC OUT jack of this instrument to the SYNC IN jack of the external device. - Page 65 Refer to "Button 4 (GLOBAL 4)" (p.58) for the settings to make on the prologue. See the owner’s manuals of each respective instrument for how to connect them for synchronization. Starting the sequencer of the connected device and the arpeggiator of this prologue will make the prologue’s arpeggiator sync with the external device.
-
Page 66: Using With Other Midi Devices
MIDI sequencer or other device, so that the prologue will play in time with the ex- ternal device and with any changes you make. Connecting Devices via MIDI and USB Controlling an external MIDI device from the prologue If you want to use the prologue’s keyboard, controllers, and sequencer to play sounds on or to control an external MIDI tone generator, connect the prologue’s MIDI OUT connector to the external MIDI tone generator’s MIDI IN connector using a MIDI cable. MIDI OUT... - Page 67 MIDI keyboard prologue Connecting the prologue to a computer via MIDI You might want to play the prologue’s keyboard and record your performance on an external MIDI sequencer or computer (connected using the MIDI interface), and then play the prologue while monitoring or playing back what you recorded. You also might want to use the prologue as both an input device for playing notes and as a MIDI tone generator. In either case, you’ll need to connect the MIDI OUT connec- tor to the MIDI IN connector on both the prologue and the external MIDI sequencer or computer. MIDI OUT MIDI IN MIDI interface...
- Page 68 Owner’s manual. Using the prologue as the master to slave external MIDI devices Connect the MIDI OUT connector of the prologue to the MIDI IN connector on your external MIDI device(s). In the GLOBAL EDIT mode, set the Clock Source of the prologue to “Internal”, and configure the external MIDI device to receive clock data via MIDI. The prologue will act as the master, and the tempo that is set using the TEMPO button on the prologue will be sent as MIDI timing clock data to operate the external MIDI device (sequenc- ers, rhythm machines, and so on).
- Page 69 Slaving the prologue clock to an external MIDI device Connect the MIDI IN connector of the prologue to the MIDI OUT connector on your external MIDI device. In the GLOBAL EDIT mode, set the Clock Source of the prologue to “Auto (MIDI)”, and configure the external MIDI device to transmit MIDI clock data. The prologue will automatically act as the slave whenever a MIDI timing clock is received, and will be driven by the tempo of the external MIDI device (sequencers, rhythm machines, and so on). Even if you set the Clock Source to “Auto (USB)” or “Auto (MIDI)”, the prologue will operate in “Internal” MIDI clock mode, unless a clock is re- ceived from an external device.
-
Page 70: Effects List
Black An effect modeled after the phaser sounds from Denmark with a wide dynamic range. Formant A phaser derived from the sound of the human voice. Twinkle A phaser that creates a twinkling (sparkly) sound. Flanger Stereo An effect that creates a thick swelling sound and a sense of motion in pitch. Light A flanger with a thinner effect than the stereo type. Mono A monaural flanger. High Sweep A flanger that sweeps through the high-frequency bands. Mid Sweep A flanger that sweeps through the mid-frequency bands. Pan Sweep A flanger that pans from left to right. Mono Sweep A monaural sweeping flanger. Triphase A flanger featuring the effect of three LFOs. (USER) This effect is not installed at factory-set default, so it cannot be selected. Up- load a user effect in order to select. See the “prologue user contents guide” (www.korg.com) for details. - Page 71 EFFECT TYPE SUB TYPE DELAY/REVERB Delay Stereo A stereo delay with an expansive left-right field. Mono A straight monaural delay. Ping Pong A ping-pong delay that bounces back and forth from left to right. Hi Pass A delay with a high-pass filter on which the low frequency band fades out. Tape Simulates a tape echo. One Tap A delay without feedback, on which the delay sounds only once. Stereo BPM A stereo delay on which the delay time is synced to the TEMPO button settings. Mono BPM A monaural delay on which the delay time is synced to the TEMPO button settings. Ping BPM A ping-pong delay on which the delay time is synced to the TEMPO button settings. Hi Pass BPM A high-pass delay on which the delay time is synced to the TEMPO button settings. Tape BPM A tape echo on which the delay time is synced to the TEM- PO button settings.
-
Page 72: Program List
BASS Ian Bradshaw Selfosc Lead LEAD Kazuto Okawa / LLLL Opal Mine POLY SYNTH Tim Mantle ReeceFlux BASS Francis Preve Sherbet CHORD LAYER KORG Inc. Raid Rush KORG Inc. Sparkle KEY/BELL Luke Edwards Poly Spread POLY SYNTH KORG Inc. Harp-like John Bowen Poly Sync POLY SYNTH KORG Inc. Cinematica... - Page 73 Program Name Category Timbre Type Author Steaming Pod POLY SYNTH KORG Inc. Smooth 5th POLY SYNTH Henning Verlage POLY SYNTH Luke Edwards Code Snipper POLY SYNTH KORG Inc. Mod Me Sigma POLY SYNTH LAYER Kazuto Okawa / LLLL Sine Pad PAD/STRINGS John Bowen Gentle Pad PAD/STRINGS James Sajeva & Nick Kwas...
- Page 74 Program Name Category Timbre Type Author 101 EP logue KEY/BELL KORG Inc. 102 Synth Piano KEY/BELL KORG Inc. 103 Snow Piano KEY/BELL KORG Inc. 104 VPM Pad EP 1 KEY/BELL KORG Inc. 105 VPM Pad EP 2 KEY/BELL LAYER KORG Inc.
- Page 75 Program Name Category Timbre Type Author 151 Trusted Guy BASS KORG Inc. 152 BigFatAnalog BASS Henning Verlage 153 FunctionBass BASS Ian Bradshaw 154 Sink Tank BASS Kazuto Okawa / LLLL 155 Bass Stab BASS Kazuto Okawa / LLLL 156 Decode Soil BASS Kazuto Okawa / LLLL 157 Dawndrezz BASS Francis Preve 158 Bass/Lead BASS...
- Page 76 Program Name Category Timbre Type Author 201 Manoeuvers LEAD Francis Preve 202 Voice Lead LEAD KORG Inc. 203 Wave Ride LEAD Kazuto Okawa / LLLL 204 PhaseShifter LEAD Francis Preve 205 Big Five LEAD Francis Preve 206 5 Lead LEAD KORG Inc. 207 Stabby House CHORD James Sajeva & Nick Kwas...
- Page 77 Program Name Category Timbre Type Author (Init Program) All Programs were made by Francis Preve, Henning Verlage, Ian Bradshaw, James Sajeva & Nick Kwas, John Bowen, Kazuto Okawa, Luke Edwards, Tim Mantle, KORG Inc. For more information about the authors please visit: Francis Preve http://www.francispreve.com/ Henning Verlage https://www.facebook.com/henningverlage John Bowen http://www.johnbowen.com/ Kazuto Okawa / LLLL https://www.facebook.com/lllltokyo/ Tim Mantle http://www.timmantle.com/...
-
Page 78: Specifications
Specifications Keyboard prologue-16: 61 keys (natural touch keyboard, velocity sensitive) prologue-8: 49 keys (natural touch keyboard, velocity sensitive) Sound generator Analog sound generator + Multi digital sound generator Maximum Polyphony prologue-16: 16 voices prologue-8: 8 voices Programs 500 (250 preset programs and 250 user programs as the factory-set default) Each program includes Voice mode and timbre settings. - Page 79 Dimensions prologue-16: 874 × 348 × 118 mm / 34.41 × 13.70 × 4.65 inches (W x D x H) prologue-8: 709 × 348 × 118 mm / 27.91 × 13.70 × 4.65 inches Weight prologue-16: 9.1 kg / 20.05 lbs. prologue-8: 7.5 kg / 16.53 lbs. Included items Power cord Quick Start Guide Options DS-1H damper pedal PS-1 pedal switch PS-3 pedal switch XVP-20 volume/expression pedal XVP-10 expression/volume pedal EXP-2 foot controller * Specifications and appearance are subject to change without notice for improve- ment. * Since the side panels of this instrument uses natural wood, there will be individ- ual differences in the wood grain, surface texture and color.
-
Page 80: Midi Implementation Chart
System Reset Notes *1: When the Global setting is "MIDI Rx Pitch Bend=On", the prologue will receive signals; and when the Global setting is "MIDI Tx Pitch Bend=On", the prologue will transmit signals. *2: When the Global setting is "MIDI Rx CC=ON", the prologue will receive signals; and the when Global setting is "MIDI Tx CC=On", the prologue will transmit signals. - Page 81 © 2017 KORG INC. Published 1/2018...
Need help?
Do you have a question about the prologue and is the answer not in the manual?
Questions and answers